在本文中,我们将带你了解计算并生成完美平方在这篇文章中,我们将为您详细介绍计算并生成完美平方的方方面面,并解答计算并生成完美平方公式常见的疑惑,同时我们还将给您一些技巧,以帮助您实现更有效的2022-
在本文中,我们将带你了解计算并生成完美平方在这篇文章中,我们将为您详细介绍计算并生成完美平方的方方面面,并解答计算并生成完美平方公式常见的疑惑,同时我们还将给您一些技巧,以帮助您实现更有效的2022-07-19:f (i) : i 的所有因子,每个因子都平方之后,累加起来。 比如 f (10) = 1 平方 + 2 平方 + 5 平方 + 10 平方 = 1 + 4 + 25 + 100 = 130。、asp.net-mvc – Url.Action生成查询字符串,以任何方式生成完整的URL?、C 语言:计算并输出 S=1+(1+2^0.5)+(1+2^0.5+3^0.5)...+(1+2^0.5+3^0.5+...+n^0.5)、C#(.net)水印图片的生成完整实例。
本文目录一览:- 计算并生成完美平方(计算并生成完美平方公式)
- 2022-07-19:f (i) : i 的所有因子,每个因子都平方之后,累加起来。 比如 f (10) = 1 平方 + 2 平方 + 5 平方 + 10 平方 = 1 + 4 + 25 + 100 = 130。
- asp.net-mvc – Url.Action生成查询字符串,以任何方式生成完整的URL?
- C 语言:计算并输出 S=1+(1+2^0.5)+(1+2^0.5+3^0.5)...+(1+2^0.5+3^0.5+...+n^0.5)
- C#(.net)水印图片的生成完整实例
")
计算并生成完美平方(计算并生成完美平方公式)
我需要一些有关如何编写Python程序的建议,该程序以列表格式为您提供前n个完美正方形的列表。输出应如下所示:
多少个正方形?:5 [1、4、9、16、25]这是我到目前为止所拥有的:
n = int(raw_input("How many squares? "))现在,对于下一部分,我需要创建前n个正方形的列表。有什么建议吗?感谢您的时间和建议。
答案1
小编典典使用列表理解:
[ a*a for a in xrange(1, n + 1) ] : i 的所有因子,每个因子都平方之后,累加起来。 比如 f (10) = 1 平方 + 2 平方 + 5 平方 + 10 平方 = 1 + 4 + 25 + 100 = 130。")
2022-07-19:f (i) : i 的所有因子,每个因子都平方之后,累加起来。 比如 f (10) = 1 平方 + 2 平方 + 5 平方 + 10 平方 = 1 + 4 + 25 + 100 = 130。
2022-07-19:f (i) : i 的所有因子,每个因子都平方之后,累加起来。
比如 f (10) = 1 平方 + 2 平方 + 5 平方 + 10 平方 = 1 + 4 + 25 + 100 = 130。
给定一个数 n,求 f (1) + f (2) + … + f (n)。
n <= 10 的 9 次方。
O (n) 的方法都会超时!低于它的!
O (根号 N) 的方法,就过了,一个思路。
O (log N) 的方法,
来自蓝桥杯练习题。
答案 2022-07-19:
观察表,二分法。
时间复杂度 O (开平方根 N + 开平方根 N * logN)。
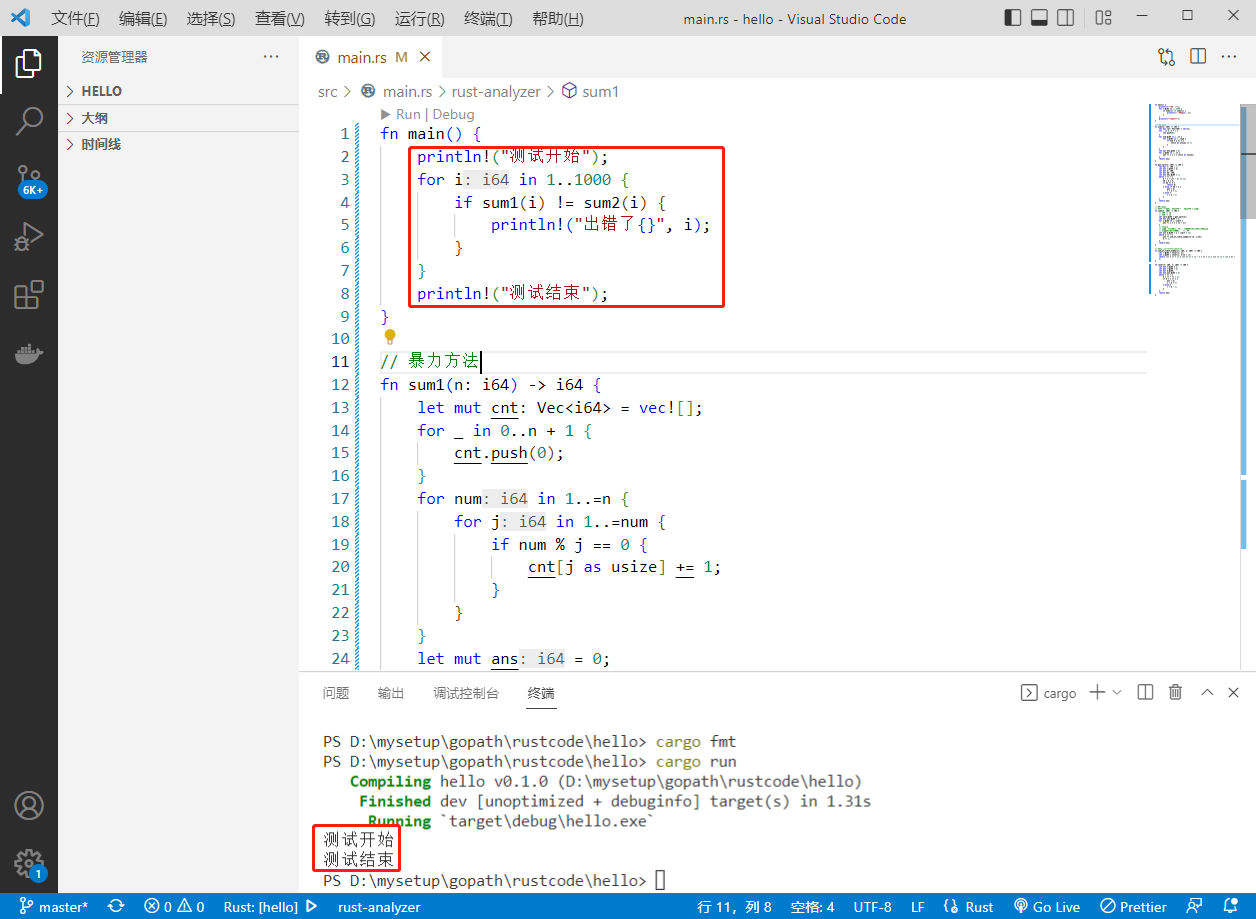
代码用 rust 编写。代码如下:
fn main() {

    println!("测试开始");
    for i in 1..1000 {

        if sum1(i) != sum2(i) {

            println!("出错了{}", i);
        }
    }
    println!("测试结束");
}

// 暴力方法
fn sum1(n: i64) -> i64 {

    let mut cnt: Vec<i64> = vec![];
    for _ in 0..n + 1 {

        cnt.push(0);
    }
    for num in 1..=n {

        for j in 1..=num {

            if num % j == 0 {

                cnt[j as usize] += 1;
            }
        }
    }
    let mut ans = 0;
    for i in 1..=n {

        ans += i * i * cnt[i as usize];
    }
    return ans;
}

fn get_sqrt(n: i64) -> i64 {

    let mut l: i64 = 1;
    let mut r = n;
    let mut m: i64;
    let mut mm: i64;
    let mut ans = 1;
    while l <= r {

        m = l + ((r - l) >> 1);
        mm = m * m;
        if mm == n {

            return m;
        } else if mm < n {

            ans = m;
            l = m + 1;
        } else {

            r = m - 1;
        }
    }
    return ans;
}

// 正式方法
// 时间复杂度O(开平方根N + 开平方根N * logN)
fn sum2(n: i64) -> i64 {

    // 100 -> 10
    // 200 -> 14
    let sqrt = get_sqrt(n);
    let mut ans = 0;
    for i in 1..=sqrt {

        ans += i * i * (n / i);
    }
    // 后半段
    // 给你一个个数,二分出几个因子,处在这个个数上!
    // 由最大个数(根号N), 开始二分
    let mut k = n / (sqrt + 1);
    while k >= 1 {

        ans += sum_of_limit_number(n, k);
        k -= 1;
    }
    return ans;
}

// 平方和公式n(n+1)(2n+1)/6
fn sum_of_limit_number(v: i64, n: i64) -> i64 {

    let r = cover(v, n);
    let l = cover(v, n + 1);
    return ((r * (r + 1) * ((r << 1) + 1) - l * (l + 1) * ((l << 1) + 1)) * n) / 6;
}

fn cover(v: i64, n: i64) -> i64 {

    let mut l = 1;
    let mut r = v;
    let mut m;
    let mut ans = 0;
    while l <= r {

        m = (l + r) / 2;
        if m * n <= v {

            ans = m;
            l = m + 1;
        } else {

            r = m - 1;
        }
    }
    return ans;
}
执行结果如下:
左神 java 代码

asp.net-mvc – Url.Action生成查询字符串,以任何方式生成完整的URL?
例如:
<a href='@Url.Action("Index","Home",new { id = 10 })' id="btn">Click</a>
这工作正常,但产生的URL是……
/home/index?id=10
有没有办法返回网址
/home/index/10
对于SEO和审美目的?我使用id和number作为占位符 – 在实际应用程序中它可以并将使用字符串代替(所以…
<a href='@Url.Action("Index",new { name="test" })' id="btn">Click</a>
返回网址
/home/index/test
解决方法
routes.MapRoute(
    name: "Default",url: "{controller}/{action}/{id}",defaults: new { controller = "Home",action = "Index",id = UrlParameter.Optional });
对于“真正的应用程序”,当您使用名为name的参数时,您将需要如下所示:
routes.MapRoute(
    name: "Default",url: "{controller}/{action}/{name}",action = "Index" });
+(1+2^0.5+3^0.5)...+(1+2^0.5+3^0.5+...+n^0.5)")
C 语言:计算并输出 S=1+(1+2^0.5)+(1+2^0.5+3^0.5)...+(1+2^0.5+3^0.5+...+n^0.5)
// 计算并输出 S=1+(1+2^0.5)+(1+2^0.5+3^0.5)...+(1+2^0.5+3^0.5+...+n^0.5)
 1 #include<math.h>
 2 #include<stdio.h>
 3 double fun(int n)
 4 {
 5     double s=1,S=0;
 6     for (int i = 2; i <= n+1; i++)//这里判断条件为n+1.
 7     {
 8         S += s;
 9         s += sqrt(i);//2^0.5=2^(1/2)=根号下2=sqrt(2)
10         printf("%f\n", S);
11         printf("%f\n", s);
12     }
13     return S;
14 }
15 void main()
16 {
17   FILE *wf;
18   int n;
19   double s;
20   printf("\n\nInput n: ");
21   scanf("%d",&n);
22   s=fun(n);
23   printf("\n\ns=%f\n\n",s);
24 /******************************/
25   wf=fopen("out.dat","w");
26   fprintf(wf,"%f",fun(20));
27   fclose(wf);
28 /*****************************/
29 }
// 使用递归解决:
 1 double f(int n)
 2 {
 3     if (n == 1) return 1;
 4     else return sqrt(n) + f(n - 1);
 5 }
 6 double fun(int n)
 7 {
 8     double S=0;
 9     for (int i = 1; i<=n; i++)
10     {
11         S += f(i);
12     }
13     return S;
14 }
// 也可以使用 pow 函数。功能:求 x 的 y 次方。用法:pow (x,y)。
水印图片的生成完整实例")
C#(.net)水印图片的生成完整实例
本文以一个完整实例讲述了C#水印图片的生成方法。是非常实用的技巧。分享给大家供大家参考。
具体实例代码如下:
/*
*
*  使用说明:
*  建议先定义一个WaterImage实例
*  然后利用实例的属性,去匹配需要进行操作的参数
*  然后定义一个WaterImageManage实例
*  利用WaterImageManage实例进行DrawImage(),印图片水印
*  DrawWords()印文字水印
*
*/
using System;
using System.Drawing;
using System.Drawing.Imaging;
using System.Drawing.drawing2d;
using System.IO;

namespace ABC
{

  /// <summary>
  /// 图片位置
  /// </summary>
  public enum ImagePosition
  {
    LeftTop,//左上
    LeftBottom,//左下
    RightTop,//右上
    RigthBottom,//右下
    TopMiddle,//顶部居中
    BottomMiddle,//底部居中
    Center      //中心
  }

  /// <summary>
  /// 水印图片的操作管理 Design by Gary Gong From Demetersoft.com
  /// </summary>
  public class WaterImageManage
  {
    /// <summary>
    /// 生成一个新的水印图片制作实例
    /// </summary>
    public WaterImageManage()
    {
      //
      // Todo: Add constructor logic here
      //
    }

    /// <summary>
    /// 添加图片水印
    /// </summary>
    /// <param name="sourcePicture">源图片文件名</param>
    /// <param name="waterImage">水印图片文件名</param>
    /// <param name="alpha">透明度(0.1-1.0数值越小透明度越高)</param>
    /// <param name="position">位置</param>
    /// <param name="PicturePath" >图片的路径</param>
    /// <returns>返回生成于指定文件夹下的水印文件名</returns>
    public string DrawImage(string sourcePicture,string waterImage,float alpha,ImagePosition position,string PicturePath)
    {
      //
      // 判断参数是否有效
      //
      if (sourcePicture == string.Empty || waterImage == string.Empty || alpha == 0.0 || PicturePath == string.Empty)
      {
        return sourcePicture;
      }

      //
      // 源图片,水印图片全路径
      //
      string sourcePictureName = PicturePath + sourcePicture;
      string waterPictureName = PicturePath + waterImage;
      string fileSourceExtension = System.IO.Path.GetExtension(sourcePictureName).ToLower();
      string fileWaterExtension = System.IO.Path.GetExtension(waterPictureName).ToLower();
      //
      // 判断文件是否存在,以及类型是否正确
      //
      if (System.IO.File.Exists(sourcePictureName) == false ||
        System.IO.File.Exists(waterPictureName) == false || (
        fileSourceExtension != ".gif" &&
        fileSourceExtension != ".jpg" &&
        fileSourceExtension != ".png") || (
        fileWaterExtension != ".gif" &&
        fileWaterExtension != ".jpg" &&
        fileWaterExtension != ".png")
        )
      {
        return sourcePicture;
      }

      //

      // 目标图片名称及全路径
      //
      string targetimage = sourcePictureName.Replace(System.IO.Path.GetExtension(sourcePictureName),"") + "_1101.jpg";

      //
      // 将需要加上水印的图片装载到Image对象中
      //
      Image imgPhoto = Image.FromFile(sourcePictureName);
      //
      // 确定其长宽
      //
      int phWidth = imgPhoto.Width;
      int phHeight = imgPhoto.Height;

      //
      // 封装 GDI+ 位图,此位图由图形图像及其属性的像素数据组成。
      //
      Bitmap bmPhoto = new Bitmap(phWidth,phHeight,PixelFormat.Format24bppRgb);

      //
      // 设定分辨率
      //
      bmPhoto.SetResolution(imgPhoto.HorizontalResolution,imgPhoto.VerticalResolution);

      //
      // 定义一个绘图画面用来装载位图
      //
      Graphics grPhoto = Graphics.FromImage(bmPhoto);

      //
      //同样,由于水印是图片,我们也需要定义一个Image来装载它
      //
      Image imgWatermark = new Bitmap(waterPictureName);

      //
      // 获取水印图片的高度和宽度
      //
      int wmWidth = imgWatermark.Width;
      int wmHeight = imgWatermark.Height;

      //SmoothingMode:指定是否将平滑处理(消除锯齿)应用于直线、曲线和已填充区域的边缘。
      // 成员名称  说明
      // AntiAlias   指定消除锯齿的呈现。
      // Default    指定不消除锯齿。

      // HighQuality 指定高质量、低速度呈现。
      // HighSpeed  指定高速度、低质量呈现。
      // Invalid    指定一个无效模式。
      // None     指定不消除锯齿。
      grPhoto.SmoothingMode = SmoothingMode.AntiAlias;


      //
      // 第一次描绘,将我们的底图描绘在绘图画面上
      //
      grPhoto.DrawImage(imgPhoto,new Rectangle(0,phWidth,phHeight),GraphicsUnit.Pixel);

      //
      // 与底图一样,我们需要一个位图来装载水印图片。并设定其分辨率
      //
      Bitmap bmWatermark = new Bitmap(bmPhoto);
      bmWatermark.SetResolution(imgPhoto.HorizontalResolution,imgPhoto.VerticalResolution);

      //
      // 继续,将水印图片装载到一个绘图画面grWatermark
      //
      Graphics grWatermark = Graphics.FromImage(bmWatermark);

      //
      //ImageAttributes 对象包含有关在呈现时如何操作位图和图元文件颜色的信息。
      //

      ImageAttributes imageAttributes = new ImageAttributes();

      //
      //Colormap: 定义转换颜色的映射
      //
      ColorMap colorMap = new ColorMap();

      //
      //我的水印图被定义成拥有绿色背景色的图片被替换成透明
      //
      colorMap.OldColor = Color.FromArgb(255,255,0);
      colorMap.NewColor = Color.FromArgb(0,0);

      ColorMap[] remapTable = { colorMap };

      imageAttributes.SetRemapTable(remapTable,ColorAdjustType.Bitmap);

      float[][] colorMatrixElements = {
      new float[] {1.0f,0.0f,0.0f},// red红色
      new float[] {0.0f,1.0f,//green绿色
      new float[] {0.0f,//blue蓝色
      new float[] {0.0f,alpha,//透明度
      new float[] {0.0f,1.0f}};//

      // ColorMatrix:定义包含 RGBA 空间坐标的 5 x 5 矩阵。
      // ImageAttributes 类的若干方法通过使用颜色矩阵调整图像颜色。
      ColorMatrix wmColorMatrix = new ColorMatrix(colorMatrixElements);


      imageAttributes.SetColorMatrix(wmColorMatrix,ColorMatrixFlag.Default,ColorAdjustType.Bitmap);

      //
      //上面设置完颜色,下面开始设置位置
      //
      int xPosOfWm;
      int yPosOfWm;

      switch (position)
      {
        case ImagePosition.BottomMiddle:
          xPosOfWm = (phWidth - wmWidth) / 2;
          yPosOfWm = phHeight - wmHeight - 10;
          break;

        case ImagePosition.Center:
          xPosOfWm = (phWidth - wmWidth) / 2;
          yPosOfWm = (phHeight - wmHeight) / 2;
          break;
        case ImagePosition.LeftBottom:
          xPosOfWm = 10;
          yPosOfWm = phHeight - wmHeight - 10;
          break;
        case ImagePosition.LeftTop:
          xPosOfWm = 10;
          yPosOfWm = 10;
          break;
        case ImagePosition.RightTop:
          xPosOfWm = phWidth - wmWidth - 10;
          yPosOfWm = 10;
          break;
        case ImagePosition.RigthBottom:
          xPosOfWm = phWidth - wmWidth - 10;
          yPosOfWm = phHeight - wmHeight - 10;
          break;
        case ImagePosition.TopMiddle:
          xPosOfWm = (phWidth - wmWidth) / 2;
          yPosOfWm = 10;
          break;
        default:
          xPosOfWm = 10;
          yPosOfWm = phHeight - wmHeight - 10;
          break;
      }

      // 第二次绘图,把水印印上去
      //
      grWatermark.DrawImage(imgWatermark,new Rectangle(xPosOfWm,yPosOfWm,wmWidth,wmHeight),wmHeight,GraphicsUnit.Pixel,imageAttributes);

      imgPhoto = bmWatermark;
      grPhoto.dispose();
      grWatermark.dispose();

      //
      // 保存文件到服务器的文件夹里面
      //
      imgPhoto.Save(targetimage,ImageFormat.Jpeg);
      imgPhoto.dispose();
      imgWatermark.dispose();
      return targetimage.Replace(PicturePath,"");
    }

/*
*
* 使用说明:
*  建议先定义一个WaterImage实例
*  然后利用实例的属性,去匹配需要进行操作的参数
*  然后定义一个WaterImageManage实例
*  利用WaterImageManage实例进行DrawImage(),印图片水印
*  DrawWords()印文字水印
*
-*/

    /// <summary>
    /// 在图片上添加水印文字
    /// </summary>
    /// <param name="sourcePicture">源图片文件(文件名,不包括路径)</param>

    /// <param name="waterWords">需要添加到图片上的文字</param>
    /// <param name="alpha">透明度</param>
    /// <param name="position">位置</param>
    /// <param name="PicturePath">文件路径</param>
    /// <returns></returns>
    public string DrawWords(string sourcePicture,string waterWords,string PicturePath)
    {
      //
      // 判断参数是否有效
      //
      if (sourcePicture == string.Empty || waterWords == string.Empty || alpha == 0.0 || PicturePath == string.Empty)
      {
        return sourcePicture;
      }

      //
      // 源图片全路径
      //
      if (PicturePath.Substring(PicturePath.Length - 1,1) != "/")
        PicturePath += "/";
      string sourcePictureName = PicturePath + sourcePicture;
      string fileExtension = System.IO.Path.GetExtension(sourcePictureName).ToLower();

      //
      // 判断文件是否存在,以及文件名是否正确
      //
      if (System.IO.File.Exists(sourcePictureName) == false || (
        fileExtension != ".gif" &&
        fileExtension != ".jpg" &&

        fileExtension != ".png"))
      {
        return sourcePicture;
      }

      //
      // 目标图片名称及全路径
      //
      string targetimage = sourcePictureName.Replace(System.IO.Path.GetExtension(sourcePictureName),"") + "_0703.jpg";

      //创建一个图片对象用来装载要被添加水印的图片
      Image imgPhoto = Image.FromFile(sourcePictureName);

      //获取图片的宽和高
      int phWidth = imgPhoto.Width;
      int phHeight = imgPhoto.Height;

      //
      //建立一个bitmap,和我们需要加水印的图片一样大小
      Bitmap bmPhoto = new Bitmap(phWidth,PixelFormat.Format24bppRgb);

      //SetResolution:设置此 Bitmap 的分辨率
      //这里直接将我们需要添加水印的图片的分辨率赋给了bitmap
      bmPhoto.SetResolution(imgPhoto.HorizontalResolution,imgPhoto.VerticalResolution);

      //Graphics:封装一个 GDI+ 绘图图面。
      Graphics grPhoto = Graphics.FromImage(bmPhoto);

      //设置图形的品质
      grPhoto.SmoothingMode = SmoothingMode.AntiAlias;

      //将我们要添加水印的图片按照原始大小描绘(复制)到图形中
      grPhoto.DrawImage(
       imgPhoto,//  要添加水印的图片
       new Rectangle(0,// 根据要添加的水印图片的宽和高
       0,// X方向从0点开始描绘
       0,// Y方向

       phWidth,// X方向描绘长度
       phHeight,// Y方向描绘长度
       GraphicsUnit.Pixel);               // 描绘的单位,这里用的是像素

      //根据图片的大小我们来确定添加上去的文字的大小
      //在这里我们定义一个数组来确定
      int[] sizes = new int[] { 16,14,12,10,8,6,4 };

      //字体
      Font crFont = null;
      //矩形的宽度和高度,Sizef有三个属性,分别为Height高,width宽,IsEmpty是否为空
      Sizef crSize = new Sizef();

      //利用一个循环语句来选择我们要添加文字的型号
      //直到它的长度比图片的宽度小
      for (int i = 0; i < 7; i++)
      {
        crFont = new Font("arial",sizes[i],FontStyle.Bold);

        //测量用指定的 Font 对象绘制并用指定的 StringFormat 对象格式化的指定字符串。
        crSize = grPhoto.MeasureString(waterWords,crFont);

        // ushort 关键字表示一种整数数据类型
        if ((ushort)crSize.Width < (ushort)phWidth)
          break;
      }

      //截边5%的距离,定义文字显示(由于不同的图片显示的高和宽不同,所以按百分比截取)
      int yPixlesFromBottom = (int)(phHeight * .05);

      //定义在图片上文字的位置
      float wmHeight = crSize.Height;
      float wmWidth = crSize.Width;

      float xPosOfWm;

      float yPosOfWm;

   switch (position)
      {
        case ImagePosition.BottomMiddle:
          xPosOfWm = phWidth / 2;
          yPosOfWm = phHeight - wmHeight - 10;
          break;
        case ImagePosition.Center:
          xPosOfWm = phWidth / 2;
          yPosOfWm = phHeight / 2;
          break;
        case ImagePosition.LeftBottom:
          xPosOfWm = wmWidth;
          yPosOfWm = phHeight - wmHeight - 10;
          break;
        case ImagePosition.LeftTop:
          xPosOfWm = wmWidth / 2;
          yPosOfWm = wmHeight / 2;
          break;
        case ImagePosition.RightTop:
          xPosOfWm = phWidth - wmWidth - 10;
          yPosOfWm = wmHeight;
          break;
        case ImagePosition.RigthBottom:
          xPosOfWm = phWidth - wmWidth - 10;
          yPosOfWm = phHeight - wmHeight - 10;
          break;
        case ImagePosition.TopMiddle:
          xPosOfWm = phWidth / 2;
          yPosOfWm = wmWidth;

          break;
        default:
          xPosOfWm = wmWidth;
          yPosOfWm = phHeight - wmHeight - 10;
          break;
      }

      //封装文本布局信息(如对齐、文字方向和 Tab 停靠位),显示操作(如省略号插入和国家标准 (National) 数字替换)和 OpenType 功能。
      StringFormat StrFormat = new StringFormat();

      //定义需要印的文字居中对齐
      StrFormat.Alignment = Stringalignment.Center;

      //SolidBrush:定义单色画笔。画笔用于填充图形形状,如矩形、椭圆、扇形、多边形和封闭路径。
      //这个画笔为描绘阴影的画笔,呈灰色
      int m_alpha = Convert.ToInt32(256 * alpha);
      SolidBrush semiTransBrush2 = new SolidBrush(Color.FromArgb(m_alpha,0));

      //描绘文字信息,这个图层向右和向下偏移一个像素,表示阴影效果
      //DrawString 在指定矩形并且用指定的 Brush 和 Font 对象绘制指定的文本字符串。
      grPhoto.DrawString(waterWords,//string of text
                    crFont,//font
                    semiTransBrush2,//Brush
                    new PointF(xPosOfWm + 1,yPosOfWm + 1),//Position
                    StrFormat);

      //从四个 ARGB 分量(alpha、红色、绿色和蓝色)值创建 Color 结构,这里设置透明度为153
      //这个画笔为描绘正式文字的笔刷,呈白色
      SolidBrush semiTransBrush = new SolidBrush(Color.FromArgb(153,255));

      //第二次绘制这个图形,建立在第一次描绘的基础上
      grPhoto.DrawString(waterWords,//font
                    semiTransBrush,//Brush
                    new PointF(xPosOfWm,yPosOfWm),//Position
                    StrFormat);

      //imgPhoto是我们建立的用来装载最终图形的Image对象
      //bmPhoto是我们用来制作图形的容器,为Bitmap对象
      imgPhoto = bmPhoto;
      //释放资源,将定义的Graphics实例grPhoto释放,grPhoto功德圆满
      grPhoto.dispose();

      //将grPhoto保存
      imgPhoto.Save(targetimage,ImageFormat.Jpeg);
      imgPhoto.dispose();

      return targetimage.Replace(PicturePath,"");
    }
  }

  /// <summary>
  /// 装载水印图片的相关信息
  /// </summary>
  public class WaterImage
  {
    public WaterImage()
    {

    }

    private string m_sourcePicture;
    /// <summary>
    /// 源图片地址名字(带后缀)

    /// </summary>
    public string SourcePicture
    {
      get { return m_sourcePicture; }
      set { m_sourcePicture = value; }
    }

    private string m_waterImager;
    /// <summary>
    /// 水印图片名字(带后缀)
    /// </summary>
    public string WaterPicture
    {
      get { return m_waterImager; }
      set { m_waterImager = value; }
    }

    private float m_alpha;
    /// <summary>
    /// 水印图片文字的透明度
    /// </summary>
    public float Alpha
    {
      get { return m_alpha; }
      set { m_alpha = value; }
    }

    private ImagePosition m_postition;
    /// <summary>
    /// 水印图片或文字在图片中的位置
    /// </summary>
    public ImagePosition Position
    {
      get { return m_postition; }
      set { m_postition = value; }
    }

    private string m_words;
    /// <summary>
    /// 水印文字的内容
    /// </summary>
    public string Words
    {
      get { return m_words; }
      set { m_words = value; }
    }

  }
}
相信本文所述对大家的C#程序设计有一定的借鉴参考作用。
今天关于计算并生成完美平方和计算并生成完美平方公式的介绍到此结束,谢谢您的阅读,有关2022-07-19:f (i) : i 的所有因子,每个因子都平方之后,累加起来。 比如 f (10) = 1 平方 + 2 平方 + 5 平方 + 10 平方 = 1 + 4 + 25 + 100 = 130。、asp.net-mvc – Url.Action生成查询字符串,以任何方式生成完整的URL?、C 语言:计算并输出 S=1+(1+2^0.5)+(1+2^0.5+3^0.5)...+(1+2^0.5+3^0.5+...+n^0.5)、C#(.net)水印图片的生成完整实例等更多相关知识的信息可以在本站进行查询。
本文标签:


![[转帖]Ubuntu 安装 Wine方法(ubuntu如何安装wine)](https://www.gvkun.com/zb_users/cache/thumbs/4c83df0e2303284d68480d1b1378581d-180-120-1.jpg)

