在本文中,我们将为您详细介绍使用Elasticsearch按时间划分的累计流量的相关知识,并且为您解答关于elasticsearchshard数量设置的疑问,此外,我们还会提供一些关于docker部署
在本文中,我们将为您详细介绍使用Elasticsearch按时间划分的累计流量的相关知识,并且为您解答关于elasticsearch shard数量设置的疑问,此外,我们还会提供一些关于docker 部署 elasticsearch + elasticsearch-head + elasticsearch-head 跨域问题 + IK 分词器、ElasticSearch (一) ElasticSearch 的应用场景及为什么要选择 ElasticSearch?、Elasticsearch - 如何在java中使用elasticsearch查找与地理定位点的匹配项、Elasticsearch CentOS6.5下安装ElasticSearch6.2.4+elasticsearch-head+Kibana的有用信息。
本文目录一览:- 使用Elasticsearch按时间划分的累计流量(elasticsearch shard数量设置)
- docker 部署 elasticsearch + elasticsearch-head + elasticsearch-head 跨域问题 + IK 分词器
- ElasticSearch (一) ElasticSearch 的应用场景及为什么要选择 ElasticSearch?
- Elasticsearch - 如何在java中使用elasticsearch查找与地理定位点的匹配项
- Elasticsearch CentOS6.5下安装ElasticSearch6.2.4+elasticsearch-head+Kibana
")
使用Elasticsearch按时间划分的累计流量(elasticsearch shard数量设置)
我正在从大量客户端应用程序接收请求/事件。我想使用elasticsearch找出我的最高流量点。
我尝试过的一件事是使用嵌套的直方图进行过滤器聚合,然后使用嵌套的“术语”聚合通过脚本字段获取一天中不同的时间。以下是我的尝试,它的执行效果非常好(正如我期望的那样,因为我正在为每个文档执行脚本)。
{ "aggs": { "sites_within_range": { "filter" : { "range" : { "occurred" : { "gt" : "now-1M" } } }, "aggs": { "sites_over_time": { "date_histogram": { "field": "occurred", "interval": "week" }, "aggs":{ "site_names": { "terms": { "script": "doc[''occurred''].date.getHourOfDay()", "size": 10000 } } } } } } }}我还考虑过将要查询的日期元素存储为文档的不同部分,例如:
{ "date": "actual datetime", "day": "monday", "hour": 8 "minute": 37}这也闻起来像是对我的错误答案。
答案1
小编典典在该线程中已经解决了同类问题。
为使解决方案适应您的问题,我们需要编写一个脚本以将日期转换为一天中的小时:
Date date = new Date(doc[''created_at''].value) ; java.text.SimpleDateFormat format = new java.text.SimpleDateFormat(''HH'');format.format(date)并在查询中使用它:
{ "aggs": { "perWeekDay": { "filter" : { "range" : { "occurred" : { "gt" : "now-1M" } } }, "aggs": { "terms": { "script": "Date date = new Date(doc[''created_at''].value) ;java.text.SimpleDateFormat format = new java.text.SimpleDateFormat(''HH'');format.format(date)" } } }}您一天中的流量就很大。
注意: 将小时/天/分钟存储在文档中是进行此类汇总的最有效方法。我的答案假设您不想存储该信息。脚本通常效率不高。

docker 部署 elasticsearch + elasticsearch-head + elasticsearch-head 跨域问题 + IK 分词器
0. docker pull 拉取 elasticsearch + elasticsearch-head 镜像
1. 启动 elasticsearch Docker 镜像
docker run -di --name tensquare_elasticsearch -p 9200:9200 -p 9300:9300 elasticsearch![]()
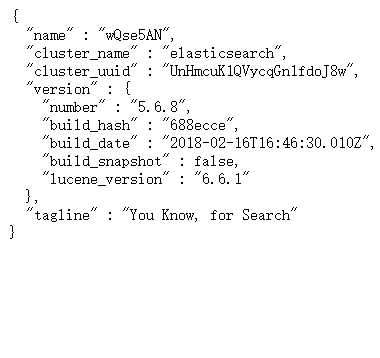
对应 IP:9200 ---- 反馈下边 json 数据,表示启动成功
2. 启动 elasticsearch-head 镜像
docker run -d -p 9100:9100 elasticsearch-head![]()
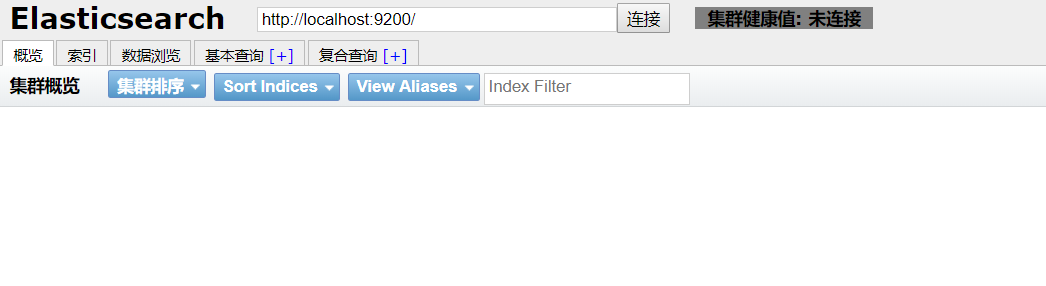
对应 IP:9100 ---- 得到下边页面,即启动成功
3. 解决跨域问题
进入 elasticsearch-head 页面,出现灰色未连接状态 , 即出现跨域问题

1. 根据 docker ps 得到 elasticsearch 的 CONTAINER ID
2. docker exec -it elasticsearch 的 CONTAINER ID /bin/bash 进入容器内
3. cd ./config
4. 修改 elasticsearch.yml 文件
echo "
http.cors.enabled: true
http.cors.allow-origin: ''*''" >> elasticsearch.yml
4. 重启 elasticsearch
docker restart elasticsearch的CONTAINER ID重新进入 IP:9100 进入 elasticsearch-head, 出现绿色标注,配置成功 !

5. ik 分词器的安装
将在 ik 所在的文件夹下,拷贝到 /usr/share/elasticsearch/plugins --- 注意: elasticsearch 的版本号必须与 ik 分词器的版本号一致
docker cp ik elasticsearch的CONTAINER ID:/usr/share/elasticsearch/plugins
重启elasticsearch
docker restart elasticsearch

未添加ik分词器:http://IP:9200/_analyze?analyzer=chinese&pretty=true&text=我爱中国
添加ik分词器后:http://IP:9200/_analyze?analyzer=ik_smart&pretty=true&text=我爱中国
ElasticSearch 的应用场景及为什么要选择 ElasticSearch?")
ElasticSearch (一) ElasticSearch 的应用场景及为什么要选择 ElasticSearch?
先了解一下数据的分类
结构化数据
又可以称之为行数据,存储在数据库里,可以用二维表结构来逻辑表达实现的数据。其实就是可以能够用数据或者统一的结构加以表示的数据。比如在数据表存储商品的库存,可以用整型表示,存储价格可以用浮点型表示,再比如给用户存储性别,可以用枚举表示,这都是结构化数据。
非结构化数据
无法用数字或者统一的结构表示的数据,称之为飞结构化数据。如:文本、图像、声音、网页。
其实结构化数据又数据非结构化数据。商品标题、描述、文章描述都是文本,其实文本就是非结构化数据。那么就可以说非结构化数据即为全文数据。
什么是全文检索?
一种将文件或者数据库中所有文本与检索项相匹配的文字资料检索方法,称之为全文检索。
全文检索的两种方法
顺序扫描法:将数据表的所有数据逐个扫描,再对文字描述扫描,符合条件的筛选出来,非常慢!
索引扫描法:全文检索的基本思路,也就是将非结构化数据中的一部分信息提取出来,重新组织,使其变得有一定结构,然后对此有一定结构的数据进行搜索,从而达到搜索相对快的目的。
全文检索的过程:
先索引的创建,然后索引搜索
为什么要选择用 ElasticSearch?
全文搜索属于最常见的需求,开源的 Elasticsearch (以下简称 Elastic)是目前全文搜索引擎的首选。
Elastic 的底层是开源库 Lucene。但是,你没法直接用 Lucene,必须自己写代码去调用它的接口。Elastic 是 Lucene 的封装,提供了 REST API 的操作接口,开箱即用。
分布式的实时文件存储,每个字段都被索引可被搜索。
分布式的实时分析搜索引擎。
可以扩展到上百台服务器,处理 PB 级别结构化或者非结构化数据。
所有功能集成在一个服务器里,可以通过 RESTful API、各种语言的客户端甚至命令与之交互。
上手容易,提供了很多合理的缺省值,开箱即用,学习成本低。
可以免费下载、使用和修改。
配置灵活,比 Sphinx 灵活的多。

Elasticsearch - 如何在java中使用elasticsearch查找与地理定位点的匹配项
如何解决Elasticsearch - 如何在java中使用elasticsearch查找与地理定位点的匹配项?
我是 elasticSearch 的新手,我正在尝试查询与地图上特定点匹配的文档,我正在使用 GeoPoint 对象,我需要进行一个返回所有“地理区域”的查询包含此句点,但我对 elasticsearch 查询有些困惑。
我仍然没有正确理解为了执行这些操作我的文档必须具有的结构,在这里我离开我正在调用的文档的类
@Data
@Document(indexName = "geozona")
public class GeozonaElasticDTO {

    @Id
    @Field(type = FieldType.Long)
    private long id;

    @Field(type = FieldType.Text)
    private UUID uuid;

    @Field(type = FieldType.Text)
    private String nombre;

    @Field(type = FieldType.Text)
    private String descripcion;

    private List<UUID> etiquetas;

    private List<UUID> lugares;

    private List<UUID> geozonaLimiteVeLocidad;

    @Field(type = FieldType.Text)
    private EnumTipoGeozona tipoGeozona;

    @Field(type = FieldType.Double)
    private Double radio;

    @Field(type = FieldType.Text)
    private String pathEncode;

    @Field(type = FieldType.Object)
    @GeoPointField
    private List<GeoPoint> points;

    @Field(type = FieldType.Double)
    private double puntoDeReferenciaLatitud;

    @Field(type = FieldType.Double)
    private double puntoDeReferenciaLongitud;

    @Field(type = FieldType.Integer)
    private int limiteDeOrientacionGradoInicio;

    @Field(type = FieldType.Integer)
    private int limiteDeOrientacionGradoTermino;

    @Field(type = FieldType.Integer)
    private Integer ancho;

    @Field(type = FieldType.Boolean)
    private boolean eliminado;

    @Field(type = FieldType.Date,format = DateFormat.custom,pattern = "uuuu-MM-dd''T''HH:mm:ssZ")
    private zoneddatetime fechaCreacion;

    @Field(type = FieldType.Date,pattern = "uuuu-MM-dd''T''HH:mm:ssZ")
    private zoneddatetime fechaActualizacion;

    @Field(type = FieldType.Integer)
    private int version;
}
这是我在弹性服务器中的类的结构
    "geozona": {
        "aliases": {},"mappings": {
            "properties": {
                "_class": {
                    "type": "text","fields": {
                        "keyword": {
                            "type": "keyword","ignore_above": 256
                        }
                    }
                },"ancho": {
                    "type": "integer"
                },"descripcion": {
                    "type": "text"
                },"eliminado": {
                    "type": "boolean"
                },"etiquetas": {
                    "type": "text","fechaActualizacion": {
                    "type": "date","format": "uuuu-MM-dd''T''HH:mm:ssZ"
                },"fechaCreacion": {
                    "type": "date","geozonaLimiteVeLocidad": {
                    "type": "text","id": {
                    "type": "keyword"
                },"limiteDeOrientacionGradoInicio": {
                    "type": "integer"
                },"limiteDeOrientacionGradoTermino": {
                    "type": "integer"
                },"lugares": {
                    "type": "text","nombre": {
                    "type": "text"
                },"pathEncode": {
                    "type": "text"
                },"points": {
                    "type": "geo_point"
                },"puntoDeReferenciaLatitud": {
                    "type": "double"
                },"puntoDeReferenciaLongitud": {
                    "type": "double"
                },"radio": {
                    "type": "double"
                },"tipoGeozona": {
                    "type": "text"
                },"uuid": {
                    "type": "text"
                },"version": {
                    "type": "integer"
                }
            }
        },"settings": {
            "index": {
                "refresh_interval": "1s","number_of_shards": "1","provided_name": "geozona","creation_date": "1609949683125","store": {
                    "type": "fs"
                },"number_of_replicas": "1","uuid": "m-y7Qa5wSwGmDA3TVm4HkA","version": {
                    "created": "7090299"
                }
            }
        }
    }
}
如果有人能指导我如何开始正确处理地理定位点与弹性的重合,那将对我有很大帮助。
解决方法
暂无找到可以解决该程序问题的有效方法,小编努力寻找整理中!
如果你已经找到好的解决方法,欢迎将解决方案带上本链接一起发送给小编。
小编邮箱:dio#foxmail.com (将#修改为@)

Elasticsearch CentOS6.5下安装ElasticSearch6.2.4+elasticsearch-head+Kibana
CentOS6.5下安装ElasticSearch6.2.4
(1)配置JDK环境
配置环境变量
export JAVA_HOME="/opt/jdk1.8.0_144"
export PATH="$JAVA_HOME/bin:$PATH"
export CLASSPATH=".:$JAVA_HOME/lib"
(2)安装ElasticSearch6.2.4
下载地址:https://www.elastic.co/cn/downloads/past-releases/elasticsearch-6-2-4
启动报错: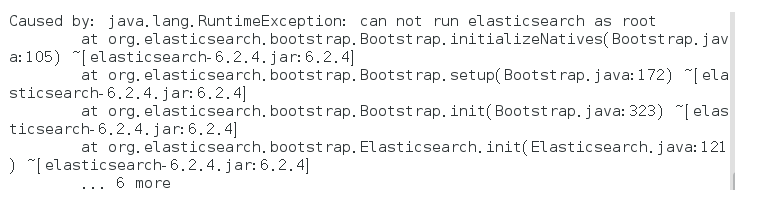
解决方式:
bin/elasticsearch -Des.insecure.allow.root=true
或者修改bin/elasticsearch,加上ES_JAVA_OPTS属性:
ES_JAVA_OPTS="-Des.insecure.allow.root=true"
再次启动: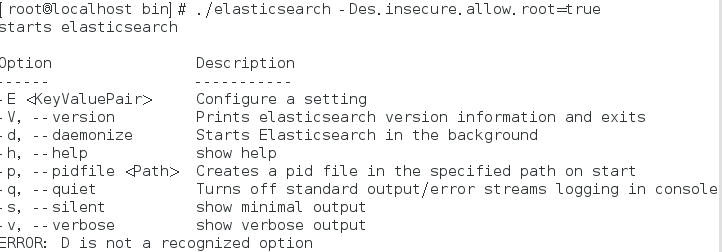
这是出于系统安全考虑设置的条件。由于ElasticSearch可以接收用户输入的脚本并且执行,为了系统安全考 虑,建议创建一个单独的用户用来运行ElasticSearch。
如果没有普通用户就要创建一个普通用户组和普通用户,下面介绍一下怎么创建用户组和普通用户
创建用户组和用户:
groupadd esgroup
useradd esuser -g esgroup -p espassword
更改elasticsearch文件夹及内部文件的所属用户及组:
cd /opt
chown -R esuser:esgroup elasticsearch-6.2.4
切换用户并运行:
su esuser
./bin/elasticsearch
再次启动显示已杀死: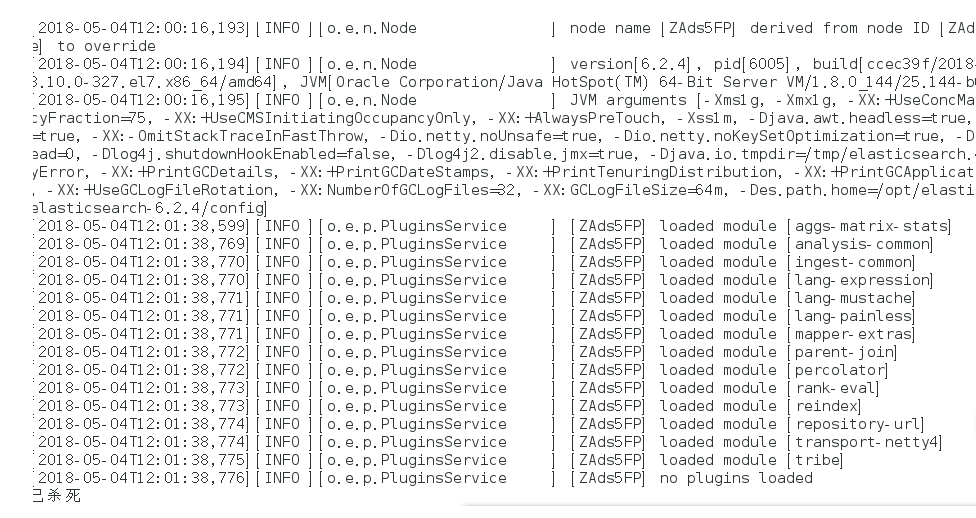
需要调整JVM的内存大小:
vi bin/elasticsearch
ES_JAVA_OPTS="-Xms512m -Xmx512m"
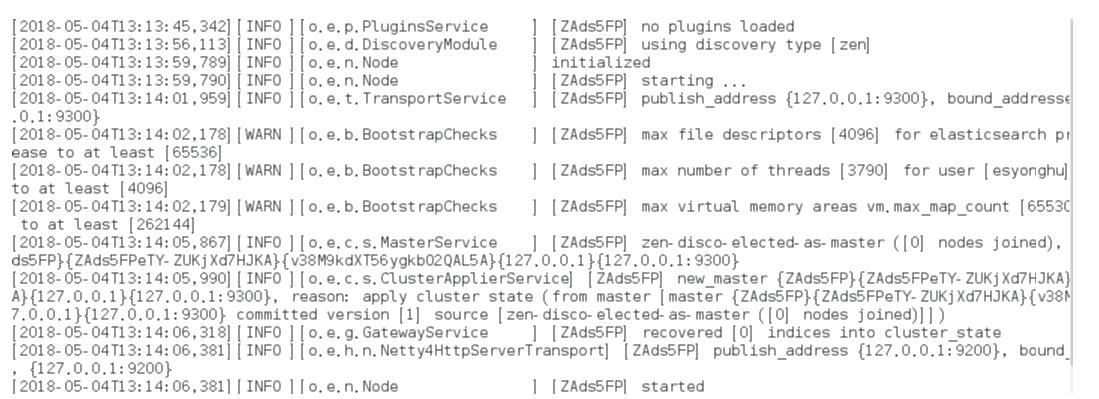
再次启动:启动成功
如果显示如下类似信息:
[INFO ][o.e.c.r.a.DiskThresholdMonitor] [ZAds5FP] low disk watermark [85%] exceeded on [ZAds5FPeTY-ZUKjXd7HJKA][ZAds5FP][/opt/elasticsearch-6.2.4/data/nodes/0] free: 1.2gb[14.2%], replicas will not be assigned to this node
需要清理磁盘空间。
后台运行:./bin/elasticsearch -d
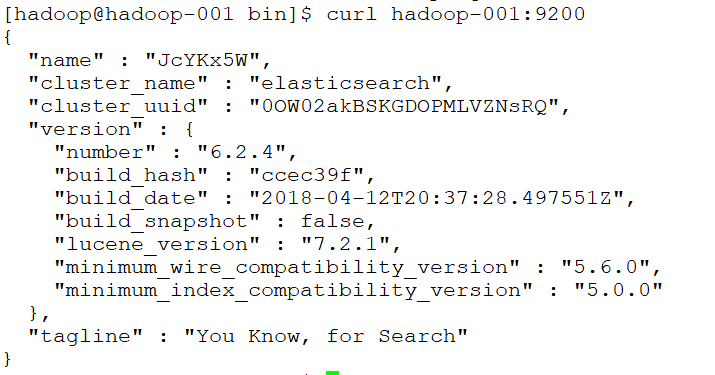
测试连接:curl 127.0.0.1:9200
会看到一下JSON数据:
[root@localhost ~]# curl 127.0.0.1:9200
{
"name" : "rBrMTNx",
"cluster_name" : "elasticsearch",
"cluster_uuid" : "-noR5DxFRsyvAFvAzxl07g",
"version" : {
"number" : "5.1.1",
"build_hash" : "5395e21",
"build_date" : "2016-12-06T12:36:15.409Z",
"build_snapshot" : false,
"lucene_version" : "6.3.0"
},
"tagline" : "You Know, for Search"
}
实现远程访问:
需要对config/elasticsearch.yml进行 配置:
network.host: hadoop-001
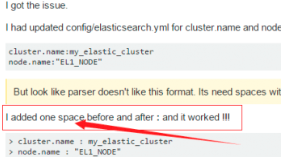
再次启动报错:Failed to load settings from [elasticsearch.yml]
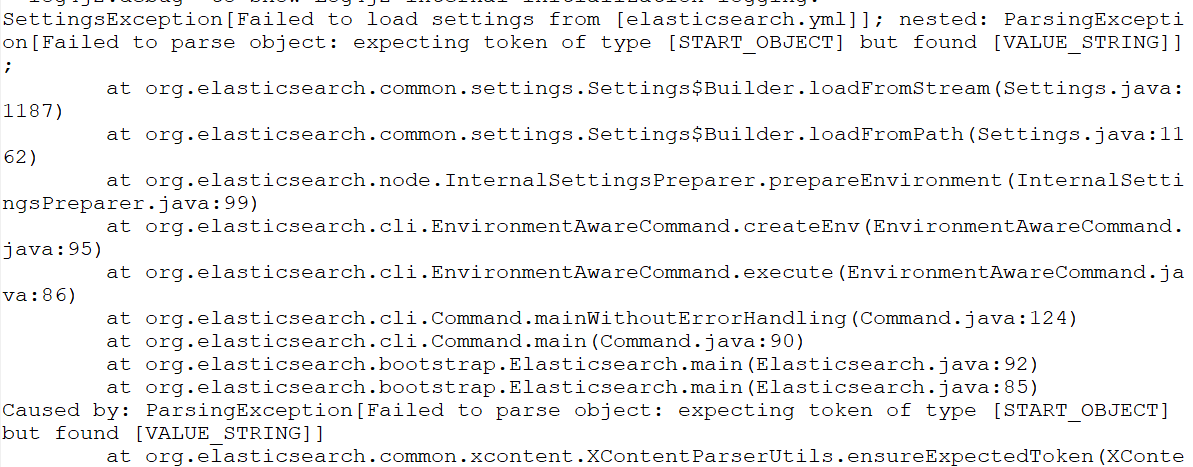
这个错就是参数的冒号前后没有加空格,加了之后就好,我找了好久这个问题;
后来在一个外国网站找到了这句话.
Exception in thread "main" SettingsException[Failed to load settings from [elasticsearch.yml]]; nested: ElasticsearchParseException[malformed, expected end of settings but encountered additional content starting at line number: [3], column number: [1]]; nested: ParserException[expected ''<document start>'', but found BlockMappingStart
in ''reader'', line 3, column 1:
node.rack : r1
^
];
Likely root cause: expected ''<document start>'', but found BlockMappingStart
in ''reader'', line 3, column 1:
node.rack : r1
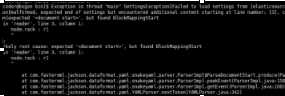
这个是行的开头没有加空格,fuck!
Exception in thread "main" SettingsException[Failed to load settings from [elasticsearch.yml]]; nested: ScannerException[while scanning a simple key
in ''reader'', line 11, column 2:
discovery.zen.ping.unicast.hosts ...
^

参数冒号后加空格,或者是数组中间加空格
例如:
# discovery.zen.minimum_master_nodes: 3
再次启动
还是报错
max file descriptors [4096] for elasticsearch process is too low
处理第一个错误:
vim /etc/security/limits.conf //文件最后加入
esuser soft nofile 65536
esuser hard nofile 65536
esuser soft nproc 4096
esuser hard nproc 4096
处理第二个错误:
进入limits.d目录下修改配置文件。
vim /etc/security/limits.d/20-nproc.conf
修改为 esuser soft nproc 4096
注意重新登录生效!!!!!!!!
处理第三个错误:
vim /etc/sysctl.conf
vm.max_map_count=655360
执行以下命令生效:
sysctl -p
关闭防火墙:systemctl stop firewalld.service
启动又又又报错
system call filters failed to install; check the logs and fix your configuration or disable sys

直接在
config/elasticsearch.yml 末尾加上一句
bootstrap.system_call_filter: false再次启动成功!
安装Head插件
Head是elasticsearch的集群管理工具,可以用于数据的浏览和查询
(1)elasticsearch-head是一款开源软件,被托管在github上面,所以如果我们要使用它,必须先安装git,通过git获取elasticsearch-head
(2)运行elasticsearch-head会用到grunt,而grunt需要npm包管理器,所以nodejs是必须要安装的
nodejs和npm安装:
http://blog.java1234.com/blog/articles/354.html
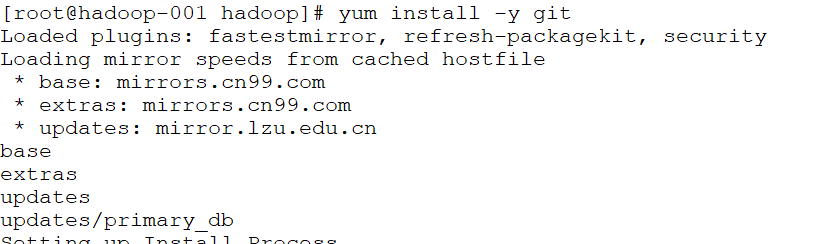
git安装
yum install -y git

(3)elasticsearch5.0之后,elasticsearch-head不做为插件放在其plugins目录下了。
使用git拷贝elasticsearch-head到本地
cd ~
git clone git://github.com/mobz/elasticsearch-head.git
(4)安装elasticsearch-head依赖包
[root@localhost local]# npm install -g grunt-cli
[root@localhost _site]# cd /usr/local/elasticsearch-head/
[root@localhost elasticsearch-head]# cnpm install
(5)修改Gruntfile.js
[root@localhost _site]# cd /usr/local/elasticsearch-head/
[root@localhost elasticsearch-head]# vi Gruntfile.js
在connect-->server-->options下面添加:hostname:’*’,允许所有IP可以访问
(6)修改elasticsearch-head默认连接地址
[root@localhost elasticsearch-head]# cd /usr/local/elasticsearch-head/_site/
[root@localhost _site]# vi app.js
将this.base_uri = this.config.base_uri || this.prefs.get("app-base_uri") || "http://localhost:9200";中的localhost修改成你es的服务器地址
(7)配置elasticsearch允许跨域访问
打开elasticsearch的配置文件elasticsearch.yml,在文件末尾追加下面两行代码即可:
http.cors.enabled: true
http.cors.allow-origin: "*"
(8)打开9100端口
[root@localhost elasticsearch-head]# firewall-cmd --zone=public --add-port=9100/tcp --permanent
重启防火墙
[root@localhost elasticsearch-head]# firewall-cmd --reload
(9)启动elasticsearch
(10)启动elasticsearch-head
[root@localhost _site]# cd ~/elasticsearch-head/
[root@localhost elasticsearch-head]# node_modules/grunt/bin/grunt server 或者 npm run start
(11)访问elasticsearch-head
关闭防火墙:systemctl stop firewalld.service
浏览器输入网址:hadoop-001:9100/

安装Kibana
Kibana是一个针对Elasticsearch的开源分析及可视化平台,使用Kibana可以查询、查看并与存储在ES索引的数据进行交互操作,使用Kibana能执行高级的数据分析,并能以图表、表格和地图的形式查看数据
(1)下载Kibana
https://www.elastic.co/downloads/kibana
(2)把下载好的压缩包拷贝到/soft目录下
(3)解压缩,并把解压后的目录移动到/user/local/kibana
(4)编辑kibana配置文件
[root@localhost /]# vi /usr/local/kibana/config/kibana.yml
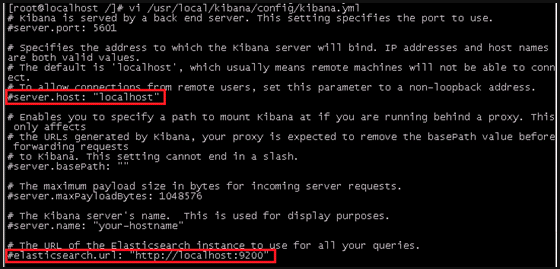
将server.host,elasticsearch.url修改成所在服务器的ip地址
server.port: 5601 //监听端口
server.host: "hadoo-001" //监听IP地址,建议内网ip
elasticsearch.url: "http:/hadoo-001" //elasticsearch连接kibana的URL,也可以填写192.168.137.188,因为它们是一个集群
(5)开启5601端口
Kibana的默认端口是5601
开启防火墙:systemctl start firewalld.service
开启5601端口:firewall-cmd --permanent --zone=public --add-port=5601/tcp
重启防火墙:firewall-cmd –reload
(6)启动Kibana
[root@localhost /]# /usr/local/kibana/bin/kibana
浏览器访问:http://192.168.137.188:5601
安装中文分词器
一.离线安装
(1)下载中文分词器
https://github.com/medcl/elasticsearch-analysis-ik
下载elasticsearch-analysis-ik-master.zip
(2)解压elasticsearch-analysis-ik-master.zip
unzip elasticsearch-analysis-ik-master.zip
(3)进入elasticsearch-analysis-ik-master,编译源码
mvn clean install -Dmaven.test.skip=true
(4)在es的plugins文件夹下创建目录ik
(5)将编译后生成的elasticsearch-analysis-ik-版本.zip移动到ik下,并解压
(6)解压后的内容移动到ik目录下
二.在线安装
./elasticsearch-plugin install https://github.com/medcl/elasticsearch-analysis-ik/releases/download/v6.2.4/elasticsearch-analysis-ik-6.2.4.zip
关于使用Elasticsearch按时间划分的累计流量和elasticsearch shard数量设置的介绍已经告一段落,感谢您的耐心阅读,如果想了解更多关于docker 部署 elasticsearch + elasticsearch-head + elasticsearch-head 跨域问题 + IK 分词器、ElasticSearch (一) ElasticSearch 的应用场景及为什么要选择 ElasticSearch?、Elasticsearch - 如何在java中使用elasticsearch查找与地理定位点的匹配项、Elasticsearch CentOS6.5下安装ElasticSearch6.2.4+elasticsearch-head+Kibana的相关信息,请在本站寻找。
本文标签:


