对于想了解webapiajaxpost.netcore正确写法,解决对象为空的读者,本文将提供新的信息,我们将详细介绍webapipost方法,并且为您提供关于.NETCore3WebApiCorsf
对于想了解webapi ajax post .netcore 正确写法, 解决对象为空的读者,本文将提供新的信息,我们将详细介绍webapi post方法,并且为您提供关于.NET Core 3 Web Api Cors fetch 一直 307 Temporary Redirect、.net core 3.1 webapi后端接收钉钉小程序post的文件/图片、.Net Core 5 Web Api - Swagger POST ok Xunit POST 错误、.NET Core WebAPI post 参数传递时后端的接收方式的有价值信息。
本文目录一览:- webapi ajax post .netcore 正确写法, 解决对象为空(webapi post方法)
- .NET Core 3 Web Api Cors fetch 一直 307 Temporary Redirect
- .net core 3.1 webapi后端接收钉钉小程序post的文件/图片
- .Net Core 5 Web Api - Swagger POST ok Xunit POST 错误
- .NET Core WebAPI post 参数传递时后端的接收方式
")
webapi ajax post .netcore 正确写法, 解决对象为空(webapi post方法)
//类定义
public class Users
{public int UserID;
public string UserName;
public string UserEmail;
}
//webapi post 写法
[HttpPost]
public Users Post([FromBody] Users value)
{
_userList.Add(value);
return value;
}
//ajax post
function post() {
$.ajax({
url: "http://localhost:5000/api/Users",
type: "POST",
contentType: "application/json; charset=utf-8",
data: '{ "UserID": 1,"UserName": "test","UserEmail": "test@cnblogs.com" }',
dataType: 'json',
success: function (data) {
alert(JSON.stringify(data));
}
});
}
//json对象 序列化 推荐使用 JSON.stringify(obj);

.NET Core 3 Web Api Cors fetch 一直 307 Temporary Redirect
https://www.cnblogs.com/VAllen/archive/2020/02/26/dotnet-core-3-cors-fetch-response-307-temporary-redirect.html
.NET Core 3 Web Api Cors fetch 一直 307 Temporary Redirect
继上一篇 .net core 3 web api jwt 一直 401 为添加JWT-BearerToken认证所述的坑后,
本次为添加CORS跨域,又踩坑了。
自从 .NET Core 2.2 之后,CORS跨域配置代码发生了很大变化。
在 .NET Core 3.1 中,本作者碰到各种HTTP错误,诸如 500、307、401 等错误代码...
在必应Bing和不断Debug调整配置代码位置后,得知:
AllowAnyOrigin方法,在新的 CORS 中间件已经被阻止使用允许任意 Origin,所以该方法无效。AllowCredentials方法,自从 .NET Core 2.2 之后,不允许和AllowAnyOrigin同时调用。WithOrigins方法,在 .NET Core 3.1 中有bug,具体原因未知,暂时只能用SetIsOriginAllowed(t=> true)代替,等效.AllowAnyOrigin方法。- 创建项目默认的模板中,
app.UseHttpsRedirection()在前面,所以我将app.UseCors()放在它后面,这是导致HTTP 307 Temporary Redirect福报的根本原因之一。 - 度娘告诉我,
app.UseCors()方法要在app.UseAuthentication()之后,是误人子弟的,其实放在它前面也可以,并且app.UseCors()要在app.UseRouting()之后,app.UseEndpoints()和app.UseHttpsRedirection()之前 - 使用fetch跨域请求时,要注意controller的action是否有设置除了
HttpOptions之外的其它Http Method方法,如果有要加上HttpOptions标记特性,因为fetch跨域请求会先执行OPTIONS预请求。 - 使用fetch请求需要JWT认证的接口时,除了在HTTP Headers设置
Authorization之外,还需要设置''credentials'': ''include''。 - 写
app.UseXxxxxx方法,引入中间件时,要注意管道(Middleware)注册顺序。
参考:
- CORS配置:https://docs.microsoft.com/zh-cn/aspnet/core/security/cors?view=aspnetcore-3.1
- JWT认证:https://docs.microsoft.com/zh-cn/aspnet/core/security/authentication/?view=aspnetcore-3.1
- Cors Issue: https://github.com/dotnet/aspnetcore/issues/16672
- Forum: https://forums.asp.net/t/2160821.aspx?CORS+in+ASP+NET+Core+3+x
源代码
以下是在 .NET Core 3.1下经过严谨测试,可以JWT认证、CORS跨域、IIS托管、自寄主运行的源代码,仅供参考。
WebApi.csproj
<Project Sdk="Microsoft.NET.Sdk.Web">
  <PropertyGroup>
    <TargetFramework>netcoreapp3.1</TargetFramework>
    <RootNamespace>WebApi</RootNamespace>
  </PropertyGroup>
  <ItemGroup>
    <PackageReference Include="Microsoft.AspNetCore.Authentication.JwtBearer" Version="3.1.2" />
    <PackageReference Include="Microsoft.Extensions.Logging.Console" Version="3.1.2" />
    <PackageReference Include="Microsoft.Extensions.Logging.Debug" Version="3.1.2" />
    <PackageReference Include="Microsoft.Extensions.Logging.EventSource" Version="3.1.2" />
    <PackageReference Include="Microsoft.Extensions.Logging.TraceSource" Version="3.1.2" />
    <PackageReference Include="Microsoft.Extensions.Options.ConfigurationExtensions" Version="3.1.2" />
    <PackageReference Include="Microsoft.TeamFoundationServer.Client" Version="16.153.0" />
    <PackageReference Include="Microsoft.VisualStudio.Services.Client" Version="16.153.0" />
    <PackageReference Include="Microsoft.VisualStudio.Services.InteractiveClient" Version="16.153.0" />
    <PackageReference Include="NLog.Web.AspNetCore" Version="4.9.0" />
  </ItemGroup>
</Project>
Program.cs
using Microsoft.AspNetCore.Hosting;
using Microsoft.Extensions.Hosting;
using Microsoft.Extensions.Logging;
using NLog.Extensions.Logging;
using System.Diagnostics;
using System.IO;

namespace WebApi
{
    public class Program
    {
        public static void Main(string[] args)
        {
            CreateHostBuilder(args).Build().Run();
        }

        public static IHostBuilder CreateHostBuilder(string[] args)
        {
            return Host.CreateDefaultBuilder(args)
                .ConfigureLogging((context, logging) =>
                {
                    logging.ClearProviders()
#if DEBUG
                        .AddConsole()
                        .AddDebug()
                        .AddEventLog()
                        .AddTraceSource(new SourceSwitch(nameof(Program), "Warning"), new ConsoleTraceListener())
#endif
                        .AddNLog();
                })
                .ConfigureWebHostDefaults(webBuilder =>
                {
                    webBuilder.UseContentRoot(Directory.GetCurrentDirectory())
                       .UseKestrel()
                       .UseIISIntegration()
                       .UseIIS()
                       .UseStartup<Startup>();
                });
        }
    }
}
Startup.cs
using MCS.Vsts.Options;
using MCS.Vsts.Services;
using Microsoft.AspNetCore.Authentication.JwtBearer;
using Microsoft.AspNetCore.Builder;
using Microsoft.AspNetCore.Hosting;
using Microsoft.AspNetCore.HttpOverrides;
using Microsoft.Extensions.Configuration;
using Microsoft.Extensions.DependencyInjection;
using Microsoft.Extensions.Hosting;
using Microsoft.IdentityModel.Tokens;
using System.Text;

namespace WebApi
{
    public class Startup
    {
        public IConfiguration Configuration { get; }

        public Startup(IConfiguration configuration)
        {
            Configuration = configuration;
        }

        public void ConfigureServices(IServiceCollection services)
        {
            services.AddControllers();

            //认证
            services.AddAuthentication(JwtBearerDefaults.AuthenticationScheme)
                .AddJwtBearer(options =>
                {
                    var secretBytes = Encoding.UTF8.GetBytes(Configuration["ServerConfig:Secret"]);
                    options.TokenValidationParameters = new TokenValidationParameters()
                    {
                        IssuerSigningKey = new SymmetricSecurityKey(secretBytes),
                        ValidateIssuer = false,
                        ValidateAudience = false,
                        ValidateActor = false,
                        RequireSignedTokens = true,
                        RequireExpirationTime = true,
                        ValidateLifetime = true
                    };
                });

            //跨域
            services.AddCors(options =>
            {
                options.AddDefaultPolicy(builder =>
                {
                    builder
                    //允许任何来源的主机访问
                    //TODO: 新的 CORS 中间件已经阻止允许任意 Origin,即设置 AllowAnyOrigin 也不会生效
                    //AllowAnyOrigin()
                    //设置允许访问的域
                    //TODO: 目前.NET Core 3.1 有 bug, 暂时通过 SetIsOriginAllowed 解决
                    //.WithOrigins(Configuration["CorsConfig:Origin"])
                    .SetIsOriginAllowed(t=> true)
                    .AllowAnyMethod()
                    .AllowAnyHeader()
                    .AllowCredentials();
                });
            });

            //TODO: do something...
        }

        public void Configure(IApplicationBuilder app, IWebHostEnvironment env)
        {
            if (env.IsDevelopment())
            {
                app.UseDeveloperExceptionPage();
            }
            else
            {
                //Enabled HSTS
                app.UseHsts();
            }

            //TODO: 要放在UseCors之后
            //app.UseHttpsRedirection();

            app.UseRouting();

            app.UseForwardedHeaders(new ForwardedHeadersOptions
            {
                ForwardedHeaders = ForwardedHeaders.XForwardedFor | ForwardedHeaders.XForwardedProto
            });

            //TODO: UseCors要在UseRouting之后,UseEndpoints 和 UseHttpsRedirection 之前
            app.UseCors();

            app.UseAuthentication();

            app.UseAuthorization();

            app.UseHttpsRedirection();

            app.UseEndpoints(endpoints =>
            {
                endpoints.MapControllers();
            });
        }
    }
}
appsettings.json
{
  "Logging": {
    "LogLevel": {
      "Default": "Information",
      "Microsoft": "Warning",
      "Microsoft.Hosting.Lifetime": "Information"
    }
  },
  "AllowedHosts": "*",
  "https_port": 44370,
  "urls": "http://*:50867",
  "ServerConfig": {
    "Secret": "xxxxxxxxxxxxxxxxxxxxxxxxxxxxxxxxxxxxxxxxxxxxxxxxxxxxxxxxxxxxxxxxxxxxx"
  },
  "CorsConfig": {
    "BaseUri": "http://myserver"
  }
}
.net core 3.1 webapi后端接收钉钉小程序post的文件/图片
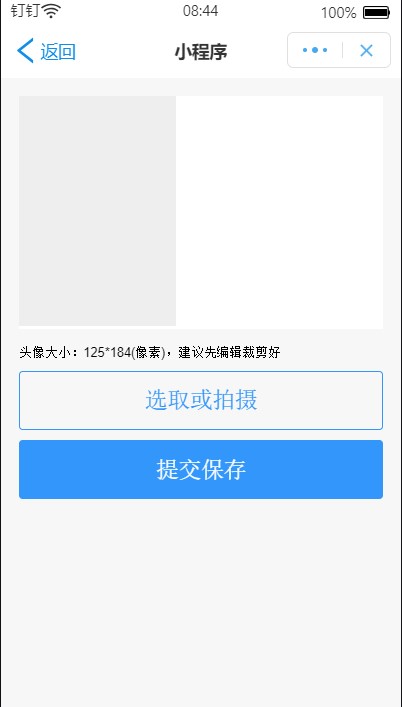
世上本没路;走的人多了,便成了路。
dd.uploadFile({
  url: ''请使用自己服务器地址'',
  fileType: ''image'',
  fileName: ''file'',
  filePath: ''...'',
  success: (res) => {
    dd.alert({
      content: ''上传成功''
    });
  },
});
这就是官网上的例子,没有后端的。但是我猜这是用"Form"进行post提交的,那脑补后端可以在post请求的boby里获取这个文件。以下是成功的后端代码:
/// <summary>
        /// 用户上传头像
        /// </summary>
        /// <param name="formCollection">Boby</param>
        /// <param name="userid">userid</param>
        /// <returns></returns>
        [HttpPost, Route("postPhotoImage")]
        public StatusCodeResult UserPostPhotoImage([FromForm] IFormCollection formCollection, string userid)
        {
            if (formCollection.Files.Count > 0)
            {
                var emp = JsonConvert.DeserializeObject<EmployeeDTO>(GetEmployeeInfo(userid));
                string photo_path = @"C:\apache-tomcat-7.0.90\webapps\default\employeesProfilePicture\";
                string photo_file = photo_path + emp.jobnumber + ".jpg";
                if (System.IO.File.Exists(photo_file))
                    System.IO.File.Delete(photo_file);
                try
                {
                    #region 存储文件
                    using (FileStream fs = System.IO.File.Create(photo_file))
                    {
                        var file = formCollection.Files[0];
                        file.CopyTo(fs);
                        int photo_width = 125;
                        int photo_height = 184;
                        Image img = ZoomImage(Image.FromStream(fs), photo_height, photo_width);
                        using (MemoryStream msResult = new MemoryStream())
                        {
                            Image resultImgage = new Bitmap(photo_width, photo_height);
                            Graphics g = Graphics.FromImage(resultImgage);
                            g.CompositingQuality = System.Drawing.Drawing2D.CompositingQuality.HighQuality;
                            g.SmoothingMode = System.Drawing.Drawing2D.SmoothingMode.HighQuality;
                            g.InterpolationMode = System.Drawing.Drawing2D.InterpolationMode.HighQualityBicubic;
                            g.Clear(Color.White);
                            g.DrawImage(img, new RectangleF(0, 0, photo_width, photo_height));
                            resultImgage.Save(msResult, ImageFormat.Png);
                            byte[] buffer = new byte[msResult.Length];
                            msResult.Seek(0, SeekOrigin.Begin);
                            msResult.Read(buffer, 0, buffer.Length);
                            msResult.Close();
                            fs.Write(buffer, 0, buffer.Length);
                        }
                        fs.Flush();
                        Console.WriteLine(Environment.NewLine + "=========================*===========================");
                        Console.WriteLine(DateTime.Now + "->:Upload Photo,FileName:" + fs.Name);
                        Console.WriteLine("=========================*===========================" + Environment.NewLine);
                    }
                    #endregion
                    return Ok();
                }
                catch (Exception)
                {
                    return BadRequest();
                }
            }
            else
                return BadRequest();
        }
大伙需要注意[FromForm]标记,[FromBoby]是获取不到的!
let debug_domain=''http://cquni.vaiwan.com:8771/api/ECard'';
let domain ="http://218.?.?.?:8771/api/ECard";
let post_url=domain+''/postPhotoImage'';
let photo_path='''';
let current_user='''';

Page({
  data: {
     src: ''''
  },
  onLoad(query) {
    current_user=query.userid;
  },
  photoselect(event){
    let that = this;
    dd.chooseImage({
      count: 1,
      success: (res) => {
        photo_path=res.filePaths[0];
        that.setData({
          src:res.filePaths[0]
        });
      },
    });
  },
  postimage(event){
    const file_url = post_url+''?userid=''+current_user;
    if (photo_path==''''){
      dd.alert({
        title:''出错啦!'',
        content: ''请先选取或拍摄照片!预览满意后再提交上传。'',
        buttonText:''我晓得了''
      });
      return;
    }
    //dd.alert({content:file_url});
    dd.uploadFile({
          url: file_url,
          fileType: ''image'',
          fileName: ''employee_photo'',
          filePath: photo_path,
          success: (res) => {
            dd.alert({
              title:''恭喜'',
              content: ''操作成功,头像已上传!'',
              buttonText:''我晓得了''
            });
          },
    });
  }
});

.Net Core 5 Web Api - Swagger POST ok Xunit POST 错误
如何解决.Net Core 5 Web Api - Swagger POST ok Xunit POST 错误?
我正在使用 XUnit 来测试我的 WebApi,GET 请求工作正常。但是当通过 XUnit 测试 POST 时,我收到了 404 Bad Request 而 Swagger 返回 200 OK


测试
[Theory]
        [InlineData("POST")]
        public async Task ContestCreateTest(string method)
        {
            var _httpClient = new Setup().httpClient;

            var request = new HttpRequestMessage(new HttpMethod(method),"/v1/Contest");

            var contestObject = new
            {
                title = "Concurso automatizado",description = "Concurso automatizado",submissionDeadLineInit = TimeZoneInfo.ConvertTime(DateTime.UtcNow.AddDays(1),TZConvert.GetTimeZoneInfo("America/Sao_Paulo")).ToString("yyyy''-''MM''-''dd''T''HH'':''mm'':''ss''.''fff''Z''"),submissionDeadLineEnd = TimeZoneInfo.ConvertTime(DateTime.UtcNow.AddDays(2),ratingDeadLineInit = TimeZoneInfo.ConvertTime(DateTime.UtcNow.AddDays(3),ratingDeadLineEnd = TimeZoneInfo.ConvertTime(DateTime.UtcNow.AddDays(4),closingDate = TimeZoneInfo.ConvertTime(DateTime.UtcNow.AddDays(5),usedistritoRules = true,rules = ""
            };

            string contestJson = JsonConvert.SerializeObject(contestObject);

            request.Content = new StringContent(contestJson,Encoding.UTF8,"multipart/form-data");

            var response = await _httpClient.SendAsync(request);

            response.EnsureSuccessstatusCode();
            Assert.Equal(HttpStatusCode.OK,response.StatusCode);
        }
解决方法
如图所示,您的 API 接受表单,但您以 json 格式发送数据。
var formDataContent = new MultipartFormDataContent
{
    { new StringContent("Concurso automatizado",Encoding.UTF8),"title"},{ new StringContent("Concurso automatizado","description")},{ new StringContent(TimeZoneInfo.ConvertTime(DateTime.UtcNow.AddDays(1),TZConvert.GetTimeZoneInfo("America/Sao_Paulo")).ToString("yyyy''-''MM''-''dd''T''HH'':''mm'':''ss''.''fff''Z''","submissionDeadLineInit" },...
};

// Act
var response = await _client.PostAsync("/v1/Contest",formDataContent);

.NET Core WebAPI post 参数传递时后端的接收方式
https://www.cnblogs.com/wyljq/archive/2020/02/15/12313361.html
.NET Core WebAPI post 参数传递时后端的接收方式
- 实体类
- dynamic 动态类型
- JObject 参数
- 单值参数 (字符串参数)
A. 前端 Post 请求代码
$.ajax({
           url: "/api/student/poststudent",
           type: ''POST'',
           data:JSON.stringify({ name: "张三", age: 21 }),
           success:function () {
           },
           dataType: "json",
           contentType: "application/json"
       });
B. 后端接收参数方式
1. 实体类
实体类是比较简单的一种传参方式,使用频率非常高。
- 添加实体类
    public class Student
    {
        public string Name { get; set; }
        public int Age { get; set; }
}- 后台处理 Post 请求代码
[HttpPost("{id}")]
public void PostStudent(Student student)
{
}- 接收参数结果

2.dynamic 动态类型
- 后台处理 Post 请求代码
[HttpPost("{id}")]
public void PostStudent(dynamic student)
{
    var name = student.name;//name大小写与前端参数一致
    var age = student.age;
}- 接收参数结果

3.JObject 参数
- 引入 Microsoft.AspNetCore.Mvc.NewtonsoftJson 包
- 添加引用
using Newtonsoft.Json.Linq; - 后台处理 Post 请求代码
[HttpPost("{id}")]
public void PostStudent(JObject student)
{
}- 接收参数结果

4. 单值参数 (字符串参数)
只能传一个字符串参数,并且用单引号包一个双引号,双引号里为字符串内容!
- 前端代码与以上方式不同
$.ajax({
           url: "/api/student/poststudent",
           type: ''POST'',
           data:''"name=张三,age=21"'',//这里是重点!用单引号包一个双引号,双引号里为字符串内容!
           success:function () {
           },
           dataType: "json",
           contentType: "application/json"
});- 后台处理 Post 请求代码
[HttpPost("{id}")]
public void PostStudent([FromBody] string values)
{
}
WebApi 方法参数前加 [FromBody] 标识,表示该参数值应该从请求的 Body 中获取,而不是从 URL 中获取。不加 [FromBody] 标识后台取不到参数值。
- 接收参数结果

设置允许跨域
如果有跨域需求支持,请设置允许跨域。在 Stateup.cs 中添加如下代码。
- 修改 ConfigureServices 方法,添加代码如下:
//允许一个或多个来源可以跨域
services.AddCors(options =>
{
      options.AddPolicy("CustomCorsPolicy", policy =>
      {
             // 设定允许跨域的来源,有多个可以用'',''隔开
             policy.WithOrigins("https://localhost:5000")//只允许https://localhost:5000来源允许跨域
             .AllowAnyHeader()
             .AllowAnyMethod()
             .AllowCredentials();
      });
});- 修改 Configure 方法,添加代码如下:
app.UseCors("CustomCorsPolicy");我们今天的关于webapi ajax post .netcore 正确写法, 解决对象为空和webapi post方法的分享就到这里,谢谢您的阅读,如果想了解更多关于.NET Core 3 Web Api Cors fetch 一直 307 Temporary Redirect、.net core 3.1 webapi后端接收钉钉小程序post的文件/图片、.Net Core 5 Web Api - Swagger POST ok Xunit POST 错误、.NET Core WebAPI post 参数传递时后端的接收方式的相关信息,可以在本站进行搜索。
本文标签:


