在本文中,我们将给您介绍关于Android环境配置和移动自动化(Genymotion)相关配置的详细内容,并且为您解答android环境配置的相关问题,此外,我们还将为您提供关于(OK)ns3—gen
在本文中,我们将给您介绍关于Android环境配置和移动自动化(Genymotion)相关配置的详细内容,并且为您解答android 环境配置的相关问题,此外,我们还将为您提供关于(OK) ns3—genymotion—android、android genymotion 下载地址、Android Studio 使用 Genymotion 模拟器、Android Studio 安装并使用 genymotion的知识。
本文目录一览:- Android环境配置和移动自动化(Genymotion)相关配置(android 环境配置)
- (OK) ns3—genymotion—android
- android genymotion 下载地址
- Android Studio 使用 Genymotion 模拟器
- Android Studio 安装并使用 genymotion
相关配置(android 环境配置)")
Android环境配置和移动自动化(Genymotion)相关配置(android 环境配置)
本机环境: Window10
其他材料准备:
安卓开发者网站(AndroidStudio下载-3.6.3)
安卓开发工具网站(SDKTools下载-android-sdk_r24.4.1-windows.zip)
Genymotion模拟器下载(如果未安装VirtualBox 虚拟机, 选择with VirtualBox-genymotion-3.1.0-vBox.exe)
安卓环境: 下载SDKTools并配置系统环境变量
1. SDKTools下载后解压[android-sdk-windows]....这是我的个人目录, 根据自己的情况修改(D:\RTE\android-sdk-windows)
2. 配置系统环境变量
系统变量名: ANDROID_HOME 变量值: D:\RTE\android-sdk-windows
系统变量名: Path , 新建两条Path环境变量
--值: %ANDROID_HOME%\tools
--值: %ANDROID_HOME%\platform_tools
3. 安装AndroidStudio
AS和SDK目录尽量 都要空间大一些, 需要下载很多东西...很大.....
- AS安装目录选择
- 选择jre(系统自带jre或者选择自己配置的JDK, 个人倾向于后者 JDK安装配置参考
- 选择AVD(可选, 模拟器后期会选择Genymotion, AVD有点卡....)
- 选择SDK目录(第一步那个目录, 会提示已经存在SDK目录, 但是缺少很多组件, 继续安装会帮助我们把之前SDK目录缺少的必要组件安装好... 当然也可以提前自己配置好..但是比较麻烦, 这步安装完成后, 就可以使用adb命令了


- 验证adb命令

- 安装完成后一些其他操作(个人习惯)
先查看是否有更新

打开SDK Manager, 勾选需要安装开发平台(Platforms), 需要安装或者更新的SDK工具等, 已安装是打钩状态, 需要更新是复选框中间有条横线, 未安装是空白状态..勾选之后点击Apply..选择Access, 然后自动安装或者更新


如果需要使用AVD, 可以打开AVD Manager自行创建虚拟设备, 选择架构时需要注意, x86架构可能无法运行ARM架构的apk, 听说ARM架构超级卡...所以直接选择了Genymotion...
Genymotion安装和使用
先安装Genymotion 然后安装VirtualBox...两个软件都可以自己选择安装位置..
打开Genymotion, 要求登录, 没有账号需要创建(邮箱)

选择个人账户(免费的...但是有水印..影响不大)

设置虚拟机安装位置和ADB位置(可选)

选择自己需要创建的机器和配置一些自选参数

重点: 创建模拟器后可能打不开......尤其是笔记本...
- win+x 用管理员身份打开命令行, 执行以下命令..(Windows Hyper-V启动后不可以兼容VirtualBox和VMware, 所以要关闭Hyper-V, 执行完命令重启)
bcdedit /set hypervisorlaunchtype off
- 还有一种情况是笔记本BIOS中未启用Intel VT-X或AMD-V虚拟化功能, 自行修改BIOS
- 还打不开的话参考官方其他办法...
同时开启AS和Genymotion模拟器

其他
- Genymotion的x86架构的模拟器要运行ARM架构的apk, 需要在模拟器添加Genymotion_ARM_Translation.zip文件, 找到对应版本直接拖进去就好, 然后重启模拟器..
- AS的Genymotion插件, 好像是已经弃用了....
然后就可以进行APP开发, 或者使用Appium进行移动自动化测试了...
 ns3—genymotion—android")
(OK) ns3—genymotion—android
brctl addbr br-androidifconfig br-android up
-----------------------------------------------------------------
[root @localhost android-on-linux]# chmod +x genymotion-2.6.0-ubuntu15_x64.bin
[root @localhost android-on-linux]# ll -h genymotion-2.6.0-ubuntu15_x64.bin
-rwxr-xr-x. 1 root root 41M 5 月 18 22:54 genymotion-2.6.0-ubuntu15_x64.bin
[root @localhost android-on-linux]# ./genymotion-2.6.0-ubuntu15_x64.bin
Installing for all users.
Installing to folder [/opt/genymobile/genymotion]. Are you sure [y/n] ? y
- Trying to find VirtualBox toolset .................... OK (Valid version of VirtualBox found: 5.0.20r106931)
- Extracting files ..................................... OK (Extract into: [/opt/genymobile/genymotion])
- Installing launcher icon ............................. OK
Installation done successfully.
You can now use these tools from [/opt/genymobile/genymotion]:
- genymotion
- genymotion-shell
- gmtool
[root @localhost android-on-linux]#
[root @localhost genymotion]# pwd
/opt/genymobile/genymotion
[root@localhost genymotion]# ./genymotion
./genymotion: error while loading shared libraries: libjpeg.so.8: cannot open shared object file: No such file or directory
-----------------------------------------------------------------
https://github.com/maciej-c/libjpeg8x64
wget https://codeload.github.com/maciej-c/libjpeg8x64/zip/master
[root@localhost libjpeg8-x64]# ll
总用量 1176
lrwxrwxrwx. 1 root root 16 5 月 18 23:12 libjpeg.so.8 -> libjpeg.so.8.0.0
-rwxrwxr-x. 1 root root 1188344 2 月 12 02:23 libjpeg.so.8.0.0
[root@localhost libjpeg8-x64]# cp -a libjpeg.so.8* /usr/lib64/
-----------------------------------------------------------------
[root@localhost genymotion]# pwd
/opt/genymobile/genymotion
[root@localhost genymotion]# ./genymotion
-----------------------------------------------------------------
[root@localhost ~]# pwd
/opt/android-on-linux/android-sdk-linux/platform-tools
[root@localhost ~]# gedit /root/.bashrc
export PATH=$PATH:/opt/android-on-linux/android-sdk-linux/platform-tools
[root@localhost ~]# adb shell
root@vbox86p:/ # netcfg
netcfg eth0 up
netcfg eth0 dhcp
//IFB — Intermediate Functional Block device ,取代旧的 imq,用于流控。
-----------------------------------------------------------------
------------------------------------------------------------------------------------------
Fedora23 + genymotion (android) + Docker + NS3 + MANETs - testing
------------------------------------------------------------------------------------------
[root@localhost ~]# mkdir /tmp/docker1
systemctl start docker.service
[root@localhost docker1]# docker run -it --rm --net=''none'' busybox /bin/sh
[root@localhost ~]# docker ps
CONTAINER ID IMAGE COMMAND CREATED STATUS PORTS NAMES
ffa93ae962e3 busybox "/bin/sh" 36 seconds ago Up 35 seconds awesome_shirley
//get PID of CONTAINER
[root@localhost ~]# docker inspect -f "{{.State.Pid}}" awesome_shirley
14438
[root@localhost ~]#
----------------------------
first:
----------------------------
[root@localhost genymotion]# pwd
/opt/genymobile/genymotion
[root@localhost genymotion]# ./genymotion
----------------------------
second:
----------------------------
------------------------------------------------------------------------------------------
https://www.nsnam.org/wiki/HOWTO_Use_Linux_Containers_to_set_up_virtual_networks
http://yaxin-cn.github.io/Docker/docker-container-use-static-IP.html
[root@localhost ~]#
brctl addbr br-android
brctl addbr br-docker
tunctl -t tap-left
tunctl -t tap-right
ifconfig tap-left 0.0.0.0 promisc up
ifconfig tap-right 0.0.0.0 promisc up
// genymotion android
ip link add veth_android44 type veth peer name X
brctl addif br-android veth_android44
ip link set veth_android44 up
----------------------------
third:
----------------------------
// Virtual Box > Settings > Network > Adapter 2 > bridge, br-android, then, to start android in genymotion window.
[root@localhost ~]# man ip-netns
By convention a named network namespace is an object at /var/run/netns/NAME that can be opened. The file
descriptor resulting from opening /var/run/netns/NAME refers to the specified network namespace. Holding that
file descriptor open keeps the network namespace alive. The file descriptor can be used with the setns(2) sys‐
tem call to change the network namespace associated with a task.
[root@localhost ~]# ps aux|grep geny
root 14807 0.4 2.6 5558944 205520 ? Sl 11:06 0:02 /opt/genymobile/genymotion/player --vm-name Custom Phone - 5.1.0 - API 22 - 768x1280
[root@localhost ~]# mkdir /var/run/netns
[root@localhost ~]#
rm /var/run/netns/* -f
ln -s /proc/14438/ns/net /var/run/netns/14438
ln -s /proc/14807/ns/net /var/run/netns/14807
----------------------------
ip link set X netns 14807
// docker busybox
ip link add veth_docker1 type veth peer name Y
brctl addif br-docker veth_docker1
ip link set veth_docker1 up
ip link set Y netns 14438
--------------
[root@localhost ~]# ip link add veth_docker1 type veth peer name X
RTNETLINK answers: File exists
[root@localhost ~]#
ip link delete veth_docker1
ip link delete X
systemctl restart network-online.target
ip addr flush dev X // to flush the device before bringing it up
--------------
------------------------------------------------------------------------------------------
[root@localhost docker2]# docker run -it --rm --net=''none'' busybox /bin/sh
/ # ifconfig -a
Y Link encap:Ethernet HWaddr 82:A9:52:BE:D2:78
BROADCAST MULTICAST MTU:1500 Metric:1
RX packets:0 errors:0 dropped:0 overruns:0 frame:0
TX packets:0 errors:0 dropped:0 overruns:0 carrier:0
collisions:0 txqueuelen:1000
RX bytes:0 (0.0 B) TX bytes:0 (0.0 B)
lo Link encap:Local Loopback
inet addr:127.0.0.1 Mask:255.0.0.0
inet6 addr: ::1/128 Scope:Host
UP LOOPBACK RUNNING MTU:65536 Metric:1
RX packets:0 errors:0 dropped:0 overruns:0 frame:0
TX packets:0 errors:0 dropped:0 overruns:0 carrier:0
collisions:0 txqueuelen:1
RX bytes:0 (0.0 B) TX bytes:0 (0.0 B)
/ #
------------------------------------------------------------------------------------------
------------------------------------------------------------------------------------------
[root@localhost ~]#
brctl addif br-android tap-left
ifconfig br-android up
brctl addif br-docker tap-right
ifconfig br-docker up
[root@localhost ~]# brctl show
bridge name bridge id STP enabled interfaces
br-android 8000.5ea947f3ed2c no tap-left
veth_android44
br-docker 8000.16168007f70a no tap-right
veth_docker1
docker0 8000.0242e1664909 no
virbr0 8000.525400b558ab yes virbr0-nic
// genymotion android
ip netns exec 14807 ip link set dev X name eth1
ip netns exec 14807 ip link set eth1 up
ip netns exec 14807 ip addr add 172.17.0.2/16 dev eth1
//ip netns exec 14807 ip route add default via 172.17.42.1
// docker busybox
ip netns exec 14438 ip link set dev Y name eth0
ip netns exec 14438 ip link set eth0 up
ip netns exec 14438 ip addr add 172.17.0.1/16 dev eth0
//ip netns exec 14438 ip route add default via 172.17.42.1
------------------------------------------------------------------------------------------
/ # route -n
Kernel IP routing table
Destination Gateway Genmask Flags Metric Ref Use Iface
172.17.0.0 0.0.0.0 255.255.0.0 U 0 0 0 eth0
/ #
------------------------------------------------------------------------------------------
//You will also have to make sure that your kernel has ethernet filtering (ebtables, bridge-nf, arptables) disabled. If you do not do this, only STP and ARP traffic will be allowed to flow across your bridge and your whole scenario will not work.
[root@localhost ~]#
cd /proc/sys/net/bridge
for f in bridge-nf-*; do echo 0 > $f; done
cd -
------------------------------------------------------------------------------------------
172.17.0.2 can not ping 172.17.0.1
------------------------------------------------------------------------------------------
/ # ping 172.17.0.1
PING 172.17.0.1 (172.17.0.1): 56 data bytes
^C
--- 172.17.0.1 ping statistics ---
2 packets transmitted, 0 packets received, 100% packet loss
------------------------------------------------------
cp manet-2015.cc /opt/tools/network_simulators/ns3/ns-allinone-3.25/ns-3.25/scratch/
[root@localhost ns-3.25]# pwd
/opt/tools/network_simulators/ns3/ns-allinone-3.25/ns-3.25
[root@localhost ns-3.25]#
./waf --run scratch/manet-2015 --vis
------------------------------------------------------
172.17.0.2 can ping 172.17.0.1 successfully
------------------------------------------------------
/ # ping 172.17.0.1
PING 172.17.0.1 (172.17.0.1): 56 data bytes
64 bytes from 172.17.0.1: seq=0 ttl=64 time=0.619 ms
64 bytes from 172.17.0.1: seq=1 ttl=64 time=0.363 ms
^C
--- 172.17.0.1 ping statistics ---
2 packets transmitted, 2 packets received, 0% packet loss
round-trip min/avg/max = 0.363/0.491/0.619 ms
/ #
------------------------------------------------------------------------------------------
ifconfig br-android down
ifconfig br-docker down
brctl delif br-android tap-left
brctl delif br-docker tap-right
brctl delbr br-android
brctl delbr br-docker
ifconfig tap-left down
ifconfig tap-right down
tunctl -d tap-left
tunctl -d tap-right
ip link delete veth_android44
ip link delete X
ip link delete veth_docker1
ip link delete Y
ip link delete eth1
------------------------------------------------------------------------------------------
So far, OK OK OK
------------------------------------------------------------------------------------------

android genymotion 下载地址
https://www.genymotion.com/download/
with VirtualBox:
http://files2.genymotion.com/genymotion/genymotion-2.6.0/genymotion-2.6.0-vbox.exe

Android Studio 使用 Genymotion 模拟器
Genymotion: Genymotion是最新版的安卓模拟器,被300000开发者所信任
1. Genymotion 下载安装(官网 http://www.genymotion.net/)
1. 注册账号:https://www.genymotion.com/account/login/

2. 下载 Genymotion :https://www.genymotion.com/download/

3. 然后就傻瓜式安装,注意要安装 virtual Box 否则 genymotion 无法使用

2. Genymotion 配置使用
1. 打开 genymotion

2. 进行配置,如上图?:找到 setting,重点配置下图?:指定好 sdk

3. 设置完上图?,回到原来页面,进行下图操作?:

4. 安装上图?:版本的模拟器,然后照下图?:操作即可

5. 启动后的界面如下图?:

6. Android Studio 安装 Genymotion 插件 如下图?:File->Setting->Plugins->genymotion->Install

7. 到这里就基本上完事了,重启 Android Studio, 然后使用 Android Studio 选择运行就好了
————————————————
2.运行程序
a.打开Toolbar View->Toolbar,显示图标
可以看到工具栏多了个Genymotion Device Manager的图标:

b.设置genymotion程序路径
点击图标,弹出如下界面:

c.运行genymotion
加载我们之前安装好的Genymotion文件夹即可。然后再点击图标,弹出如下界面:

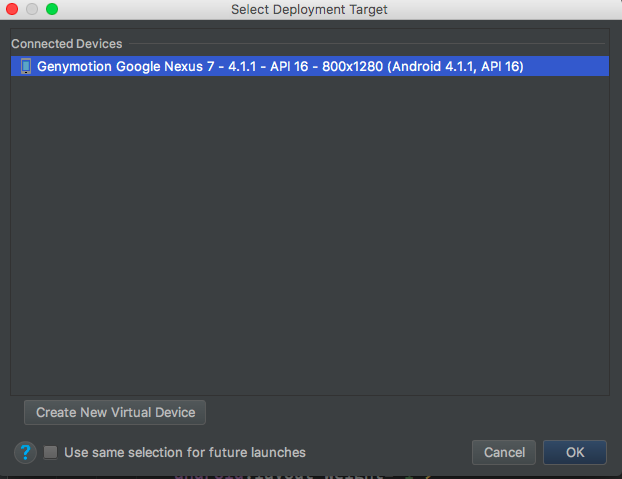
d.选择项目点击运行,弹出如下界面:


Android Studio 安装并使用 genymotion
一。安装 genymotion 与 VirtualBox
1. 安装
genymotion 安装包:https://pan.baidu.com/s/1UTwvJv2pbHE4znBw91V19g
virtualbox 安装包:https://pan.baidu.com/s/1lEFNDty5yK5TU3ijb5jKPQ
要先安装 virtualbox,在打开 genymotion
2. 新建虚拟机
运行 Genymotion 软件,会提示你需要创建虚拟设备,点击 yes 按钮开始创建虚拟设备:

使用之前注册的账号进行连接:

然后选择其中一个版本的模拟器:


当然了,如果要在模拟器上运行程序,还要确保模拟器加载了 Android SDK:

备注:如果启动模拟器时出现下面的错误:

升级电脑显卡驱动就行了。
这样,我们的模拟器就建好了,并且可以启动起来。接下来要将模拟器和 Android Studio 相关联。
3. 用 android studio 在 genymotion 中运行程序
1. 安装 genymotion 插件
进入 set->Plugins, 选择 Browse Repositories, 查找 genymotion, 安装插件,插件安装好之后,紧接着重启软件,让新加载的插件生效。
2. 运行程序
a. 打开 Toolbar View->Toolbar, 显示图标
可以看到工具栏多了个 Genymotion Device Manager 的图标:

b. 设置 genymotion 程序路径
点击图标,弹出如下界面:

c. 运行 genymotion
加载我们之前安装好的 Genymotion 文件夹即可。然后再点击图标,弹出如下界面:

d. 选择项目点击运行,弹出如下界面:
今天关于Android环境配置和移动自动化(Genymotion)相关配置和android 环境配置的讲解已经结束,谢谢您的阅读,如果想了解更多关于(OK) ns3—genymotion—android、android genymotion 下载地址、Android Studio 使用 Genymotion 模拟器、Android Studio 安装并使用 genymotion的相关知识,请在本站搜索。
本文标签:


![[转帖]Ubuntu 安装 Wine方法(ubuntu如何安装wine)](https://www.gvkun.com/zb_users/cache/thumbs/4c83df0e2303284d68480d1b1378581d-180-120-1.jpg)

