本篇文章给大家谈谈SpringBootActuator相当打印JSON,以及springboot打印http请求的知识点,同时本文还将给你拓展SpingbootActuator配置json格式化、Sp
本篇文章给大家谈谈Spring Boot Actuator相当打印JSON,以及springboot打印http请求的知识点,同时本文还将给你拓展Sping boot Actuator配置json格式化、Spring Boot (28) actuator 与 spring-boot-admin、Spring Boot (十九):使用 Spring Boot Actuator 监控应用、Spring Boot 2.x 中的 Actuator等相关知识,希望对各位有所帮助,不要忘了收藏本站喔。
本文目录一览:- Spring Boot Actuator相当打印JSON(springboot打印http请求)
- Sping boot Actuator配置json格式化
- Spring Boot (28) actuator 与 spring-boot-admin
- Spring Boot (十九):使用 Spring Boot Actuator 监控应用
- Spring Boot 2.x 中的 Actuator
")
Spring Boot Actuator相当打印JSON(springboot打印http请求)
在我的Spring Boot 1.3.3.RELEASE应用程序中,Actuator的Health端点返回以下JSON:
{"status":"UP","diskSpace":{"status":"UP","total":120031539200,"free":109277069312,"threshold":10485760}}
我想要返回漂亮的打印JSON而不是单个字符串.
我在我的application.yml中添加了以下配置:
spring:
  jackson:
    serialization:
      INDENT_OUTPUT: true
但输出仍然返回相同的单个字符串.
如何正确配置我的应用程序以返回漂亮的JSON?
更新
这是我的application.yml
server:
  port: @server.port@
  contextpath: /dashboard

management:
  contextpath: /actuator

spring:
  jackson:
    serialization:
      INDENT_OUTPUT: true
  jmx:
    enabled: false
  aop:
    proxy-target-class: @spring.aop.proxy-target-class@
  security:
    bcryptPasswordEncoder:
      strength: @spring.security.bcryptPasswordEncoder.strength@
  datasource:
    driverClassName: @spring.datasource.driverClassName@
    url: @spring.datasource.url@
    username: @spring.datasource.username@
    password: @spring.datasource.password@
  jpa:
    database: @spring.jpa.database@
    database-platform: @spring.jpa.database-platform@
    hibernate.ddl-auto: @spring.jpa.hibernate.ddl-auto@
    show-sql: @spring.jpa.show-sql@

ok:
  client:
    clientSecret: @ok.client.clientSecret@
    clientPublicKey: @ok.client.clientPublicKey@
这是父pom.xml
这是常见的pom.xml


这个主要的pom.xml


Chrome屏幕截图:

最佳答案
尽管已经提到了所有很好的答案,但我希望它们能为我工作,但是在spring-boot-starter-1.3.3.RELEASE中,唯一让我的JSON打印到漂亮的配置是Jenky’s答案:Jackson PrettyPrint for Spring 4
为方便起见,我正在从那篇文章中复制两个可能的解决方案,XML配置或代码配置.
选项1:XML配置

factorybean">

选项2:代码配置

@Configuration
public class CustomWebMvcConfiguration extends WebMvcConfigurationSupport {

    @Override
    protected void extendMessageConverters( List

Sping boot Actuator配置json格式化
问题

在访问/actuator/health的过程中,json没有格式化。
解决
在application.properties文件中,添加如下配置:
spring.jackson.serialization.indent_output=true
效果

这样json就会自动被格式化处理。
参考
- 79.3 Customize the Jackson ObjectMapper
 actuator 与 spring-boot-admin")
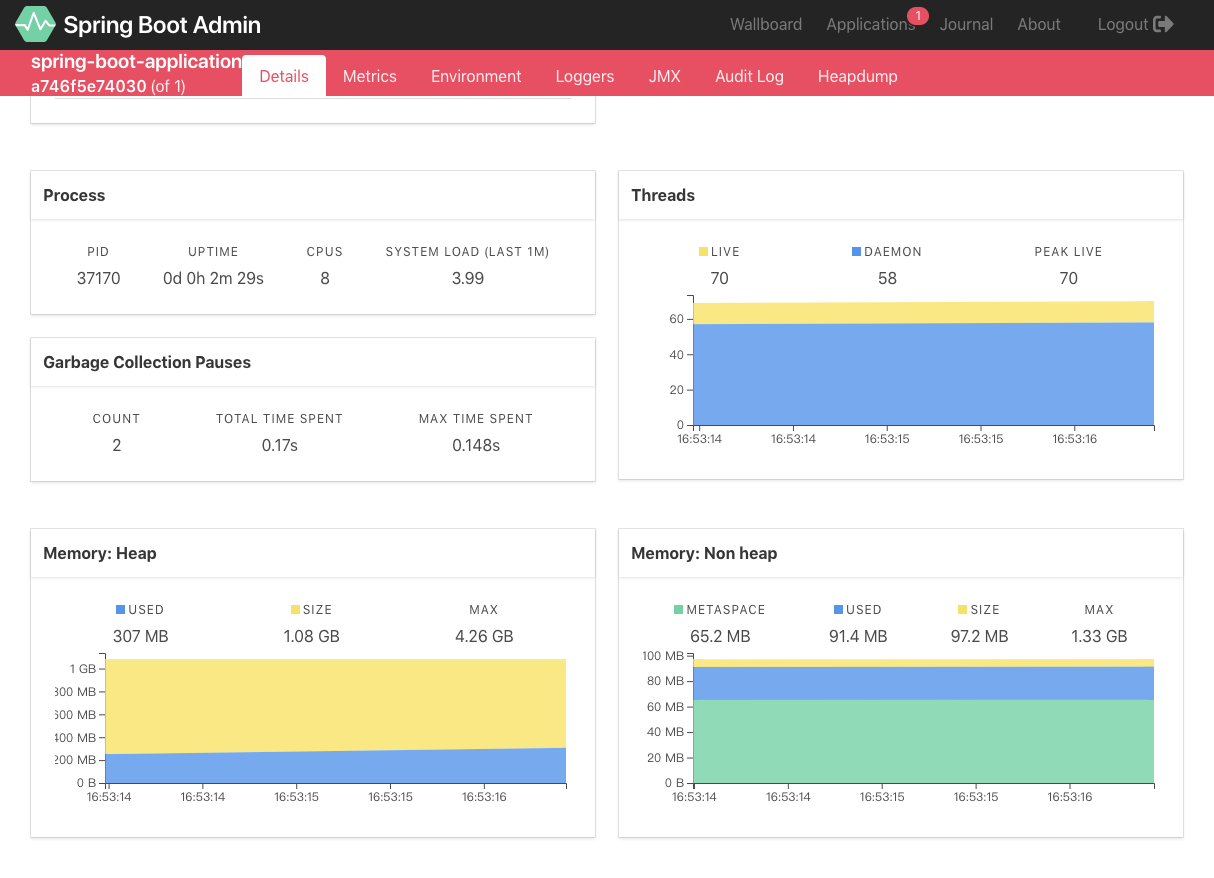
Spring Boot (28) actuator 与 spring-boot-admin
在上一篇中,通过 restful api 的方式查看信息过于繁琐,也不直观,效率低下。当服务过多的时候看起来就过于麻烦,每个服务都需要调用不同的接口来查看监控信息。
SBA
SBA 全称 spring boot admin 是一个管理和监控 spring boot 应用程序的开源项目,分为 admin-server 与 admin-client 两个组件,admin-server 通过采集 actuator 端点数据,显示在 spring -boot-admin-ui 上,已知的端点几乎都有进行采集,通过 spring-boot-admin 可以动态切换日志级别、导出日志、导出 heapdump、监控各项指标 等等
spring boot admin 在对单一服务监控的同时也提供了集群监控方案,支持通过 eureka、consul、zookeeper 等注册中心的方式实现多服务监控与管理
导入依赖
在 pom.xml 中添加对 spring-boot-admin 的相关依赖
<!-- 服务端:带UI界面 -->
        <dependency>
            <groupId>de.codecentric</groupId>
            <artifactId>spring-boot-admin-starter-server</artifactId>
            <version>2.0.0</version>
        </dependency>
        <!-- 客户端包 -->
        <dependency>
            <groupId>de.codecentric</groupId>
            <artifactId>spring-boot-admin-starter-client</artifactId>
            <version>2.0.0</version>
        </dependency>
        <!-- 安全认证 -->
        <dependency>
            <groupId>org.springframework.boot</groupId>
            <artifactId>spring-boot-starter-security</artifactId>
        </dependency>
        <!-- 端点 -->
        <dependency>
            <groupId>org.springframework.boot</groupId>
            <artifactId>spring-boot-starter-actuator</artifactId>
        </dependency>
        <!-- 在管理界面中与 JMX-beans 进行交互所需要被依赖的 JAR -->
        <dependency>
            <groupId>org.jolokia</groupId>
            <artifactId>jolokia-core</artifactId>
        </dependency>
如果想访问 info 的信息需要如下配置
<build>
        <plugins>
            <plugin>
                <groupId>org.springframework.boot</groupId>
                <artifactId>spring-boot-maven-plugin</artifactId>
                <executions>
                    <execution>
                        <goals>
                            <goal>build-info</goal>
                        </goals>
                    </execution>
                </executions>
            </plugin>
        </plugins>
    </build>
属性配置
在 application.yml 中配置 actuator 的相关配置,其中 info 开头的属性,就是访问 info 端点中显示的相关内容,值得注意的十 spring boot2.x 中,默认只开放了 info、health 两个端点,剩余的需要自己通过配置 management.endpoints.web.exposure.include 属性来加载,这个 management.endpoints.web.base-path 属性比较重要,因为 spring boot2.x 后每个端点默认的路径是 /actuator/endpointId 这样依赖 spring boot admin 是无法正常采集的
application.yml
spring:
  profiles:
    active: prod #指定读取哪个文件
  boot:
    admin:
      client:
        url: http://localhost:8088
        instance:
          prefer-ip: true

info:
  head: head
  body: body
management:
  endpoints:
    web:
      exposure:
        #加载所有的端点,默认只加载了info、health
        include: ''*''
      #不配置SBA 扫描不到
      base-path: /
  endpoint:
    health:
      show-details: always
    #可以关闭指定的端点
    shutdown:
      enabled: false
application-dev.yml 空的
application-prod.yml
server:
  port: 8088
  servlet:
    context-path: /

spring:
  boot:
    admin:
      client:
        username: david
        password: 123456
        instance:
          metadata:
            user:
              name: david
              password: 123456
  security:
    user:
      name: david
      password: 123456
在启动方法中增加 @EnableAdminServer 注解 代表是 Server 端
@EnableAdminServer
@SpringBootApplication
public class BootApplication{

    public static void main(String[] args) {
        SpringApplication.run(BootApplication.class,args);
    }

    @Profile("dev")
    @Configuration
    public static class SecurityPermitAllConfig extends WebSecurityConfigurerAdapter{
        @Override
        protected void configure(HttpSecurity http) throws Exception{
            http.authorizeRequests().anyRequest().permitAll().and().csrf().disable();
        }
    }

    @Profile("prod")
    @Configuration
    public static class SecuritySecureConfig extends WebSecurityConfigurerAdapter{
        private final String adminContextPath;

        public SecuritySecureConfig(AdminServerProperties adminServerProperties){
            this.adminContextPath = adminServerProperties.getContextPath();
        }

        @Override
        protected void configure(HttpSecurity http) throws Exception{
            SavedRequestAwareAuthenticationSuccessHandler successHandler = new SavedRequestAwareAuthenticationSuccessHandler();
            successHandler.setTargetUrlParameter("redirectTo");

            http.authorizeRequests()
                    .antMatchers(adminContextPath + "/assets/**").permitAll()
                    .antMatchers(adminContextPath + "/login").permitAll()
                    .anyRequest().authenticated()
                    .and()
                    .formLogin().loginPage(adminContextPath + "/login").successHandler(successHandler).and()
                    .logout().logoutUrl(adminContextPath + "/logout").and()
                    .httpBasic().and()
                    .csrf().disable();
        }
    }
}
测试
启动项目 访问 http://localhost:8088/login
:使用 Spring Boot Actuator 监控应用")
Spring Boot (十九):使用 Spring Boot Actuator 监控应用
微服务的特点决定了功能模块的部署是分布式的,大部分功能模块都是运行在不同的机器上,彼此通过服务调用进行交互,前后台的业务流会经过很多个微服务的处理和传递,出现了异常如何快速定位是哪个环节出现了问题?
在这种框架下,微服务的监控显得尤为重要。本文主要结合 Spring Boot Actuator,跟大家一起分享微服务 Spring Boot Actuator 的常见用法,方便我们在日常中对我们的微服务进行监控治理。
Actuator 监控
Spring Boot 使用“习惯优于配置的理念”,采用包扫描和自动化配置的机制来加载依赖 Jar 中的 Spring bean,不需要任何 Xml 配置,就可以实现 Spring 的所有配置。虽然这样做能让我们的代码变得非常简洁,但是整个应用的实例创建和依赖关系等信息都被离散到了各个配置类的注解上,这使得我们分析整个应用中资源和实例的各种关系变得非常的困难。
Actuator 是 Spring Boot 提供的对应用系统的自省和监控的集成功能,可以查看应用配置的详细信息,例如自动化配置信息、创建的 Spring beans 以及一些环境属性等。
为了保证 actuator 暴露的监控接口的安全性,需要添加安全控制的依赖spring-boot-start-security依赖,访问应用监控端点时,都需要输入验证信息。Security 依赖,可以选择不加,不进行安全管理,但不建议这么做。
Actuator 的 REST 接口
Actuator 监控分成两类:原生端点和用户自定义端点;自定义端点主要是指扩展性,用户可以根据自己的实际应用,定义一些比较关心的指标,在运行期进行监控。
原生端点是在应用程序里提供众多 Web 接口,通过它们了解应用程序运行时的内部状况。原生端点又可以分成三类:
- 应用配置类:可以查看应用在运行期的静态信息:例如自动配置信息、加载的 springbean 信息、yml 文件配置信息、环境信息、请求映射信息;
- 度量指标类:主要是运行期的动态信息,例如堆栈、请求连、一些健康指标、metrics 信息等;
- 操作控制类:主要是指 shutdown,用户可以发送一个请求将应用的监控功能关闭。
Actuator 提供了 13 个接口,具体如下表所示。
| HTTP 方法 | 路径 | 描述 |
|---|---|---|
| GET | /auditevents | 显示应用暴露的审计事件 (比如认证进入、订单失败) |
| GET | /beans | 描述应用程序上下文里全部的 Bean,以及它们的关系 |
| GET | /conditions | 就是 1.0 的 /autoconfig ,提供一份自动配置生效的条件情况,记录哪些自动配置条件通过了,哪些没通过 |
| GET | /configprops | 描述配置属性(包含默认值)如何注入Bean |
| GET | /env | 获取全部环境属性 |
| GET | /env/{name} | 根据名称获取特定的环境属性值 |
| GET | /flyway | 提供一份 Flyway 数据库迁移信息 |
| GET | /liquidbase | 显示Liquibase 数据库迁移的纤细信息 |
| GET | /health | 报告应用程序的健康指标,这些值由 HealthIndicator 的实现类提供 |
| GET | /heapdump | dump 一份应用的 JVM 堆信息 |
| GET | /httptrace | 显示HTTP足迹,最近100个HTTP request/repsponse |
| GET | /info | 获取应用程序的定制信息,这些信息由info打头的属性提供 |
| GET | /logfile | 返回log file中的内容(如果 logging.file 或者 logging.path 被设置) |
| GET | /loggers | 显示和修改配置的loggers |
| GET | /metrics | 报告各种应用程序度量信息,比如内存用量和HTTP请求计数 |
| GET | /metrics/{name} | 报告指定名称的应用程序度量值 |
| GET | /scheduledtasks | 展示应用中的定时任务信息 |
| GET | /sessions | 如果我们使用了 Spring Session 展示应用中的 HTTP sessions 信息 |
| POST | /shutdown | 关闭应用程序,要求endpoints.shutdown.enabled设置为true |
| GET | /mappings | 描述全部的 URI路径,以及它们和控制器(包含Actuator端点)的映射关系 |
| GET | /threaddump | 获取线程活动的快照 |
快速上手
相关配置
项目依赖
<dependencies>
  <dependency>
    <groupId>org.springframework.boot</groupId>
    <artifactId>spring-boot-starter-web</artifactId>
  </dependency>
  <dependency>
      <groupId>org.springframework.boot</groupId>
      <artifactId>spring-boot-starter-actuator</artifactId>
  </dependency>
</dependencies>
配置文件
info.app.name=spring-boot-actuator
info.app.version= 1.0.0
info.app.test=test

management.endpoints.web.exposure.include=*
management.endpoint.health.show-details=always
#management.endpoints.web.base-path=/monitor

management.endpoint.shutdown.enabled=true
management.endpoints.web.base-path=/monitor代表启用单独的url地址来监控 Spring Boot 应用,为了安全一般都启用独立的端口来访问后端的监控信息management.endpoint.shutdown.enabled=true启用接口关闭 Spring Boot
配置完成之后,启动项目就可以继续验证各个监控功能了。
命令详解
在 Spring Boot 2.x 中为了安全期间,Actuator 只开放了两个端点 /actuator/health 和 /actuator/info。可以在配置文件中设置打开。
可以打开所有的监控点
management.endpoints.web.exposure.include=*
也可以选择打开部分
management.endpoints.web.exposure.exclude=beans,trace
Actuator 默认所有的监控点路径都在/actuator/*,当然如果有需要这个路径也支持定制。
management.endpoints.web.base-path=/manage
设置完重启后,再次访问地址就会变成/manage/*
Actuator 几乎监控了应用涉及的方方面面,我们重点讲述一些经常在项目中常用的命令。
health
health 主要用来检查应用的运行状态,这是我们使用最高频的一个监控点。通常使用此接口提醒我们应用实例的运行状态,以及应用不”健康“的原因,比如数据库连接、磁盘空间不够等。
默认情况下 health 的状态是开放的,添加依赖后启动项目,访问:http://localhost:8080/actuator/health即可看到应用的状态。
{
    "status" : "UP"
}
默认情况下,最终的 Spring Boot 应用的状态是由 HealthAggregator 汇总而成的,汇总的算法是:
- 1 设置状态码顺序:
setStatusOrder(Status.DOWN, Status.OUT_OF_SERVICE, Status.UP, Status.UNKNOWN);。 - 2 过滤掉不能识别的状态码。
- 3 如果无任何状态码,整个 Spring Boot 应用的状态是 UNKNOWN。
- 4 将所有收集到的状态码按照 1 中的顺序排序。
- 5 返回有序状态码序列中的第一个状态码,作为整个 Spring Boot 应用的状态。
health 通过合并几个健康指数检查应用的健康情况。Spring Boot Actuator 有几个预定义的健康指标比如DataSourceHealthIndicator, DiskSpaceHealthIndicator, MongoHealthIndicator, RedisHealthIndicator等,它使用这些健康指标作为健康检查的一部分。
举个例子,如果你的应用使用 Redis,RedisHealthindicator 将被当作检查的一部分;如果使用 MongoDB,那么MongoHealthIndicator 将被当作检查的一部分。
可以在配置文件中关闭特定的健康检查指标,比如关闭 redis 的健康检查:
management.health.redise.enabled=false
默认,所有的这些健康指标被当作健康检查的一部分。
info
info 就是我们自己配置在配置文件中以 info 开头的配置信息,比如我们在示例项目中的配置是:
info.app.name=spring-boot-actuator
info.app.version= 1.0.0
info.app.test= test
启动示例项目,访问:http://localhost:8080/actuator/info返回部分信息如下:
{
  "app": {
    "name": "spring-boot-actuator",
    "version": "1.0.0",
    "test":"test"
  }
}
beans
根据示例就可以看出,展示了 bean 的别名、类型、是否单例、类的地址、依赖等信息。
启动示例项目,访问:http://localhost:8080/actuator/beans返回部分信息如下:
[
  {
    "context": "application:8080:management",
    "parent": "application:8080",
    "beans": [
      {
        "bean": "embeddedServletContainerFactory",
        "aliases": [

        ],
        "scope": "singleton",
        "type": "org.springframework.boot.context.embedded.tomcat.TomcatEmbeddedServletContainerFactory",
        "resource": "null",
        "dependencies": [

        ]
      },
      {
        "bean": "endpointWebMvcChildContextConfiguration",
        "aliases": [

        ],
        "scope": "singleton",
        "type": "org.springframework.boot.actuate.autoconfigure.EndpointWebMvcChildContextConfiguration$$EnhancerBySpringCGLIB$$a4a10f9d",
        "resource": "null",
        "dependencies": [

        ]
      }
  }
]
conditions
Spring Boot 的自动配置功能非常便利,但有时候也意味着出问题比较难找出具体的原因。使用 conditions 可以在应用运行时查看代码了某个配置在什么条件下生效,或者某个自动配置为什么没有生效。
启动示例项目,访问:http://localhost:8080/actuator/conditions返回部分信息如下:
{
    "positiveMatches": {
     "DevToolsDataSourceAutoConfiguration": {
            "notMatched": [
                {
                    "condition": "DevToolsDataSourceAutoConfiguration.DevToolsDataSourceCondition",
                    "message": "DevTools DataSource Condition did not find a single DataSource bean"
                }
            ],
            "matched": [ ]
        },
        "RemoteDevToolsAutoConfiguration": {
            "notMatched": [
                {
                    "condition": "OnPropertyCondition",
                    "message": "@ConditionalOnProperty (spring.devtools.remote.secret) did not find property ''secret''"
                }
            ],
            "matched": [
                {
                    "condition": "OnClassCondition",
                    "message": "@ConditionalOnClass found required classes ''javax.servlet.Filter'', ''org.springframework.http.server.ServerHttpRequest''; @ConditionalOnMissingClass did not find unwanted class"
                }
            ]
        }
    }
}
heapdump
返回一个 GZip 压缩的 JVM 堆 dump
启动示例项目,访问:http://localhost:8080/actuator/heapdump会自动生成一个 Jvm 的堆文件 heapdump,我们可以使用 JDK 自带的 Jvm 监控工具 VisualVM 打开此文件查看内存快照。类似如下图:
shutdown
开启接口优雅关闭 Spring Boot 应用,要使用这个功能首先需要在配置文件中开启:
management.endpoint.shutdown.enabled=true
配置完成之后,启动示例项目,使用 curl 模拟 post 请求访问 shutdown 接口。
shutdown 接口默认只支持 post 请求。
curl -X POST "http://localhost:8080/actuator/shutdown"
{
    "message": "Shutting down, bye..."
}
此时你会发现应用已经被关闭。
mappings
描述全部的 URI 路径,以及它们和控制器的映射关系
启动示例项目,访问:http://localhost:8080/actuator/mappings返回部分信息如下:
{
  "/**/favicon.ico": {
    "bean": "faviconHandlerMapping"
  },
  "{[/hello]}": {
    "bean": "requestMappingHandlerMapping",
    "method": "public java.lang.String com.neo.controller.HelloController.index()"
  },
  "{[/error]}": {
    "bean": "requestMappingHandlerMapping",
    "method": "public org.springframework.http.ResponseEntity<java.util.Map<java.lang.String, java.lang.Object>> org.springframework.boot.autoconfigure.web.BasicErrorController.error(javax.servlet.http.HttpServletRequest)"
  }
}
threaddump
/threaddump 接口会生成当前线程活动的快照。这个功能非常好,方便我们在日常定位问题的时候查看线程的情况。 主要展示了线程名、线程ID、线程的状态、是否等待锁资源等信息。
启动示例项目,访问:http://localhost:8080/actuator/threaddump返回部分信息如下:
[
  {
    "threadName": "http-nio-8088-exec-6",
    "threadId": 49,
    "blockedTime": -1,
    "blockedCount": 0,
    "waitedTime": -1,
    "waitedCount": 2,
    "lockName": "java.util.concurrent.locks.AbstractQueuedSynchronizer$ConditionObject@1630a501",
    "lockOwnerId": -1,
    "lockOwnerName": null,
    "inNative": false,
    "suspended": false,
    "threadState": "WAITING",
    "stackTrace": [
      {
        "methodName": "park",
        "fileName": "Unsafe.java",
        "lineNumber": -2,
        "className": "sun.misc.Unsafe",
        "nativeMethod": true
      },
      ...
      {
        "methodName": "run",
        "fileName": "TaskThread.java",
        "lineNumber": 61,
        "className": "org.apache.tomcat.util.threads.TaskThread$WrappingRunnable",
        "nativeMethod": false
      }
      ...
    ],
    "lockInfo": {
      "className": "java.util.concurrent.locks.AbstractQueuedSynchronizer$ConditionObject",
      "identityHashCode": 372286721
    }
  }
  ...
]
生产出现问题的时候,可以通过应用的线程快照来检测应用正在执行的任务。
文章内容已经升级到 Spring Boot 2.x
示例代码-github
示例代码-码云
参考
Spring Boot Actuator: Production-ready features
对没有监控的微服务Say No!
Spring Boot Actuator 使用

Spring Boot 2.x 中的 Actuator

1. 前言
Spring Boot 提供了很多开箱即用的starter,其中有一款非常特别的starter——actuator 。它是用来对Spring Boot 应用进行监控、指标采集、管理,并提供一些很有用的端点(endpoint)来实现上述功能。这有助于我们对Spring Boot 应用进行监视和管理。我们本文将探讨Spring Boot 2.x下的actuator的一些知识点。
2. 集成
像其它starter一样,通过非常简单的依赖集成即可开箱即用。我们通过在项目中引入(以maven为例):
     <dependency>
            <groupId>org.springframework.boot</groupId>
            <artifactId>spring-boot-starter-actuator</artifactId>
     </dependency>
3. endpoints
Actuator的核心是端点(endpoint),我们通过端点来获取应用的一些监控信息或者通过端点来改变系统的一些状态。Actuator中内置了非常多的端点:
| id | 描述 | 默认是否启用 |
|---|---|---|
| auditevents | 显示当前应用程序的审计事件信息 | Yes |
| beans | 显示应用Spring Beans的完整列表 | Yes |
| caches | 显示可用缓存信息 | Yes |
| conditions | 显示自动装配类的状态及及应用信息 | Yes |
| configprops | 显示所有 @ConfigurationProperties 列表 | Yes |
| env | 显示 ConfigurableEnvironment 中的属性 | Yes |
| flyway | 显示 Flyway 数据库迁移信息 | Yes |
| health | 显示应用的健康信息(未认证只显示status,认证显示全部信息详情) | Yes |
| info | 显示任意的应用信息 | Yes |
| liquibase | 展示Liquibase 数据库迁移 | Yes |
| metrics | 展示当前应用的 metrics 信息 | Yes |
| mappings | 显示所有 @RequestMapping 路径集列表 | Yes |
| scheduledtasks | 显示应用程序中的计划任务 | Yes |
| sessions | 允许从Spring会话支持的会话存储中检索和删除用户会话。 | Yes |
| shutdown | 允许应用以优雅的方式关闭(默认情况下不启用) | No |
| threaddump | 执行一个线程dump | Yes |
| httptrace | 显示HTTP跟踪信息(默认显示最后100个HTTP请求 - 响应交换) | Yes |
| heapdump | 返回一个GZip压缩的hprof堆dump文件 | Yes |
| prometheus | Prometheus服务器抓取的格式显示metrics信息 | Yes |
3.1 启用与关闭
默认情况下除了shutdown是关闭的其它端点都是启用的。个别端点的启用依赖其他组件,比如我们上篇文章介绍的Prometheus。我们可以在Spring Boot 配置文件中通过配置(id参见上表)management.endpoint.<id>.enabled来配置端点是否启用。
另外我们可以通过management.endpoints.enabled-by-default来修改全局端口默认配置,以下示例启用info端点并禁用所有其他端点:
# 先设置所有的端点默认为关闭
management.endpoints.enabled-by-default=false
# 然后开启info 端点
management.endpoint.info.enabled=true
3.2 开放与封闭
特别需要我们注意的是,以上只是我们开启的端点功能,并不意味我们把这些端点暴露给应用之外的环境中去。暴露的配置规则是 management.endpoints.<web|jmx>.exposure.<include|exclude>我们以web为例,通过以下方式来暴露web端点:
#  * 为暴露所有web端点,如果暴露的是一个列表请使用端点 id 并以逗号隔开
management.endpoints.web.exposure.include=''*''
同样的如果我们要排除一些web端点请用 management.endpoints.web.exposure.exclude来配置。我们可以通过/actuator来列举暴露的端点。当然这个路径取决于我们对management.endpoints.web.basePath的配置。
3.3 安全性
对于生产环境来说端点都是敏感的。我们当然不希望非法的访问端点,特别如/shutdown这种端点。我们可以通过上面3.1、3.2进行关闭、封闭操作。也可直接配置management.server.port=-1 来关闭管理端点。或者确保在外面的安全框架诸如Spring security的控制之下。即保证 EndpointRequest.toAnyEndpoint()的安全性。
3.4 自定义端点
Spring Boot 2.x 开始,Actuator支持CRUD模型,而不是旧的RW(读/写)模型。我们可以按照两种策略来自定义:
- @Endpoint 同时支持JMX和http
- @JmxEndpoint 只支持JMX技术
- @WebEndpoint 只支持http
通过在一个端点类(必须是Spring Bean)上添加上面其中一个来表明该类是一个端点类。
在类的方法使用@ReadOperation,@WriteOperation或@DeleteOperation,这分别会映射到Http中的 GET、POST、DELETE(对http来说)。 以下是我们自定义的一个端点:
@Component
@Endpoint(id = "features")
public class FeaturesEndpoint {

   private Map<String, Feature> features = new ConcurrentHashMap<>();

   @ReadOperation
   public Map<String, Feature> features() {
       return features;
   }

   @ReadOperation
   public Feature feature(@Selector String name) {
       return features.get(name);
   }

   @WriteOperation
   public void configureFeature(@Selector String name, Feature feature) {
       features.put(name, feature);
   }

   @DeleteOperation
   public void deleteFeature(@Selector String name) {
       features.remove(name);
   }

   public static class Feature {
       private Boolean enabled;

       // [...] getters and setters
   }

}
注意请务必保证端点的id在该应用中唯一。
3.5 端点扩展
假设我们想要确保我们的应用程序的生产实例永远不是SNAPSHOT版本。我们决定通过更改返回此信息的Actuator端点(/info)来完成此操作。如果我们的应用程序恰好是SNAPSHOT。我们将获得不同的HTTP状态代码。
我们可以使用@EndpointExtension或其更具体的@EndpointWebExtension、@EndpointJmxExtension轻松扩展预定义端点的行为:
@Component
@EndpointWebExtension(endpoint = InfoEndpoint.class)
public class InfoWebEndpointExtension {

    private InfoEndpoint delegate;

    // standard constructor

    @ReadOperation
    public WebEndpointResponse<Map> info() {
        Map<String, Object> info = this.delegate.info();
        Integer status = getStatus(info);
        return new WebEndpointResponse<>(info, status);
    }

    private Integer getStatus(Map<String, Object> info) {
        // return 5xx if this is a snapshot
        return 200;
    }
}
3.6 Spring Boot metrics
运维应用监控依赖于对应用度量(metric)指标的抽取。Spring Boot 2.x中的Actuator 对Micrometer的自动配置。 甚至我们可以通过一个叫MeterRegistry的Spring Bean来注册一个自定义的metric指标。我们可以通过/actuator/metrics端点获取所有的metric指标。 也可以通过/actuator/metrics/{metricName} 来获取具体度量的元数据。
Micrometer 是一个应用度量门面类库,类似SLF4。后面我会专门写一篇文章来介绍这个知识点。请关注我的公众号:Felordcn 以保证第一时间获取相关的知识。
4. 总结
本文我们介绍了Spring Boot 2.x中Actuator 组件。该组件可以帮助我们来获取系统的一些元信息和一些监控度量指标。对于Spring Boot 应用十分重要。该组件是一个生产级别的工具,我们不应该忽略它。
关注公众号:码农小胖哥 获取更多资讯

我们今天的关于Spring Boot Actuator相当打印JSON和springboot打印http请求的分享已经告一段落,感谢您的关注,如果您想了解更多关于Sping boot Actuator配置json格式化、Spring Boot (28) actuator 与 spring-boot-admin、Spring Boot (十九):使用 Spring Boot Actuator 监控应用、Spring Boot 2.x 中的 Actuator的相关信息,请在本站查询。
本文标签:


![[转帖]Ubuntu 安装 Wine方法(ubuntu如何安装wine)](https://www.gvkun.com/zb_users/cache/thumbs/4c83df0e2303284d68480d1b1378581d-180-120-1.jpg)

