最近很多小伙伴都在问Ckeditor在Java项目中与Extjs结合使用和javaeditorcr怎么用这两个问题,那么本篇文章就来给大家详细解答一下,同时本文还将给你拓展CKEditor/FCKEd
最近很多小伙伴都在问Ckeditor在Java项目中与Extjs结合使用和javaeditorcr怎么用这两个问题,那么本篇文章就来给大家详细解答一下,同时本文还将给你拓展CKEditor/FCKEditor 使用 CKeditor 3.0.1 快速使用教程(含插入图片)、CKEditor/FCKEditor 使用FCKeditor 2.6.5 快速使用教程(含插入图片)、CKEditor3.x 在Java项目中配置、包括图片上传(支持FTP、图片压缩)、CKEditor在jQuery UI重新排序时冻结等相关知识,下面开始了哦!
本文目录一览:- Ckeditor在Java项目中与Extjs结合使用(javaeditorcr怎么用)
- CKEditor/FCKEditor 使用 CKeditor 3.0.1 快速使用教程(含插入图片)
- CKEditor/FCKEditor 使用FCKeditor 2.6.5 快速使用教程(含插入图片)
- CKEditor3.x 在Java项目中配置、包括图片上传(支持FTP、图片压缩)
- CKEditor在jQuery UI重新排序时冻结
")
Ckeditor在Java项目中与Extjs结合使用(javaeditorcr怎么用)
一、 配置所需文件及jar包
1、 ckeditor.zip,解压后放入web项目WebRoot目录中(可自定义子目录)
2、 ckeditor-java-core.jar,放入web项目WebRoot/WEB-INF/lib目录中
下载地址:http://ckeditor.com/download
3、 其他所需资源jar包已集成在struts2-core.jar中
二、 简单的使用
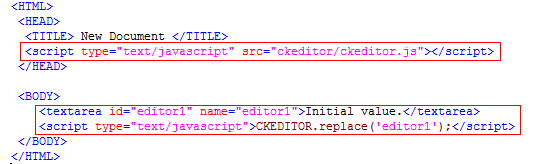
1、 导入ckeditor.js
<script type="text/javascript" src="ckeditor/ckeditor.js"></script>
2、 一般是使用一个”<textarea>”来显示内容,然后替换成CKEditor编辑器
<textarea cols="80" id="content" name="fileUpload"> </textarea>
<script type="text/javascript">
CKEDITOR.replace(''content''); //content为textarea的id
</script>
三、 项目中的使用
1、 在WebRoot/ckeditor/config.js中使用自定义的工具条,加上自定义的按钮"addpic"和插件定义:CKEDITOR.editorConfig = function( config )
{
config.toolbar = […,
[''addpic''],
…];
};
config.extraPlugins = ''addpic'';
2、 在WebRoot/ckeditor/plugins/下新建文件夹addpic,文件夹下有自定义图片(14px*13px)作为按钮的图标,和自定义的plugin.js文件:
(function () {
//Section 1 : 按下自定义按钮时执行的代码
var a = {
exec: function (editor) {
editor.show();
}
},
b = ''addpic'';
CKEDITOR.plugins.add(b, {
init: function (editor) {
editor.addCommand(b, a);
editor.ui.addButton(''addpic'', {
label: ''添加图片'',
icon: this.path + ''addpic.png'',//自定义图片按钮路径名称
command: b
});
}
});
})();
3、 自定义的show方法:(WebRoot/scripts/comm/extCkeditorFun.js)
/*html编辑器图片上传*/
SMFshow=function(editorId){
var _items=[{
xtype:''panel'',
width:270,
border:false,
bodyStyle:''font-size:12px;color:red;'',
html:''文件名中含有特殊字符或文件名过长都会导致上传失败!''
}];
var ff=function(){
var f=new Ext.form.TextField({
inputType:''file'',
width:210,
hideLabel:true
});
var p=new Ext.Panel({
layout:''form'',
width:280,
border:false,
items:[f]
});
return p;
}
_items.push(ff());
//按钮
var _buttons=[];
_buttons.push({
text:''确定插入'',
handler:function(){
if(uploadForm.form.isValid()){
uploadForm.form.doAction(''submit'',{
waitTitle:''上传文件'',
waitMsg:''正在上传文件……'',
url:''../ckeditor/fileUploadAction.action'',//自定义后台处理上传文件Action(配置映射到com.fun.ExtCkeditorAction)
method:''post'',
success:function(form,action){
//插入图片
var result=action.result;
if(result.error){ //Java程序中返回的json串中自定义的属性error,这个地方要根据自己的需要判断出错
alert(''图片插入失败,请检查文件名!'');
return;
}
//SMF.base为预定义的根路径,result.filename也是返回的json串中自定义的属性。我把上传的文件都放到images/htmlEditor目录下了,所以只需要返回文件名就行。
var img=
''<img src="''+SMF.base+''/images/htmlEditor/''+result.filename+''"/>'';
InsertHTML(img);
win.close();
},failure:function(form,action){
alert(''图片插入失败,请检查文件名!'');
}
});
}
}
},{
text:''取消'',
handler:function(){
win.close();
}
});
var uploadForm=new Ext.form.FormPanel({
fileUpload :true,
items:_items,
buttons:_buttons,
bodyStyle:''padding:5px;'',
autoScroll:true
})
var win=new Ext.Window({
title:''插入图片'',
width:330,
height:300,
layout:''fit'',
modal:true,
items:uploadForm
});
win.show();
var InsertHTML=function(value){
// Get the editor instance that we want to interact with.
var oEditor = CKEDITOR.instances[editorId];
// Check the active editing mode.
if ( oEditor.mode == ''wysiwyg'' ){
oEditor.insertHtml( value );
}
}
}
4、 ExtCkeditorAction:
execute() {
imagePath//服务器上物理地址
pagePath//服务器上web地址(前端调用该地址供客户端访问)
}
copy(myFile, imageFile){
//读入myFile写到imageFile
//myFile为上传的文件
//imageFile为服务器上物理文件
}
5、 使用ckeditor:(dc16.js)
(1)新建id为description(id名称自己取)的textarea,EXT中为Ext.form.TextArea
var dtl = new Ext.form.TextArea({
id : ''description'',
name : ''DETAIL'',
allowBlank : false,
blankText : ''详细内容不能为空'',
disabled : false,
autoWidth : true
});
(2)然后在适当的地方执行
var editor=CKEDITOR.replace(''description'');
editor.show=function(){
SMFshow(''description'');
}//注意:Ext组件的加载延迟
//ckeditor初始化时editor.setData('''');
//或加载数据时editor.setData(result.data[''description'']);//Ext里的result
6、 销毁当前组件时需移除editor,否则下次加载时会失败:
listeners : {
''beforedestroy'' : function(v) {
if(editor!=null) {
CKEDITOR.remove(editor);
}
editorPanel.destroy();
}
}
")
CKEditor/FCKEditor 使用 CKeditor 3.0.1 快速使用教程(含插入图片)
因为直接把内容作为字符串给编辑器的 Value 属性赋值使用的是 JavaScript 代码,要让 JS 代码不受内容中双引号、换行等的干扰,只有先读入到 textarea 最方便。使用 CKeditor 3.0.1
<textarea cols="90" rows="10" id="content" name="content">cftea</textarea>
<script type="text/javascript" src="ckeditor/ckeditor.js"></script>
<script type="text/javascript">
<!--
CKEDITOR.replace("content");
//-->
</script>
可以看出,3.x 版本的使用非常方便,也不用担心会形成两个同名的 content。实际上 textarea 的 id 省略了也是可以的,因为 CKEditor 会先按 name 来查找,查找不到,再按 id 来查找。
并且编辑器会在 textarea 的位置替换原有的 textarea。
设置编辑器皮肤、宽高
<textarea cols="90" rows="10" id="content" name="content">cftea</textarea>
<script type="text/javascript" src="ckeditor/ckeditor.js"></script>
<script type="text/javascript">
<!--
CKEDITOR.replace("content",
{
skin: "kama", width:700, height:300
});
//-->
</script>
")
")