在这篇文章中,我们将带领您了解不再需要AndroidO强制转换为findViewById吗?的全貌,同时,我们还将为您介绍有关actvity.findViewById()与view.findViewB
在这篇文章中,我们将带领您了解不再需要Android O强制转换为findViewById吗?的全貌,同时,我们还将为您介绍有关actvity.findViewById() 与 view.findViewById()、Android application - findViewById 返回 NULL 的问题、Android findViewById与findViewWithTag()、Android findViewById使用技巧的知识,以帮助您更好地理解这个主题。
本文目录一览:- 不再需要Android O强制转换为findViewById吗?
- actvity.findViewById() 与 view.findViewById()
- Android application - findViewById 返回 NULL 的问题
- Android findViewById与findViewWithTag()
- Android findViewById使用技巧

不再需要Android O强制转换为findViewById吗?
我最近在Android Studio中将我的android SDK和构建工具更新为API 26,当我执行以下操作时,我直接注意到Android
Studio将我的视图演员标记为“冗余”:
TextView itemName = (TextView) findViewById(R.id.menuItemName);经过一些研究,我发现自SDK 26起,findViewById使用Java
8功能来返回相同的对象类型,但是我想知道的是,删除所有强制类型转换是否完全安全。这会在Android
26之前的版本上引起任何问题吗?有关此方面的更多信息将对您有所帮助,因为我在互联网上找不到太多信息。提前致谢。
答案1
小编典典正如您所注意到的,方法签名已更改,现在看起来像:
public <T extends View> T findViewById(int id);与旧版本(SDK 26之前的版本)相比:
public View findViewById(int id);因此只要您使用SDK 26(或更高版本)来 编译
项目,就可以安全地从代码中删除强制类型转换,因为您将使用findViewById()不再需要的强制类型。
因此,将minSdk设置为低于26不会造成问题吗?
不,minSdk也不targetSdk重要。重要的是compileSdk哪个必须26更高。
 与 view.findViewById()")
actvity.findViewById() 与 view.findViewById()
自从学习android的hello world开始
我们就知道了这样一个函数findViewById(),他已经成为了家喻户晓,坑蒙拐骗,杀人越货必备的一个函数(好吧,这句是扯淡)
但一直用也没细致研究过它,直到写程序的时候发现一个由这个函数引起的一个莫名其妙的bug,遂决定好好研究下次函数~
我们调用的findViewById()函数其实有两种(目前我只看到两种,不确定还有没有其他的),一种是Activity类中findViewById()函数
另外一种是View类中定义的findViewById()函数
一般我们在oncreate()方法中使用的(**view)findViewById(R.id.**)既是调用的Activity中的findViewById()函数
而在其他情况写出的***view.findViewById()中调用的是view类中的findViewById()
分别看一下源代码中的实现方法及介绍
Activity类中定义的findViewById()
[java]
/**
* Finds a view that was identified by the id attribute from the XML that
* was processed in {@link #onCreate}.
*
* @return The view if found or null otherwise.
*/
public View findViewById(int id) {
return getWindow().findViewById(id);
}
/**
* Retrieve the current {@link android.view.Window} for the activity.
* This can be used to directly access parts of the Window API that
* are not available through Activity/Screen.
*
* @return Window The current window, or null if the activity is not
* visual.
*/
public Window getWindow() {
return mWindow;
}
从这里可以看出这个函数是在寻找在xml中定义的指定id的对象
View类中的findViewById()
[java]
/**
* Look for a child view with the given id. If this view has the given
* id, return this view.
*
* @param id The id to search for.
* @return The view that has the given id in the hierarchy or null
*/
public final View findViewById(int id) {
if (id < 0) {
return null;
}
return findViewTraversal(id);
/**
* {@hide}
* @param id the id of the view to be found
* @return the view of the specified id, null if cannot be found
*/
protected View findViewTraversal(int id) {
if (id == mID) {
return this;
}
return null;
}
从这里可以看出我们是从一个view的child view中寻找指定id的对象,所以即使几个layout的XML文件中的View的id号相同的话,只要他们没有相同的父节点,或有相同的父亲节点,但不在父节点及以上节点调用findViewById通过id来查找他们就是没有问题。(这句引用自这里http://www.2cto.com/kf/201204/127404.html)
使用这个函数的常见问题:
1.既然Activity中的findViewById()是从R.java中寻找东西,那么我们就要杜绝相同名字的控件
今天自己的bug就是因为这个产生的

说到控件的命名,今天还有一个小发现
仔细看下边两段代码代码
[xml]
< ?xml version="1.0" encoding="utf-8"?>
< LinearLayout xmlns:android="http://schemas.android.com/apk/res/android"
android:id="@+id/LinearLayout"
android:layout_width="match_parent"
android:layout_height="match_parent"
android:orientation="vertical" >
< /LinearLayout>
[xml]
< ?xml version="1.0" encoding="utf-8"?>
< LinearLayout xmlns:android="http://schemas.android.com/apk/res/android"
android:layout_width="match_parent"
android:layout_height="match_parent"
android:orientation="vertical" >
< /LinearLayout>
一段里边Layout没有id这个参数,一段里边有id,虽然代码不同但在outline中显示出来都是
这样在第一种情况下R.id中可以找到LinearLayout这个控件,第二种是没有的哈,这些也是以后要注意的细节
2.在调用view中的findViewById()一定要想好父View是谁!即**view.findViewById()中的**view要找对,如果没有找对父View,返回基本都是null了

Android application - findViewById 返回 NULL 的问题
一般是两种问题:
1. 在 setContentView 之前就调用 findViewById,此时会返回 NULL
2. 害人匪浅的,eclipse 的问题 -- 将 project clean 之后再 build 一次就好了。
")
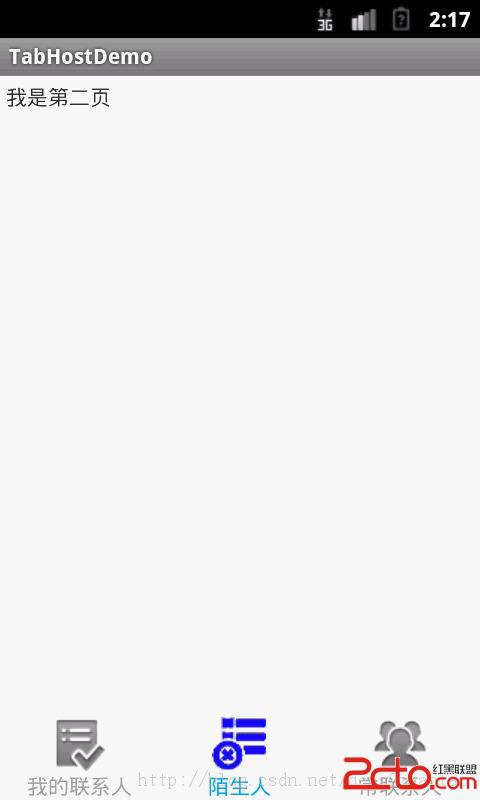
Android findViewById与findViewWithTag()
一、方法介绍
android 平台获取控件的方式,一般使用View.findViewById(int)但还有一个方findViewWithTag(Object key),indViewById(int resId)适合正向匹配查询,而findViewWithTag(Object key)适合反向查询。但2者中,后者功能比较弱,不能查询到所有的具有该tag的View。
在这里,着重讲解findViewWithTag
实际操作,往往是对固定的tabcard,或者TabWidget来说非常合适,另外有些时候,对于没必要设置ViewHolder的控件来说也非常合适。
在自定义tabWidget时,饿哦们可以将每个widget的tab设置成tag,然后读取的方式非常好,当然,这功能可有可无。
二、代码实现
1.布局文件R.layout.main.xml
<?xml version="1.0" encoding="utf-8"?>
<LinearLayout xmlns:android="http://schemas.android.com/apk/res/android"
    android:layout_width="match_parent"
    android:layout_height="match_parent"
    android:orientation="vertical">

    <!-- 这个布局决定了标签在上面还是在下面显示 -->
    <FrameLayout
        android:id="@+id/realtabcontent"
        android:layout_width="match_parent"
        android:layout_height="0dip"
        android:layout_weight="1" />

    <android.support.v4.app.FragmentTabHost
        android:id="@android:id/tabhost"
        android:layout_width="match_parent"
        android:layout_height="wrap_content">

        <TabWidget
            android:id="@android:id/tabs"
            android:layout_width="match_parent"
            android:layout_height="wrap_content"
            android:orientation="horizontal"/>
    </android.support.v4.app.FragmentTabHost>

</LinearLayout>
2.java代码
public class MainActivity extends FragmentActivity {

    private FragmentTabHost mTabHost = null;;
    private View indicator = null;

    @Override
    protected void onCreate(Bundle savedInstanceState) {
        super.onCreate(savedInstanceState);

        setContentView(R.layout.main);

        mTabHost = (FragmentTabHost) findViewById(android.R.id.tabhost);
        mTabHost.setup(this, getSupportFragmentManager(), R.id.realtabcontent);

        // 添加tab名称和图标
        indicator = getIndicatorView("我的联系人", R.layout.mycontact_indicator);
        mTabHost.addTab(mTabHost.newTabSpec("myContact")
                .setIndicator(indicator), FirstFragment.class, null);

        indicator = getIndicatorView("陌生人", R.layout.strangercontact_indicator);
        mTabHost.addTab(
                mTabHost.newTabSpec("stranger").setIndicator(indicator),
                secondFragment.class, null);

        indicator = getIndicatorView("常联系人", R.layout.alwayscontact_indicator);
        mTabHost.addTab(
                mTabHost.newTabSpec("alwaysContact").setIndicator(indicator),
                ThirdFragment.class, null);
    }

    private View getIndicatorView(String name, int layoutId)
     {
        View v = getLayoutInflater().inflate(layoutId, null);
        TextView tv = (TextView) v.findViewById(R.id.tabText);
        tv.setText(name);

        v.setTag(name);  //设置tag

        return v;
    }

    @Override
    protected void onDestroy() {
        // TODO Auto-generated method stub
        super.onDestroy();
        mTabHost = null;
    }
}
alwayscontact_indicator.xml文件
<?xml version="1.0" encoding="utf-8"?>
<LinearLayout xmlns:android="http://schemas.android.com/apk/res/android"
android:layout_width="match_parent"
android:layout_height="match_parent"
android:layout_gravity="center"
android:gravity="center">
<TextView
android:id="@+id/tabText"
android:layout_width="wrap_content"
android:layout_height="wrap_content"
android:focusable="true"
android:drawableTop="@drawable/mycontact_selector"
android:textColor="@drawable/tabitem_txt_sel"/>
</LinearLayout>
3.当我们需要命令模式(是一种设计模式,类似于BroadcastReciever的Action进行Tab切换)先来建立一个内部类
private BroadcastReceiver commandBroadcast = new BroadcastReceiver()
{

    private final String commondKey = "COMMOND_KEY";
    @override
    public void OnReceiver(Context  cxt,Intent data)
    {
       if("我的联系人".equals(intent.getStringExtra(commondKey)))
       {
           mTabHost.setCurrentTag("myContact");
           View layouView = mTabHost.getTabWidget().findViewWithTag("我的联系人");
       }
       else if("陌生人".equals(intent.getStringExtra(commondKey)))
       {
            mTabHost.setCurrentTag("stranger");
            View layouView = mTabHost.getTabWidget().findViewWithTag("陌生人");
       }
    }

}
4.在Activity中注册commandBroadcast,Action使用(具体步骤略过)
cn.test.my.tab.action5.当我们需要切换时tabcard时,直接可以发送广播
Intent intent = new Intent("cn.test.my.tab.action");
intent.putString("COMMOND_KEY","我的联系人");
sendBroadcast(intent);
就到这里,如有疑问,请留言
try doing it!

Android findViewById使用技巧
程序中初始化控件方法:(View)findViewById(int redID),而且还得强制转化为相应类型,code浪费大量的时间,
阅读起来也不美观。
//一般写法,很累跟强制转换似的,很难受这样写
tv_title_other = (TextView) findViewById(R.id.tv_title_other);
//替代方式
protected <T extends View> T findView(int viewId) {
     return (T) findViewById(viewId);
}
//简化之后
tv_title_other = findView(R.id.tv_title_other);
代码片段
ViewGroup.java {

    public ViewGroup(Context context, AttributeSet attrs) {
        super((Context)null, (AttributeSet)null, 0, 0);
        throw new RuntimeException("Stub!");
    }
}

View.java {

    public View(Context context, AttributeSet attrs, int defStyleAttr, int defStyleRes) {
        throw new RuntimeException("Stub!");
    }
}
关于不再需要Android O强制转换为findViewById吗?的介绍现已完结,谢谢您的耐心阅读,如果想了解更多关于actvity.findViewById() 与 view.findViewById()、Android application - findViewById 返回 NULL 的问题、Android findViewById与findViewWithTag()、Android findViewById使用技巧的相关知识,请在本站寻找。
本文标签:


![[转帖]Ubuntu 安装 Wine方法(ubuntu如何安装wine)](https://www.gvkun.com/zb_users/cache/thumbs/4c83df0e2303284d68480d1b1378581d-180-120-1.jpg)

