在本文中,我们将详细介绍Displayfieldsascheckbox,pushbutton,dropdownboxinALV的各个方面,同时,我们也将为您带来关于018Android单选按钮(Rad
在本文中,我们将详细介绍Display fields as checkbox, pushbutton, dropdownbox in ALV的各个方面,同时,我们也将为您带来关于018 Android 单选按钮 (RadioButton) 和复选框 (CheckBox) 的使用、该怎么解决、android ListView Item 和 CheckBox、Button 点击事件冲突的问题、android RadioButton和CheckBox组件的使用方法的有用知识。
本文目录一览:- Display fields as checkbox, pushbutton, dropdownbox in ALV
- 018 Android 单选按钮 (RadioButton) 和复选框 (CheckBox) 的使用
- 该怎么解决">该怎么解决
- android ListView Item 和 CheckBox、Button 点击事件冲突的问题
- android RadioButton和CheckBox组件的使用方法

Display fields as checkbox, pushbutton, dropdownbox in ALV
总结
以上是小编为你收集整理的Display fields as checkbox, pushbutton, dropdownbox in ALV全部内容。
如果觉得小编网站内容还不错,欢迎将小编网站推荐给好友。
 和复选框 (CheckBox) 的使用")
018 Android 单选按钮 (RadioButton) 和复选框 (CheckBox) 的使用
1.RadioButton
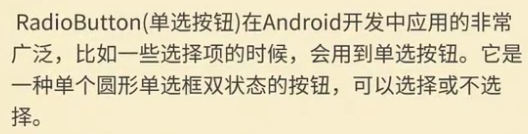
(1) 介绍
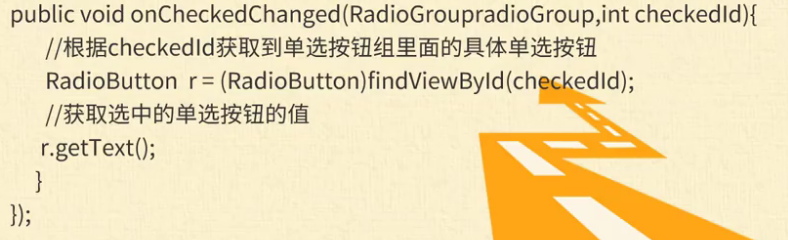
(2) 单选按钮点击事件的用法
(3) RadioButton 与 RadioGroup 配合使用实现单选题功能
(4) xml 布局及使用
<?xml version="1.0" encoding="utf-8"?>
<LinearLayout xmlns:android="http://schemas.android.com/apk/res/android"
    xmlns:app="http://schemas.android.com/apk/res-auto"
    xmlns:tools="http://schemas.android.com/tools"
    android:layout_width="match_parent"
    android:layout_height="match_parent"
    android:orientation="vertical"
    tools:context=".MainActivity">


    <TextView
        android:id="@+id/textView"
        android:layout_width="match_parent"
        android:layout_height="wrap_content"
        android:text="您最喜欢的城市是" />

    <RadioGroup
        android:id="@+id/radiogroup"
        android:layout_width="match_parent"
        android:layout_height="wrap_content"
        android:orientation="vertical">

        <RadioButton
            android:id="@+id/radioButton"
            android:layout_width="match_parent"
            android:layout_height="wrap_content"
            android:text="北京" />

        <RadioButton
            android:id="@+id/radioButton2"
            android:layout_width="match_parent"
            android:layout_height="wrap_content"
            android:text="上海" />

        <RadioButton
            android:id="@+id/radioButton3"
            android:layout_width="match_parent"
            android:layout_height="wrap_content"
            android:text="广州" />

        <RadioButton
            android:id="@+id/radioButton4"
            android:layout_width="match_parent"
            android:layout_height="wrap_content"
            android:text="杭州" />
    </RadioGroup>

    <Button
        android:id="@+id/button"
        android:layout_width="wrap_content"
        android:layout_height="wrap_content"
        android:text="确定" />
</LinearLayout>
2. 复选框 (CheckBox)
(1) 介绍
(2) xml 文件
<TextView
        android:id="@+id/textview2"
        android:layout_width="match_parent"
        android:layout_height="wrap_content"
        android:text="你最喜欢的运动是"/>

    <CheckBox
        android:id="@+id/checkBox"
        android:layout_width="match_parent"
        android:layout_height="wrap_content"
        android:text="乒乓球" />

    <CheckBox
        android:id="@+id/checkBox2"
        android:layout_width="match_parent"
        android:layout_height="wrap_content"
        android:text="羽毛球" />

    <CheckBox
        android:id="@+id/checkBox3"
        android:layout_width="match_parent"
        android:layout_height="wrap_content"
        android:text="排球" />

    <CheckBox
        android:id="@+id/checkBox4"
        android:layout_width="match_parent"
        android:layout_height="wrap_content"
        android:text="足球" />
    <Button
        android:id="@+id/button2"
        android:layout_width="wrap_content"
        android:layout_height="wrap_content"
        android:text="确定" />
(3) java 后台
对应工程名:test23
package com.lucky.test23;

import android.support.v7.app.AppCompatActivity;
import android.os.Bundle;
import android.view.View;
import android.widget.Button;
import android.widget.CheckBox;
import android.widget.RadioButton;
import android.widget.RadioGroup;
import android.widget.Toast;

public class MainActivity extends AppCompatActivity {

    Button button1;
    Button button2;
    RadioGroup radioGroup;
    CheckBox checkBox1;
    CheckBox checkBox2;
    CheckBox checkBox3;
    CheckBox checkBox4;
    @Override
    protected void onCreate(Bundle savedInstanceState) {
        super.onCreate(savedInstanceState);
        setContentView(R.layout.activity_main);
        button1=findViewById(R.id.button);
        button2=findViewById(R.id.button2);
        radioGroup=findViewById(R.id.radiogroup);
        checkBox1=findViewById(R.id.checkBox);
        checkBox2=findViewById(R.id.checkBox2);
        checkBox3=findViewById(R.id.checkBox3);
        checkBox4=findViewById(R.id.checkBox4);

        //绑定按钮点击事件
        button1.setOnClickListener(new View.OnClickListener() {
            @Override
            public void onClick(View v) {
                for (int i = 0; i <radioGroup.getChildCount(); i++) {   //radioGroup.getChildCount()获取子容器数量
                    RadioButton radioButton= (RadioButton) radioGroup.getChildAt(i);

                    //判断按钮是否被选中
                    if(radioButton.isChecked()){
                        String str=radioButton.getText().toString();
                        Toast.makeText(MainActivity.this,str,Toast.LENGTH_SHORT).show();
                        break;
                    }
                }
            }
        });

        button2.setOnClickListener(new View.OnClickListener() {
            @Override
            public void onClick(View v) {
                //将变量放入数组中便于取用
                CheckBox[] cbox={checkBox1,checkBox2,checkBox3,checkBox4};
                String str="";
                //遍历数组,判断各个复选框的选中情况
                for (int i = 0; i <cbox.length ; i++) {
                    if(cbox[i].isChecked()){
                        str=str+cbox[i].getText().toString();
                    }
                }
                Toast.makeText(MainActivity.this,str,Toast.LENGTH_SHORT).show();
            }
        });
    }
}
3. 效果图
 该怎么解决" alt="该怎么解决">
该怎么解决">该怎么解决
这个name="ids[]"有什么用?
------解决方案--------------------
ids[]=1;
ids[]=2;
传到php是个数组
$_POST[ids]=array(1,2);
------解决方案--------------------
name="ids[]",这里是复选框 checkbox,
这里可以存储用户的id,一些批量操作,需要获取用户的id,比如批量删除,审核用户 等等
在php页面 $_POST[''ids''],可以获得多个用户的id,进而进行相应的业务.
LZ可以把问题说的再详细点.
------解决方案--------------------
$ids=$_POST[''ids''];
这里传到 action

android ListView Item 和 CheckBox、Button 点击事件冲突的问题
在 Item 的根目录上设置属性:
//表示锁定子View的焦点,不让Layout下的子View获取
android:descendantFocusability="blocksDescendants"
CheckBox 和 Button 设置属性:
//三个属性都需要设置为false
android:focusable="false"
android:focusableInTouchMode="false"
android:clickable="false"
完整的布局文件示例:
<LinearLayout
    xmlns:android="http://schemas.android.com/apk/res/android"
    android:layout_width="fill_parent"
    android:layout_height="fill_parent"
    android:descendantFocusability="blocksDescendants"
    android:orientation="vertical">

    <LinearLayout
        android:layout_width="match_parent"
        android:layout_height="45dp"
        android:orientation="horizontal">
        <CheckBox
            android:id="@+id/box"
            android:layout_width="wrap_content"
            android:layout_height="wrap_content"
            android:layout_gravity="center_vertical"
            android:visibility="gone"
            android:focusable="false"
            android:focusableInTouchMode="false"
            android:clickable="false"
            android:layout_marginLeft="8dp"
            android:button="@drawable/check_box_background"
            android:gravity="center_vertical" />

        <TextView
            android:id="@+id/text_name"
            android:layout_width="wrap_content"
            android:paddingRight="5dp"
            android:layout_weight="0.1"
            android:layout_height="match_parent"
            android:gravity="center_vertical"
            android:layout_marginLeft="20dp"
            android:text="点名"
            android:textColor="@color/gray2"
            android:textSize="14sp" />

        <TextView
            android:id="@+id/text_workinfo"
            android:layout_width="0dp"
            android:layout_weight="0.99"
            android:layout_height="wrap_content"
            android:gravity="center_vertical"
            android:paddingLeft="5dp"
            android:minHeight="45dp"
            android:layout_marginRight="5dp"
            android:text="0.0"
            android:textColor="@color/green"
            android:textSize="14sp" />

        <TextView
            android:id="@+id/text_edit"
            android:layout_width="0dp"
            android:layout_weight="0.4"
            android:paddingTop="8dp"
            android:paddingBottom="8dp"
            android:layout_height="wrap_content"
            android:gravity="center"
            android:layout_marginRight="5dp"
            android:text="编辑"
            android:textColor="@color/black"
            android:background="@drawable/border_line_corner_blue"
            android:textSize="14sp" />

    </LinearLayout>

    <LinearLayout
        android:layout_width="match_parent"
        android:layout_height="1dp"
        android:layout_marginLeft="10dp"
        android:layout_marginRight="10dp"
        android:visibility="visible"
        android:background="@color/gray" />
</LinearLayout>

android RadioButton和CheckBox组件的使用方法
RadioButton是单选按钮,多个RadioButton放在一个RadioGroup控件中,也就是说每次只能有1个RadioButton被选中。而CheckBox是多选按钮,Toatst是android中带的一个用于显示提示小窗口消息的控件,其提示的内容过一会儿会自动消失。
RadioGroup和CheckBox控件设置监听器都是用的setonCheckedchangelistener函数,其输入参数是一个函数,且函数内部要实现1个内部类。RadioGroup监听器的输入参数用的是RadioGroup.OnCheckedchangelistener(),而CheckBox监听器的输入参数用的是函数CompoundButton.OnCheckedchangelistener().
开发环境:android4.1
实验效果如下(采用的是线性布局):
效果图:

上面3个为一组RadioGroup,每选中其中一个RadioButton,则会有相应的提示。且只能选中其中的一个。
下面的4都为CheckBox,可以选中其中的多个。每个CheckBox被选中或者取消选中都有相应的文字提示小窗口。
代码如下:
MainActivity.java:
package com.example.control1;
import android.app.Activity;
import android.os.Bundle;
import android.widget.CheckBox;
import android.widget.CompoundButton;
import android.widget.CompoundButton.OnCheckedchangelistener;
import android.widget.RadioButton;
import android.widget.RadioGroup;
import android.widget.TextView;
import android.widget.Toast;
public class MainActivity extends Activity {
//定义各控件的变量
private TextView who = null;
private TextView how = null;
private RadioGroup who_group = null;
private RadioButton china = null;
private RadioButton america = null;
private RadioButton others = null;
private CheckBox less = null;
private CheckBox thirty = null;
private CheckBox forty = null;
private CheckBox fifty = null;
@Override
public void onCreate(Bundle savedInstanceState) {
super.onCreate(savedInstanceState);
setContentView(R.layout.activity_main);
//获得对应的控件
who = (TextView)findViewById(R.id.who);
how = (TextView)findViewById(R.id.how);
who_group = (RadioGroup)findViewById(R.id.who_group);
china = (RadioButton)findViewById(R.id.china);
america = (RadioButton)findViewById(R.id.america);
others = (RadioButton)findViewById(R.id.others);
less = (CheckBox)findViewById(R.id.less);
thirty = (CheckBox)findViewById(R.id.thirty);
forty = (CheckBox)findViewById(R.id.forty);
fifty = (CheckBox)findViewById(R.id.fifty);
//设置who_group的监听器,其实是一句代码,其参数是一个带有重构函数的对象
who_group.setonCheckedchangelistener(new RadioGroup.OnCheckedchangelistener() {
public void onCheckedChanged(RadioGroup group,int checkedId) {
// Todo Auto-generated method stub
if(checkedId == china.getId()){
Toast.makeText(MainActivity.this,"中国",Toast.LENGTH_SHORT).show();
}
else if(checkedId == america.getId()){
Toast.makeText(MainActivity.this,"美国",Toast.LENGTH_SHORT).show();
}
else if(checkedId == others.getId()){
Toast.makeText(MainActivity.this,"其它国家",Toast.LENGTH_SHORT).show();
}
}
});
//下面为4个checkBox多选按钮分别建立监听器
less.setonCheckedchangelistener(new OnCheckedchangelistener() {
public void onCheckedChanged(CompoundButton buttonView,boolean isChecked) {
// Todo Auto-generated method stub
if(isChecked)
{
Toast.makeText(MainActivity.this,"30个以下",Toast.LENGTH_SHORT).show();
}
else{
Toast.makeText(MainActivity.this,"不是30个以下",Toast.LENGTH_SHORT).show();
}
}
});
//下面为4个checkBox多选按钮分别建立监听器
thirty.setonCheckedchangelistener(new CompoundButton.OnCheckedchangelistener() {
public void onCheckedChanged(CompoundButton buttonView,"30~39","不是30~39",Toast.LENGTH_SHORT).show();
}
}
});
//下面为4个checkBox多选按钮分别建立监听器
forty.setonCheckedchangelistener(new OnCheckedchangelistener() {
public void onCheckedChanged(CompoundButton buttonView,"40~49","不是40~49",Toast.LENGTH_SHORT).show();
}
}
});
//下面为4个checkBox多选按钮分别建立监听器
fifty.setonCheckedchangelistener(new OnCheckedchangelistener() {
public void onCheckedChanged(CompoundButton buttonView,"50以上","不是50以上",Toast.LENGTH_SHORT).show();
}
}
});
}
}
activity_main.xml:
<LinearLayout xmlns:android="http://schemas.android.com/apk/res/android"
xmlns:tools="http://schemas.android.com/tools"
android:layout_width="match_parent"
android:layout_height="match_parent"
android:orientation="vertical"
>
<TextView
android:id="@+id/who"
android:layout_width="wrap_content"
android:layout_height="wrap_content"
android:text="@string/who"
/>
<RadioGroup
android:id="@+id/who_group"
android:layout_width="wrap_content"
android:layout_height="wrap_content"
android:orientation="vertical"
>
<RadioButton
android:id="@+id/china"
android:layout_height="wrap_content"
android:layout_width="wrap_content"
android:text="@string/china"
/>
<RadioButton
android:id="@+id/america"
android:layout_width="wrap_content"
android:layout_height="wrap_content"
android:text="@string/america"
/>
<RadioButton
android:id="@+id/others"
android:layout_width="wrap_content"
android:layout_height="wrap_content"
android:text="@string/others"
/>
</RadioGroup>
<TextView
android:id="@+id/how"
android:layout_width="wrap_content"
android:layout_height="wrap_content"
android:text="@string/how"
/>
<CheckBox
android:id="@+id/less"
android:layout_width="wrap_content"
android:layout_height="wrap_content"
android:text="@string/less"
/>
<CheckBox
android:id="@+id/thirty"
android:layout_width="wrap_content"
android:layout_height="wrap_content"
android:text="@string/thirty"
/>
<CheckBox
android:id="@+id/forty"
android:layout_width="wrap_content"
android:layout_height="wrap_content"
android:text="@string/forty"
/>
<CheckBox
android:id="@+id/fifty"
android:layout_width="wrap_content"
android:layout_height="wrap_content"
android:text="@string/fifty"
/>
</LinearLayout>


![[转帖]Ubuntu 安装 Wine方法(ubuntu如何安装wine)](https://www.gvkun.com/zb_users/cache/thumbs/4c83df0e2303284d68480d1b1378581d-180-120-1.jpg)

