对于Flume02——发送数据到Flume感兴趣的读者,本文将会是一篇不错的选择,我们将详细介绍flumesink到文件,并为您提供关于FlumesinkKafkaSpoutStormBoltHbas
对于Flume02——发送数据到Flume感兴趣的读者,本文将会是一篇不错的选择,我们将详细介绍flume sink 到文件,并为您提供关于Flume sink Kafka Spout Storm Bolt Hbase or Redis (Flume)、Flume 篇 ---Flume 安装配置与相关使用、flume+flume+kafka消息传递+storm消费、flume+log4j+hdfs(日志通过flume传到hdfs)的有用信息。
本文目录一览:- Flume02——发送数据到Flume(flume sink 到文件)
- Flume sink Kafka Spout Storm Bolt Hbase or Redis (Flume)
- Flume 篇 ---Flume 安装配置与相关使用
- flume+flume+kafka消息传递+storm消费
- flume+log4j+hdfs(日志通过flume传到hdfs)
")
Flume02——发送数据到Flume(flume sink 到文件)
构建Flume事件
事件是Flume中数据的基本形式,每个Flume事件包含header的一个map集合和一个body,是表示为字节数组的有效载荷。
package org.apache.flume;
import java.util.Map;

public interface Event {
  public Map<String, String> getHeaders();
  public void setHeaders(Map<String, String> headers);
  public byte[] getBody();
  public void setBody(byte[] body);
}
Event接口的不同实现类的数据内部可能不同,只要其显示接口的指定格式的header 和 body即可。
通常使用EventBuilder API来创建事件,EventBuilder 提供了4个通常用来创建Flume事件的方法。
package org.apache.flume.event;

import java.nio.charset.Charset;
import java.util.HashMap;
import java.util.Map;

import org.apache.flume.Event;

public class EventBuilder {

  //方法1:headers作为map传入
  public static Event withBody(byte[] body, Map<String, String> headers) {
    Event event = new SimpleEvent();
    if(body == null) {
      body = new byte[0];
    }
    event.setBody(body);
    if (headers != null) {
      event.setHeaders(new HashMap<String, String>(headers));
    }
    return event;
  }

  //方法2:没有header
  public static Event withBody(byte[] body) {
    return withBody(body, null);
  }

  //方法3:传入headers , String 和 编码
  public static Event withBody(String body, Charset charset,
      Map<String, String> headers) {
    return withBody(body.getBytes(charset), headers);
  }

  //方法4:传入String 和 编码
  public static Event withBody(String body, Charset charset) {
    return withBody(body, charset, null);
  }

}
使用Flume客户端SDK
创建Flume RPC客户端
通过RpcClientFactory类创建PRC客户端实例。
package org.apache.flume.api;

import java.io.File;
import java.io.FileNotFoundException;
import java.io.FileReader;
import java.io.IOException;
import java.io.Reader;
import java.util.Locale;
import java.util.Properties;
import org.apache.flume.FlumeException;

public class RpcClientFactory {

  /**
   * Returns an instance of {@link RpcClient}, optionally with failover.
   * To create a failover client, the properties object should have a
   * property <tt>client.type</tt> which has the value "failover". The client
   * connects to hosts specified by <tt>hosts</tt> property in given properties.
   *
   * @see org.apache.flume.api.FailoverRpcClient
   * <p>
   * If no <tt>client.type</tt> is specified, a default client that connects to
   * single host at a given port is created.(<tt>type</tt> can also simply be
   * <tt>DEFAULT</tt> for the default client).
   *
   * @see org.apache.flume.api.NettyAvroClient
   *
   * @param properties The properties to instantiate the client with.
   * @throws FlumeException
   */
  @SuppressWarnings("unchecked")
  public static RpcClient getInstance(Properties properties)
      throws FlumeException {
    String type = null;
    type = properties.getProperty(
        RpcClientConfigurationConstants.CONFIG_CLIENT_TYPE);
    if (type == null || type.isEmpty()) {
      type = ClientType.DEFAULT.getClientClassName();
    }
    Class<? extends AbstractRpcClient> clazz;
    AbstractRpcClient client;
    try {
      String clientClassType = type;
      ClientType clientType = null;
      try{
        clientType = ClientType.valueOf(type.toUpperCase(Locale.ENGLISH));
      } catch (IllegalArgumentException e){
        clientType = ClientType.OTHER;
      }
      if (!clientType.equals(ClientType.OTHER)){
        clientClassType = clientType.getClientClassName();
      }
      clazz =
          (Class<? extends AbstractRpcClient>) Class.forName(clientClassType);
    } catch (ClassNotFoundException e) {
      throw new FlumeException("No such client!", e);
    }

    try {
      client = clazz.newInstance();
    } catch (InstantiationException e) {
      throw new FlumeException("Cannot instantiate client. " +
          "Exception follows:", e);
    } catch (IllegalAccessException e) {
      throw new FlumeException("Cannot instantiate client. " +
          "Exception follows:", e);
    }
    client.configure(properties);
    return client;

  }

  /**
   * Delegates to {@link #getInstance(Properties props)}, given a File path
   * to a {@link Properties} file.
   * @param propertiesFile Valid properties file
   * @return RpcClient configured according to the given Properties file.
   * @throws FileNotFoundException If the file cannot be found
   * @throws IOException If there is an IO error
   */
  public static RpcClient getInstance(File propertiesFile)
      throws FileNotFoundException, IOException {
    Reader reader = new FileReader(propertiesFile);
    Properties props = new Properties();
    props.load(reader);
    return getInstance(props);
  }

  /**
   * Deprecated. Use
   * {@link getDefaultInstance() getDefaultInstance(String, Integer)} instead.
   * @throws FlumeException
   * @deprecated
   */
  @Deprecated
  public static RpcClient getInstance(String hostname, Integer port)
      throws FlumeException {
    return getDefaultInstance(hostname, port);
  }

  /**
   * Returns an instance of {@link RpcClient} connected to the specified
   * {@code hostname} and {@code port}.
   * @throws FlumeException
   */
  public static RpcClient getDefaultInstance(String hostname, Integer port)
      throws FlumeException {
    return getDefaultInstance(hostname, port, 0);

  }

  /**
   * Deprecated. Use
   * {@link getDefaultInstance() getDefaultInstance(String, Integer, Integer)}
   * instead.
   * @throws FlumeException
   * @deprecated
   */
  @Deprecated
  public static RpcClient getInstance(String hostname, Integer port,
      Integer batchSize) throws FlumeException {
    return getDefaultInstance(hostname, port, batchSize);
  }

  /**
   * Returns an instance of {@link RpcClient} connected to the specified
   * {@code hostname} and {@code port} with the specified {@code batchSize}.
   * @throws FlumeException
   */
  public static RpcClient getDefaultInstance(String hostname, Integer port,
      Integer batchSize) throws FlumeException {

    if (hostname == null) {
      throw new NullPointerException("hostname must not be null");
    }
    if (port == null) {
      throw new NullPointerException("port must not be null");
    }
    if (batchSize == null) {
      throw new NullPointerException("batchSize must not be null");
    }

    Properties props = new Properties();
    props.setProperty(RpcClientConfigurationConstants.CONFIG_HOSTS, "h1");
    props.setProperty(RpcClientConfigurationConstants.CONFIG_HOSTS_PREFIX + "h1",
        hostname + ":" + port.intValue());
    props.setProperty(RpcClientConfigurationConstants.CONFIG_BATCH_SIZE, batchSize.toString());
    NettyAvroRpcClient client = new NettyAvroRpcClient();
    client.configure(props);
    return client;
  }

  /**
   * Return an {@linkplain RpcClient} that uses Thrift for communicating with
   * the next hop. The next hop must have a ThriftSource listening on the
   * specified port.
   * @param hostname - The hostname of the next hop.
   * @param port - The port on which the ThriftSource is listening
   * @param batchSize - batch size of each transaction.
   * @return an {@linkplain RpcClient} which uses thrift configured with the
   * given parameters.
   */
  public static RpcClient getThriftInstance(String hostname, Integer port,
    Integer batchSize) {
    if (hostname == null) {
      throw new NullPointerException("hostname must not be null");
    }
    if (port == null) {
      throw new NullPointerException("port must not be null");
    }
    if (batchSize == null) {
      throw new NullPointerException("batchSize must not be null");
    }

    Properties props = new Properties();
    props.setProperty(RpcClientConfigurationConstants.CONFIG_HOSTS, "h1");
    props.setProperty(RpcClientConfigurationConstants.CONFIG_HOSTS_PREFIX + "h1",
      hostname + ":" + port.intValue());
    props.setProperty(RpcClientConfigurationConstants.CONFIG_BATCH_SIZE, batchSize.toString());
    ThriftRpcClient client = new ThriftRpcClient();
    client.configure(props);
    return client;
  }

  /**
   * Return an {@linkplain RpcClient} that uses Thrift for communicating with
   * the next hop. The next hop must have a ThriftSource listening on the
   * specified port. This will use the default batch size. See {@linkplain
   * RpcClientConfigurationConstants}
   * @param hostname - The hostname of the next hop.
   * @param port - The port on which the ThriftSource is listening
   * @return - An {@linkplain RpcClient} which uses thrift configured with the
   * given parameters.
   */
  public static RpcClient getThriftInstance(String hostname, Integer port) {
    return getThriftInstance(hostname, port, RpcClientConfigurationConstants
      .DEFAULT_BATCH_SIZE);
  }

  /**
   * Return an {@linkplain RpcClient} that uses Thrift for communicating with
   * the next hop.
   * @param props
   * @return - An {@linkplain RpcClient} which uses thrift configured with the
   * given parameters.
   */
  public static RpcClient getThriftInstance(Properties props) {
    props.setProperty(RpcClientConfigurationConstants.CONFIG_CLIENT_TYPE,
      ClientType.THRIFT.clientClassName);
    return getInstance(props);
  }

  public static enum ClientType {
    OTHER(null),
    DEFAULT(NettyAvroRpcClient.class.getCanonicalName()),
    DEFAULT_FAILOVER(FailoverRpcClient.class.getCanonicalName()),
    DEFAULT_LOADBALANCE(LoadBalancingRpcClient.class.getCanonicalName()),
    THRIFT(ThriftRpcClient.class.getCanonicalName());


    private final String clientClassName;

    private ClientType(String className) {
      this.clientClassName = className;
    }

    protected String getClientClassName() {
      return this.clientClassName;
    }

  }
}
阅读源码可知,该类为我们提供了几个典型的接口,从Properties读取客户端配置,从文件读取客户端配置,从host和port获取配置
其中该类有一个必要的参数就是client.type,用来指明客户端的类型。客户端的类型包括:defalut,defalut_failover,defalut_loadbalance或者thrift
")
Flume sink Kafka Spout Storm Bolt Hbase or Redis (Flume)
Flume可以应用于日志采集.在本次的介绍中,主要用于采集应用系统的日志,将日志输出到kafka,再经过storm进行实施处理.
我们会一如既往的光顾一下flume的官网,地址如下:
flume官网
下图是官网的截图,其中的标注是如何配置source以及sink,flume支持多种source和sink,我们本次使用的是监控日志文件使用tail -f 命令作为source,sink则使用sink-kafka,之前已经将kafka和storm集成,所以,日志会直接采集到storm

配置如下:flume-conf.properties
# Licensed to the Apache Software Foundation (ASF) under one
# or more contributor license agreements.  See the NOTICE file
# distributed with this work for additional information
# regarding copyright ownership.  The ASF licenses this file
# to you under the Apache License, Version 2.0 (the
# "License"); you may not use this file except in compliance
# with the License.  You may obtain a copy of the License at
#
#  http://www.apache.org/licenses/LICENSE-2.0
#
# Unless required by applicable law or agreed to in writing,
# software distributed under the License is distributed on an
# "AS IS" BASIS, WITHOUT WARRANTIES OR CONDITIONS OF ANY
# KIND, either express or implied.  See the License for the
# specific language governing permissions and limitations
# under the License.


# The configuration file needs to define the sources,
# the channels and the sinks.
# Sources, channels and sinks are defined per agent,
# in this case called ''agent''

a1.sources = r1
a1.sinks = k1
a1.channels = c1

# Describe/configure the source
a1.sources.r1.type = exec
a1.sources.r1.command = tail -F /home/logs/dccfront/dataCollect.log

#Describe the sink
#a1.sinks.k1.type = logger
a1.sinks.k1.type = org.apache.flume.sink.kafka.KafkaSink
a1.sinks.k1.topic = dccfront
a1.sinks.k1.brokerList = node2:9092,node3:9092,node4:9092
a1.sinks.k1.requiredAcks = 1
a1.sinks.k1.batchSize = 20

# Use a channel which buffers events in memory
a1.channels.c1.type = memory
a1.channels.c1.keep-alive = 60
a1.channels.c1.capacity = 10000
a1.channels.c1.transactionCapacity = 100

# Bind the source and sink to the channel
a1.sources.r1.channels = c1
a1.sinks.k1.channel = c1
so easy,接下来就是启动flume
bin/flume-ng agent --conf conf --conf-file conf/flume-conf.properties --name a1 -Dflume.root.logger=INFO,console
启动完成时候,就可向日志文件里写日志啦.比如,我是通过访问应用,通过应用产生日志
tail -f 日志文件截图如下:

storm集群获取的日志如下:

/猫小鞭/
温馨提示,官方文档其实很简单,看看就会了,从此丢弃二手鞋.


Flume 篇 ---Flume 安装配置与相关使用
一。前述
Copy 过来一段介绍 Apache Flume 是一个从可以收集例如日志,事件等数据资源,并将这些数量庞大的数据从各项数据资源中集中起来存储的工具 / 服务,或者数集中机制。flume 具有高可用,分布式,配置工具,其设计的原理也是基于将数据流,如日志数据从各种网站服务器上汇集起来存储到 HDFS,HBase 等集中存储器中。官网:http://flume.apache.org/FlumeUserGuide.html
二。架构
1. 基本架构

介绍:
Source:(相当于一个来源)
从数据发生器接收数据,并将接收的数据以 Flume 的 event 格式传递给一个或者多个通道 channal,Flume 提供多种数据接收的方式,比如 Avro,Thrift,twitter1% 等
Channel:(相当于一个中转)
channal 是一种短暂的存储容器,它将从 source 处接收到的 event 格式的数据缓存起来,直到它们被 sinks 消费掉,它在 source 和 sink 间起着一共桥梁的作用,channal 是一个完整的事务,这一点保证了数据在收发的时候的一致性。并且它可以和任意数量的 source 和 sink 链接。支持的类型有: JDBC channel , File System channel , Memort channel 等.
sink:(相当于最后的写出)
sink 将数据存储到集中存储器比如 Hbase 和 HDFS, 它从 channals 消费数据 (events) 并将其传递给目标地。目标地可能是另一个 sink, 也可能 HDFS,HBase.
2. 延伸架构
2.1 利用 AVRO 中转

2.2 一般多个来源时可以配置这样

ps:
1、上传
2、解压
3、修改 conf/flume-env.sh 文件中的 JDK 目录
注意:JAVA_OPTS 配置 如果我们传输文件过大 报内存溢出时 需要修改这个配置项
4、验证安装是否成功 ./flume-ng version
5、配置环境变量
export FLUME_HOME=/home/apache-flume-1.6.0-bin
3.2 Source、Channel、Sink 有哪些类型
Flume Source
Source 类型 | 说明
Avro Source | 支持 Avro 协议(实际上是 Avro RPC),内置支持
Thrift Source | 支持 Thrift 协议,内置支持
Exec Source | 基于 Unix 的 command 在标准输出上生产数据
JMS Source | 从 JMS 系统(消息、主题)中读取数据
Spooling Directory Source | 监控指定目录内数据变更
Twitter 1% firehose Source| 通过 API 持续下载 Twitter 数据,试验性质
Netcat Source | 监控某个端口,将流经端口的每一个文本行数据作为 Event 输入
Sequence Generator Source | 序列生成器数据源,生产序列数据
Syslog Sources | 读取 syslog 数据,产生 Event,支持 UDP 和 TCP 两种协议
HTTP Source | 基于 HTTP POST 或 GET 方式的数据源,支持 JSON、BLOB 表示形式
Legacy Sources | 兼容老的 Flume OG 中 Source(0.9.x 版本)
Flume Channel
Channel 类型 说明
Memory Channel | Event 数据存储在内存中
JDBC Channel | Event 数据存储在持久化存储中,当前 Flume Channel 内置支持 Derby
File Channel | Event 数据存储在磁盘文件中
Spillable Memory Channel | Event 数据存储在内存中和磁盘上,当内存队列满了,会持久化到磁盘文件
Pseudo Transaction Channel | 测试用途
Custom Channel | 自定义 Channel 实现
Flume Sink
Sink 类型 说明
HDFS Sink | 数据写入 HDFS
Logger Sink | 数据写入日志文件
Avro Sink | 数据被转换成 Avro Event,然后发送到配置的 RPC 端口上
Thrift Sink | 数据被转换成 Thrift Event,然后发送到配置的 RPC 端口上
IRC Sink | 数据在 IRC 上进行回放
File Roll Sink | 存储数据到本地文件系统
Null Sink | 丢弃到所有数据
HBase Sink | 数据写入 HBase 数据库
Morphline Solr Sink | 数据发送到 Solr 搜索服务器(集群)
ElasticSearch Sink | 数据发送到 Elastic Search 搜索服务器(集群)
Kite Dataset Sink | 写数据到 Kite Dataset,试验性质的
Custom Sink | 自定义 Sink 实现
案例 1、 A simple example
http://flume.apache.org/FlumeUserGuide.html#a-simple-example
配置文件
############################################################
# Name the components on this agent
a1.sources = r1
a1.sinks = k1
a1.channels = c1
# Describe/configure the source
a1.sources.r1.type = netcat
a1.sources.r1.bind = localhost
a1.sources.r1.port = 44444
# Describe the sink
a1.sinks.k1.type = logger
# Use a channel which buffers events in memory
a1.channels.c1.type = memory
a1.channels.c1.capacity = 1000
a1.channels.c1.transactionCapacity = 100
# Bind the source and sink to the channel
a1.sources.r1.channels = c1
a1.sinks.k1.channel = c1
############################################################
启动 flume
flume-ng agent -n a1 -c conf -f simple.conf -Dflume.root.logger=INFO,console 指定配置目录
安装 telnet
yum install telnet
退出 ctrl+] quit
Memory Chanel 配置
capacity:默认该通道中最大的可以存储的 event 数量是 100,
trasactionCapacity:每次最大可以 source 中拿到或者送到 sink 中的 event 数量也是 100
keep-alive:event 添加到通道中或者移出的允许时间
byte**:即 event 的字节量的限制,只包括 eventbody
案例 2、两个 flume 做集群(第一个 agent 的 sink 作为第二个 agent 的 source)
node01 服务器中,配置文件
############################################################
# Name the components on this agent
a1.sources = r1
a1.sinks = k1
a1.channels = c1
# Describe/configure the source
a1.sources.r1.type = netcat
a1.sources.r1.bind = node1
a1.sources.r1.port = 44444
# Describe the sink
# a1.sinks.k1.type = logger
a1.sinks.k1.type = avro
a1.sinks.k1.hostname = node2
a1.sinks.k1.port = 60000
# Use a channel which buffers events in memory
a1.channels.c1.type = memory
a1.channels.c1.capacity = 1000
a1.channels.c1.transactionCapacity = 100
# Bind the source and sink to the channel
a1.sources.r1.channels = c1
a1.sinks.k1.channel = c1
############################################################
node02 服务器中,安装 Flume(步骤略)
配置文件
############################################################
# Name the components on this agent
a1.sources = r1
a1.sinks = k1
a1.channels = c1
# Describe/configure the source
a1.sources.r1.type = avro
a1.sources.r1.bind = node2
a1.sources.r1.port = 60000
# Describe the sink
a1.sinks.k1.type = logger
# Use a channel which buffers events in memory
a1.channels.c1.type = memory
a1.channels.c1.capacity = 1000
a1.channels.c1.transactionCapacity = 100
# Bind the source and sink to the channel
a1.sources.r1.channels = c1
a1.sinks.k1.channel = c1
############################################################
先启动 node02 的 Flume
flume-ng agent -n a1 -c conf -f avro.conf -Dflume.root.logger=INFO,console
再启动 node01 的 Flume
flume-ng agent -n a1 -c conf -f simple.conf2 -Dflume.root.logger=INFO,console
打开 telnet 测试 node02 控制台输出结果
案例 3、Exec Source(监听一个文件)
http://flume.apache.org/FlumeUserGuide.html#exec-source
配置文件
############################################################
a1.sources = r1
a1.sinks = k1
a1.channels = c1
# Describe/configure the source
a1.sources.r1.type = exec
a1.sources.r1.command = tail -F /home/flume.exec.log
# Describe the sink
a1.sinks.k1.type = logger
# Use a channel which buffers events in memory
a1.channels.c1.type = memory
a1.channels.c1.capacity = 1000
a1.channels.c1.transactionCapacity = 100
# Bind the source and sink to the channel
a1.sources.r1.channels = c1
a1.sinks.k1.channel = c1
############################################################
启动 Flume
flume-ng agent -n a1 -c conf -f exec.conf -Dflume.root.logger=INFO,console
创建空文件演示 touch flume.exec.log
循环添加数据
for i in {1..50}; do echo "$i hi flume" >> flume.exec.log ; sleep 0.1; done
案例 4、Spooling Directory Source(监听一个目录)
http://flume.apache.org/FlumeUserGuide.html#spooling-directory-source
配置文件
############################################################
a1.sources = r1
a1.sinks = k1
a1.channels = c1
# Describe/configure the source
a1.sources.r1.type = spooldir
a1.sources.r1.spoolDir = /home/logs
a1.sources.r1.fileHeader = true
# Describe the sink
a1.sinks.k1.type = logger
# Use a channel which buffers events in memory
a1.channels.c1.type = memory
a1.channels.c1.capacity = 1000
a1.channels.c1.transactionCapacity = 100
# Bind the source and sink to the channel
a1.sources.r1.channels = c1
a1.sinks.k1.channel = c1
############################################################
启动 Flume
flume-ng agent -n a1 -c conf -f spool.conf -Dflume.root.logger=INFO,console
拷贝文件演示
mkdir logs
cp flume.exec.log logs/
案例 5、hdfs sink
http://flume.apache.org/FlumeUserGuide.html#hdfs-sink
配置文件
############################################################
a1.sources = r1
a1.sinks = k1
a1.channels = c1
# Describe/configure the source
a1.sources.r1.type = spooldir
a1.sources.r1.spoolDir = /home/logs
a1.sources.r1.fileHeader = true
# Describe the sink
*** 只修改上一个 spool sink 的配置代码块 a1.sinks.k1.type = logger
a1.sinks.k1.type=hdfs
a1.sinks.k1.hdfs.path=hdfs://sxt/flume/%Y-%m-%d/%H%M
## 每隔 60s 或者文件大小超过 10M 的时候产生新文件
# hdfs 有多少条消息时新建文件,0 不基于消息个数
a1.sinks.k1.hdfs.rollCount=0
# hdfs 创建多长时间新建文件,0 不基于时间
a1.sinks.k1.hdfs.rollInterval=60
# hdfs 多大时新建文件,0 不基于文件大小
a1.sinks.k1.hdfs.rollSize=10240
# 当目前被打开的临时文件在该参数指定的时间(秒)内,没有任何数据写入,则将该临时文件关闭并重命名成目标文件
a1.sinks.k1.hdfs.idleTimeout=3
a1.sinks.k1.hdfs.fileType=DataStream
a1.sinks.k1.hdfs.useLocalTimeStamp=true
## 每五分钟生成一个目录:
# 是否启用时间上的” 舍弃”,这里的” 舍弃”,类似于” 四舍五入”,后面再介绍。如果启用,则会影响除了 % t 的其他所有时间表达式
a1.sinks.k1.hdfs.round=true
# 时间上进行 “舍弃” 的值;
a1.sinks.k1.hdfs.roundValue=5
# 时间上进行” 舍弃” 的单位,包含:second,minute,hour
a1.sinks.k1.hdfs.roundUnit=minute
# Use a channel which buffers events in memory
a1.channels.c1.type = memory
a1.channels.c1.capacity = 1000
a1.channels.c1.transactionCapacity = 100
# Bind the source and sink to the channel
a1.sources.r1.channels = c1
a1.sinks.k1.channel = c1(将 source,channel,sink 关联)
############################################################
创建 HDFS 目录
hadoop fs -mkdir /flume
启动 Flume
flume-ng agent -n a1 -c conf -f hdfs.conf -Dflume.root.logger=INFO,console
查看 hdfs 文件
hadoop fs -ls /flume/...
hadoop fs -get /flume/...
http://flume.apache.org/
安装
1、上传
2、解压
3、修改 conf/flume-env.sh 文件中的 JDK 目录
注意:JAVA_OPTS 配置 如果我们传输文件过大 报内存溢出时 需要修改这个配置项
4、验证安装是否成功 ./flume-ng version
5、配置环境变量
export FLUME_HOME=/home/apache-flume-1.6.0-bin
Source、Channel、Sink 有哪些类型
Flume Source
Source 类型 | 说明
Avro Source | 支持 Avro 协议(实际上是 Avro RPC),内置支持
Thrift Source | 支持 Thrift 协议,内置支持
Exec Source | 基于 Unix 的 command 在标准输出上生产数据
JMS Source | 从 JMS 系统(消息、主题)中读取数据
Spooling Directory Source | 监控指定目录内数据变更
Twitter 1% firehose Source| 通过 API 持续下载 Twitter 数据,试验性质
Netcat Source | 监控某个端口,将流经端口的每一个文本行数据作为 Event 输入
Sequence Generator Source | 序列生成器数据源,生产序列数据
Syslog Sources | 读取 syslog 数据,产生 Event,支持 UDP 和 TCP 两种协议
HTTP Source | 基于 HTTP POST 或 GET 方式的数据源,支持 JSON、BLOB 表示形式
Legacy Sources | 兼容老的 Flume OG 中 Source(0.9.x 版本)
Flume Channel
Channel 类型 说明
Memory Channel | Event 数据存储在内存中
JDBC Channel | Event 数据存储在持久化存储中,当前 Flume Channel 内置支持 Derby
File Channel | Event 数据存储在磁盘文件中
Spillable Memory Channel | Event 数据存储在内存中和磁盘上,当内存队列满了,会持久化到磁盘文件
Pseudo Transaction Channel | 测试用途
Custom Channel | 自定义 Channel 实现
Flume Sink
Sink 类型 说明
HDFS Sink | 数据写入 HDFS
Logger Sink | 数据写入日志文件
Avro Sink | 数据被转换成 Avro Event,然后发送到配置的 RPC 端口上
Thrift Sink | 数据被转换成 Thrift Event,然后发送到配置的 RPC 端口上
IRC Sink | 数据在 IRC 上进行回放
File Roll Sink | 存储数据到本地文件系统
Null Sink | 丢弃到所有数据
HBase Sink | 数据写入 HBase 数据库
Morphline Solr Sink | 数据发送到 Solr 搜索服务器(集群)
ElasticSearch Sink | 数据发送到 Elastic Search 搜索服务器(集群)
Kite Dataset Sink | 写数据到 Kite Dataset,试验性质的
Custom Sink | 自定义 Sink 实现
案例 1、 A simple example
http://flume.apache.org/FlumeUserGuide.html#a-simple-example
配置文件
############################################################
# Name the components on this agent
a1.sources = r1
a1.sinks = k1
a1.channels = c1
# Describe/configure the source
a1.sources.r1.type = netcat
a1.sources.r1.bind = localhost
a1.sources.r1.port = 44444
# Describe the sink
a1.sinks.k1.type = logger
# Use a channel which buffers events in memory
a1.channels.c1.type = memory
a1.channels.c1.capacity = 1000
a1.channels.c1.transactionCapacity = 100
# Bind the source and sink to the channel
a1.sources.r1.channels = c1
a1.sinks.k1.channel = c1
############################################################
启动 flume
flume-ng agent -n a1 -c conf -f simple.conf -Dflume.root.logger=INFO,console
安装 telnet
yum install telnet
退出 ctrl+] quit
Memory Chanel 配置
capacity:默认该通道中最大的可以存储的 event 数量是 100,
trasactionCapacity:每次最大可以 source 中拿到或者送到 sink 中的 event 数量也是 100
keep-alive:event 添加到通道中或者移出的允许时间
byte**:即 event 的字节量的限制,只包括 eventbody
案例 2、两个 flume 做集群
node01 服务器中,配置文件
############################################################
# Name the components on this agent
a1.sources = r1
a1.sinks = k1
a1.channels = c1
# Describe/configure the source
a1.sources.r1.type = netcat
a1.sources.r1.bind = node1
a1.sources.r1.port = 44444
# Describe the sink
# a1.sinks.k1.type = logger
a1.sinks.k1.type = avro
a1.sinks.k1.hostname = node2
a1.sinks.k1.port = 60000
# Use a channel which buffers events in memory
a1.channels.c1.type = memory
a1.channels.c1.capacity = 1000
a1.channels.c1.transactionCapacity = 100
# Bind the source and sink to the channel
a1.sources.r1.channels = c1
a1.sinks.k1.channel = c1
############################################################
node02 服务器中,安装 Flume(步骤略)
配置文件
############################################################
# Name the components on this agent
a1.sources = r1
a1.sinks = k1
a1.channels = c1
# Describe/configure the source
a1.sources.r1.type = avro
a1.sources.r1.bind = node2
a1.sources.r1.port = 60000
# Describe the sink
a1.sinks.k1.type = logger
# Use a channel which buffers events in memory
a1.channels.c1.type = memory
a1.channels.c1.capacity = 1000
a1.channels.c1.transactionCapacity = 100
# Bind the source and sink to the channel
a1.sources.r1.channels = c1
a1.sinks.k1.channel = c1
############################################################
先启动 node02 的 Flume
flume-ng agent -n a1 -c conf -f avro.conf -Dflume.root.logger=INFO,console
再启动 node01 的 Flume
flume-ng agent -n a1 -c conf -f simple.conf2 -Dflume.root.logger=INFO,console
打开 telnet 测试 node02 控制台输出结果
案例 3、Exec Source
http://flume.apache.org/FlumeUserGuide.html#exec-source
配置文件
############################################################
a1.sources = r1
a1.sinks = k1
a1.channels = c1
# Describe/configure the source
a1.sources.r1.type = exec
a1.sources.r1.command = tail -F /home/flume.exec.log
# Describe the sink
a1.sinks.k1.type = logger
# Use a channel which buffers events in memory
a1.channels.c1.type = memory
a1.channels.c1.capacity = 1000
a1.channels.c1.transactionCapacity = 100
# Bind the source and sink to the channel
a1.sources.r1.channels = c1
a1.sinks.k1.channel = c1
############################################################
启动 Flume
flume-ng agent -n a1 -c conf -f exec.conf -Dflume.root.logger=INFO,console
创建空文件演示 touch flume.exec.log
循环添加数据
for i in {1..50}; do echo "$i hi flume" >> flume.exec.log ; sleep 0.1; done
案例 4、Spooling Directory Source
http://flume.apache.org/FlumeUserGuide.html#spooling-directory-source
配置文件
############################################################
a1.sources = r1
a1.sinks = k1
a1.channels = c1
# Describe/configure the source
a1.sources.r1.type = spooldir
a1.sources.r1.spoolDir = /home/logs
a1.sources.r1.fileHeader = true
# Describe the sink
a1.sinks.k1.type = logger
# Use a channel which buffers events in memory
a1.channels.c1.type = memory
a1.channels.c1.capacity = 1000
a1.channels.c1.transactionCapacity = 100
# Bind the source and sink to the channel
a1.sources.r1.channels = c1
a1.sinks.k1.channel = c1
############################################################
启动 Flume
flume-ng agent -n a1 -c conf -f spool.conf -Dflume.root.logger=INFO,console
拷贝文件演示
mkdir logs
cp flume.exec.log logs/
案例 5、hdfs sink
http://flume.apache.org/FlumeUserGuide.html#hdfs-sink
配置文件
############################################################
a1.sources = r1
a1.sinks = k1
a1.channels = c1
# Describe/configure the source
a1.sources.r1.type = spooldir
a1.sources.r1.spoolDir = /home/logs
a1.sources.r1.fileHeader = true
# Describe the sink
*** 只修改上一个 spool sink 的配置代码块 a1.sinks.k1.type = logger
a1.sinks.k1.type=hdfs
a1.sinks.k1.hdfs.path=hdfs://sxt/flume/%Y-%m-%d/%H%M
## 每隔 60s 或者文件大小超过 10M 的时候产生新文件
# hdfs 有多少条消息时新建文件,0 不基于消息个数
a1.sinks.k1.hdfs.rollCount=0
# hdfs 创建多长时间新建文件,0 不基于时间
a1.sinks.k1.hdfs.rollInterval=60
# hdfs 多大时新建文件,0 不基于文件大小
a1.sinks.k1.hdfs.rollSize=10240
# 当目前被打开的临时文件在该参数指定的时间(秒)内,没有任何数据写入,则将该临时文件关闭并重命名成目标文件
a1.sinks.k1.hdfs.idleTimeout=3
a1.sinks.k1.hdfs.fileType=DataStream
a1.sinks.k1.hdfs.useLocalTimeStamp=true
## 每五分钟生成一个目录:
# 是否启用时间上的” 舍弃”,这里的” 舍弃”,类似于” 四舍五入”,后面再介绍。如果启用,则会影响除了 % t 的其他所有时间表达式
a1.sinks.k1.hdfs.round=true
# 时间上进行 “舍弃” 的值;
a1.sinks.k1.hdfs.roundValue=5
# 时间上进行” 舍弃” 的单位,包含:second,minute,hour
a1.sinks.k1.hdfs.roundUnit=minute
# Use a channel which buffers events in memory
a1.channels.c1.type = memory
a1.channels.c1.capacity = 1000
a1.channels.c1.transactionCapacity = 100
# Bind the source and sink to the channel
a1.sources.r1.channels = c1
a1.sinks.k1.channel = c1
############################################################
创建 HDFS 目录
hadoop fs -mkdir /flume
启动 Flume
flume-ng agent -n a1 -c conf -f hdfs.conf -Dflume.root.logger=INFO,console
查看 hdfs 文件
hadoop fs -ls /flume/...
hadoop fs -get /flume/...
作业:
1、flume 如何收集 java 请求数据
2、项目当中如何来做? 日志存放 /log/ 目录下 以 yyyyMMdd 为子目录 分别存放每天的数据

flume+flume+kafka消息传递+storm消费
通过flume收集其他机器上flume的监测数据,发送到本机的kafka进行消费。
环境:slave中安装flume,master中安装flume+kafka(这里用两台虚拟机,也可以用三台以上)
masterIP 192.168.83.128 slaveIP 192.168.83.129通过监控test.log文件的变化,收集变化信息发送到主机的flume中,再发送到kafka中进行消费
1、配置slave1在flume中配置conf目录中的example.conf文件,没有就创建一个
#Name the components on this agent
a1.sources = r1
a1.sinks = k1
a1.channels = c1

# Describe/configure the source
a1.sources.r1.type = exec
#监控文件夹下的test.log文件
a1.sources.r1.command = tail -F /home/qq/pp/data/test.log
a1.sources.r1.channels = c1

# Describe the sink
##sink端的avro是一个数据发送者
a1.sinks = k1
##type设置成avro来设置发消息
a1.sinks.k1.type = avro
a1.sinks.k1.channel = c1
##下沉到master这台机器
a1.sinks.k1.hostname = 192.168.83.133
##下沉到mini2中的44444
a1.sinks.k1.port = 44444
a1.sinks.k1.batch-size = 2

# Use a channel which buffers events in memory
a1.channels.c1.type = memory
a1.channels.c1.capacity = 1000
a1.channels.c1.transactionCapacity = 100

# Bind the source and sink to the channel
a1.sources.r1.channels = c1
a1.sinks.k1.channel = c1
2、master上配置flume/conf里面的example.conf(标红的注意下)
#me the components on this agent
a1.sources = r1
a1.sinks = k1
a1.channels = c1

# Describe/configure the source
##source中的avro组件是一个接收者服务
a1.sources.r1.type = avro
a1.sources.r1.channels = c1
a1.sources.r1.bind = 0.0.0.0
a1.sources.r1.port = 44444

# Describe the sink
#a1.sinks.k1.type = logger
#对于sink的配置描述 使用kafka做数据的消费
a1.sinks.k1.type = org.apache.flume.sink.kafka.KafkaSink
a1.sinks.k1.topic = flume_kafka
a1.sinks.k1.brokerList = 192.168.83.128:9092,192.168.83.129:9092
a1.sinks.k1.requiredAcks = 1
a1.sinks.k1.batchSize = 20

# Use a channel which buffers events in memory
a1.channels.c1.type = memory
a1.channels.c1.capacity = 1000
a1.channels.c1.transactionCapacity = 100

# Bind the source and sink to the channel
a1.sources.r1.channels = c1
a1.sinks.k1.channel = c1
3、向监听文件写入字符串(程序循环写入,不用手动修改test.log文件了)
[root@s1 # cd /home/qq/pp/data
[root@s1 home/qq/pp/data# while true
> do
> echo "toms" >> test.log
> sleep 1
> done
4、查看上面的程序是否执行
#cd /home/qq/pp/data
#tail -f test.log
5、打开消息接收者master的flume
进入flume安装目录,执行如下语句
bin/flume-ng agent -c conf -f conf/example.conf -n a1 -Dflume.root.logger=INFO,console现在回打印出一些信息
6、启动slave的flume
进入flume安装目录,执行如下语句
bin/flume-ng agent -c conf -f conf/example.conf -n a1 -Dflume.root.logger=INFO,console7、 进入master ---kafka安装目录
1)启动zookeeper
bin/zookeeper-server-start.sh -daemon config/zookeeper.properties
2)启动kafka服务
bin/kafka-server-start.sh -daemon config/server.properties
3)创建topic
kafka-topics.sh --create --topic flume_kafka --zookeeper 192.168.83.129:2181,192.168.83.128:2181 --partitions 2 --replication-factor 1
4)创建消费者
bin/kafka-console-consumer.sh --bootstrap-server 192.168.83.128:9092,192.168.83.129:9092 --topic flume_kafka --from-beginning5)然后就会看到消费之窗口打印写入的信息,

8、此时启动 eclipse实例(https://www.cnblogs.com/51python/p/10908660.html),注意修改ip以及topic
如果启动不成功看看是不是kafka设置问题(https://www.cnblogs.com/51python/p/10919330.html第一步虚拟机部署)
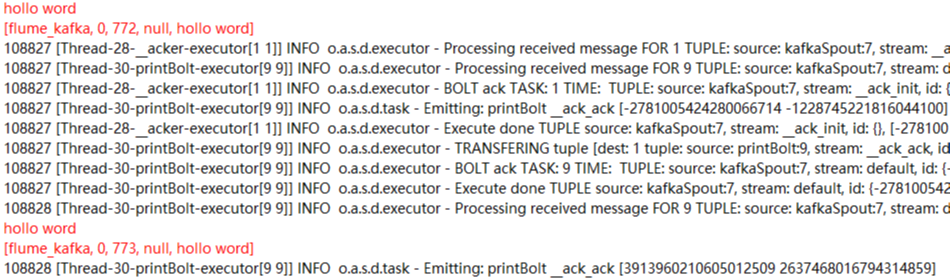
启动后会打印出结果(这是第二次测试不是用的toms而是hollo word测试的,此处只是一个实例)
ok!一个流程终于走完了!
参考:
https://blog.csdn.net/luozhonghua2014/article/details/80369469?utm_source=blogxgwz5
https://blog.csdn.net/wxgxgp/article/details/85701844
https://blog.csdn.net/tototuzuoquan/article/details/73203241
")
flume+log4j+hdfs(日志通过flume传到hdfs)
flume+log4j+hdfs(日志通过flume传到hdfs)
- log4j 日志生成.
- flume 日志收集系统,收集日志.
- HDFS Hadoop分布式文件系统,存储日志,使用版本hadoop-3.0.0-alpha1.tar.gz 本文档采用伪分布式方式进行试验,后期进行集群测试.
hdfs 伪分布式安装见博文[hadoop基础环境搭建]一文。
flume安装参考链接
系统环境:centos6.5 linux 64系统
- 官网下载apache-flume-1.6.0-bin.tar.gz
- 压缩包上传至/tmp目录,解压缩至/opt/目录
tar -zxvf apache-flume-1.6.0-bin.tar.gz -C /opt/
3.配置flume的环境变量: 修改 /etc/profile(~/.bashrc)文件
export FLUME_HOME=/home/connect/software/flume
export PATH=$FLUME_HOME/bin:$PATH
修改生效:
source /etc/profile(~/.bashrc)
4 进入apahce-flume的bin目录下:
cd /opt/apache-flume-1.6.0-bin/bin
5 运行脚本程序:
./flume-ng version
如果出现版本号,则表明安装成功
6 使用实例: 在/opt/ apache-flume-1.6.0-bin/conf目录创建example.conf文件,内容如下:
# example.conf: A single-node Flume configuration

# Name the components on this agent
tier1.sources=source1
tier1.channels=channel1
tier1.sinks=sink1

tier1.sources.source1.type=avro
tier1.sources.source1.bind=0.0.0.0
tier1.sources.source1.port=44444
tier1.sources.source1.channels=channel1

tier1.channels.channel1.type=memory
tier1.channels.channel1.capacity=10000
tier1.channels.channel1.transactionCapacity=1000
tier1.channels.channel1.keep-alive=30

tier1.sinks.sink1.type=hdfs
tier1.sinks.sink1.channel=channel1
tier1.sinks.sink1.hdfs.path=hdfs://master68:8020/flume/events
tier1.sinks.sink1.hdfs.fileType=DataStream
tier1.sinks.sink1.hdfs.writeFormat=Text
tier1.sinks.sink1.hdfs.rollInterval=0
tier1.sinks.sink1.hdfs.rollSize=10240
tier1.sinks.sink1.hdfs.rollCount=0
tier1.sinks.sink1.hdfs.idleTimeout=60
然后,启动flume,在目录/opt/ apache-flume-1.6.0-bin下,运行flume
flume-ng agent -c ../conf -f ../conf/flume_kafka.conf -Dflume.root.logger=INFO,console -n tier1 > ../logs/flume.log 2>&1 &
参数说明:
-
n 指定agent名称
-
c 指定配置文件目录
-
f 指定配置文件
-
Dflume.root.logger=DEBUG,console 设置日志等级
-
然后idea新建maven工程
    package com.besttone.flume;

    import java.util.Date;

    import org.apache.commons.logging.Log;
    import org.apache.commons.logging.LogFactory;

    public class WriteLog {
    protected static final Log logger = LogFactory.getLog(WriteLog.class);

    /**
     * [@param](https://my.oschina.net/u/2303379) args
     * [@throws](https://my.oschina.net/throws) InterruptedException
     */
    public static void main(String[] args) throws InterruptedException {
        // TODO Auto-generated method stub
        while (true) {
        //每隔两秒log输出一下当前系统时间戳
            logger.info(new Date().getTime());
            Thread.sleep(2000);
        }
    }
}
对应的pom文件为:
<project xmlns="http://maven.apache.org/POM/4.0.0" xmlns:xsi="http://www.w3.org/2001/XMLSchema-instance"
  xsi:schemaLocation="http://maven.apache.org/POM/4.0.0 http://maven.apache.org/xsd/maven-4.0.0.xsd">
  <modelVersion>4.0.0</modelVersion>

  <groupId>flumeTest</groupId>
  <artifactId>test</artifactId>
  <version>1.0-SNAPSHOT</version>
  <packaging>jar</packaging>

  <name>test</name>
  <url>http://maven.apache.org</url>

  <properties>
    <project.build.sourceEncoding>UTF-8</project.build.sourceEncoding>
  </properties>

  <dependencies>
    <dependency>
      <groupId>junit</groupId>
      <artifactId>junit</artifactId>
      <version>3.8.1</version>
      <scope>test</scope>
    </dependency>
    <dependency>
      <groupId>org.slf4j</groupId>
      <artifactId>slf4j-log4j12</artifactId>
      <version>1.7.21</version>
    </dependency>
    <dependency>
      <groupId>org.apache.flume</groupId>
      <artifactId>flume-ng-core</artifactId>
      <version>1.6.0</version>
    </dependency>
    <dependency>
      <groupId>org.apache.flume.flume-ng-clients</groupId>
      <artifactId>flume-ng-log4jappender</artifactId>
      <version>1.6.0</version>
    </dependency>
  </dependencies>
  <build>
    <plugins>
      <plugin>
        <artifactId>maven-war-plugin</artifactId>
        <version>2.6</version>
        <configuration>
          <warSourceDirectory>WebContent</warSourceDirectory>
          <failOnMissingWebXml>false</failOnMissingWebXml>
        </configuration>
      </plugin>
      <plugin>
        <artifactId>maven-compiler-plugin</artifactId>
        <version>3.5</version>
        <configuration>
          <source>1.8</source>
          <target>1.8</target>
        </configuration>
      </plugin>
    </plugins>
  </build>
</project>
log4j配置文件为:
### set log levels ###
log4j.rootLogger=INFO, stdout, file, flume
log4j.logger.per.flume=INFO

### flume ###
log4j.appender.flume=org.apache.flume.clients.log4jappender.Log4jAppender
log4j.appender.flume.layout=org.apache.log4j.PatternLayout
log4j.appender.flume.Hostname=10.37.167.204
log4j.appender.flume.Port=44444

### stdout ###
log4j.appender.stdout=org.apache.log4j.ConsoleAppender
log4j.appender.stdout.Threshold=INFO
log4j.appender.stdout.Target=System.out
log4j.appender.stdout.layout=org.apache.log4j.PatternLayout
log4j.appender.stdout.layout.ConversionPattern=%d{yyyy-MM-dd HH:mm:ss} %c{1} [%p] %m%n

### file ###
log4j.appender.file=org.apache.log4j.DailyRollingFileAppender
log4j.appender.file.Threshold=INFO
log4j.appender.file.File=./logs/tracker/tracker.log
log4j.appender.file.Append=true
log4j.appender.file.DatePattern=''.''yyyy-MM-dd
log4j.appender.file.layout=org.apache.log4j.PatternLayout
log4j.appender.file.layout.ConversionPattern=%d{yyyy-MM-dd HH:mm:ss} %c{1} [%p] %m%n
然后写一个运行脚本:
#!/bin/sh
jarlist=$(ls  /../flume/lib/*.jar)
CLASSPATH =/.../flume/test-1.0-SNAPSHOT.jar
for jar in ${jarlist}
do
    CLASSPATH=${CLASSPATH}:${jar}
done
echo ${CLASSPATH}

java -classpath $CLASSPATH flumeTest.WriteLog
最后打包发送到服务器,然后运行就ok了。
程序成功运行会出现如下画面:
 2018-01-08 21:11:40 WriteLog [INFO] 1515417100168
  2018-01-08 21:11:42 WriteLog [INFO] 1515417102169
  2018-01-08 21:11:44 WriteLog [INFO] 1515417104170
  2018-01-08 21:11:46 WriteLog [INFO] 1515417106172
  2018-01-08 21:11:48 WriteLog [INFO] 1515417108175
  2018-01-08 21:11:50 WriteLog [INFO] 1515417110177
  2018-01-08 21:11:52 WriteLog [INFO] 1515417112178
  2018-01-08 21:11:54 WriteLog [INFO] 1515417114180
  2018-01-08 21:11:56 WriteLog [INFO] 1515417116181
  2018-01-08 21:11:58 WriteLog [INFO] 1515417118183
  2018-01-08 21:12:00 WriteLog [INFO] 1515417120184
  2018-01-08 21:12:02 WriteLog [INFO] 1515417122185
  2018-01-08 21:12:04 WriteLog [INFO] 1515417124186
  2018-01-08 21:12:06 WriteLog [INFO] 1515417126188
  2018-01-08 21:12:08 WriteLog [INFO] 1515417128189
  2018-01-08 21:12:10 WriteLog [INFO] 1515417130191
  2018-01-08 21:12:12 WriteLog [INFO] 1515417132192
  2018-01-08 21:12:14 WriteLog [INFO] 1515417134193
  2018-01-08 21:12:16 WriteLog [INFO] 1515417136194
  2018-01-08 21:12:18 WriteLog [INFO] 1515417138196
  2018-01-08 21:12:20 WriteLog [INFO] 1515417140197
  2018-01-08 21:12:22 WriteLog [INFO] 1515417142198
5 最后进入hdfs或在浏览器中查看日志是否进入hdfs中输入:
http:localhost:9870
-
[ ] 问题(提示hadoop不能加载本地库)
-

-
[ ] 问题2
-
在linux下,不可避免的会用VIM打开一些windows下编辑过的文本文件。我们会发现文件的每行结尾都会有一个^M$符号,这是因为 DOS下的编辑器和Linux编辑器对文件行末的回车符处理不一致
-
解决方案: 1 (个人认为是最方便的) 在终端下敲命令:
dos2unix filename
直接转换成unix格式,就OK了.当出现不能用的时候,则说明dos2unix没有被安装,所以需要:
yum install dos2unix -y
然后继续运行就可以了
- [ ] 问题3
- 问题描述: 在hadoop伪分布式中,第一次NameNode格式化后,启动start-dfs.sh后,通过jps查看,namenode/datanode/namesecondly进程都启动了,而当再次格式化namenode之后,DataNode启动不起来了,可以查看问题相似链接 解决方案: 查看core-site.xml中所写的地址/opt/temp/lih-temp中dfs中的name,data,与namesecondary三者中的current中的VERSION中的关系,具体如下两图所示:
- 正确的图

- 错误的图

当第二次对namenode进行格式化时,必须要求namenode的clusterID与datanode的clusterID相同,而namesecondary的就不要求了
- [ ] 4 问题描述:在安装好hadoop之后,配置文件设置如链接所示,当利用wordcount来进行计算: 下文用到的链接
在目录中先新建两个txt文档(如上链接)
#./hdfs dfs -mkdir /hdfsInput

[bin]# ./hadoop jar ../share/hadoop/mapreduce/hadoop-mapreduce-examples-3.0.0-alpha1.jar wordcount /hdfsInput /hdfsOutput
当利用hadoop运行mapreduce的jar程序时,出现了如下问题: 
产生问题的原因: 路径设置不正确
解决办法: 在mapred-site.xm文件中添加(mapreduce的端口为:8088还有8042,虽然不知道是什么,但是后面会知道的):
<property>
    <name>mapreduce.application.classpath</name>
        <value>
                /opt/hadoop/share/hadoop/hdfs/*,
                /opt/hadoop/share/hadoop/hdfs/lib/*,
                /opt/hadoop/share/hadoop/mapreduce/*,
                /opt/hadoop/share/hadoop/mapreduce/lib/*,
                /opt/hadoop/share/hadoop/yarn/*,
                /opt/hadoop/share/hadoop/yarn/lib/*
        </value>
<property>
参考各种网站:
-
参考网站1
-
参考网站2
-
重点参看1
-
重点参考2
-
参考链接4
-
hadoop集群运行jar
- [ ] 拓展知识点
对项目进行打jar包,并利用命令对其进行运行
- 利用命令对项目进行打包jar并且进行运行: 编写java程序:
public class Helloword {
    public static void main(String[] args) {
      System.out.println("Hello word!!");
    }
}
然后进行编译:
javac Helloword.java
java Helloword

然后 使用
jar -cvf hello.jar Helloword.class
即将Helloword打成了hello.jar,然后进行运行
java -jar hello.jar

jar -cvf hello.war Helloword.class
将Helloword打成war包
java -jar hello.war
- 利用intellij idea进行打包
-
[对一般工程](http://jingyan.baidu.com/article/f25ef254a829a6482c1b8224.html) -
如果对含有依赖jar的maven项目,需要将maven中的依赖也打成jar包,需要在pom文件中添加相应的依赖:在首先要在pom里<dependencies>和<repositories>间增加<bulid>属性,build配置信息如下:
<build>
    <plugins>
      <plugin>
        <artifactId>maven-assembly-plugin</artifactId>
        <configuration>
          <appendAssemblyId>false</appendAssemblyId>
          <descriptorRefs>
            <descriptorRef>jar-with-dependencies</descriptorRef>
          </descriptorRefs>
          <archive>
            <manifest>
              <mainClass>LIHAO.Helloword</mainClass>
            </manifest>
          </archive>
        </configuration>
        <executions>
          <execution>
            <id>make-assembly</id>
            <phase>package</phase>
            <goals>
              <goal>assembly</goal>
            </goals>
          </execution>
        </executions>
      </plugin>
    </plugins>
  </build>
然后利用:
mvn clean package install -Dmaven.test.skip -X
即可
关于Flume02——发送数据到Flume和flume sink 到文件的问题就给大家分享到这里,感谢你花时间阅读本站内容,更多关于Flume sink Kafka Spout Storm Bolt Hbase or Redis (Flume)、Flume 篇 ---Flume 安装配置与相关使用、flume+flume+kafka消息传递+storm消费、flume+log4j+hdfs(日志通过flume传到hdfs)等相关知识的信息别忘了在本站进行查找喔。
本文标签:


![[转帖]Ubuntu 安装 Wine方法(ubuntu如何安装wine)](https://www.gvkun.com/zb_users/cache/thumbs/4c83df0e2303284d68480d1b1378581d-180-120-1.jpg)

