在这篇文章中,我们将为您详细介绍FFmpeg(五)重采样相关函数理解的内容,并且讨论关于ffmpeg音频重采样的相关问题。此外,我们还会涉及一些关于2023-03-17:使用Go语言和FFmpeg库实
在这篇文章中,我们将为您详细介绍FFmpeg(五) 重采样相关函数理解的内容,并且讨论关于ffmpeg 音频重采样的相关问题。此外,我们还会涉及一些关于2023-03-17:使用Go语言和FFmpeg库实现音频重采样解码,并将其保存为PCM格式的文件。、2023-04-30:用go语言重写ffmpeg的resampling_audio.c示例,它实现了音频重采样的功能。、Android 中集成 ffmpeg (一):编译 ffmpeg、Android使用FFmpeg(一)--编译ffmpeg的知识,以帮助您更全面地了解这个主题。
本文目录一览:- FFmpeg(五) 重采样相关函数理解(ffmpeg 音频重采样)
- 2023-03-17:使用Go语言和FFmpeg库实现音频重采样解码,并将其保存为PCM格式的文件。
- 2023-04-30:用go语言重写ffmpeg的resampling_audio.c示例,它实现了音频重采样的功能。
- Android 中集成 ffmpeg (一):编译 ffmpeg
- Android使用FFmpeg(一)--编译ffmpeg
 重采样相关函数理解(ffmpeg 音频重采样)")
FFmpeg(五) 重采样相关函数理解(ffmpeg 音频重采样)
一、重采样流程
重采样(解码音频数据之后格式不可以直接播放,需要重采样,类似图像的像素转换)
1.分配上下文
2.设置参数(分为(前几个是)输出格式和(后几个)输入格式,两个相对应的) 可以通过改变样本率来改变音频的播放速度,但是会失帧。
3.初始化
4.开始转换
二、相关函数说明
1、 SwrContext *actx = swr_alloc(); //进行分配和初始化
2、 actx = swr_alloc_set_opts(actx,
av_get_default_channel_layout(2), //输出标准(左右声道)
AV_SAMPLE_FMT_S16, //样本格式:float 、s16、s24
ac->sample_rate,//样本率,一般使用原始的
av_get_default_channel_layout(ac->channels),
ac->sample_fmt,
ac->sample_rate,
0,0 );
3、 re = swr_init(actx);
4、 //将一帧一帧的音频进行重采样 (参数对应输入输出)
int len = swr_convert(actx, //重采样上下文
out, //输出的指针
frame->nb_samples, //样本数量:单声道的样本数量
(const uint8_t**)frame->data,//解码出来的data
frame->nb_samples);//单通的样本数量
代码说明:


#include <jni.h>
#include <string>
#include <android/log.h>
#include <android/native_window.h>
#include <android/native_window_jni.h>
#define LOGW(...) __android_log_print(ANDROID_LOG_WARN,"testff",__VA_ARGS__)

extern "C"{
#include <libavcodec/avcodec.h>
#include <libavformat/avformat.h>
#include <libavcodec/jni.h>
#include <libswscale/swscale.h>
#include <libswresample/swresample.h>
}
#include<iostream>
using namespace std;

static double r2d(AVRational r)
{
    return r.num==0||r.den == 0 ? 0 :(double)r.num/(double)r.den;
}

//当前时间戳 clock
long long GetNowMs()
{
    struct timeval tv;
    gettimeofday(&tv,NULL);
    int sec = tv.tv_sec%360000;
    long long t = sec*1000+tv.tv_usec/1000;
    return t;
}
extern "C"
JNIEXPORT
jint JNI_OnLoad(JavaVM *vm,void *res)
{
    av_jni_set_java_vm(vm,0);
    return JNI_VERSION_1_4;
}

extern "C"
JNIEXPORT jstring
JNICALL
Java_aplay_testffmpeg_MainActivity_stringFromJNI(
        JNIEnv *env,
        jobject /* this */) {
    std::string hello = "Hello from C++ ";
    // TODO
    hello += avcodec_configuration();
    return env->NewStringUTF(hello.c_str());
}

extern "C"
JNIEXPORT void JNICALL
Java_aplay_testffmpeg_XPlay_Open(JNIEnv *env, jobject instance, jstring url_, jobject surface) {
    const char *path = env->GetStringUTFChars(url_, 0);

    //初始化解封装
    av_register_all();
    //初始化网络
    avformat_network_init();

    avcodec_register_all();

    //打开文件
    AVFormatContext *ic = NULL;
    //char path[] = "/sdcard/video.flv";
    int re = avformat_open_input(&ic,path,0,0);
    if(re != 0)
    {
        LOGW("avformat_open_input failed!:%s",av_err2str(re));
        return;
    }
    LOGW("avformat_open_input %s success!",path);
    //获取流信息
    re = avformat_find_stream_info(ic,0);
    if(re != 0)
    {
        LOGW("avformat_find_stream_info failed!");
    }
    LOGW("duration = %lld nb_streams = %d",ic->duration,ic->nb_streams);

    int fps = 0;
    int videoStream = 0;
    int audioStream = 1;

    for(int i = 0; i < ic->nb_streams; i++)
    {
        AVStream *as = ic->streams[i];
        if(as->codecpar->codec_type == AVMEDIA_TYPE_VIDEO)
        {
            LOGW("视频数据");
            videoStream = i;
            fps = r2d(as->avg_frame_rate);

            LOGW("fps = %d,width=%d height=%d codeid=%d pixformat=%d",fps,
                 as->codecpar->width,
                 as->codecpar->height,
                 as->codecpar->codec_id,
                 as->codecpar->format
            );
        }
        else if(as->codecpar->codec_type ==AVMEDIA_TYPE_AUDIO )
        {
            LOGW("音频数据");
            audioStream = i;
            LOGW("sample_rate=%d channels=%d sample_format=%d",
                 as->codecpar->sample_rate,
                 as->codecpar->channels,
                 as->codecpar->format
            );
        }
    }
    //ic->streams[videoStream];
    //获取音频流信息
    audioStream = av_find_best_stream(ic,AVMEDIA_TYPE_AUDIO,-1,-1,NULL,0);
    LOGW("av_find_best_stream audioStream = %d",audioStream);
    //////////////////////////////////////////////////////////
    //打开视频解码器
    //软解码器
    AVCodec *codec = avcodec_find_decoder(ic->streams[videoStream]->codecpar->codec_id);
    //硬解码
    codec = avcodec_find_decoder_by_name("h264_mediacodec");
    if(!codec)
    {
        LOGW("avcodec_find failed!");
        return;
    }
    //解码器初始化
    AVCodecContext *vc = avcodec_alloc_context3(codec);
    avcodec_parameters_to_context(vc,ic->streams[videoStream]->codecpar);

    vc->thread_count = 8;
    //打开解码器
    re = avcodec_open2(vc,0,0);
    //vc->time_base = ic->streams[videoStream]->time_base;
    LOGW("vc timebase = %d/ %d",vc->time_base.num,vc->time_base.den);
    if(re != 0)
    {
        LOGW("avcodec_open2 video failed!");
        return;
    }

    //////////////////////////////////////////////////////////
    //打开音频解码器
    //软解码器
    AVCodec *acodec = avcodec_find_decoder(ic->streams[audioStream]->codecpar->codec_id);
    //硬解码
    //codec = avcodec_find_decoder_by_name("h264_mediacodec");
    if(!acodec)
    {
        LOGW("avcodec_find failed!");
        return;
    }
    //音频解码器初始化
    AVCodecContext *ac = avcodec_alloc_context3(acodec);
    avcodec_parameters_to_context(ac,ic->streams[audioStream]->codecpar);
    ac->thread_count = 8;
    //打开解码器
    re = avcodec_open2(ac,0,0);
    if(re != 0)
    {
        LOGW("avcodec_open2  audio failed!");
        return;
    }
    //读取帧数据
    AVPacket *pkt = av_packet_alloc();
    AVFrame *frame = av_frame_alloc();
    long long start = GetNowMs();
    int frameCount = 0;


    //初始化像素格式转换的上下文
    SwsContext *vctx = NULL;
    int outWidth = 1280;
    int outHeight = 720;
    char *rgb = new char[1920*1080*4];
    char *pcm = new char[48000*4*2];

    //音频重采样上下文初始化
    SwrContext *actx = swr_alloc();
    actx = swr_alloc_set_opts(actx,
                              av_get_default_channel_layout(2),
                              AV_SAMPLE_FMT_S16,ac->sample_rate,
                              av_get_default_channel_layout(ac->channels),
                              ac->sample_fmt,ac->sample_rate,
                              0,0 );
    re = swr_init(actx);
    if(re != 0)
    {
        LOGW("swr_init failed!");
    }
    else
    {
        LOGW("swr_init success!");
    }

    //显示窗口初始化
    ANativeWindow *nwin = ANativeWindow_fromSurface(env,surface);
    ANativeWindow_setBuffersGeometry(nwin,outWidth,outHeight,WINDOW_FORMAT_RGBA_8888);
    ANativeWindow_Buffer wbuf;

    for(;;)
    {
        //超过三秒
        if(GetNowMs() - start >= 3000)
        {
            LOGW("now decode fps is %d",frameCount/3);
            start = GetNowMs();
            frameCount = 0;
        }

        int re = av_read_frame(ic,pkt);
        if(re != 0)
        {

            LOGW("读取到结尾处!");
            int pos = 20 * r2d(ic->streams[videoStream]->time_base);
            av_seek_frame(ic,videoStream,pos,AVSEEK_FLAG_BACKWARD|AVSEEK_FLAG_FRAME );
            continue;
        }

        AVCodecContext *cc = vc;
        if(pkt->stream_index == audioStream)
            cc=ac;

        //发送到线程中解码
        re = avcodec_send_packet(cc,pkt);
        //清理
        int p = pkt->pts;
        av_packet_unref(pkt);

        if(re != 0)
        {
            LOGW("avcodec_send_packet failed!");
            continue;
        }

        for(;;)
        {
            re = avcodec_receive_frame(cc,frame);
            if(re !=0)
            {
                //LOGW("avcodec_receive_frame failed!");
                break;
            }
            //LOGW("avcodec_receive_frame %lld",frame->pts);
            //如果是视频帧
            if(cc == vc)
            {
                frameCount++;
                vctx = sws_getCachedContext(vctx,
                                            frame->width,
                                            frame->height,
                                            (AVPixelFormat)frame->format,
                                            outWidth,
                                            outHeight,
                                            AV_PIX_FMT_RGBA,
                                            SWS_FAST_BILINEAR,
                                            0,0,0
                );
                if(!vctx)
                {
                    LOGW("sws_getCachedContext failed!");
                }
                else
                {
                    uint8_t *data[AV_NUM_DATA_POINTERS] = {0};
                    data[0] =(uint8_t *)rgb;
                    int lines[AV_NUM_DATA_POINTERS] = {0};
                    lines[0] = outWidth * 4;
                    int h = sws_scale(vctx,
                                      (const uint8_t **)frame->data,
                                      frame->linesize,0,
                                      frame->height,
                                      data,lines);
                    LOGW("sws_scale = %d",h);
                    if(h > 0)
                    {
                        ANativeWindow_lock(nwin,&wbuf,0);
                        uint8_t *dst = (uint8_t*)wbuf.bits;
                        memcpy(dst,rgb,outWidth*outHeight*4);
                        ANativeWindow_unlockAndPost(nwin);
                    }
                }

            }
            else //音频
            {
                uint8_t *out[2] = {0};
                out[0] = (uint8_t*) pcm;

                //音频重采样
                int len = swr_convert(actx,out,
                                      frame->nb_samples,
                                      (const uint8_t**)frame->data,
                                      frame->nb_samples);
                LOGW("swr_convert = %d",len);
            }

        }

        //////////////////////


    }
    delete rgb;
    delete pcm;


    //关闭上下文
    avformat_close_input(&ic);


    env->ReleaseStringUTFChars(url_, path);
}

2023-03-17:使用Go语言和FFmpeg库实现音频重采样解码,并将其保存为PCM格式的文件。
2023-03-17:使用Go语言和FFmpeg库实现音频重采样解码,并将其保存为PCM格式的文件。
答案2023-03-17:
在音视频处理领域,常常需要对音频进行重采样和解码,以便于后续的处理和分析。本文将介绍如何使用Go语言及FFmpeg库实现音频重采样解码为PCM数据的过程。
1.前置知识和背景介绍
在介绍音频重采样解码之前,我们需要了解几个基本概念:
音频采样率:指音频信号每秒钟采样的次数,通常用赫兹(Hz)表示。常见的采样率有44100Hz、48000Hz等。
音频编码格式:指把声音转成数字信号后所采用的编码格式,常见的编码格式有MP3、AAC、WAV等。
音频重采样:指改变音频采样率的过程,也可以理解为对音频做插值运算,使得原来采样率与目标采样率不一致的音频能够适配到目标采样率上。
音频解码:指把已经编码压缩的音频文件解码成原始的音频数据流的过程。
2.实现步骤
实现音频重采样解码为PCM数据的具体步骤如下:
2.1.导入所需的FFmpeg库和Go语言包
首先,我们需要导入一些必要的FFmpeg库和Go语言包,以便后续代码中能够正常调用相关接口和方法。代码示例如下:
import (
    "fmt"
    "os"
    "unsafe"

	"github.com/moonfdd/ffmpeg-go/ffcommon"
	"github.com/moonfdd/ffmpeg-go/libavcodec"
	"github.com/moonfdd/ffmpeg-go/libavformat"
	"github.com/moonfdd/ffmpeg-go/libavutil"
	"github.com/moonfdd/ffmpeg-go/libswresample"
)
2.2.打开输入音频文件
需要打开输入音频文件,并检查是否打开成功。若无法打开,则应该返回错误信息。
fmtCtx := libavformat.AvformatAllocContext()
if libavformat.AvformatOpenInput(&fmtCtx, inFileName, nil, nil) < 0 {
    fmt.Printf("Cannot open input file.\n")
    return
}
其中,inFileName是输入音频文件名。
2.3.获取音频流信息
获取音频流信息,包括音频流的相关参数(采样率、声道数、采样格式等),并检查是否获取成功。若无法获取成功,则应该返回错误信息。
if fmtCtx.AvformatFindStreamInfo(nil) < 0 {
    fmt.Printf("Cannot find stream info in input file.\n")
    return
}

aStreamIndex := -1
for i := uint32(0); i < fmtCtx.NbStreams; i++ {
    if fmtCtx.GetStream(i).Codecpar.CodecType == libavutil.AVMEDIA_TYPE_AUDIO {
        aStreamIndex = int(i)
        break
    }
}

if aStreamIndex == -1 {
    fmt.Printf("Cannot find audio stream.\n")
    return
}

aCodecPara := fmtCtx.GetStream(uint32(aStreamIndex)).Codecpar
其中,aCodecPara是音频流的参数。
2.4.查找音频解码器并打开音频解码器
根据音频流的参数,查找对应的音频解码器,并打开解码器。在打开解码器时,需要将音频流的参数设置为解码器的参数。
codec := libavcodec.AvcodecFindDecoder(aCodecPara.CodecId)
if codec == nil {
    fmt.Printf("Cannot find any codec for audio.\n")
    return
}

codecCtx = codec.AvcodecAllocContext3()

if codecCtx.AvcodecParametersToContext(aCodecPara) < 0 {
    fmt.Printf("Cannot alloc codec context.\n")
    return
}

if codecCtx.AvcodecOpen2(codec, nil) < 0 {
    fmt.Printf("Cannot open audio codec.\n")
    return
}
其中,codecCtx是解码器的上下文。
2.5.计算重采样参数
计算重采样后的采样率、声道数和采样格式等参数。
out_channel_layout := codecCtx.ChannelLayout
out_sample_fmt := libavutil.AV_SAMPLE_FMT_S16
out_sample_rate := int32(44100)
out_channels := libavutil.AvGetChannelLayoutNbChannels(out_channel_layout)
2.6.初始化重采样上下文
根据输入和输出参数,初始化重采样上下文
swrCtx := libswresample.SwrAllocSetOpts(
    nil,
    out_channel_layout, out_sample_fmt, out_sample_rate,
    codecCtx.ChannelLayout, codecCtx.SampleFmt(), int(codecCtx.SampleRate()), 0, nil,
)

if swrCtx == nil {
    fmt.Printf("Cannot allocate resampler context.\n")
    return
}

if swrCtx.SwrInit() < 0 {
    fmt.Printf("Cannot initialize resampling context.\n")
    return
}
其中,swrCtx是重采样上下文。
2.7.分配AVPacket和AVFrame
分别分配AVPacket和AVFrame,用于从输入音频流中读取数据、向解码器传递数据和从解码器接收数据等操作。
pkt := libavcodec.AvPacketAlloc()
defer pkt.AvPacketFree()

frame := libavutil.AvFrameAlloc()
defer frame.AvFrameFree()
2.8.从输入音频流中读取数据,并将其送入解码器进行解码
循环从输入音频流中读取数据,并将数据送入解码器进行解码。若读取到的数据为空,则跳出循环。
for {
    ret := fmtCtx.AvReadFrame(pkt)
    if ret < 0 {
        break
    }

    if pkt.StreamIndex() != int32(aStreamIndex) {
        continue
    }

    ret = codecCtx.AvCodecSendPacket(pkt)
    if ret < 0 {
        fmt.Printf("Error sending a packet for decoding.\n")
        break
    }

    for {
        ret = codecCtx.AvCodecReceiveFrame(frame)
        if ret < 0 {
            break
        }

        // 进行重采样
        data := make([]*uint8, 0)
        for i := 0; i < int(frame.NbSamples()); i++ {
            data = append(data, (*uint8)(frame.ExtendedData(0)[i]))
        }
        out_nb_samples := swrCtx.SwrGetDelay(int64(codecCtx.SampleRate())) + int(frame.NbSamples())
        out_samples_per_channel := out_nb_samples * out_channels
        out_buffer := libavutil.AvMalloc(uintptr(out_samples_per_channel) * uintptr(libavutil.AvGetBytesPerSample(out_sample_fmt)))
        defer libavutil.AvFree(out_buffer)
        out_data := (**uint8)(unsafe.Pointer(&out_buffer))
        swrCtx.SwrConvert(out_data, out_nb_samples, data, int(frame.NbSamples()))
    }

    pkt.AvPacketUnref()
}
注意,在解码时需要根据每个AVPacket的stream index判断是否是目标音频流。
2.9.编写PCM数据到文件中
将重采样后的PCM数据写入输出文件中。
outFile, err := os.Create(outFileName)
if err != nil {
    fmt.Printf("Can not create output file.\n")
    return
}
defer outFile.Close()

samples_size := libavutil.AvGetBytesPerSample(out_sample_fmt)
for i := 0; i < out_samples_per_channel; i++ {
    for j := 0; j < out_channels; j++ {
        sample_value := *(*int16)(unsafe.Pointer(uintptr(out_buffer) + uintptr(i*out_channels+j)*uintptr(samples_size)))
        binary.Write(outFile, binary.LittleEndian, &sample_value)
    }
}
其中,outFileName是输出音频文件名。
3.go语言完整代码
// https://feater.top/ffmpeg/ffmpeg-audio-resample-decode-mp3-to-pcm-with-cpu
package main

import (
	"fmt"
	"os"
	"os/exec"
	"unsafe"

	"github.com/moonfdd/ffmpeg-go/ffcommon"
	"github.com/moonfdd/ffmpeg-go/libavcodec"
	"github.com/moonfdd/ffmpeg-go/libavformat"
	"github.com/moonfdd/ffmpeg-go/libavutil"
	"github.com/moonfdd/ffmpeg-go/libswresample"
)

const MAX_AUDIO_FRAME_SIZE = 192000

func main() {
	os.Setenv("Path", os.Getenv("Path")+";./lib")
	ffcommon.SetAvutilPath("./lib/avutil-56.dll")
	ffcommon.SetAvcodecPath("./lib/avcodec-58.dll")
	ffcommon.SetAvdevicePath("./lib/avdevice-58.dll")
	ffcommon.SetAvfilterPath("./lib/avfilter-56.dll")
	ffcommon.SetAvformatPath("./lib/avformat-58.dll")
	ffcommon.SetAvpostprocPath("./lib/postproc-55.dll")
	ffcommon.SetAvswresamplePath("./lib/swresample-3.dll")
	ffcommon.SetAvswscalePath("./lib/swscale-5.dll")

	genDir := "./out"
	_, err := os.Stat(genDir)
	if err != nil {
		if os.IsNotExist(err) {
			os.Mkdir(genDir, 0777) //  Everyone can read write and execute
		}
	}

	inVFileName := "./out/test.mp3"
	outFileName := "./out/test16.pcm"

	// ./lib/ffmpeg -i ./resources/big_buck_bunny.mp4 -acodec libmp3lame -vn ./out/test.mp3
	//是否存在mp3文件
	_, err = os.Stat(inVFileName)
	if err != nil {
		if os.IsNotExist(err) {
			fmt.Println("create mp3 file")
			exec.Command("./lib/ffmpeg", "-i", "./resources/big_buck_bunny.mp4", "-acodec", "libmp3lame", "-vn", inVFileName, "-y").CombinedOutput()
		}
	}

	os.Remove(outFileName)
	f, err := os.OpenFile(outFileName, os.O_CREATE|os.O_RDWR, 0777)
	if err != nil {
		fmt.Println("open file failed,err:", err)
		return
	}

	fmtCtx := libavformat.AvformatAllocContext()
	var codecCtx *libavcodec.AVCodecContext
	pkt := libavcodec.AvPacketAlloc()
	frame := libavutil.AvFrameAlloc()

	aStreamIndex := -1

	for {
		if libavformat.AvformatOpenInput(&fmtCtx, inVFileName, nil, nil) < 0 {
			fmt.Printf("Cannot open input file.\n")
			break
		}

		if fmtCtx.AvformatFindStreamInfo(nil) < 0 {
			fmt.Printf("Cannot find stream info in input file.\n")
			break
		}

		fmtCtx.AvDumpFormat(0, inVFileName, 0)

		//查找视频流在文件中的位置
		for i := uint32(0); i < fmtCtx.NbStreams; i++ {
			if fmtCtx.GetStream(i).Codecpar.CodecType == libavutil.AVMEDIA_TYPE_AUDIO {
				aStreamIndex = int(i)
				break
			}
		}

		if aStreamIndex == -1 {
			fmt.Printf("Cannot find audio stream.\n")
			return
		}

		aCodecPara := fmtCtx.GetStream(uint32(aStreamIndex)).Codecpar
		codec := libavcodec.AvcodecFindDecoder(aCodecPara.CodecId)
		if codec == nil {
			fmt.Printf("Cannot find any codec for audio.\n")
			return
		}

		codecCtx = codec.AvcodecAllocContext3()

		if codecCtx.AvcodecParametersToContext(aCodecPara) < 0 {
			fmt.Printf("Cannot alloc codec context.\n")
			return
		}

		codecCtx.PktTimebase = fmtCtx.GetStream(uint32(aStreamIndex)).TimeBase

		if codecCtx.AvcodecOpen2(codec, nil) < 0 {
			fmt.Printf("Cannot open audio codec.\n")
			return
		}

		//设置转码参数
		out_channel_layout := codecCtx.ChannelLayout
		out_sample_fmt := libavutil.AV_SAMPLE_FMT_S16
		out_sample_rate := int32(44100) //codecCtx.SampleRate
		out_channels := libavutil.AvGetChannelLayoutNbChannels(out_channel_layout)

		audio_out_buffer := libavutil.AvMalloc(MAX_AUDIO_FRAME_SIZE * 2)

		var swr_ctx *libswresample.SwrContext
		swr_ctx = swr_ctx.SwrAllocSetOpts(int64(out_channel_layout),
			libavutil.AVSampleFormat(out_sample_fmt),
			out_sample_rate,
			int64(codecCtx.ChannelLayout),
			codecCtx.SampleFmt,
			codecCtx.SampleRate,
			0, uintptr(0))
		swr_ctx.SwrInit()

		for (fmtCtx.AvReadFrame(pkt)) >= 0 {
			if pkt.StreamIndex == uint32(aStreamIndex) {
				if codecCtx.AvcodecSendPacket(pkt) >= 0 {
					for codecCtx.AvcodecReceiveFrame(frame) >= 0 {
						/*
						   Planar(平面),其数据格式排列方式为 (特别记住,该处是以点nb_samples采样点来交错,不是以字节交错):
						   LLLLLLRRRRRRLLLLLLRRRRRRLLLLLLRRRRRRL...(每个LLLLLLRRRRRR为一个音频帧)
						   而不带P的数据格式(即交错排列)排列方式为:
						   LRLRLRLRLRLRLRLRLRLRLRLRLRLRLRLRLRLRL...(每个LR为一个音频样本)
						*/
						if libavutil.AvSampleFmtIsPlanar(codecCtx.SampleFmt) != 0 {
							len0 := swr_ctx.SwrConvert((**byte)(unsafe.Pointer(&audio_out_buffer)),
								MAX_AUDIO_FRAME_SIZE*2,
								(**byte)(unsafe.Pointer(&frame.Data)),
								frame.NbSamples)
							if len0 < 0 {
								continue
							}
							dst_bufsize := libavutil.AvSamplesGetBufferSize(nil,
								out_channels,
								len0,
								libavutil.AVSampleFormat(out_sample_fmt),
								1)

							bytes := []byte{}
							ptr := audio_out_buffer
							for i := int32(0); i < dst_bufsize; i++ {
								bytes = append(bytes, *(*byte)(unsafe.Pointer(ptr)))
								ptr++
							}
							f.Write(bytes)
						}
					}
				}
			}
			pkt.AvPacketUnref()
		}

		break
	}

	libavutil.AvFrameFree(&frame)
	libavcodec.AvPacketFree(&pkt)
	codecCtx.AvcodecClose()
	libavcodec.AvcodecFreeContext(&codecCtx)
	fmtCtx.AvformatFreeContext()
	f.Close()
	fmt.Println("-----------------------------------------")
	// ./lib/ffplay -ar 44100 -ac 2 -f s16le -i ./out/test.pcm
	_, err = exec.Command("./lib/ffplay.exe", "-ar", "44100", "-ac", "2", "-f", "s16le", "-i", "./out/test16.pcm").Output()
	if err != nil {
		fmt.Println("play err = ", err)
	}
}
4.测试和演示结果
go run ./examples/a16.audio_decode_swr_mp32pcm/main.go

5.结论
通过调用Go语言和FFmpeg库提供的接口和方法,我们可以轻松实现音频重采样解码,并将其保存为PCM格式的文件。这对于音视频应用开发和研究等领域非常有帮助。在实际工作中,我们可以根据具体需求和场景,进一步优化和扩展相关功能。

2023-04-30:用go语言重写ffmpeg的resampling_audio.c示例,它实现了音频重采样的功能。
2023-04-30:用go语言重写ffmpeg的resampling_audio.c示例,它实现了音频重采样的功能。
答案2023-04-30:
resampling_audio.c 是 FFmpeg 中的一个源文件,其主要功能是实现音频重采样。
音频重采样是指将一段音频数据从一个采样率、声道数或样本格式转换为另一种采样率、声道数或样本格式。在实际应用中,不同的设备和系统可能需要不同的音频格式,因此进行音频重采样是非常常见的操作。
resampling_audio.c 中实现了多种音频重采样算法,包括最近邻插值法、线性插值法、升采样过滤器、降采样过滤器等等。这些算法可以针对不同的输入和输出音频格式进行选择,以达到最佳效果。
使用 resampling_audio.c 可以方便地完成音频重采样操作,并在保证音质的同时提高处理效率。因此,它是 FFmpeg 中非常重要的一个模块。
代码见github/moonfdd/ffmpeg-go库。
这段代码是一个使用 FFmpeg 中的 libswresample 库进行音频重采样的示例程序。大体过程如下:
--1. 初始化输入和输出音频参数,包括声道数、采样率、样本格式等。
--3. 创建 libswresample 的上下文(SwrContext)。
--5. 通过 AvOptSetXXX 函数设置输入输出参数。
--7. 调用 SwrInit 函数初始化 resampler 上下文。
--9. 申请输入和输出音频数据缓冲区。
--11. 循环读取输入音频数据,重采样并保存为输出音频数据。每次循环中:
----a. 填充源音频数据缓冲区(即生成或从文件中读取音频数据)。
----b. 计算重采样后的目标音频数据大小。
----c. 申请足够的输出音频数据缓冲区空间。
----d. 调用 SwrConvert 函数将源音频数据转换为目标音频数据。
----e. 将重采样后的目标音频数据写入输出文件。
--13. 释放资源并退出程序。
需要注意的是,在实际使用中需要根据具体情况调整输入输出音频参数以及重采样算法等设置。
命令如下:
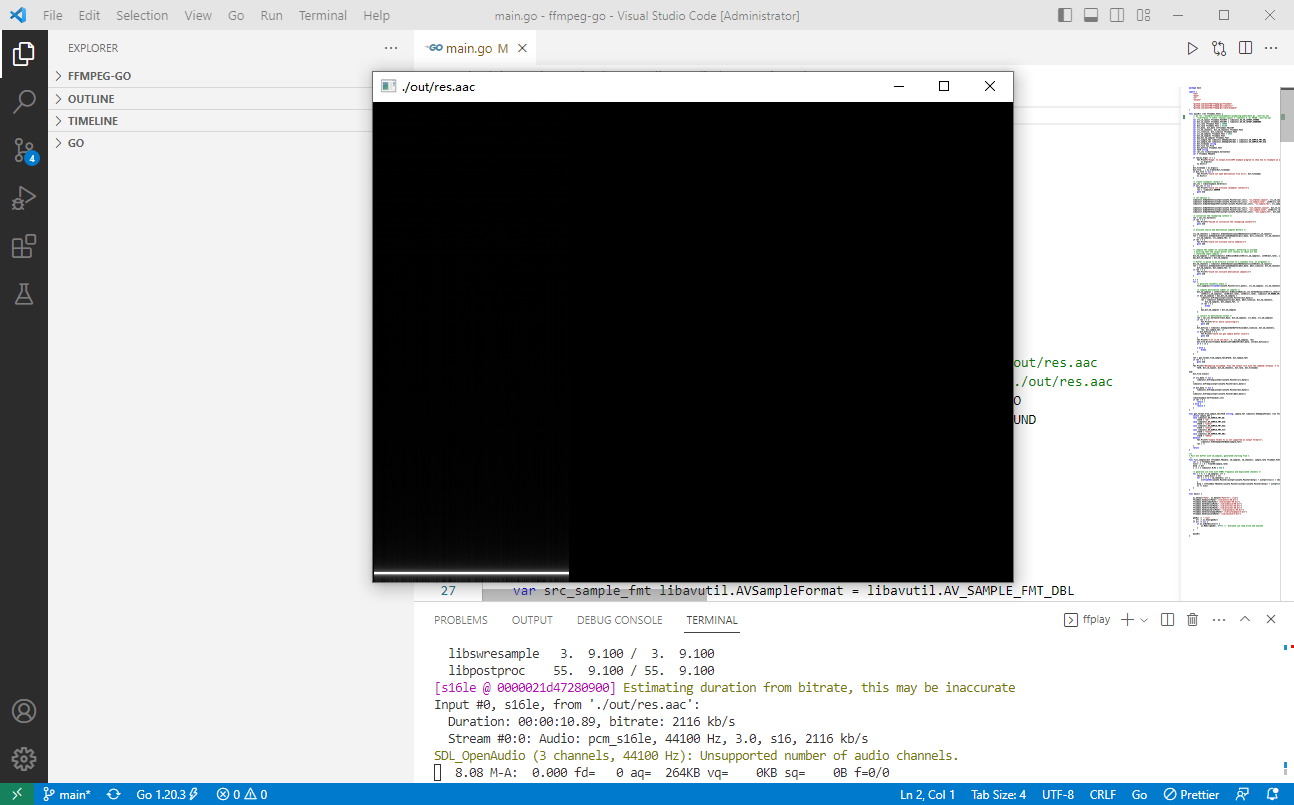
go run ./examples/internalexamples/resampling_audio/main.go ./out/res.aac

./lib/ffplay -f s16le -channel_layout 7 -channels 3 -ar 44100 ./out/res.aac
golang代码如下:
package main

import (
	"fmt"
	"math"
	"os"
	"unsafe"

	"github.com/moonfdd/ffmpeg-go/ffcommon"
	"github.com/moonfdd/ffmpeg-go/libavutil"
	"github.com/moonfdd/ffmpeg-go/libswresample"
)

func main0() (ret ffcommon.FInt) {
	var src_ch_layout ffcommon.FInt64T = libavutil.AV_CH_LAYOUT_STEREO
	var dst_ch_layout ffcommon.FInt64T = libavutil.AV_CH_LAYOUT_SURROUND
	var src_rate ffcommon.FInt = 48000
	var dst_rate ffcommon.FInt = 44100
	var src_data, dst_data **ffcommon.FUint8T
	var src_nb_channels, dst_nb_channels ffcommon.FInt
	var src_linesize, dst_linesize ffcommon.FInt
	var src_nb_samples ffcommon.FInt = 1024
	var dst_nb_samples ffcommon.FInt
	var max_dst_nb_samples ffcommon.FInt
	var src_sample_fmt libavutil.AVSampleFormat = libavutil.AV_SAMPLE_FMT_DBL
	var dst_sample_fmt libavutil.AVSampleFormat = libavutil.AV_SAMPLE_FMT_S16
	var dst_filename string
	var dst_file *os.File
	var dst_bufsize ffcommon.FInt
	var fmt0 string
	var swr_ctx *libswresample.SwrContext
	var t ffcommon.FDouble

	if len(os.Args) != 2 {
		fmt.Printf("Usage: %s output_file\nAPI example program to show how to resample an audio stream with libswresample.\nThis program generates a series of audio frames, resamples them to a specified output format and rate and saves them to an output file named output_file.\n",
			os.Args[0])
		os.Exit(1)
	}
	dst_filename = os.Args[1]
	dst_file, _ = os.Create(dst_filename)
	if dst_file == nil {
		fmt.Printf("Could not open destination file %s\n", dst_filename)
		os.Exit(1)
	}

	/* create resampler context */
	swr_ctx = libswresample.SwrAlloc()
	if swr_ctx == nil {
		fmt.Printf("Could not allocate resampler context\n")
		ret = -libavutil.ENOMEM
		goto end
	}

	/* set options */
	libavutil.AvOptSetInt(uintptr(unsafe.Pointer(swr_ctx)), "in_channel_layout", src_ch_layout, 0)
	libavutil.AvOptSetInt(uintptr(unsafe.Pointer(swr_ctx)), "in_sample_rate", int64(src_rate), 0)
	libavutil.AvOptSetSampleFmt(uintptr(unsafe.Pointer(swr_ctx)), "in_sample_fmt", src_sample_fmt, 0)

	libavutil.AvOptSetInt(uintptr(unsafe.Pointer(swr_ctx)), "out_channel_layout", dst_ch_layout, 0)
	libavutil.AvOptSetInt(uintptr(unsafe.Pointer(swr_ctx)), "out_sample_rate", int64(src_rate), 0)
	libavutil.AvOptSetSampleFmt(uintptr(unsafe.Pointer(swr_ctx)), "out_sample_fmt", dst_sample_fmt, 0)

	/* initialize the resampling context */
	ret = swr_ctx.SwrInit()
	if ret < 0 {
		fmt.Printf("Failed to initialize the resampling context\n")
		goto end
	}

	/* allocate source and destination samples buffers */

	src_nb_channels = libavutil.AvGetChannelLayoutNbChannels(uint64(src_ch_layout))
	ret = libavutil.AvSamplesAllocArrayAndSamples(&src_data, &src_linesize, src_nb_channels,
		src_nb_samples, src_sample_fmt, 0)
	if ret < 0 {
		fmt.Printf("Could not allocate source samples\n")
		goto end
	}

	/* compute the number of converted samples: buffering is avoided
	 * ensuring that the output buffer will contain at least all the
	 * converted input samples */
	dst_nb_samples = int32(libavutil.AvRescaleRnd(int64(src_nb_samples), int64(dst_rate), int64(src_rate), libavutil.AV_ROUND_UP))
	max_dst_nb_samples = dst_nb_samples

	/* buffer is going to be directly written to a rawaudio file, no alignment */
	dst_nb_channels = libavutil.AvGetChannelLayoutNbChannels(uint64(dst_ch_layout))
	ret = libavutil.AvSamplesAllocArrayAndSamples(&dst_data, &dst_linesize, dst_nb_channels,
		dst_nb_samples, dst_sample_fmt, 0)
	if ret < 0 {
		fmt.Printf("Could not allocate destination samples\n")
		goto end
	}

	t = 0
	for {
		/* generate synthetic audio */
		fill_samples((*float64)(unsafe.Pointer(*src_data)), src_nb_samples, src_nb_channels, src_rate, &t)

		/* compute destination number of samples */
		dst_nb_samples = int32(libavutil.AvRescaleRnd(swr_ctx.SwrGetDelay(int64(src_rate))+
			int64(src_nb_samples), int64(dst_rate), int64(src_rate), libavutil.AV_ROUND_UP))
		if dst_nb_samples > max_dst_nb_samples {
			libavutil.AvFreep(uintptr(unsafe.Pointer(dst_data)))
			ret = libavutil.AvSamplesAlloc(dst_data, &dst_linesize, dst_nb_channels,
				dst_nb_samples, dst_sample_fmt, 1)
			if ret < 0 {
				break
			}
			max_dst_nb_samples = dst_nb_samples
		}

		/* convert to destination format */
		ret = swr_ctx.SwrConvert(dst_data, dst_nb_samples, src_data, src_nb_samples)
		if ret < 0 {
			fmt.Printf("Error while converting\n")
			goto end
		}
		dst_bufsize = libavutil.AvSamplesGetBufferSize(&dst_linesize, dst_nb_channels,
			ret, dst_sample_fmt, 1)
		if dst_bufsize < 0 {
			fmt.Printf("Could not get sample buffer size\n")
			goto end
		}
		fmt.Printf("t:%f in:%d out:%d\n", t, src_nb_samples, ret)
		dst_file.Write(ffcommon.ByteSliceFromByteP(*dst_data, int(dst_bufsize)))
		if t < 10 {

		} else {
			break
		}
	}

	ret = get_format_from_sample_fmt(&fmt0, dst_sample_fmt)
	if ret < 0 {
		goto end
	}
	fmt.Printf("Resampling succeeded. Play the output file with the command:\nffplay -f %s -channel_layout %d -channels %d -ar %d %s\n",
		fmt0, dst_ch_layout, dst_nb_channels, dst_rate, dst_filename)

end:
	dst_file.Close()

	if src_data != nil {
		libavutil.AvFreep(uintptr(unsafe.Pointer(src_data)))
	}
	libavutil.AvFreep(uintptr(unsafe.Pointer(&src_data)))

	if dst_data != nil {
		libavutil.AvFreep(uintptr(unsafe.Pointer(dst_data)))
	}
	libavutil.AvFreep(uintptr(unsafe.Pointer(&dst_data)))

	libswresample.SwrFree(&swr_ctx)
	if ret < 0 {
		return 1
	} else {
		return 0
	}
}

func get_format_from_sample_fmt(fmt0 *string, sample_fmt libavutil.AVSampleFormat) (ret ffcommon.FInt) {
	switch sample_fmt {
	case libavutil.AV_SAMPLE_FMT_U8:
		*fmt0 = "u8"
	case libavutil.AV_SAMPLE_FMT_S16:
		*fmt0 = "s16le"
	case libavutil.AV_SAMPLE_FMT_S32:
		*fmt0 = "s32le"
	case libavutil.AV_SAMPLE_FMT_FLT:
		*fmt0 = "f32le"
	case libavutil.AV_SAMPLE_FMT_DBL:
		*fmt0 = "f64le"
	default:
		fmt.Printf("sample format %s is not supported as output format\n",
			libavutil.AvGetSampleFmtName(sample_fmt))
		ret = -1
	}
	return
}

/**
* Fill dst buffer with nb_samples, generated starting from t.
 */
func fill_samples(dst *ffcommon.FDouble, nb_samples, nb_channels, sample_rate ffcommon.FInt, t *ffcommon.FDouble) {
	var i, j ffcommon.FInt
	tincr := 1.0 / float64(sample_rate)
	dstp := dst
	c := 2 * libavutil.M_PI * 440.0

	/* generate sin tone with 440Hz frequency and duplicated channels */
	for i = 0; i < nb_samples; i++ {
		*dstp = math.Sin(c * *t)
		for j = 1; j < nb_channels; j++ {
			*(*float64)(unsafe.Pointer(uintptr(unsafe.Pointer(dstp)) + uintptr(8*j))) = *dstp
		}
		dstp = (*ffcommon.FDouble)(unsafe.Pointer(uintptr(unsafe.Pointer(dstp)) + uintptr(8*nb_channels)))
		*t += tincr
	}
}

func main() {

	os.Setenv("Path", os.Getenv("Path")+";./lib")
	ffcommon.SetAvutilPath("./lib/avutil-56.dll")
	ffcommon.SetAvcodecPath("./lib/avcodec-58.dll")
	ffcommon.SetAvdevicePath("./lib/avdevice-58.dll")
	ffcommon.SetAvfilterPath("./lib/avfilter-56.dll")
	ffcommon.SetAvformatPath("./lib/avformat-58.dll")
	ffcommon.SetAvpostprocPath("./lib/postproc-55.dll")
	ffcommon.SetAvswresamplePath("./lib/swresample-3.dll")
	ffcommon.SetAvswscalePath("./lib/swscale-5.dll")

	genDir := "./out"
	_, err := os.Stat(genDir)
	if err != nil {
		if os.IsNotExist(err) {
			os.Mkdir(genDir, 0777) //  Everyone can read write and execute
		}
	}

	main0()
}
:编译 ffmpeg")
Android 中集成 ffmpeg (一):编译 ffmpeg
- 方案选择
Android 中集成 ffmpeg 的 codec 功能无非两种方式:
-
- JNI 直接调用,主要用于 App 开发(无权限修改系统底层),如 EXOPlayer,JPlayer 等。
- 集成 ffmpeg 到 OMX,即封装 ffmpeg 为 OMX 的 plugin,然后实现 component 接口。
考虑到性能问题,我选取的方案二即集成 ffmpeg 到 OMX。首先第一个问题就是 ffmpeg 的编译。也有两种方式:
-
- 集成 ffmpeg 源码到整个 Android 系统工程,独立写 bp 或 mk 进行编译。(由于 ffmpeg 配置复杂,参考网上的一些现成 mk 进行修改发现工作量比较巨大)
- 独立 NDK 编译 ffmpeg 成动态库或静态库,然后通过 prebuild 的方式集成。(由于 OMX 的 plugin 是直接动态加载动态库,无编译上的依赖,此种方法编译跟普通的 ffmpeg 编译类似,故推荐该方法)
- FFmpeg 配置
32bit 编译配置:


 1 #!/bin/bash
 2
 3 chmod 777 ./configure
 4 #chmod 777 ./version.sh
 5 NDK=/your_ndk_path/android-ndk-r16b
 6 SYSROOT=$NDK/platforms/android-27/arch-arm
 7 TOOLCHAIN=$NDK/toolchains/arm-linux-androideabi-4.9/prebuilt/linux-x86_64
 8 CROSS=$TOOLCHAIN/bin/arm-linux-androideabi-
 9
10 ISYSROOT=$NDK/sysroot
11 ASM=$ISYSROOT/usr/include/arm-linux-androideabi
12 CC=$TOOLCHAIN/bin/arm-linux-androideabi-gcc
13 NM=$TOOLCHAIN/bin/arm-linux-androideabi-nm
14
15 CPU=arm
16 PREFIX=./android/$CPU
17 ADDI_CFLAGS="-marm"
18
19 function build_one
20 {
21 ./configure \
22 --prefix=$PREFIX \
23 --target-os=linux \
24 --arch=$CPU \
25 --enable-cross-compile \
26 --incdir=$NDK/sysroot/usr/include \
27 --sysroot=$SYSROOT \
28 --cross-prefix=$CROSS \
29 --cc=$CC \
30 --nm=$NM \
31 --extra-cflags="-I$ASM -isysroot $ISYSROOT -Os -fpic $ADDI_CFLAGS" \
32 --enable-shared \
33 --enable-static \
34 --disable-asm \
35 --enable-pic \
36 --disable-doc \
37 --disable-ffmpeg \
38 --disable-ffplay \
39 --disable-ffprobe \
40 --disable-ffserver \
41 --disable-avdevice \
42 --disable-doc \
43 --disable-symver \
44 --disable-debug \
45 --disable-encoders \
46 --disable-muxers \
47 --enable-avresample \
48 --disable-pthreads \
49 --enable-swresample
50 make
51 make install
52 }
53
54 rm -rf $PREFIX
55 make distclean
56 build_one
说明:
1. --disable-asm 选项是因为在 ffmpeg-2.0 的版本编译出版本运行时出现错误:libavcodec.so: has text relocation。 但是在用 ffmpeg-3.3 版本时没有出现。也有文章说跟 NDK 版本也有关系。
可以通过命令检查:readelf -a aarch64/lib/libavcodec.so |grep TEXTREL
2. 在高版本的 ffmpeg(如 3.3.8)中,可以直接指定 --target-os=android ,否则就需要修改 configure 文件让输出的动态库不带版本号,修改 SLIBNAME_WITH_VERSION 等选项为:
SLIBNAME=''$(SLIBPREF)$(FULLNAME)$(SLIBSUF)''
SLIBNAME_WITH_VERSION=''$(SLIBNAME).$(LIBVERSION)''
SLIBNAME_WITH_MAJOR=''$(SLIBNAME).$(LIBMAJOR)''
LIB_INSTALL_EXTRA_CMD=''$$(RANLIB) "$(LIBDIR)/$(LIBNAME)"''
SLIB_INSTALL_NAME=''$(SLIBNAME_WITH_VERSION)''
SLIB_INSTALL_LINKS=''$(SLIBNAME_WITH_MAJOR) $(SLIBNAME)''
3. ffmpeg 增加动态库导出函数,只需要修改源码所在目录的.v 文件,如在 libavformat/libavformat.v 中增加导出 ffurl_register_protocol 方法供外部代码链接。
64bit 编译配置:


 1 #!/bin/bash
 2
 3 chmod 777 ./configure
 4 #chmod 777 ./version.sh
 5 NDK=/disk2/wuxingde/android-ndk-r16b
 6 SYSROOT=$NDK/platforms/android-27/arch-arm64
 7 TOOLCHAIN=$NDK/toolchains/aarch64-linux-android-4.9/prebuilt/linux-x86_64
 8
 9 ISYSROOT=$NDK/sysroot
10 ASM=$ISYSROOT/usr/include/aarch64-linux-android
11 CC=$TOOLCHAIN/bin/aarch64-linux-android-gcc
12 NM=$TOOLCHAIN/bin/aarch64-linux-android-nm
13
14 CPU=aarch64
15 PREFIX=$(pwd)/android/$CPU
16 #ADDI_CFLAGS="-marm"
17
18 function build_one
19 {
20 ./configure \
21 --prefix=$PREFIX \
22 --target-os=linux \
23 --arch=$CPU \
24 --enable-cross-compile \
25 --incdir=$NDK/sysroot/usr/include \
26 --sysroot=$SYSROOT \
27 --cross-prefix=$TOOLCHAIN/bin/aarch64-linux-android- \
28 --cc=$CC \
29 --nm=$NM \
30 --extra-cflags="-I$ASM -isysroot $ISYSROOT -Os -fpic" \
31 --enable-shared \
32 --enable-static \
33 --enable-asm \
34 --enable-pic \
35 --disable-doc \
36 --disable-ffmpeg \
37 --disable-ffplay \
38 --disable-ffprobe \
39 --disable-ffserver \
40 --disable-avdevice \
41 --disable-doc \
42 --disable-symver \
43 --disable-debug \
44 --disable-encoders \
45 --disable-muxers \
46 --enable-avresample \
47 --disable-pthreads \
48 --enable-swresample
49 make
50 make install
51 }
52
53 rm -rf $PREFIX
54 make distclean
55 build_one
- PREBUID
如果只用 64bit 版本可以直接使用下面 Android.mk 一次性编译:


LOCAL_PATH := $(call my-dir)
include $(CLEAR_VARS)
LOCAL_PREBUILT_LIBS := \
        lib/libavcodec.so \
        lib/libavformat.so \
        lib/libavutil.so \
        lib/libavfilter.so \
        lib/libswresample.so \
        lib/libavresample.so \
        lib/libswscale.so

include $(BUILD_MULTI_PREBUILT)如果同时需要 32bit 和 64bit 版本需要使用下面 Android.mk 分别编译各个库:


 1 LOCAL_PATH := $(call my-dir)
 2 include $(CLEAR_VARS)
 3
 4 LOCAL_SRC_FILES_32 := \
 5         arm/lib/libavcodec.so
 6 LOCAL_SRC_FILES_64 := \
 7         aarch64/lib/libavcodec.so
 8 LOCAL_MODULE := libavcodec
 9 LOCAL_MODULE_SUFFIX := .so
10 LOCAL_MODULE_CLASS := SHARED_LIBRARIES
11 #LOCAL_MODULE_TARGET_ARCH := arm
12 LOCAL_MULTILIB := both
13 include $(BUILD_PREBUILT)
14
15 include $(CLEAR_VARS)
16 LOCAL_SRC_FILES_32 := \
17         arm/lib/libavformat.so
18 LOCAL_SRC_FILES_64 := \
19         aarch64/lib/libavformat.so
20 LOCAL_MODULE := libavformat
21 LOCAL_MODULE_SUFFIX := .so
22 LOCAL_MODULE_CLASS := SHARED_LIBRARIES
23 #LOCAL_MODULE_TARGET_ARCH := arm
24 LOCAL_MULTILIB := both
25 include $(BUILD_PREBUILT)
26
27 include $(CLEAR_VARS)
28 LOCAL_SRC_FILES_32 := \
29         arm/lib/libavutil.so
30 LOCAL_SRC_FILES_64 := \
31         aarch64/lib/libavutil.so
32 LOCAL_MODULE := libavutil
33 LOCAL_MODULE_SUFFIX := .so
34 LOCAL_MODULE_CLASS := SHARED_LIBRARIES
35 #LOCAL_MODULE_TARGET_ARCH := arm
36 LOCAL_MULTILIB := both
37 include $(BUILD_PREBUILT)
38
39 include $(CLEAR_VARS)
40 LOCAL_SRC_FILES_32 := \
41         arm/lib/libavresample.so
42 LOCAL_SRC_FILES_64 := \
43         aarch64/lib/libavresample.so
44 LOCAL_MODULE := libavresample
45 LOCAL_MODULE_SUFFIX := .so
46 LOCAL_MODULE_CLASS := SHARED_LIBRARIES
47 #LOCAL_MODULE_TARGET_ARCH := arm
48 LOCAL_MULTILIB := both
49 include $(BUILD_PREBUILT)
50
51 include $(CLEAR_VARS)
52 LOCAL_SRC_FILES_32 := \
53         arm/lib/libavfilter.so
54 LOCAL_SRC_FILES_64 := \
55         aarch64/lib/libavfilter.so
56 LOCAL_MODULE := libavfilter
57 LOCAL_MODULE_SUFFIX := .so
58 LOCAL_MODULE_CLASS := SHARED_LIBRARIES
59 #LOCAL_MODULE_TARGET_ARCH := arm
60 LOCAL_MULTILIB := both
61 include $(BUILD_PREBUILT)
62
63 include $(CLEAR_VARS)
64 LOCAL_SRC_FILES_32 := \
65         arm/lib/libswresample.so
66 LOCAL_SRC_FILES_64 := \
67         aarch64/lib/libswresample.so
68 LOCAL_MODULE := libswresample
69 LOCAL_MODULE_SUFFIX := .so
70 LOCAL_MODULE_CLASS := SHARED_LIBRARIES
71 #LOCAL_MODULE_TARGET_ARCH := arm
72 LOCAL_MULTILIB := both
73 include $(BUILD_PREBUILT)
74
75 include $(CLEAR_VARS)
76 LOCAL_SRC_FILES_32 := \
77         arm/lib/libswscale.so
78 LOCAL_SRC_FILES_64 := \
79         aarch64/lib/libswscale.so
80 LOCAL_MODULE := libswscale
81 LOCAL_MODULE_SUFFIX := .so
82 LOCAL_MODULE_CLASS := SHARED_LIBRARIES
83 #LOCAL_MODULE_TARGET_ARCH := arm
84 LOCAL_MULTILIB := both
85 include $(BUILD_PREBUILT)
编译部分就到此结束,这部分由于 Android NDK 版本(我用的是 android-ndk-r16b)和 ffmpeg 版本不同,网上很多教程都没法用,花费了很多时间。特别要注意 ffmpeg 中 --extra-cflags = 配置,不要随意加额外一些定义,可能会导致链接不上的问题。
--编译ffmpeg")
Android使用FFmpeg(一)--编译ffmpeg
关于
Android使用FFmpeg(一)--编译ffmpeg
Android使用FFmpeg(二)--Android Studio配置ffmpeg
Android使用FFmpeg(三)--ffmpeg实现视频播放
Android使用FFmpeg(四)--ffmpeg实现音频播放(使用AudioTrack进行播放)
Android使用FFmpeg(五)--ffmpeg实现音频播放(使用openSL ES进行播放)
Android使用FFmpeg(六)--ffmpeg实现音视频同步播放
Android使用FFmpeg(七)--ffmpeg实现暂停、快退快进播放
前言
ffmpeg简介
在现今这个阶段,越来越多的app会涉及到音视频,那么学会使用ffmpeg就很有必要了。在这个系类中将讲解如何把ffmpeg编译成动态库,以及使用ffmpeg实现音视频播放和音视频的采集。
编译环境
Linux/Ubuntu/centos都行
在windows环境下可以安装虚拟机或者购买一个云主机,作者在金山云购买的一个Ubuntu主机。
准备工作
下载配置ndk,下载ffmpeg并解压。
开始
配置ndk
如果你已经配置ok,请跳过这一步。
我们打开自己的虚拟机或者云服务器并且获取到root权限。创建文件夹ndk_build并进入到文件夹中,下载ndk,并解压
mkdir ndk_build//新建文件夹
cd ndk_build//进入到文件夹
wget +linux版本的下载链接地址//下载ndk
unzip + 压缩文件//解压
配置ndk
vim ~/.bashrc//进入环境变量配置
export NDKROOT=/home/ndk_build/android-ndk-r14b//配置你的安装路径
export PATH=$NDKROOT:$PATH//配置路径
:wq!//保存退出
source ~/.bashrc//执行环境变量
ndk-build//查看是否安装成功,只要不是显示ndk-build not found,则表示安装成功
下载编译ffmpeg
下载ffmpeg并解压
下载ffmpeg并解压.png
wget http://ffmpeg.org/releases/ffmpeg-2.6.9.tar.gz
tar -xzf  ffmpeg-2.6.9.tar.gz
修改configure文件并新建android_build.sh文件,编辑android_build.sh
#!/bin/bash
make clean
export NDK=/home/ndk_build/android-ndk-r14b
export SYSROOT=$NDK/platforms/android-9/arch-arm/
export TOOLCHAIN=$NDK/toolchains/arm-linux-androideabi-4.9/prebuilt/linux-x86_64
export CPU=arm
export PREFIX=$(pwd)/android/$CPU
export ADDI_CFLAGS="-marm"
./configure --target-os=linux \
--prefix=$PREFIX --arch=arm \
--disable-doc \
--enable-shared \
--disable-static \
--disable-yasm \
--disable-symver \
--enable-gpl \
--disable-ffmpeg \
--disable-ffplay \
--disable-ffprobe \
--disable-ffserver \
--disable-doc \
--disable-symver \
--cross-prefix=$TOOLCHAIN/bin/arm-linux-androideabi- \
--enable-cross-compile \
--sysroot=$SYSROOT \
--extra-cflags="-Os -fpic $ADDI_CFLAGS" \
--extra-ldflags="$ADDI_LDFLAGS" \
$ADDITIONAL_CONFIGURE_FLAG
make clean
make
make install
其中NDK是你自己刚刚配置的ndk路径,SYSROOT为platforms中的路径,TOOLCHAIN为toolchains里面中的路径,依次配置好过后保存并退出。
修改configure,如果你不修改的话,编译出来过后的.so文件后面会有一串数字,无法使用,所以得修改他的命名规则。
将该文件中的如下四行:
SLIBNAME_WITH_MAJOR=''$(SLIBNAME).$(LIBMAJOR)''
LIB_INSTALL_EXTRA_CMD=''$$(RANLIB)"$(LIBDIR)/$(LIBNAME)"''
SLIB_INSTALL_NAME=''$(SLIBNAME_WITH_VERSION)''
SLIB_INSTALL_LINKS=''$(SLIBNAME_WITH_MAJOR)$(SLIBNAME)''
替换为:
SLIBNAME_WITH_MAJOR=''$(SLIBPREF)$(FULLNAME)-$(LIBMAJOR)$(SLIBSUF)''
LIB_INSTALL_EXTRA_CMD=''$$(RANLIB)"$(LIBDIR)/$(LIBNAME)"''
SLIB_INSTALL_NAME=''$(SLIBNAME_WITH_MAJOR)''
SLIB_INSTALL_LINKS=''$(SLIBNAME)''
编译.sh文件
···
./android_build.sh
···
当编译成功过后会在文件夹中出现android文件夹,

在lib文件夹中就有你需要的.so文件了

这样就差不多编译完成,如果你需要编译一份别人已经编译过的ffmpeg,那么请先执行./confifure --disable-yasm,然后再自己编译。
如果还没编译好但是急需的朋友可以直接下载使用。
so下载地址
关于FFmpeg(五) 重采样相关函数理解和ffmpeg 音频重采样的问题我们已经讲解完毕,感谢您的阅读,如果还想了解更多关于2023-03-17:使用Go语言和FFmpeg库实现音频重采样解码,并将其保存为PCM格式的文件。、2023-04-30:用go语言重写ffmpeg的resampling_audio.c示例,它实现了音频重采样的功能。、Android 中集成 ffmpeg (一):编译 ffmpeg、Android使用FFmpeg(一)--编译ffmpeg等相关内容,可以在本站寻找。
本文标签:


![[转帖]Ubuntu 安装 Wine方法(ubuntu如何安装wine)](https://www.gvkun.com/zb_users/cache/thumbs/4c83df0e2303284d68480d1b1378581d-180-120-1.jpg)

