在这篇文章中,我们将带领您了解Xamarin.Forms的相对布局RelativeLayout的全貌,包括xamarin.forms布局的相关情况。同时,我们还将为您介绍有关androidLinear
在这篇文章中,我们将带领您了解Xamarin.Forms的相对布局RelativeLayout的全貌,包括xamarin.forms 布局的相关情况。同时,我们还将为您介绍有关android LinearLayout和RelativeLayout实现精确布局、Android LinearLayout,RelativeLayout 相对,绝对布局的 100% 适配、Android RelativeLayout 相对布局、Android RelativeLayout相对布局属性简析的知识,以帮助您更好地理解这个主题。
本文目录一览:- Xamarin.Forms的相对布局RelativeLayout(xamarin.forms 布局)
- android LinearLayout和RelativeLayout实现精确布局
- Android LinearLayout,RelativeLayout 相对,绝对布局的 100% 适配
- Android RelativeLayout 相对布局
- Android RelativeLayout相对布局属性简析
")
Xamarin.Forms的相对布局RelativeLayout(xamarin.forms 布局)
Xamarin.Forms的相对布局RelativeLayout
相对布局RelativeLayout是App中常用的布局方式。它是以界面中的某个元素为基准,设置另外一个元素的位置和大小。通过这种布局方式可以实现动态布局,使得设计的界面可以在不同分辨率的屏幕中有更好的显示效果。
Xamarin.Forms也提供了RelativeLayout。该布局为子元素附加了一系列的属性。这些属性的值为约束表达式。约束表达式定义了基准元素类型、基准元素的相对属性、比例因子、偏移值和与基准元素名称。使用约束表达式,开发者可以以父容器或兄弟控件为基准,设置当前元素的位置和大小。

android LinearLayout和RelativeLayout实现精确布局
先明确几个概念的区别:padding margin:都是边距的含义,关键问题得明白是什么相对什么的边距
padding:是控件的内容相对控件的边缘的边距.
margin :是控件边缘相对父空间的边距

android:gravity是对该view 内容的限定.
比如一个button 上面的text. 你可以设置该text 在view的靠左,靠右等位置.该属性就干了这个.
android:layout_gravity 是用来设置该view中的子view相对于父view的位置.
比如一个button 在linearlayout里,你想把该button放在靠左,靠右等位置就可以在linearlayout中通过该属性设置
XML 布局文件
<?xml version="1.0" encoding="utf-8"?>
<LinearLayout xmlns:android="http://schemas.android.com/apk/res/android"
	android:orientation="horizontal"
	android:layout_width="fill_parent"
	android:layout_height="wrap_content"
	android:gravity="center_vertical">

	<ImageView android:id="@+id/ivLogo"
		android:layout_width="50dp"
		android:layout_height="50dp"
		android:src="@drawable/icon"
		android:paddingLeft="5dp" />

	<RelativeLayout android:id="@+id/rl_name"
		android:layout_width="wrap_content"
		android:layout_height="wrap_content"
		android:gravity="right"
		android:padding="10dp">

		<TextView android:id="@+id/tvApplicationName"
			android:layout_width="wrap_content"
			android:layout_height="wrap_content"
			android:textSize="16dp" />
	</RelativeLayout>

	<RelativeLayout android:id="@+id/rl_score"
		android:layout_width="fill_parent"
		android:layout_height="wrap_content"
		android:gravity="right"
		android:padding="10dp">

		<TextView android:id="@+id/tvRating"
		android:layout_width="wrap_content"
			android:layout_height="wrap_content"
			android:text="5.0" />

		<RatingBar android:id="@+id/ratingbar"
			android:layout_width="wrap_content"
			android:layout_height="wrap_content"
			android:numStars="5"android:layout_below="@id/tvRating" />
	</RelativeLayout>

</LinearLayout>
上面布局文件的效果图

上面的布局文件是一个ListView中的list_item布局,在一个ListView中显示所有的APK资源,每个资源项显示图标,名称及评分。
在listItem的最外层LinearLayout中加android:gravity="center_vertical",设定内容垂直居中显示。
在id为rl_score的RelativeLayout中设定android:layout_width="fill_parent"来填充剩余空间;
android:gravity="right"设定内容相对于rl_score右对齐;
android:padding="10dp"设定RelativeLayout中的内容相对RelativeLayout的边缘的边距为10dp。
这个布局虽然简单,但却是经常用到的。
文章出处:http://blog.csdn.net/sunboy_2050/article/details/6723473

Android LinearLayout,RelativeLayout 相对,绝对布局的 100% 适配
1). 我们先自定义一个类来继承 RelativeLayout,其中最主要是实现 onMeasure()方法和 onLayout()方法!通过 generateLayoutParams()来获取下面的 attr.xml 中的属性比例值,
然后再在 onMeasure () 方法中 ViewGroup.LayoutParams params = child.getLayoutParams (); 来获取占空比!从而达到子控件是主控件的多少比例大小!
  1 package watch.devond.okhttp;
  2
  3 import android.content.Context;
  4 import android.content.res.TypedArray;
  5 import android.util.AttributeSet;
  6 import android.view.View;
  7 import android.view.ViewGroup;
  8 import android.widget.RelativeLayout;
  9
 10 public class PercentRelativeLayout extends RelativeLayout {
 11
 12     public PercentRelativeLayout(Context context) {
 13         super(context);
 14     }
 15
 16     public PercentRelativeLayout(Context context, AttributeSet attrs) {
 17         super(context, attrs);
 18     }
 19
 20     public PercentRelativeLayout(Context context, AttributeSet attrs, int defStyleAttr) {
 21         super(context, attrs, defStyleAttr);
 22     }
 23
 24     /***
 25      * 测量容器的宽高
 26      * @param widthMeasureSpec
 27      * @param heightMeasureSpec
 28      */
 29     @Override
 30     protected void onMeasure(int widthMeasureSpec, int heightMeasureSpec) {
 31         int width = View.MeasureSpec.getSize(widthMeasureSpec);
 32         int height = View.MeasureSpec.getSize(heightMeasureSpec);
 33         //测量子控件的宽高,然后进行改变
 34
 35         int childCount = getChildCount();
 36         for(int i = 0;i < childCount;i++){
 37
 38             float widthPercent = 0;
 39             float heightPercent = 0;
 40
 41             View child = getChildAt(i);
 42             ViewGroup.LayoutParams params = child.getLayoutParams();
 43             if(params instanceof PercentRelativeLayout.LayoutParams){
 44                 widthPercent = ((LayoutParams) params).getWidthPercent();
 45                 heightPercent = ((LayoutParams) params).getHeihtPercent();
 46             }
 47             if(widthPercent != 0){
 48                 params.width = (int) (width * widthPercent);
 49
 50                 params.height = (int) (height * heightPercent);
 51
 52             }
 53         }
 54         super.onMeasure(widthMeasureSpec, heightMeasureSpec);
 55     }
 56
 57     /***
 58      * 排版摆放控件
 59      * @param changed
 60      * @param l
 61      * @param t
 62      * @param r
 63      * @param b
 64      */
 65     @Override
 66     protected void onLayout(boolean changed, int l, int t, int r, int b) {
 67         super.onLayout(changed, l, t, r, b);
 68
 69     }
 70
 71     /**
 72      * @param attrs
 73      * @return
 74      */
 75     @Override
 76     public RelativeLayout.LayoutParams generateLayoutParams(AttributeSet attrs) {
 77
 78         return new LayoutParams(getContext(),attrs);
 79     }
 80
 81     class LayoutParams extends RelativeLayout.LayoutParams {
 82
 83         private float widthPercent;
 84         private float heihtPercent;
 85
 86         public float getWidthPercent() {
 87             return widthPercent;
 88         }
 89
 90         public void setWidthPercent(float widthPercent) {
 91             this.widthPercent = widthPercent;
 92         }
 93
 94         public float getHeihtPercent() {
 95             return heihtPercent;
 96         }
 97
 98         public void setHeihtPercent(float heihtPercent) {
 99             this.heihtPercent = heihtPercent;
100         }
101
102         public LayoutParams(Context c, AttributeSet attrs) {
103             super(c, attrs);
104             TypedArray array = c.obtainStyledAttributes(attrs,R.styleable.PercentRelativeLayout);
105             widthPercent = array.getFloat(R.styleable.PercentRelativeLayout_layout_widthPercent,widthPercent);
106             heihtPercent = array.getFloat(R.styleable.PercentRelativeLayout_layout_heihtPercent,heihtPercent);
107             array.recycle();
108         }
109
110         public LayoutParams(int w, int h) {
111             super(w, h);
112         }
113
114         public LayoutParams(ViewGroup.LayoutParams source) {
115             super(source);
116         }
117
118         public LayoutParams(MarginLayoutParams source) {
119             super(source);
120         }
121
122     }
123 }
2) 在 res 文件的 value 文件中创建 attr.xml 文件如下:
<?xml version="1.0" encoding="utf-8"?>
<resources>
<!--百分比RelativeLayout-->
<declare-styleable name="PercentRelativeLayout">
<attr name="layout_widthPercent" format="float"> </attr>
<attr name="layout_heihtPercent" format="float"> </attr>
</declare-styleable>
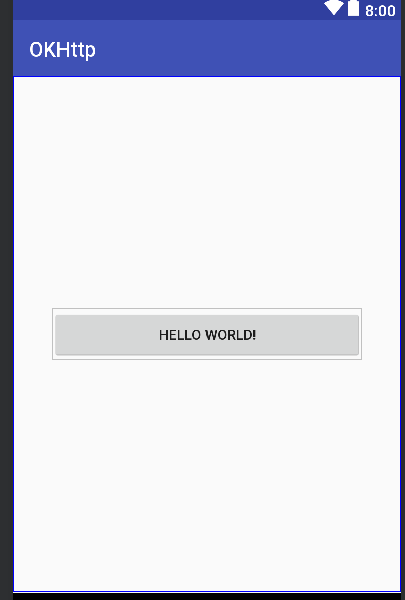
</resources>3)主界面的 xml
 1 <?xml version="1.0" encoding="utf-8"?>
 2 <watch.devond.okhttp.PercentRelativeLayout xmlns:android="http://schemas.android.com/apk/res/android"
 3     xmlns:tools="http://schemas.android.com/tools"
 4     android:layout_width="match_parent"
 5     android:layout_height="match_parent"
 6     xmlns:app="http://schemas.android.com/apk/res-auto"
 7     android:gravity="center"
 8     tools:ignore="ResAuto">
 9
10     <Button
11         android:layout_width="wrap_content"
12         android:layout_height="wrap_content"
13         android:text="Hello World!"
14         app:layout_widthPercent ="0.8"
15         app:layout_heihtPercent ="0.1"
16         />
17
18
19 </watch.devond.okhttp.PercentRelativeLayout>

Android RelativeLayout 相对布局
<?xml version="1.0" encoding="utf-8"?>
<RelativeLayout xmlns:android="http://schemas.android.com/apk/res/android"
    xmlns:app="http://schemas.android.com/apk/res-auto"
    xmlns:tools="http://schemas.android.com/tools"
    android:layout_width="match_parent"
    android:layout_height="match_parent"
    tools:context=".MainActivity"
    android:orientation="vertical">

    <TextView
        android:id="@+id/one"
        android:layout_centerInParent="true"
        android:layout_width="120dp"
        android:layout_height="120dp"
        android:background="#4593Ec"
        android:gravity="center"
        android:text="1"
        android:textColor="@color/white"
        android:textSize="40sp"/>

    <TextView
        android:id="@+id/two"
        android:layout_alignParentBottom="true"
        android:layout_width="120dp"
        android:layout_height="120dp"
        android:background="#7DB145"
        android:gravity="center"
        android:text="2"
        android:textColor="@color/white"
        android:textSize="25sp"/>

    <TextView
        android:id="@+id/three"
        android:layout_alignParentRight="true"
        android:layout_width="120dp"
        android:layout_height="120dp"
        android:background="#F10000"
        android:gravity="center"
        android:text="3"
        android:textColor="@color/white"
        android:textSize="25sp"/>

</RelativeLayout>


Android RelativeLayout相对布局属性简析
RelativeLayout用到的一些重要的属性:第一类:属性值为true或false
android:layout_centerHrizontal 水平居中
android:layout_centerVertical 垂直居中
android:layout_centerInparent 相对于父元素完全居中
android:layout_alignParentBottom 贴紧父元素的下边缘
android:layout_alignParentLeft 贴紧父元素的左边缘
android:layout_alignParentRight 贴紧父元素的右边缘
android:layout_alignParentTop 贴紧父元素的上边缘
android:layout_alignWithParentIfMissing 如果对应的兄弟元素找不到的话就以父元素做参照物
第二类:属性值必须为id的引用名“@id/id-name”
android:layout_below 在某元素的下方
android:layout_above 在某元素的的上方
android:layout_toLeftOf 在某元素的左边
android:layout_toRightOf 在某元素的右边
android:layout_alignTop 本元素的上边缘和某元素的的上边缘对齐
android:layout_alignLeft 本元素的左边缘和某元素的的左边缘对齐
android:layout_alignBottom 本元素的下边缘和某元素的的下边缘对齐
android:layout_alignRight 本元素的右边缘和某元素的的右边缘对齐
第三类:属性值为具体的像素值,如30dip,40px
android:layout_marginBottom 离某元素底边缘的距离
android:layout_marginLeft 离某元素左边缘的距离
android:layout_marginRight 离某元素右边缘的距离
android:layout_marginTop 离某元素上边缘的距离
EditText的android:hint
设置EditText为空时输入框内的提示信息
android:gravity
android:gravity属性是对该view 内容的限定.比如一个button 上面的text. 你可以设置该text 在view的靠左,靠右等位置.以button为例,android:gravity="right"则button上面的文字靠右
android:layout_gravity
android:layout_gravity是用来设置该view相对与起父view 的位置.比如一个button 在linearlayout里,你想把该button放在靠左、靠右等位置就可以通过该属性设置.以button为例,android:layout_gravity="right"则button靠右
android:layout_alignParentRight
使当前控件的右端和父控件的右端对齐。这里属性值只能为true或false,默认false。
android:scaleType:
android:scaleType是控制图片如何resized/moved来匹对ImageView的size。ImageView.ScaleType / android:scaleType值的意义区别:
CENTER /center 按图片的原来size居中显示,当图片长/宽超过View的长/宽,则截取图片的居中部分显示
CENTER_CROP / centerCrop 按比例扩大图片的size居中显示,使得图片长(宽)等于或大于View的长(宽)
CENTER_INSIDE / centerInside 将图片的内容完整居中显示,通过按比例缩小或原来的size使得图片长/宽等于或小于View的长/宽
FIT_CENTER / fitCenter 把图片按比例扩大/缩小到View的宽度,居中显示
FIT_END / fitEnd 把图片按比例扩大/缩小到View的宽度,显示在View的下部分位置
FIT_START / fitStart 把图片按比例扩大/缩小到View的宽度,显示在View的上部分位置
FIT_XY / fitXY 把图片不按比例扩大/缩小到View的大小显示
MATRIX / matrix 用矩阵来绘制,动态缩小放大图片来显示。
** 要注意一点,Drawable文件夹里面的图片命名是不能大写的。
关于Xamarin.Forms的相对布局RelativeLayout和xamarin.forms 布局的介绍已经告一段落,感谢您的耐心阅读,如果想了解更多关于android LinearLayout和RelativeLayout实现精确布局、Android LinearLayout,RelativeLayout 相对,绝对布局的 100% 适配、Android RelativeLayout 相对布局、Android RelativeLayout相对布局属性简析的相关信息,请在本站寻找。
本文标签:


![[转帖]Ubuntu 安装 Wine方法(ubuntu如何安装wine)](https://www.gvkun.com/zb_users/cache/thumbs/4c83df0e2303284d68480d1b1378581d-180-120-1.jpg)

