如果您对使用Netty实现ServletAPI感兴趣,那么本文将是一篇不错的选择,我们将为您详在本文中,您将会了解到关于使用Netty实现ServletAPI的详细内容,我们还将为您解答netty和s
如果您对使用Netty实现Servlet API感兴趣,那么本文将是一篇不错的选择,我们将为您详在本文中,您将会了解到关于使用Netty实现Servlet API的详细内容,我们还将为您解答netty和servlet的相关问题,并且为您提供关于Eclipse操作Servlet入门案例,创建类无法实现Servlet接口和继承HttpServlet类、HTTP状态500-servlet fitTrackerServlet的Servlet.init()抛出异常、javax.servlet.http.HttpServletMapping的实例源码、Java后端开发:使用Netty实现高性能API服务器的有价值信息。
本文目录一览:- 使用Netty实现Servlet API(netty和servlet)
- Eclipse操作Servlet入门案例,创建类无法实现Servlet接口和继承HttpServlet类
- HTTP状态500-servlet fitTrackerServlet的Servlet.init()抛出异常
- javax.servlet.http.HttpServletMapping的实例源码
- Java后端开发:使用Netty实现高性能API服务器
")
使用Netty实现Servlet API(netty和servlet)
是否有人在Netty的基础上构建了Servlet API?我很想建立自己的公司,因为我无法用Google搜索实现。
- http://www.jboss.org/netty/community#nabble-td4752485
- http://markmail.org/message/4qmvuaacxqzevqhc
基本上,我希望提供足够的支持以使jersey正常工作(希望jersey没有做任何threadlocal的工作)。
答案1
小编典典Jersey不需要servlet-即使在JDK中包含的轻量级http服务器上也可以正常运行,甚至可以与Grizzly NIO框架(类似于Netty-
请参阅grizzly.java.net)一起运行。为了了解如何使其与Netty一起运行,您可能需要查看Jersey工作区中的jersey-
grizzly2模块-
如果您愿意开发该模块并为Jersey项目做出贡献,那就太好了。现在,让您失望的是,Jersey确实使用了ThreadLocals。我们一直在计划引入对非阻塞异步调用的支持,但是这需要大量的重构,因此仅会随2.0版本一起提供(最终将实现JAX-
RS 2.0)。无论如何,除了非阻塞性的东西外,仍然可以在像Netty这样的Grizzly框架上运行它,因为它的“轻量级”。

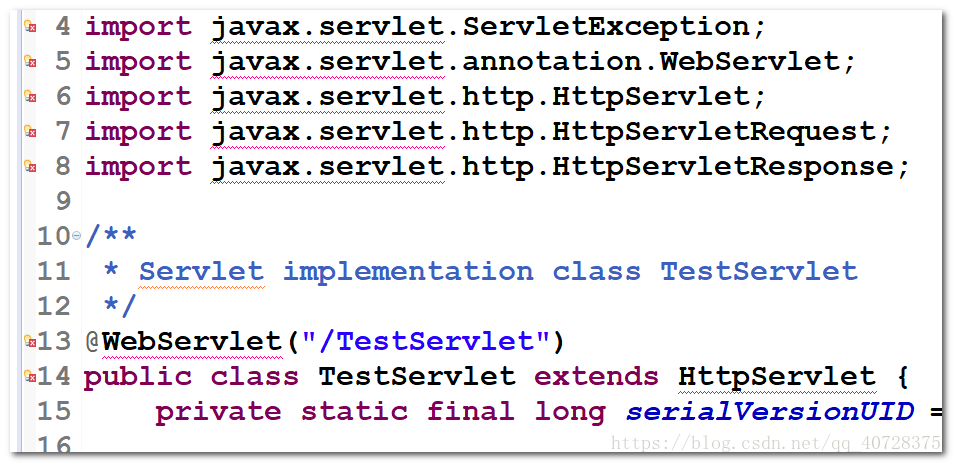
Eclipse操作Servlet入门案例,创建类无法实现Servlet接口和继承HttpServlet类
问题描述:
从昨天下午到今天中午,这个问题被缠绕了良久。百度了很多,却都没有一言命中要害。
首先,还是基于对Web的理解。
第一:建立的是Dynamic Web Project;
第二:然后需要Web服务器,也就是Tomcat,没有集成工具Eclipse,发布Web工程有三种方式(自己查);但是使用了Eclipse就得把Tomcat部署进去,即使Eclipse来操作Tomcat的了;
具体的配置步骤:window---->Preferences------>Server------->Runtime Environmemt----->add------>Tomcat版本------>选择你的Tomcat文件夹位置........(自己查)
问题:Eclipse找不到HttpServlet类是因为没有导入Servlet-api.jar包
解决方案一:
解决办法是:
打开Properties->java Bulid path->Libraries->Add Libraries->Server Runtime,选择tomcat服务器;
如果server Runtime里面是空的,是因为还没有添加服务器,添加运行时环境: Window->Preferences->Server->runtime Enviroment->add, 选择tomcat版本确定,这样工程中的 红色的浪线标记就不见了.
解决方案二:
重新导入即可。
在需要导入的工程上右键进入properties --> Java build path ,library选项卡中选择Add external jars,选择你所安装tomcat目录下lib文件中的Servlet-api.jar包。
问题:
Implicit super constructor Object() is undefined for default constructor. Must define an explicit constructor:
默认构造函数未定义隐式超类构造函数Object()。 必须定义一个显式构造函数
解 决方案:
把java的类库加载进去,在工程上右键选择属性->Java Build Path的Libraries->Add Library选择JRE System Library->点击Next->选择Execution environment并选择版本或workspace default jre->点击Finish。
或者尝试:
右击项目--build path---configure Build path--libraries--双击JRE System library--Alternate JRE选择。
抛出异常")
HTTP状态500-servlet fitTrackerServlet的Servlet.init()抛出异常
这是我第一次使用Spring,并且正在关注PluralSight上的教程。运行第一个示例,我遇到标题中列出的错误。在我的控制台中,出现类似这些的错误。我正在使用较旧版本的依赖项来完成本课程。我已经确保紧跟本教程,所以不确定我是否在某个地方搞砸了或不赞成使用某些东西。我正在使用http://
localhost:8080 / FitnessTracker /
greeting.html
SEVERE: Context initialization failed
java.lang.IllegalArgumentException
SEVERE: StandardWrapper.Throwable
java.lang.IllegalArgumentException
SEVERE: Allocate exception for servlet fitTrackerServlet
java.lang.IllegalArgumentException
HelloController.java
package com.pluralsight.controller;

import org.springframework.stereotype.Controller;
import org.springframework.ui.Model;
import org.springframework.web.bind.annotation.RequestMapping;

@Controller
public class HelloController {

    @RequestMapping(value = "/greeting")
    public String sayHello(Model model) {
        model.addAttribute("greeting","Hello World");
        return "hello";
    }
}
servlet-config.xml
<?xml version="1.0" encoding="UTF-8"?>
<beans xmlns="http://www.springframework.org/schema/beans"
    xmlns:xsi="http://www.w3.org/2001/XMLSchema-instance"
    xmlns:context="http://www.springframework.org/schema/context"
    xmlns:mvc="http://www.springframework.org/schema/mvc"
    xmlns:p="http://www.springframework.org/schema/p"
    xsi:schemaLocation="http://www.springframework.org/schema/mvc http://www.springframework.org/schema/mvc/spring-mvc-3.2.xsd
        http://www.springframework.org/schema/beans http://www.springframework.org/schema/beans/spring-beans.xsd
        http://www.springframework.org/schema/context http://www.springframework.org/schema/context/spring-context-3.2.xsd">

    <mvc:annotation-driven />
    <context:component-scan base-package="com.pluralsight.controller" />

    <beanp:prefix="/WEB-INF/jsp/" p:suffix=".jsp"/>

</beans>
hello.jsp
<%@ page language="java" contentType="text/html; charset=ISO-8859-1"
    pageEncoding="ISO-8859-1"%>
<!DOCTYPE html PUBLIC "-//W3C//DTD HTML 4.01 Transitional//EN" "http://www.w3.org/TR/html4/loose.dtd">
<html>
<head>
<meta http-equiv="Content-Type" content="text/html; charset=ISO-8859-1">
<title>Insert title here</title>
</head>
<body>
    <h1>${greeting}</h1>
</body>
</html>
web.xml
<?xml version="1.0" encoding="UTF-8"?>
<web-app xmlns="http://java.sun.com/xml/ns/javaee" xmlns:xsi="http://www.w3.org/2001/XMLSchema-instance" version="2.5" xsi:schemaLocation="http://java.sun.com/xml/ns/javaee http://java.sun.com/xml/ns/javaee/web-app_2_5.xsd">
  <servlet>
    <servlet-name>fitTrackerServlet</servlet-name>
    <servlet-class>org.springframework.web.servlet.DispatcherServlet</servlet-class>
    <init-param>
        <param-name>contextConfigLocation</param-name>
        <param-value>/WEB-INF/config/servlet-config.xml</param-value>
    </init-param>
  </servlet>

  <servlet-mapping>
    <servlet-name>fitTrackerServlet</servlet-name>
    <url-pattern>*.html</url-pattern>
  </servlet-mapping>

  <display-name>Archetype Created Web Application</display-name>
</web-app>
pom.xml
<project xmlns="http://maven.apache.org/POM/4.0.0" xmlns:xsi="http://www.w3.org/2001/XMLSchema-instance"
  xsi:schemaLocation="http://maven.apache.org/POM/4.0.0 http://maven.apache.org/maven-v4_0_0.xsd">
  <modelVersion>4.0.0</modelVersion>
  <groupId>com.pluralsight</groupId>
  <artifactId>FitnessTracker</artifactId>
  <packaging>war</packaging>
  <version>0.0.1-SNAPSHOT</version>
  <name>FitnessTracker Maven Webapp</name>
  <url>http://maven.apache.org</url>
  <dependencies>
    <dependency>
      <groupId>junit</groupId>
      <artifactId>junit</artifactId>
      <version>3.8.1</version>
      <scope>test</scope>
    </dependency>
    <dependency>
        <groupId>org.springframework</groupId>
        <artifactId>spring-webmvc</artifactId>
        <version>3.2.0.RELEASE</version>
    </dependency>


    <dependency>
        <groupId>javax.servlet</groupId>
        <artifactId>servlet-api</artifactId>
        <version>2.5</version>
        <scope>provided</scope>
    </dependency>
    <dependency>
        <groupId>javax.servlet</groupId>
        <artifactId>jstl</artifactId>
        <version>1.2</version>
        <scope>provided</scope>
    </dependency>
  </dependencies>
  <build>
    <finalName>FitnessTracker</finalName>
  </build>
</project>

javax.servlet.http.HttpServletMapping的实例源码
@Override
public void doFilter(ServletRequest request,ServletResponse response,FilterChain chain) throws IOException,servletexception {

    HttpServletRequest httpServletRequest = ((HttpServletRequest) request);
    HttpServletMapping mapping = ((HttpServletRequest) request).getHttpServletMapping();
    String resourceURI = mapping.getMatchValue();

    if (mapping.getServletName().equals("jsp")) {
        // Push resources
        resourceCache.keySet().stream()
                .filter(resourceURI::contains)
                .findFirst()
                .ifPresent(s -> resourceCache.get(s)
                        .forEach(path -> httpServletRequest.newPushBuilder().path(path).push()));

        // create empty resource list if absent
        resourceCache.putIfAbsent(resourceURI,Collections.newSetFromMap(new ConcurrentHashMap<>()));
    } else {
        // Add resource
        resourceCache.keySet().stream()
                .filter(httpServletRequest.getHeader("Referer")::contains)
                .forEach(page -> resourceCache.get(page).add(resourceURI));
    }

    chain.doFilter(request,response);
}
@Override
public void doFilter(ServletRequest request,response);
}
@Override
protected void doGet(HttpServletRequest request,HttpServletResponse response)
        throws IOException,servletexception {


    HttpServletMapping mapping = request.getHttpServletMapping();

    response.getWriter()
            .append("Mapping match:")
            .append(mapping.getMappingmatch().name())
            .append("\n")
            .append("Match value:")
            .append(mapping.getMatchValue())
            .append("\n")
            .append("Pattern:")
            .append(mapping.getPattern());
}
protected void doGet(HttpServletRequest request,HttpServletResponse response) throws servletexception,IOException {
    HttpServletMapping servletMapping = request.getHttpServletMapping();
    response.getWriter()
            .append("<html><body>")
            .append("Value Matched: ").append(servletMapping.getMatchValue())
            .append("<br/>")
            .append("Pattern Used: ").append(servletMapping.getPattern())
            .append("<br/>")
            .append("Mapping Matched: ").append(servletMapping.getMappingmatch().name())
            .append("<br/>")
            .append("</body></html>");
}
protected void doGet(HttpServletRequest request,IOException {
    HttpServletMapping servletMapping = request.getHttpServletMapping();
    response.getWriter()
            .append("<html><body>")
            .append("Value Matched: ").append(servletMapping.getMatchValue())
            .append("<br/>")
            .append("Pattern Used: ").append(servletMapping.getPattern())
            .append("<br/>")
            .append("Mapping Matched: ").append(servletMapping.getMappingmatch().name())
            .append("<br/>")
            .append("Servlet Name: ").append(servletMapping.getServletName())
            .append("<br/>")
            .append("</body></html>");
}
public static void printCurrentMappingDetails(HttpServletRequest request,PrintWriter out) throws IOException {
        HttpServletMapping forwardMapping = (HttpServletMapping) request.getAttribute(Requestdispatcher.FORWARD_MAPPING);
        HttpServletMapping includeMapping = (HttpServletMapping) request.getAttribute(Requestdispatcher.INCLUDE_MAPPING);
        HttpServletMapping asyncMapping = (HttpServletMapping) request.getAttribute(AsyncContext.ASYNC_MAPPING);

        out.print("<p> " + request.getHttpServletMapping() + "</p>");
        out.print("<p> FORWARD_MAPPING: " + forwardMapping + "</p>");
        out.print("<p> INCLUDE_MAPPING: " + includeMapping + "</p>");
        out.print("<p> ASYNC_MAPPING: " + asyncMapping + "</p>");
        out.print("<hr />");


}

Java后端开发:使用Netty实现高性能API服务器
近年来,随着互联网技术的迅猛发展,服务器端的高性能、高并发和高可用性要求越来越高,而netty作为一个高性能、异步无阻塞的网络通信框架,越来越受到广大开发者的关注和使用。
本文将介绍如何利用Netty框架实现一个高性能的API服务器。
一、什么是Netty
Netty是一个基于Java NIO的异步事件驱动的网络应用框架,用以快速开发高性能、高可靠性的网络通信程序,比如客户端和服务器端。
它的核心组件包括Buffer、Channel、EventLoop、Codec等。Buffer是Netty的缓冲区组件,Channel是提供了抽象的网络通信接口,EventLoop是Netty的事件驱动模型,Codec是编解码器。通过这些组件,Netty框架可以提供高性能、高并发、低延迟的网络通信能力。
立即学习“Java免费学习笔记(深入)”;
二、Netty的基本使用
首先,我们需要引入Netty的依赖:
<dependency>
    <groupId>io.netty</groupId>
    <artifactId>netty-all</artifactId>
    <version>4.1.42.Final</version>
</dependency>然后,我们需要创建一个Bootstrap对象,通过这个对象来启动我们的Netty服务器:
EventLoopGroup bossGroup = new NioEventLoopGroup();
EventLoopGroup workerGroup = new NioEventLoopGroup();
try{
    ServerBootstrap bootstrap = new ServerBootstrap();
    bootstrap.group(bossGroup, workerGroup)
             .channel(NioServerSocketChannel.class)
             .childHandler(new ChannelInitializer<SocketChannel>() {
                 @Override
                 public void initChannel(SocketChannel ch) throws Exception {
                     ChannelPipeline pipeline = ch.pipeline();
                     pipeline.addLast(new HttpServerCodec());
                     pipeline.addLast(new HttpObjectAggregator(65536));
                     pipeline.addLast(new ChunkedWriteHandler());
                     pipeline.addLast(new HttpServerHandler());
                  }
              });
    ChannelFuture future = bootstrap.bind(port).sync();
    future.channel().closeFuture().sync();
}finally{
      bossGroup.shutdownGracefully();
      workerGroup.shutdownGracefully();
}在上面的代码中,我们创建了两个EventLoopGroup对象,一个用来接收客户端请求的bossGroup,一个用来处理客户端请求的workerGroup。通过ServerBootstrap对象来配置Netty服务器的参数,包括通信的协议(NioServerSocketChannel),处理器(Handler),以及Channel的初始化等操作。
我们还可以看到,在上面的代码中,我们添加了HttpServerCodec和HttpObjectAggregator组件,来实现对HTTP请求和响应的编解码和聚合。同时,我们还添加了ChunkedWriteHandler,来实现对大数据流的处理。
最后,我们通过bootstrap.bind方法绑定端口并启动Netty服务器,通过future.channel().closeFuture().sync()方法来阻塞主线程并等待Netty服务器关闭。
三、使用Netty实现高性能API服务器
对于一个API服务器,我们通常需要处理大量的请求和响应,同时保证系统的可用性和高性能的响应时间。
在这里,我们以实现一个简单的API服务器为例,来介绍如何使用Netty框架实现一个高性能的API服务器。
1、接口定义
我们先来定义一个简单的API接口,这个接口用来实现获取用户信息的功能:
GET /user/{id} HTTP/1.1
Host: localhost:8888其中{id}是用户的ID号,我们需要根据这个ID号来查询用户信息并返回给客户端。
2、业务处理
接下来,我们需要实现业务逻辑处理,即根据客户端请求中的ID号来查询用户信息,并将查询结果返回给客户端。
首先,我们来创建一个处理器HttpServerHandler,这个处理器继承自SimpleChannelInboundHandler,我们可以在这个处理器中实现我们的业务逻辑。
public class HttpServerHandler extends SimpleChannelInboundHandler<FullHttpRequest> {
    @Override
    protected void channelRead0(ChannelHandlerContext ctx, FullHttpRequest msg) throws Exception {
        HttpServerRoute route = HttpServerRoute.builder()
                .addRoute("/user/{id}", new GetUserHandler())
                .build();
        HttpServerRequest request = new HttpServerRequest(msg);
        HttpServerResponse response = new HttpServerResponse(ctx, msg);
        route.route(request, response);
    }
}可以看到,在上面的代码中,我们通过HttpServerRoute对象来实现路由匹配。当接收到客户端请求时,我们会将请求转为HttpServerRequest对象,并将响应对象HttpServerResponse包装在内,再通过HttpServerRoute对象来匹配路由规则,并将请求分发给对应的处理器进行处理。
我们需要实现GetUserHandler处理器,这个处理器用来根据用户ID查询用户信息:
public class GetUserHandler implements HttpServerHandlerInterface {
    @Override
    public void handle(HttpServerRequest request, HttpServerResponse response) throws Exception {
        String id = request.getPathParam("id");
        //查询用户信息
        User user = UserService.getUserById(id);
        if (user != null) {
            JSONObject json = new JSONObject();
            json.put("id", user.getId());
            json.put("name", user.getName());
            response.sendJSON(HttpResponseStatus.OK, json.toJSONString());
        } else {
            response.sendError(HttpResponseStatus.NOT_FOUND);
        }
    }
}在上面的代码中,我们将根据请求中的ID号查询用户信息,并通过JSONObject来构建请求响应的JSON字符串数据,最后将查询结果返回给客户端。
我们还需要实现UserService类,来提供查询用户信息的功能:
public class UserService {
    public static User getUserById(String id) {
        //查询数据库中的用户信息
    }
}3、性能测试
最后,我们来测试一下我们实现的Netty高性能API服务器的响应时间和QPS(每秒钟并发请求数量)。
通过Apache ab工具,我们可以模拟多个客户端并发请求,并统计响应时间和QPS信息。使用如下命令:
ab -n 10000 -c 100 -k http://localhost:8888/user/1
参数说明:
-n:表示总请求数量
-c:表示并发请求数量
-k:表示启用Keep-alive连接
通过测试,我们可以得到响应时间和QPS信息:
Server Software:
Server Hostname:        localhost
Server Port:            8888

Document Path:          /user/1
Document Length:        36 bytes

Concurrency Level:      100
Time taken for tests:   3.777 seconds
Complete requests:      10000
Failed requests:        0
Keep-Alive requests:    10000
Total transferred:      1460000 bytes
HTML transferred:       360000 bytes
Requests per second:    2647.65 [#/sec] (mean)
Time per request:       37.771 [ms] (mean)
Time per request:       0.378 [ms] (mean, across all concurrent requests)
Transfer rate:          377.12 [Kbytes/sec] received

Connection Times (ms)
              min  mean[+/-sd] median   max
Connect:        0    2   1.2      2      10
Processing:     3   32  11.3     32      84
Waiting:        3   32  11.3     32      84
Total:          6   34  11.2     34      86

Percentage of the requests served within a certain time (ms)
  50%     34
  66%     38
  75%     40
  80%     42
  90%     49
  95%     55
  98%     64
  99%     71
100% 86 (longest request)可以看到,我们的API服务器在测试中能够有效地处理来自100个并发请求的模拟,每秒钟可以处理2647.65个请求,响应时间平均只有37.771毫秒。
四、总结
通过上述的介绍和步骤,我们了解到了如何使用Netty作为网络通信框架,通过它来开发高性能的API服务器。使用Netty框架可以大大提升服务器性能,使得我们的服务器具备高并发、高可靠性、低延迟等特性。同时,Netty框架也具备较高的扩展性和灵活性,可以方便地集成在任何一种应用中。
作为Java后端开发技术栈的一部分,使用Netty框架也是必须掌握的技能之一。
以上就是Java后端开发:使用Netty实现高性能API服务器的详细内容,更多请关注php中文网其它相关文章!
今天关于使用Netty实现Servlet API和netty和servlet的介绍到此结束,谢谢您的阅读,有关Eclipse操作Servlet入门案例,创建类无法实现Servlet接口和继承HttpServlet类、HTTP状态500-servlet fitTrackerServlet的Servlet.init()抛出异常、javax.servlet.http.HttpServletMapping的实例源码、Java后端开发:使用Netty实现高性能API服务器等更多相关知识的信息可以在本站进行查询。
本文标签:


