在这篇文章中,我们将为您详细介绍通过GoogleAnalytics跟踪UTM活动变量的内容。此外,我们还会涉及一些关于2.3.6、GoogleAnalytics高级应用——事件跟踪、android–G
在这篇文章中,我们将为您详细介绍通过 Google Analytics 跟踪 UTM 活动变量的内容。此外,我们还会涉及一些关于2.3.6、Google Analytics高级应用——事件跟踪、android – Google Analytics SDK v4跟踪广告系列通过电子邮件发送无数据、android – Google Analytics – 活动中的跟踪器对象、android – Google Analytics点击已发送但在Analytics控制台上不可见的知识,以帮助您更全面地了解这个主题。
本文目录一览:- 通过 Google Analytics 跟踪 UTM 活动变量
- 2.3.6、Google Analytics高级应用——事件跟踪
- android – Google Analytics SDK v4跟踪广告系列通过电子邮件发送无数据
- android – Google Analytics – 活动中的跟踪器对象
- android – Google Analytics点击已发送但在Analytics控制台上不可见

通过 Google Analytics 跟踪 UTM 活动变量
您可以在source / medium中找到UTM参数值。
这可能有很多原因。
首先,您可以在“获取 > 广告系列 > 所有广告系列”下找到您的广告系列数据。
UTM 参数由您设置,由 Google Analytics“删除”,因为您不再在列出的 URL 中看到它们,但当然,它们仍然计入您在 GA 的上述部分中看到的内容。(否则一开始就没有任何意义)
为什么您认为您的广告系列应该有更多点击次数?您是否有来自 Google Ads 等其他来源的相互冲突的数据?

2.3.6、Google Analytics高级应用——事件跟踪
“事件”是指用户与内容进行的互动,可以独立于网页或屏幕的加载而进行跟踪。下载、移动广告单击、小工具、Flash 元素、AJAX 嵌入式元素以及视频播放都是可以作为事件进行跟踪的操作。
简单的一句就是:凡是用户的行为都可以用事件跟踪,当您想不到用什么方式跟踪的时候,用事件跟踪就没错的。
事件跟踪有5个参数,用法如表2-12所列:
表2-12 事件参数解析
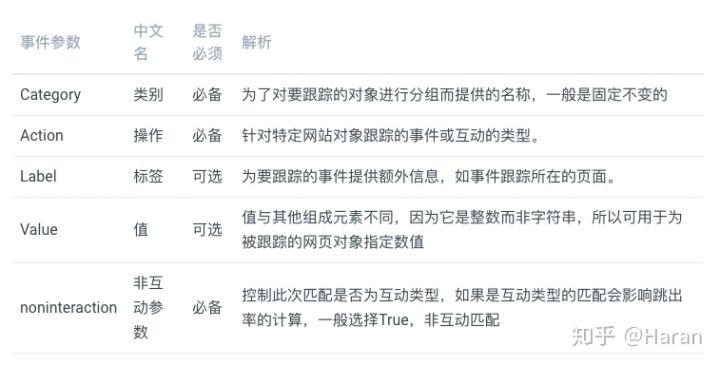
在这里再次强调,事件跟踪是匹配的一种类型,默认是会纳入跳出率的计算的了,为了不让事件跟踪影响真实跳出率,通常会将事件跟踪设置为非互动匹配,
事件跟踪的限制,系统会自动发送前10个匹配给Google分析,之后是每秒1次,如果您的是一秒内有多次触发,事件跟踪得到的数据是不准确的,对此您可以做归并,如触发2次,5次的时候发一次事件。
经典版的用法是:
_trackEvent(category, action, opt_label, opt_value, opt_noninteraction)
统一版的用法是:
onClick=”ga(‘send’, ‘event’, ‘ category’, ‘action’, ‘label’, value, {''NonInteraction'':1});”
下面举例如何添加,比如单击某个链接:
经典版的代码格式为:
_trackEvent(‘book retailer’, ‘click’, ‘Barnes&Noble’, 5, True)
统一版的代码格式为:
onClick="ga(''send'', ''event'', ''book retailer'', ''click'', ''Barnes&Noble'', 5, True);"
上述格式添加在您需要跟踪的位置,您单击那里希望它触发就添加在哪里,完整格式的如:
经典版:
<a href=”/catalogue/books.html” onClick=”_gaq.push([‘_trackEvent(‘book retailer’, ‘click’, ‘Barnes&Noble’, 5, True]);”>New Release</a>
统一版:
<a href=”/catalogue/books.html” onClick="ga(''send'', ''event'', ''book retailer'', ''click'', ''Barnes&Noble'', 5, True);">New Release</a>
进一步还可以将ga()封装成一个函数,然后给onClick调用,封装的函数如:
function click_link(){
ga(''send'', ''event'', ''book retailer'', ''click'', ''Barnes&Noble'', 5, True)
}
统一版代码变形为:
<a href=”/catalogue/books.html” onClick="click_link()">New Release</a>
上述的方式是直接往页面添加代码的形式,这种采用页面硬编码的形式有很大的弊端:每次添加事件跟踪都需要开发添加有发版,事件添加多了不利于代码的维护。最便捷的方法是通过GTM去添加,而且配置的方法多种多样,灵活多变,有兴趣的可以直接去看第三章第二节的事件跟踪。
报告的查看:事件跟踪的报告在GA中选择“行为”→“事件”里面,一般查看“热门事件”居多。

android – Google Analytics SDK v4跟踪广告系列通过电子邮件发送无数据
我们正在尝试使用以下代码将数据发送到Google Analytics:
我们要跟踪的网址:
URL SCHEME : scheme://www.example.com/commandes?utm_source=Mail_Invitation_Vente_ET&utm_medium=email&utm_term=ALL&utm_content=ALL&utm_campaign=TEST_CAMPAIGN
OR
URLs WEB:
http://www.example.com/commandes?utm_source=Mail_Invitation_Vente_ET&utm_medium=email&utm_term=ALL&utm_content=ALL&utm_campaign=TEST_CAMPAIGN

http://examplepetstore.com/index.html?utm_source=email&utm_medium=email_marketing&utm_campaign=summer&utm_content=email_variation_1
(the documentation : https://developers.google.com/analytics/devguides/collection/android/v4/campaigns)
跟踪代码:
Tracker tracker = GoogleAnalytics.getInstance(this).newTracker("UA-XXXXX");
tracker.enableExceptionReporting(true);
tracker.enableAdvertisingIdCollection(true);
tracker.enableAutoActivityTracking(true);
tracker.setScreenName("SCREEN/ android");
tracker.send(new HitBuilders.Screenviewbuilder().setCampaignParamsFromUrl(URL_TO_TRACK).build());
GoogleAnalytics.getInstance(context).dispatchLocalHits();
我们也试过这个:
HashMap<String,String> campaignMap = new HashMap<>(3);
campaignMap.put("utm_source",SOURCE_TO_TRACK);
campaignMap.put("utm_medium",MEDIUM_TO_TRACK);
campaignMap.put("utm_campaign",CAMPAIGN_TO_TRACK);
tracker.send(new HitBuilders.Screenviewbuilder().setAll(campaignMap).build());
我们希望通过URL SCHEME(协议或HTTP URL)跟踪特定链接的点击.
你能告诉我们我的代码是否有问题吗?
SDK版本:play-services:7.5.0
我使用的是Google Analytics v4.
解决方法
public static GoogleAnalytics analytics;

public static Tracker tracker;
protected void onCreate(Bundle savedInstanceState) {

        analytics = GoogleAnalytics.getInstance(this);
        analytics.setLocaldispatchPeriod(1800);
        tracker = analytics.newTracker("UA-XXXXX-0");
        tracker.enableExceptionReporting(true);
        tracker.enableExceptionReporting(true);
        tracker.enableAutoActivityTracking(true);
String campaignData = "http://examplepetstore.com/index.html?utm_source=email&utm_medium=email_marketing&utm_campaign=summer&utm_content=email_variation_1 ";

        tracker.setReferrer(campaignData);

        tracker.send(new HitBuilders.Screenviewbuilder()
                .setCampaignParamsFromUrl(campaignData)
                .build());


}
AndroidMainfest.xml
<?xml version="1.0" encoding="utf-8"?>
<manifest xmlns:android="http://schemas.android.com/apk/res/android"
    package="com.xxxxxxx"
    android:versionCode="11"
    android:versionName="1.0" >

    <uses-sdk
        android:maxsdkVersion="23"
        android:minSdkVersion="14" />

    <uses-permission android:name="android.permission.INTERNET" />
    <uses-permission android:name="android.permission.ACCESS_NETWORK_STATE" />
    <uses-permission android:name="android.permission.WAKE_LOCK" />

 <application
 <receiver
            android:name="com.google.android.gms.analytics.AnalyticsReceiver"
            android:enabled="true">
            <intent-filter>
                <action android:name="com.google.android.gms.analytics.ANALYTICS_disPATCH" />
            </intent-filter>
        </receiver>

        <service
            android:name="com.google.android.gms.analytics.AnalyticsService"
            android:enabled="true"
            android:exported="false" />

        <!--
            Optionally,register CampaignTrackingReceiver and CampaignTrackingService to enable
            installation campaign reporting
            android:permission="android.permission.INSTALL_PACKAGES"
       -->

        <service android:name="com.google.android.gms.analytics.CampaignTrackingService" />
        <receiver android:name="com.google.android.gms.analytics.CampaignTrackingReceiver"
            android:exported="true"
            android:permission="android.permission.INSTALL_PACKAGES">

            <intent-filter>
                <action android:name="com.android.vending.INSTALL_REFERRER" />
            </intent-filter>
        </receiver>

    </application>

</manifest>
应用程序级build.gradel
apply plugin: ''android''
apply plugin: ''com.google.gms.google-services''


dependencies {
    compile filetree(dir: ''libs'',include: ''*.jar'')
    compile project('':Volley'')
    compile project('':Volley'')

    compile ''com.google.android.gms:play-services-analytics:8.3.0''
    //apply plugin: ''com.google.gms.google-services''
    compile ''com.android.support:multidex:1.0.0''

}

android {

    //compileSdkVersion 20
    //buildToolsversion "20.0.0"

    compileSdkVersion 23
    buildToolsversion "23.0.0"
    useLibrary ''org.apache.http.legacy''

    configurations {
        all*.exclude group: ''com.android.support'',module: ''support-v4''
    }

    defaultConfig {
        applicationId "com.xxxxxxx"
        multiDexEnabled true
        minSdkVersion 14
        targetSdkVersion 23
        versionCode 11
        versionName "1.0"
    }

    sourceSets {
        main {
            manifest.srcFile ''AndroidManifest.xml''
            java.srcDirs = [''src'']
            resources.srcDirs = [''src'']
            aidl.srcDirs = [''src'']
            renderscript.srcDirs = [''src'']
            res.srcDirs = [''res'']
            assets.srcDirs = [''assets'']
        }

        // Move the tests to tests/java,tests/res,etc...
        instrumentTest.setRoot(''tests'')

        // Move the build types to build-types/<type>
        // For instance,build-types/debug/java,build-types/debug/AndroidManifest.xml,...
        // This moves them out of them default location under src/<type>/... which would
        // conflict with src/ being used by the main source set.
        // Adding new build types or product flavors should be accompanied
        // by a similar customization.
        debug.setRoot(''build-types/debug'')
        release.setRoot(''build-types/release'')
    }
}
项目级build.gradel
// Top-level build file where you can add configuration options common to all sub-projects/modules.
buildscript {
    repositories {
        //mavenCentral()
        jcenter()
    }
    dependencies {
        classpath ''com.android.tools.build:gradle:1.3.0''
        classpath ''com.google.gms:google-services:1.5.0-beta2''

    }

    allprojects {
        repositories {
            jcenter()
        }
    }
}

android – Google Analytics – 活动中的跟踪器对象
public void sengToGoogleAnalytics() {
    Tracker t = ((AnalyticsSampleApp) this.getApplication()).getTracker(TrackerName.APP_TRACKER);
    t.setScreenName(getString(R.string.memoryhome));
    t.send(new HitBuilders.Appviewbuilder().build());
}
日志
06-11 11:49:59.510: E/AndroidRuntime(2917): FATAL EXCEPTION: main06-11 11:49:59.510: E/AndroidRuntime(2917): java.lang.RuntimeException: Unable to start activity ComponentInfo{kids.animals.fruits.objects.brain.puzzle.memory.game.free/kids.animals.fruits.objects.brain.puzzle.memory.game.free.MemoryHome}: java.lang.classCastException: android.app.Application cannot be cast to kids.animals.fruits.objects.brain.puzzle.memory.game.free.AnalyticsSampleApp06-11 11:49:59.510: E/AndroidRuntime(2917):
06-11 11:49:59.510: E/AndroidRuntime(2917): java.lang.RuntimeException: Unable to start activity ComponentInfo{kids.animals.fruits.objects.brain.puzzle.memory.game.free/kids.animals.fruits.objects.brain.puzzle.memory.game.free.MemoryHome}: java.lang.classCastException: android.app.Application cannot be cast to kids.animals.fruits.objects.brain.puzzle.memory.game.free.AnalyticsSampleApp06-11 11:49:59.510: E/AndroidRuntime(2917): 06-11 11:49:59.510: E/AndroidRuntime(2917):
06-11 11:49:59.510: E/AndroidRuntime(2917): 06-11 11:49:59.510: E/AndroidRuntime(2917): 06-11 11:49:59.510: E/AndroidRuntime(2917):
06-11 11:49:59.510: E/AndroidRuntime(2917): 06-11 11:49:59.510: E/AndroidRuntime(2917): 06-11 11:49:59.510: E/AndroidRuntime(2917):
06-11 11:49:59.510: E/AndroidRuntime(2917): 06-11 11:49:59.510: E/AndroidRuntime(2917): 06-11 11:49:59.510: E/AndroidRuntime(2917):
06-11 11:49:59.510: E/AndroidRuntime(2917): 06-11 11:49:59.510: E/AndroidRuntime(2917): 06-11 11:49:59.510: E/AndroidRuntime(2917):
06-11 11:49:59.510: E/AndroidRuntime(2917): 06-11 11:49:59.510: E/AndroidRuntime(2917): 06-11 11:49:59.510: E/AndroidRuntime(2917):
06-11 11:49:59.510: E/AndroidRuntime(2917): 06-11 11:49:59.510: E/AndroidRuntime(2917): 06-11 11:49:59.510: E/AndroidRuntime(2917):
06-11 11:49:59.510: E/AndroidRuntime(2917): 06-11 11:49:59.510: E/AndroidRuntime(2917): 06-11 11:49:59.510: E/AndroidRuntime(2917):
06-11 11:49:59.510: E/AndroidRuntime(2917): 06-11 11:49:59.510: E/AndroidRuntime(2917): 06-11 11:49:59.510: E/AndroidRuntime(2917):
06-11 11:49:59.510: E/AndroidRuntime(2917): 06-11 11:49:59.510: E/AndroidRuntime(2917): 06-11 11:49:59.510: E/AndroidRuntime(2917):
06-11 11:49:59.510: E/AndroidRuntime(2917): 06-11 11:49:59.510: E/AndroidRuntime(2917): 06-11 11:49:59.510: E/AndroidRuntime(2917):
06-11 11:49:59.510: E/AndroidRuntime(2917): 06-11 11:49:59.510: E/AndroidRuntime(2917): 06-11 11:49:59.510: E/AndroidRuntime(2917): Caused by: java.lang.classCastException: android.app.Application cannot be cast to kids.animals.fruits.objects.brain.puzzle.memory.game.free.AnalyticsSampleApp
06-11 11:49:59.510: E/AndroidRuntime(2917): 06-11 11:49:59.510: E/AndroidRuntime(2917): Caused by: java.lang.classCastException: android.app.Application cannot be cast to kids.animals.fruits.objects.brain.puzzle.memory.game.free.AnalyticsSampleApp06-11 11:49:59.510: E/AndroidRuntime(2917):
06-11 11:49:59.510: E/AndroidRuntime(2917): Caused by: java.lang.classCastException: android.app.Application cannot be cast to kids.animals.fruits.objects.brain.puzzle.memory.game.free.AnalyticsSampleApp06-11 11:49:59.510: E/AndroidRuntime(2917): 06-11 11:49:59.510: E/AndroidRuntime(2917):
06-11 11:49:59.510: E/AndroidRuntime(2917): 06-11 11:49:59.510: E/AndroidRuntime(2917): 06-11 11:49:59.510: E/AndroidRuntime(2917):
06-11 11:49:59.510: E/AndroidRuntime(2917): 06-11 11:49:59.510: E/AndroidRuntime(2917): 06-11 11:49:59.510: E/AndroidRuntime(2917):
06-11 11:49:59.510: E/AndroidRuntime(2917): 06-11 11:49:59.510: E/AndroidRuntime(2917): 06-11 11:49:59.510: E/AndroidRuntime(2917):
06-11 11:49:59.510: E/AndroidRuntime(2917): 06-11 11:49:59.510: E/AndroidRuntime(2917): 06-11 11:49:59.510: E/AndroidRuntime(2917):
06-11 11:49:59.510: E/AndroidRuntime(2917): 06-11 11:49:59.510: E/AndroidRuntime(2917):
06-11 11:49:59.510: E/AndroidRuntime(2917):
解决方法
getApplication返回的对象是android.app.Application,抛出一个 ClassCastException,如logcat中的以下行所示
06-11 11:49:59.510: E/AndroidRuntime(2917): Caused by: java.lang.classCastException: android.app.Application cannot be cast to kids.animals.fruits.objects.brain.puzzle.memory.game.free.AnalyticsSampleApp06-11
解:
如果您的清单不包含application element,则可能会导致此问题
<application android:name=".YourApplication"...
</application>

android – Google Analytics点击已发送但在Analytics控制台上不可见
07-14 11:11:22.734 31016-31016/com.dhinchek.user I/GAv4: Google Analytics 9.0.80 is starting up. To enable debug logging on a device run:
                                                           adb shell setprop log.tag.GAv4 DEBUG
                                                           adb logcat -s GAv4
07-14 11:11:22.760 31016-31016/com.dhinchek.user D/GAv4: setLocaldispatchPeriod (sec): 30
07-14 11:11:22.896 31016-31497/com.dhinchek.user D/GAv4: Sending first hit to property: UA-77779576-2
07-14 11:11:22.898 31016-31497/com.dhinchek.user D/GAv4: Hit delivery requested: ht=1468501882775,_s=0,_v=ma9.0.80,a=239605409,aid=com.dhinchek.user,an=Dhinchek,av=1.4,cd=Splash,cid=0a56ad2b-533b-4a48-84ef-285fbbb6a6f3,sc=start,sf=100.0,sr=720x1280,t=screenview,tid=UA-77779576-2,ul=en-us,v=1
07-14 11:11:22.907 31016-31497/com.dhinchek.user D/GAv4: Hit delivery requested: ht=1468501882797,_s=1,a=239605410,v=1
07-14 11:11:23.023 31016-31497/com.dhinchek.user D/GAv4: Hit sent to the device AnalyticsService for delivery
07-14 11:11:23.042 31016-31497/com.dhinchek.user D/GAv4: Hit sent to the device AnalyticsService for delivery
07-14 11:11:26.003 31016-31497/com.dhinchek.user D/GAv4: Hit delivery requested: ht=1468501885946,_s=2,a=239605411,cd=Login,v=1
07-14 11:11:26.048 31016-31497/com.dhinchek.user D/GAv4: Hit sent to the device AnalyticsService for delivery
我猜测命中是否发送到分析服务然后代码是正确的,但我无法在分析控制台中看到任何进展.这两个点击是我的应用程序中的两个不同的活动.任何人都可以帮我解决如何进一步调试此问题,或建议如何解决这个问题?欢迎所有观点.
解决方法
或者它可能还不够长?它默认情况下每30分钟发送一次,然后将GA报告网站花费几个小时来显示它.
它可能有助于查看更详细的official GA Dispatch docs,并包含您可以尝试的其他类似的东西.
关于通过 Google Analytics 跟踪 UTM 活动变量的介绍现已完结,谢谢您的耐心阅读,如果想了解更多关于2.3.6、Google Analytics高级应用——事件跟踪、android – Google Analytics SDK v4跟踪广告系列通过电子邮件发送无数据、android – Google Analytics – 活动中的跟踪器对象、android – Google Analytics点击已发送但在Analytics控制台上不可见的相关知识,请在本站寻找。
在这篇文章中,我们将为您详细介绍当队列已满时,带有 rdkafka 的 Pykafka 不会阻塞生产者的内容,并且讨论关于队列已满的条件的相关问题。此外,我们还会涉及一些关于4.kafka 生产者 --- 向 Kafka 中写入数据 (转)、C++编程中使用librdkafka库去连接kafka集群经验总结、CentOS7.5下使用Docker安装Kafka及C使用librdkafka调用Kafka、Kafka - PHP 使用 Rdkafka 生产/消费数据的知识,以帮助您更全面地了解这个主题。
本文目录一览:- 当队列已满时,带有 rdkafka 的 Pykafka 不会阻塞生产者(队列已满的条件)
- 4.kafka 生产者 --- 向 Kafka 中写入数据 (转)
- C++编程中使用librdkafka库去连接kafka集群经验总结
- CentOS7.5下使用Docker安装Kafka及C使用librdkafka调用Kafka
- Kafka - PHP 使用 Rdkafka 生产/消费数据
")
当队列已满时,带有 rdkafka 的 Pykafka 不会阻塞生产者(队列已满的条件)
如何解决当队列已满时,带有 rdkafka 的 Pykafka 不会阻塞生产者?
我正在运行一个使用 pykafka 生成消息的简单场景,但是当我同时启用 rdkafka 和消息大小相对较大时出现异常。
我的代码与示例非常相似here
with topic.get_producer(use_rdkafka=True,delivery_reports=True,block_on_queue_full=True) as p:
    for i in range(40000):
        print(i)
        p._protocol_version = 1
        p.produce(str.encode(msg_str),partition_key=str(f''{i}'').encode(),timestamp=datetime.datetime.Now())
        while True:
            try:
                msg,exc = p.get_delivery_report(block=False,timeout=.1)
                if exc is not None:
                    print(''Failed to deliver msg {}: {}''.format(msg.partition_key,repr(exc)))
                else:
                    print(f''Successfully delivered msg {msg.partition_key}'')
            except queue.Empty:
                break
当 msg_str 只是一个短字符串时,一切正常。但是当长度大约为 30000 个字符时,生产在大约 38847 次迭代后停止,一段时间后我得到一个异常 pykafka.exceptions.ProducerQueueFullError。
看起来我添加的 block_on_queue_full=True 标志是明确的 ignored
    if rdkafka and use_rdkafka:
        Cls = rdkafka.RdKafkaProducer
        kwargs.pop(''block_on_queue_full'',None)
在我可以继续生产之前启用等待的正确顺序是什么?
解决方法
暂无找到可以解决该程序问题的有效方法,小编努力寻找整理中!
如果你已经找到好的解决方法,欢迎将解决方案带上本链接一起发送给小编。
小编邮箱:dio#foxmail.com (将#修改为@)
")
4.kafka 生产者 --- 向 Kafka 中写入数据 (转)
转: https://www.cnblogs.com/sodawoods-blogs/p/8969513.html
(1)生产者概览
(1)不同的应用场景对消息有不同的需求,即是否允许消息丢失、重复、延迟以及吞吐量的要求。不同场景对 Kafka 生产者的 API 使用和配置会有直接的影响。
例子 1:信用卡事务处理系统,不允许消息的重复和丢失,延迟最大 500ms,对吞吐量要求较高。
例子 2:保存网站的点击信息,允许少量的消息丢失和重复,延迟可以稍高(用户点击链接可以马上加载出页面即可),吞吐量取决于用户使用网站的频度。
(2)Kafka 发送消息的主要步骤
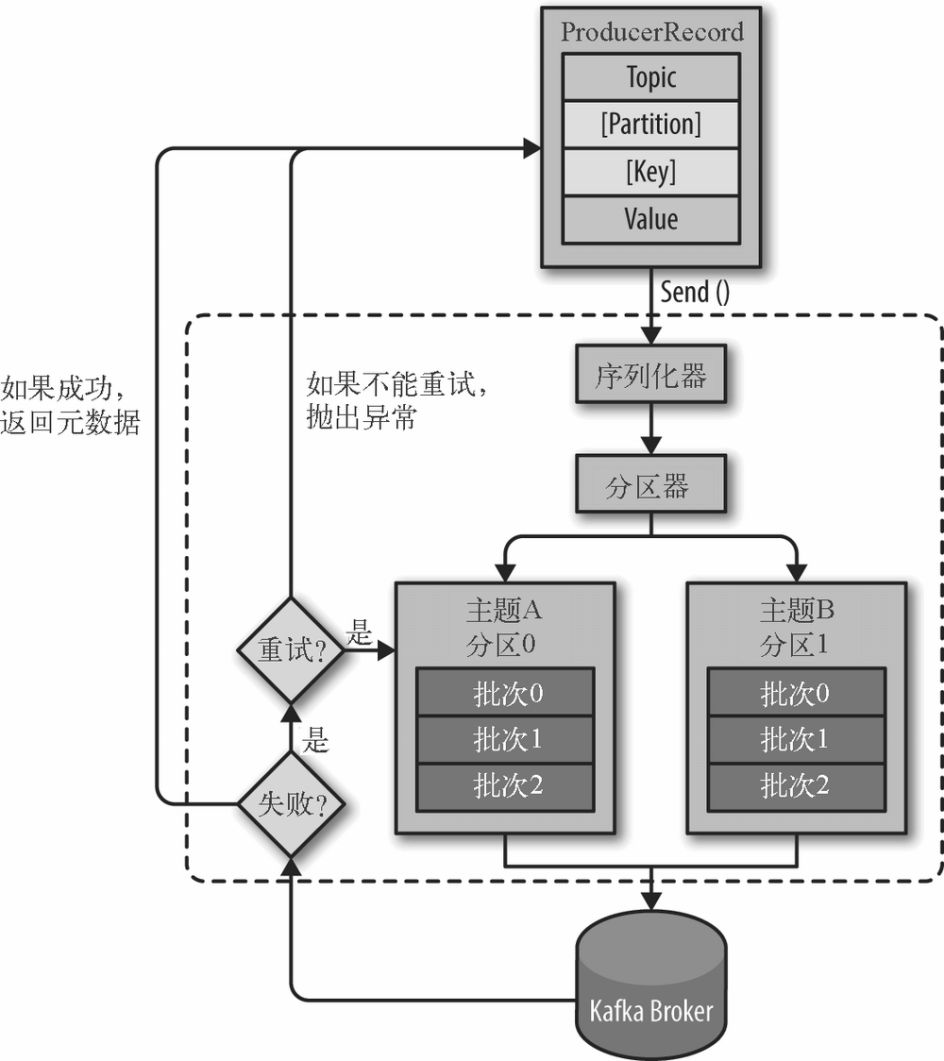
消息格式:每个消息是一个 ProducerRecord 对象,必须指定消息所属的 Topic 和消息值 Value,此外还可以指定消息所属的 Partition 以及消息的 Key。
1:序列化 ProducerRecord
2:如果 ProducerRecord 中指定了 Partition,则 Partitioner 不做任何事情;否则,Partitioner 根据消息的 key 得到一个 Partition。这是生产者就知道向哪个 Topic 下的哪个 Partition 发送这条消息。
3:消息被添加到相应的 batch 中,独立的线程将这些 batch 发送到 Broker 上
4:broker 收到消息会返回一个响应。如果消息成功写入 Kafka,则返回 RecordMetaData 对象,该对象包含了 Topic 信息、Patition 信息、消息在 Partition 中的 Offset 信息;若失败,返回一个错误
(3)Kafka 的顺序保证。Kafka 保证同一个 partition 中的消息是有序的,即如果生产者按照一定的顺序发送消息,broker 就会按照这个顺序把他们写入 partition,消费者也会按照相同的顺序读取他们。
例子:向账户中先存 100 再取出来 和 先取 100 再存进去是完全不同的,因此这样的场景对顺序很敏感。
如果某些场景要求消息是有序的,那么不建议把 retries 设置成 0,。可以把 max.in.flight.requests.per.connection 设置成 1,会严重影响生产者的吞吐量,但是可以保证严格有序。
(2)创建 Kafka 生产者
要往 Kafka 中写入消息,需要先创建一个 Producer,并设置一些属性。
Properties kafkaProps = new Properties();
kafkaProps.put("bootstrap.servers", "broker1:port1, broker2:port2");
kafkaProps.put("key.serializer", "org.apache.kafka.common.StringSerializer");
kafkaProps.put("value.serializer", "org.apache.kafka.common.StringSerializer");
producer = new KafkaProducer<String, String>(kafkaProps);
Kafka 的生产者有如下三个必选的属性:
(1)bootstrap.servers,指定 broker 的地址清单
(2)key.serializer 必须是一个实现 org.apache.kafka.common.serialization.Serializer 接口的类,将 key 序列化成字节数组。注意:key.serializer 必须被设置,即使消息中没有指定 key。
(3)value.serializer,将 value 序列化成字节数组
(3)发送消息到 Kafka
(1)同步发送消息
ProducerRecord<String, String> record = new ProducerRecord<>("CustomCountry", "Precision Products", "France");//Topic Key Value
try{
    Future future = producer.send(record);
    future.get();//不关心是否发送成功,则不需要这行。
} catch(Exception e) {
    e.printStackTrace();//连接错误、No Leader错误都可以通过重试解决;消息太大这类错误kafkaProducer不会进行任何重试,直接抛出异常
}
(2)异步发送消息
ProducerRecord<String, String> record = new ProducerRecord<>("CustomCountry", "Precision Products", "France");//Topic Key Value
producer.send(record, new DemoProducerCallback());//发送消息时,传递一个回调对象,该回调对象必须实现org.apahce.kafka.clients.producer.Callback接口

private class DemoProducerCallback implements Callback {
    @Override
    public void onCompletion(RecordMetadata recordMetadata, Exception e) {
        if (e != null) {//如果Kafka返回一个错误,onCompletion方法抛出一个non null异常。
            e.printStackTrace();//对异常进行一些处理,这里只是简单打印出来
        }
    }
}
(4)生产者的配置
(1)acks 指定必须要有多少个 partition 副本收到消息,生产者才会认为消息的写入是成功的。
acks=0,生产者不需要等待服务器的响应,以网络能支持的最大速度发送消息,吞吐量高,但是如果 broker 没有收到消息,生产者是不知道的
acks=1,leader partition 收到消息,生产者就会收到一个来自服务器的成功响应
acks=all,所有的 partition 都收到消息,生产者才会收到一个服务器的成功响应
(2)buffer.memory,设置生产者内缓存区域的大小,生产者用它缓冲要发送到服务器的消息。
(3)compression.type,默认情况下,消息发送时不会被压缩,该参数可以设置成 snappy、gzip 或 lz4 对发送给 broker 的消息进行压缩
(4)retries,生产者从服务器收到临时性错误时,生产者重发消息的次数
(5)batch.size,发送到同一个 partition 的消息会被先存储在 batch 中,该参数指定一个 batch 可以使用的内存大小,单位是 byte。不一定需要等到 batch 被填满才能发送
(6)linger.ms,生产者在发送消息前等待 linger.ms,从而等待更多的消息加入到 batch 中。如果 batch 被填满或者 linger.ms 达到上限,就把 batch 中的消息发送出去
(7)max.in.flight.requests.per.connection,生产者在收到服务器响应之前可以发送的消息个数
(5)序列化器
在创建 ProducerRecord 时,必须指定序列化器,推荐使用序列化框架 Avro、Thrift、ProtoBuf 等,不推荐自己创建序列化器。
在使用 Avro 之前,需要先定义模式(schema),模式通常使用 JSON 来编写。
(1)创建一个类代表客户,作为消息的 value
class Custom {
    private int customID;
    private String customerName;

    public Custom(int customID, String customerName) {
        super();
        this.customID = customID;
        this.customerName = customerName;
    }

    public int getCustomID() {
        return customID;
    }

    public String getCustomerName() {
        return customerName;
    }
}
(2)定义 schema
{
  "namespace": "customerManagement.avro",
   "type": "record",
   "name": "Customer",
   "fields":[
       {
          "name": "id", "type": "string"
       },
       {
          "name": "name",  "type": "string"
       },
   ]
}
(3)生成 Avro 对象发送到 Kafka
Properties props = new Properties();
      props.put("bootstrap", "loacalhost:9092");
      props.put("key.serializer", "io.confluent.kafka.serializers.KafkaAvroSerializer");
      props.put("value.serializer", "io.confluent.kafka.serializers.KafkaAvroSerializer");
      props.put("schema.registry.url", schemaUrl);//schema.registry.url指向射麻的存储位置
      String topic = "CustomerContacts";
      Producer<String, Customer> produer = new KafkaProducer<String, Customer>(props);

      //不断生成消息并发送
      while (true) {
          Customer customer = CustomerGenerator.getNext();
          ProducerRecord<String, Customer> record = new ProducerRecord<>(topic, customer.getId(), customer);
          producer.send(record);//将customer作为消息的值发送出去,KafkaAvroSerializer会处理剩下的事情
      }
(6)Partition
ProducerRecord 可以只包含 Topic 和消息的 value,key 默认是 null,但是大多数应用程序会用到 key,key 的两个作用:
(1)作为消息的附加信息
(2)决定消息该被写到 Topic 的哪个 partition,拥有相同 key 的消息会被写到同一个 partition。
如果 key 为空,kafka 使用默认的 partitioner,使用 RoundRobin 算法将消息均衡地分布在各个 partition 上;
如果 key 不为空,kafka 使用自己实现的 hash 方法对 key 进行散列,相同的 key 被映射到相同的 partition 中。只有在不改变 partition 数量的前提下,key 和 partition 的映射才能保持不变。
kafka 也支持用户实现自己的 partitioner,用户自己定义的 paritioner 需要实现 Partitioner 接口。

C++编程中使用librdkafka库去连接kafka集群经验总结
1.C++编程中使用librdkafka库去连接kafka集群分为生产端,消费端两个部分。本次是在https://github.com/edenhill/librdkafka 下载源码编译,安装的。过程很简单不再这里详细说明。
一.生产端使用
在编译完之后会有一个rdkafka_example.cpp,参考他进行编写程序。主要逻辑如下:
RdKafka::Conf *m_conf;
RdKafka::Conf *m_tconf;
RdKafka::Producer *m_producer;
RdKafka::Topic *m_topic;
MyHashPartitionerCb hash_partitioner;
ExampleDeliveryReportCb ex_dr_cb;
ExampleEventCb ex_event_cb;
m_conf = RdKafka::Conf::create(RdKafka::Conf::CONF_GLOBAL);
m_tconf = RdKafka::Conf::create(RdKafka::Conf::CONF_TOPIC);
m_tconf->set("partitioner_cb", &hash_partitioner, errstr)
m_conf->set("metadata.broker.list", m_sBrokenList, errstr);
m_conf->set("queue.buffering.max.ms", "10", errstr); //批量提交
m_conf->set("queue.buffering.max.messages", sMaxMsgs, errstr);
m_conf->set("event_cb", &ex_event_cb, errstr);
m_conf->set("dr_cb", &ex_dr_cb, errstr);
m_producer = RdKafka::Producer::create(m_conf, errstr);
m_topic = RdKafka::Topic::create(m_producer, m_topicName,m_tconf, errstr);
RdKafka::ErrorCode resp = m_producer->produce(m_topic, m_PartionCn , RdKafka::Producer::RK_MSG_COPY, pData, iDataLen, (const void *)pKey, strlen(pKey),NULL);
m_producer->poll(1);//可以是poll 0
注意点:
1.成产过程中的pKey值需要注意一点,不能全部一样,这会影响到各分区的负载均衡。
2.queue.buffering.max.messages" //本地队列缓冲值,应该是在10w-50w之间,太小则会处理不过来引起丢弃。
3.在此基础上加上多线程就满足需求
二.消费端的使用
1.主要参考rdkafka_consumer_example.cpp 文件。
主要逻辑如下:
RdKafka::Conf *m_conf;
RdKafka::Conf *m_tconf;
m_conf = RdKafka::Conf::create(RdKafka::Conf::CONF_GLOBAL);
m_tconf = RdKafka::Conf::create(RdKafka::Conf::CONF_TOPIC);
ExampleRebalanceCb ex_rebalance_cb;
m_conf->set("rebalance_cb", &ex_rebalance_cb, errstr);
m_conf->set("enable.partition.eof", "true", errstr);
m_conf->set("metadata.broker.list", m_sBrokenList, errstr) //设置服务列表
m_conf->set("auto.commit.interval.ms", g_conf.sCommitTimeVal, errstr)
m_conf->set("group.id", m_sGroupID, errstr)
MyConsumeCb ex_consume_cb;
m_conf->set("consume_cb", &ex_consume_cb, errstr);
ExampleEventCb ex_event_cb;
m_conf->set("event_cb", &ex_event_cb, errstr);
m_tconf->set("auto.offset.reset", "latest", errstr);
m_conf->set("default_topic_conf", m_tconf, errstr);
RdKafka::KafkaConsumer *consumer = RdKafka::KafkaConsumer::create(m_conf, errstr);
std::vector<std::string> topicsVec;
topicsVec.clear();
topicsVec.push_back(m_sTopicName);
RdKafka::ErrorCode err = consumer->subscribe(topicsVec);
while (m_runFlag)
{
RdKafka::Message *msg = consumer->consume(1000);//1000是超时时间单位毫秒
msg_consume(msg, NULL);
delete msg;
}
consumer->close();
delete consumer;
注意点:
1.消费者组中消费者数量不能大于分区数量。不同的消费者组可以消费相同topic
2.加上多线程即可满足多个消费者同时消费。
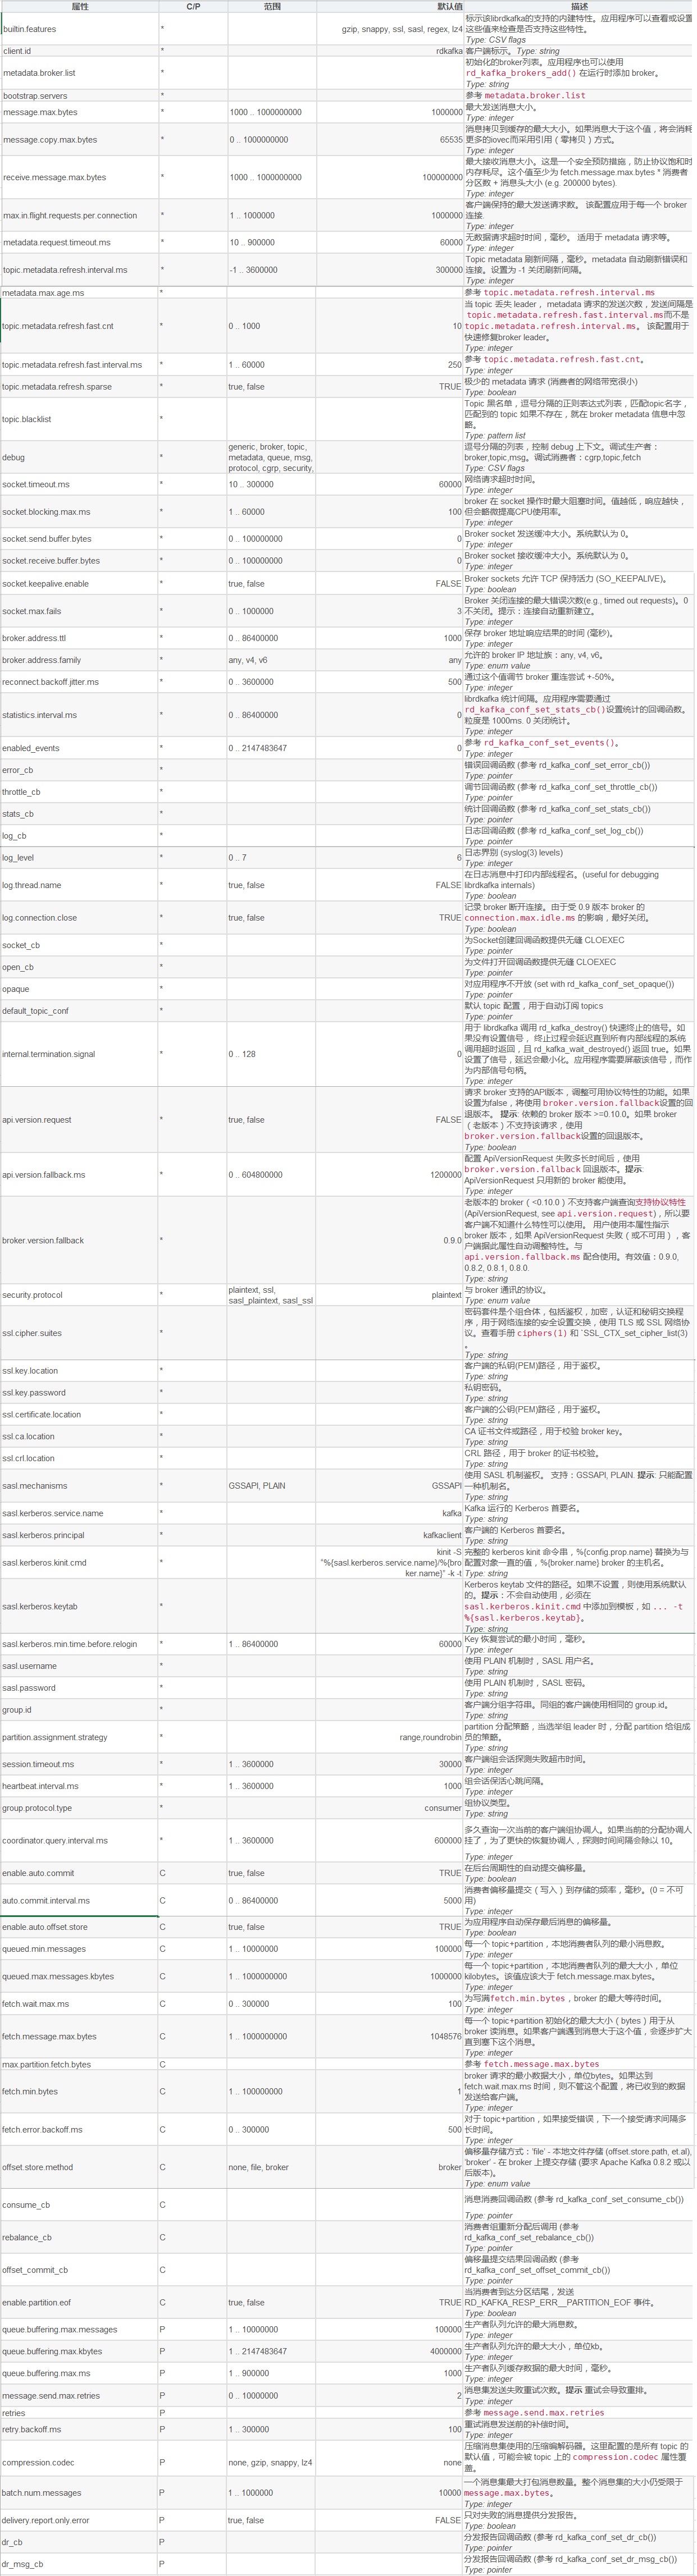
附上kafka参数的对照表

CentOS7.5下使用Docker安装Kafka及C使用librdkafka调用Kafka
一、安装Kafka
1、安装docker:curl -fsSL https://get.docker.com | bash -s docker --mirror Aliyun


(1)先启动docker服务:systemctl start docker
(2)安装Kafka及后台启动docker:docker-compose -f docker-compose.yml up -d
如果下载过慢则设置阿里镜像并且重启docker服务:yum-config-manager --add-repo http://mirrors.aliyun.com/docker-ce/linux/centos/docker-ce.repo@H_301_20@@H_301_20@
version: "3.3"
services:
    zookeeper:
        image: zookeeper:3.5.5
        restart: always
        container_name: zookeeper
        ports:
            - "2181:2181"
        expose:
            - "2181"
        environment:
            - ZOO_MY_ID=1
    kafka:
        image: wurstmeister/kafka:2.12-2.2.1
        restart: always
        container_name: kafka
        environment:
            - KAFKA_broKER_ID=1
            - KAFKA_LISTENERS=PLAINTEXT://kafka:9090
            - KAFKA_ZOOKEEPER_CONNECT=zookeeper:2181
            - KAFKA_MESSAGE_MAX_BYTES=2000000
        ports:
            - "9090:9090"
        depends_on:
            - zookeeper
(3)安装后结果如下:docker ps -a

二、Kafka脚本使用
1、进入kakfa容器:docker exec -it kafka /bin/bash
2、执行生产者脚本并且输入消息hello:/opt/kafka/bin/kafka-console-producer.sh --broker-list kafka:9090 --topic Hello-Kafka

3、新启动一个终端后执行消费者脚本:/opt/kafka/bin/kafka-console-consumer.sh --bootstrap-server kafka:9090 --topic Hello-Kafka

(1)每次启动一个终端并且执行消费者脚本,默认都是不同分组,相当于订阅-发布,如果需要切换到队列方式,只需要在执行脚本后增加相同分组如–group test即可
/opt/kafka/bin/kafka-console-consumer.sh --bootstrap-server kafka:9090 --topic Hello-Kafka –group test
(2)从头消费则增加–from-beginning即可
/opt/kafka/bin/kafka-console-consumer.sh --bootstrap-server kafka:9090 --topic Hello-Kafka --from-beginning
4、列出topic:/opt/kafka/bin/kafka-topics.sh --list --bootstrap-server kafka:9090

三、C使用librdkafka调用Kafka
API使用很简单,参考Github上的示例根据工作的需要修改即可,并且API会断网自动重连。
1、安装kafka C/C++开发库librdkafka:yum install librdkafka-devel
2、消费者代码示例:https://github.com/edenhill/librdkafka/blob/master/examples/consumer.c
引用头文件改成#include <librdkafka/rdkafka.h>并且注释掉#include "rdkafka.h"
/*
 * librdkafka - Apache Kafka C library
 *
 * copyright (c) 2019, Magnus Edenhill
 * All rights reserved.
 *
 * Redistribution and use in source and binary forms, with or without
 * modification, are permitted provided that the following conditions are met:
 *
 * 1. Redistributions of source code must retain the above copyright notice,
 *    this list of conditions and the following disclaimer.
 * 2. Redistributions in binary form must reproduce the above copyright notice,
 *    this list of conditions and the following disclaimer in the documentation
 *    and/or other materials provided with the distribution.
 *
 * THIS SOFTWARE IS PROVIDED BY THE copYRIGHT HOLDERS AND CONTRIBUTORS "AS IS"
 * AND ANY EXPRESS OR IMPLIED WARRANTIES, INCLUDING, BUT NOT LIMITED TO, THE
 * IMPLIED WARRANTIES OF MERCHANTABILITY AND fitness FOR A PARTIculaR PURPOSE
 * ARE disCLaimED. IN NO EVENT SHALL THE copYRIGHT OWNER OR CONTRIBUTORS BE
 * LIABLE FOR ANY DIRECT, INDIRECT, INCIDENTAL, SPECIAL, EXEMPLARY, OR
 * CONSEQUENTIAL damAGES (INCLUDING, BUT NOT LIMITED TO, PROCUREMENT OF
 * SUBSTITUTE GOODS OR SERVICES; LOSS OF USE, DATA, OR PROFITS; OR BUSInesS
 * INTERRUPTION) HOWEVER CAUSED AND ON ANY THEORY OF LIABILITY, WHETHER IN
 * CONTRACT, STRICT LIABILITY, OR TORT (INCLUDING NEGLIGENCE OR OTHERWISE)
 * ARISING IN ANY WAY OUT OF THE USE OF THIS SOFTWARE, EVEN IF ADVISED OF THE
 * POSSIBILITY OF SUCH damAGE.
 */

/**
 * Simple high-level balanced Apache Kafka consumer
 * using the Kafka driver from librdkafka
 * (https://github.com/edenhill/librdkafka)
 */

#include <stdio.h>
#include <signal.h>
#include <string.h>
#include <ctype.h>


/* Typical include path would be <librdkafka/rdkafka.h>, but this program
 * is builtin from within the librdkafka source tree and thus differs. */
#include <librdkafka/rdkafka.h>
//#include "rdkafka.h"


static volatile sig_atomic_t run = 1;

/**
 * @brief Signal termination of program
 */
static void stop (int sig) {
        run = 0;
}


/**
 * @returns 1 if all bytes are printable, else 0.
 */
static int is_printable (const char *buf, size_t size) {
        size_t i;

        for (i = 0 ; i < size ; i++)
                if (!isprint((int)buf[i]))
                        return 0;

        return 1;
}


int main (int argc, char **argv) {
        rd_kafka_t *rk;          /* Consumer instance handle */
        rd_kafka_conf_t *conf;   /* Temporary configuration object */
        rd_kafka_resp_err_t err; /* librdkafka API error code */
        char errstr[512];        /* librdkafka API error reporting buffer */
        const char *brokers;     /* Argument: broker list */
        const char *groupid;     /* Argument: Consumer group id */
        char **topics;           /* Argument: list of topics to subscribe to */
        int topic_cnt;           /* Number of topics to subscribe to */
        rd_kafka_topic_partition_list_t *subscription; /* Subscribed topics */
        int i;

        /*
         * Argument validation
         */
        if (argc < 4) {
                fprintf(stderr,
                        "%% Usage: "
                        "%s <broker> <group.id> <topic1> <topic2>..\n",
                        argv[0]);
                return 1;
        }

        brokers   = argv[1];
        groupid   = argv[2];
        topics    = &argv[3];
        topic_cnt = argc - 3;


        /*
         * Create Kafka client configuration place-holder
         */
        conf = rd_kafka_conf_new();

        /* Set bootstrap broker(s) as a comma-separated list of
         * host or host:port (default port 9092).
         * librdkafka will use the bootstrap brokers to acquire the full
         * set of brokers from the cluster. */
        if (rd_kafka_conf_set(conf, "bootstrap.servers", brokers,
                              errstr, sizeof(errstr)) != RD_KAFKA_CONF_OK) {
                fprintf(stderr, "%s\n", errstr);
                rd_kafka_conf_destroy(conf);
                return 1;
        }

        /* Set the consumer group id.
         * All consumers sharing the same group id will join the same
         * group, and the subscribed topic' partitions will be assigned
         * according to the partition.assignment.strategy
         * (consumer config property) to the consumers in the group. */
        if (rd_kafka_conf_set(conf, "group.id", groupid,
                              errstr, sizeof(errstr)) != RD_KAFKA_CONF_OK) {
                fprintf(stderr, "%s\n", errstr);
                rd_kafka_conf_destroy(conf);
                return 1;
        }

        /* If there is no prevIoUsly committed offset for a partition
         * the auto.offset.reset strategy will be used to decide where
         * in the partition to start fetching messages.
         * By setting this to earliest the consumer will read all messages
         * in the partition if there was no prevIoUsly committed offset. */
        if (rd_kafka_conf_set(conf, "auto.offset.reset", "earliest",
                              errstr, sizeof(errstr)) != RD_KAFKA_CONF_OK) {
                fprintf(stderr, "%s\n", errstr);
                rd_kafka_conf_destroy(conf);
                return 1;
        }

        /*
         * Create consumer instance.
         *
         * NOTE: rd_kafka_new() takes ownership of the conf object
         *       and the application must not reference it again after
         *       this call.
         */
        rk = rd_kafka_new(RD_KAFKA_CONSUMER, conf, errstr, sizeof(errstr));
        if (!rk) {
                fprintf(stderr,
                        "%% Failed to create new consumer: %s\n", errstr);
                return 1;
        }

        conf = NULL; /* Configuration object is Now owned, and freed,
                      * by the rd_kafka_t instance. */


        /* Redirect all messages from per-partition queues to
         * the main queue so that messages can be consumed with one
         * call from all assigned partitions.
         *
         * The alternative is to poll the main queue (for events)
         * and each partition queue separately, which requires setting
         * up a rebalance callback and keeping track of the assignment:
         * but that is more complex and typically not recommended. */
        rd_kafka_poll_set_consumer(rk);


        /* Convert the list of topics to a format suitable for librdkafka */
        subscription = rd_kafka_topic_partition_list_new(topic_cnt);
        for (i = 0 ; i < topic_cnt ; i++)
                rd_kafka_topic_partition_list_add(subscription,
                                                  topics[i],
                                                  /* the partition is ignored
                                                   * by subscribe() */
                                                  RD_KAFKA_PARTITION_UA);

        /* Subscribe to the list of topics */
        err = rd_kafka_subscribe(rk, subscription);
        if (err) {
                fprintf(stderr,
                        "%% Failed to subscribe to %d topics: %s\n",
                        subscription->cnt, rd_kafka_err2str(err));
                rd_kafka_topic_partition_list_destroy(subscription);
                rd_kafka_destroy(rk);
                return 1;
        }

        fprintf(stderr,
                "%% Subscribed to %d topic(s), "
                "waiting for rebalance and messages...\n",
                subscription->cnt);

        rd_kafka_topic_partition_list_destroy(subscription);


        /* Signal handler for clean shutdown */
        signal(SIGINT, stop);

        /* Subscribing to topics will trigger a group rebalance
         * which may take some time to finish, but there is no need
         * for the application to handle this idle period in a special way
         * since a rebalance may happen at any time.
         * Start polling for messages. */

        while (run) {
                rd_kafka_message_t *rkm;

                rkm = rd_kafka_consumer_poll(rk, 100);
                if (!rkm)
                        continue; /* Timeout: no message within 100ms,
                                   *  try again. This short timeout allows
                                   *  checking for `run` at frequent intervals.
                                   */

                /* consumer_poll() will return either a proper message
                 * or a consumer error (rkm->err is set). */
                if (rkm->err) {
                        /* Consumer errors are generally to be considered
                         * informational as the consumer will automatically
                         * try to recover from all types of errors. */
                        fprintf(stderr,
                                "%% Consumer error: %s\n",
                                rd_kafka_message_errstr(rkm));
                        rd_kafka_message_destroy(rkm);
                        continue;
                }

                /* Proper message. */
                printf("Message on %s [%"PRId32"] at offset %"PRId64":\n",
                       rd_kafka_topic_name(rkm->rkt), rkm->partition,
                       rkm->offset);

                /* Print the message key. */
                if (rkm->key && is_printable(rkm->key, rkm->key_len))
                        printf(" Key: %.*s\n",
                               (int)rkm->key_len, (const char *)rkm->key);
                else if (rkm->key)
                        printf(" Key: (%d bytes)\n", (int)rkm->key_len);

                /* Print the message value/payload. */
                if (rkm->payload && is_printable(rkm->payload, rkm->len))
                        printf(" Value: %.*s\n",
                               (int)rkm->len, (const char *)rkm->payload);
                else if (rkm->payload)
                        printf(" Value: (%d bytes)\n", (int)rkm->len);

                rd_kafka_message_destroy(rkm);
        }


        /* Close the consumer: commit final offsets and leave the group. */
        fprintf(stderr, "%% Closing consumer\n");
        rd_kafka_consumer_close(rk);


        /* Destroy the consumer */
        rd_kafka_destroy(rk);

        return 0;
}
3、编译代码:gcc -g consumer.c -o consumer -lrdkafka -lz -lpthread -lrt
4、先执行echo “127.0.0.1 kafka” >> /etc/hosts 再执行否则出错:./consumer kafka:9090 10 Hello-Kafka


Kafka - PHP 使用 Rdkafka 生产/消费数据
Kafka集群部署
安装rdkafka
rdkafka 依赖 libkafka
yum install rdkafka rdkafka-devel
pecl install rdkafka
php --ri rdkafka
http://pecl.php.net/package/r... 可以参阅支持的kafka客户端版本
生产者
连接集群,创建 topic,生产数据。
<?php
$rk = new Rdkafka\Producer();
$rk->setLogLevel(LOG_DEBUG);

// 链接kafka集群
$rk->addBrokers("192.168.20.6:9092,192.168.20.6:9093");

// 创建topic
$topic = $rk->newTopic("topic_1");

while (true) {
    $message = "hello kafka " . date("Y-m-d H:i:s");
    echo "hello kafka " . date("Y-m-d H:i:s") . PHP_EOL;

    try {
        $topic->produce(RD_KAFKA_PARTITION_UA, 0, $message);
        sleep(2);
    } catch (\Exception $e) {
        echo $e->getMessage() . PHP_EOL;
    }
}
消费者-HighLevel
自动分配partition,rebalance,comsumer group。
<?php
$conf = new RdKafka\Conf();

// Set a rebalance callback to log partition assignments (optional)
$conf->setRebalanceCb(function (RdKafka\KafkaConsumer $kafka, $err, array $partitions = null) {
    switch ($err) {
        case RD_KAFKA_RESP_ERR__ASSIGN_PARTITIONS:
            echo "Assign: ";
            var_dump($partitions);
            $kafka->assign($partitions);
            break;
        case RD_KAFKA_RESP_ERR__REVOKE_PARTITIONS:
            echo "Revoke: ";
            var_dump($partitions);
            $kafka->assign(null);
            break;
        default:
            throw new \Exception($err);
    }
});

// Configure the group.id. All consumer with the same group.id will consume
// different partitions.
$conf->set(''group.id'', ''group_1'');

// Initial list of Kafka brokers
$conf->set(''metadata.broker.list'', ''192.168.20.6:9092,192.168.20.6:9093'');

$topicConf = new RdKafka\TopicConf();

// Set where to start consuming messages when there is no initial offset in
// offset store or the desired offset is out of range.
// ''smallest'': start from the beginning
$topicConf->set(''auto.offset.reset'', ''smallest'');

// Set the configuration to use for subscribed/assigned topics
$conf->setDefaultTopicConf($topicConf);

$consumer = new RdKafka\KafkaConsumer($conf);

// Subscribe to topic ''topic_1''
$consumer->subscribe([''topic_1'']);

echo "Waiting for partition assignment... (make take some time when\n";
echo "quickly re-joining the group after leaving it.)\n";

while (true) {
    $message = $consumer->consume(3e3);
    switch ($message->err) {
        case RD_KAFKA_RESP_ERR_NO_ERROR:
            var_dump($message);
            break;
        case RD_KAFKA_RESP_ERR__PARTITION_EOF:
            sleep(2);
        case RD_KAFKA_RESP_ERR__TIMED_OUT:
            echo $message->errstr() . PHP_EOL;
            break;
        default:
            throw new \Exception($message->errstr(), $message->err);
            break;
    }
}
消费者-LowLevel
指定partition消费。php consumer_lowlevel.php [partitonNuo]LowLevel 没有消费组的概念,也可以认为每个消费者都属于一个独立消费组。
<?php
if (!isset($argv[1])) {
    fwrite(STDOUT, "请指定消费分区:");
    $partition = (int) fread(STDIN, 1024);
} else {
    $partition = (int) $argv[1];
}

$topic = "topic_1";

$conf = new RdKafka\Conf();

// Set the group id. This is required when storing offsets on the broker
$conf->set(''group.id'', ''group_2'');

$rk = new RdKafka\Consumer($conf);
$rk->addBrokers(''192.168.20.6:9092,192.168.20.6:9093'');

$topicConf = new RdKafka\TopicConf();
$topicConf->set(''auto.commit.interval.ms'', 2000);

// Set the offset store method to ''file''
// $topicConf->set(''offset.store.method'', ''file'');
// $topicConf->set(''offset.store.path'', sys_get_temp_dir());

// Alternatively, set the offset store method to ''broker''
$topicConf->set(''offset.store.method'', ''broker'');

// Set where to start consuming messages when there is no initial offset in
// offset store or the desired offset is out of range.
// ''smallest'': start from the beginning
$topicConf->set(''auto.offset.reset'', ''smallest'');

$topic = $rk->newTopic($topic, $topicConf);

// Start consuming partition 0
$topic->consumeStart($partition, RD_KAFKA_OFFSET_STORED);

while (true) {
    $message = $topic->consume($partition, 3 * 1000);
    switch ($message->err) {
        case RD_KAFKA_RESP_ERR_NO_ERROR:
            var_dump($message);
            break;
        case RD_KAFKA_RESP_ERR__PARTITION_EOF:
        case RD_KAFKA_RESP_ERR__TIMED_OUT:
            echo $message->errstr() . PHP_EOL;
            break;
        default:
            throw new \Exception($message->errstr(), $message->err);
            break;
    }
}今天的关于当队列已满时,带有 rdkafka 的 Pykafka 不会阻塞生产者和队列已满的条件的分享已经结束,谢谢您的关注,如果想了解更多关于4.kafka 生产者 --- 向 Kafka 中写入数据 (转)、C++编程中使用librdkafka库去连接kafka集群经验总结、CentOS7.5下使用Docker安装Kafka及C使用librdkafka调用Kafka、Kafka - PHP 使用 Rdkafka 生产/消费数据的相关知识,请在本站进行查询。
如果您想了解如何设计新的@fluentui/react-button [v8 beta]?和如何设计新的商业模式的知识,那么本篇文章将是您的不二之选。我们将深入剖析如何设计新的@fluentui/react-button [v8 beta]?的各个方面,并为您解答如何设计新的商业模式的疑在这篇文章中,我们将为您介绍如何设计新的@fluentui/react-button [v8 beta]?的相关知识,同时也会详细的解释如何设计新的商业模式的运用方法,并给出实际的案例分析,希望能帮助到您!
本文目录一览:- 如何设计新的@fluentui/react-button [v8 beta]?(如何设计新的商业模式)
- BigBlueButton 1.0-beta 发布,远程教育平台
- dart – Flutter – FloatingActionButton在中心
- Fluent Operator v2.0 发布:Fluent Bit 新的部署方式——Fluent Bit Collector
- Fluent-UI 一套受 Fluent Design System 启发的 React 组件库
![如何设计新的@fluentui/react-button [v8 beta]?(如何设计新的商业模式)](http://www.gvkun.com/zb_users/upload/2025/02/c11d652c-bcbf-46e9-93a5-876281565f901738920495138.jpg "如何设计新的@fluentui/react-button [v8 beta]?(如何设计新的商业模式)")
如何设计新的@fluentui/react-button [v8 beta]?(如何设计新的商业模式)
查看了定义新反应按钮的文件,似乎需要一个 ButtonTokens。猜测这是随着更广泛的 Fluent UI 趋势转向样式标记。
const btnStyle : ButtonTokens = { borderColor: 'red' }
return (
   <FluentButton tokens={btnStyle} />
)

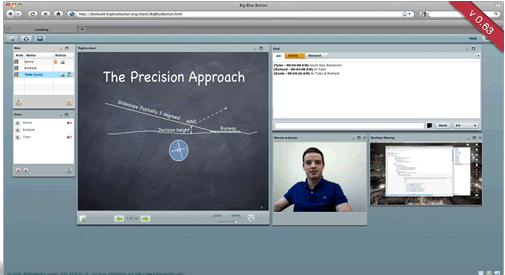
BigBlueButton 1.0-beta 发布,远程教育平台
BigBlueButton 1.0-beta 发布,此版本提供了更多的机会给教师和学生互动。
主要新特性:
Polling – Presenters can now poll students for immediate feedback.
Improved video dock – The video dock now shows the webcams without boarders to give more visibility.
Emoji – Students can now use emoji icons (happy, neutral, sad, confused, and away) to give feedback in addition current raise hand.
Puffin Browser detection – BigBlueButton detects Puffin version 4.6 (or later) and enables the user to broadcast their microphone and webcam within a BigBlueButton session on a mobile device. The Puffin Browser is a mobile web browser supports the latest Flash engine over the cloud for iPad, iPhone and Android.
详细改进和截图请看 1.0-beta overview。
安装请看 1.0-beta install。
开发进度计划请看 development process
更多内容请看发行说明。
BigBlueButton 是一个使用 ActionScript 开发的在线视频会议系统或者是远程教育系统,主要功能包括在线PPT演示、视频交流和语音交流,还可以进行文字交流、举手发言等功能,特别适合用在网上教学,支持中文等多种语音。
界面非常漂亮:

dart – Flutter – FloatingActionButton在中心
import 'package:Flutter/material.dart';
import 'number.dart';
import 'keyboard.dart';

class ContaPage extends StatelessWidget {
  @override
  Widget build(BuildContext context) => new Scaffold(
    body: new Column(
      children: <Widget>[
        new Number(),new Keyboard(),],),floatingActionButton: new FloatingActionButton(
      elevation: 0.0,child: new Icon(Icons.check),backgroundColor: new Color(0xFFE57373),onpressed: (){}
    )
  );
}

解决方法
您应该选择要包装在Flexible中的一部分,以便折叠以避免溢出,或者使用ListView替换部分或全部,以便用户可以滚动查看隐藏的部分.

Fluent Operator v2.0 发布:Fluent Bit 新的部署方式——Fluent Bit Collector
2019 年 1 月 21 日,KubeSphere 社区为了满足以云原生的方式管理 Fluent Bit 的需求开发了 FluentBit Operator。此后产品不断迭代,在 2021 年 8 月 4 日 正式将 FluentBit Operator 捐献给 Fluent 社区,之后重新命名为 Fluent Operator。自此 Fluent Operator 社区吸引了来自世界各地的贡献者参与项目的开发和迭代。
日前,Fluent Operator v2.0(2.0.0 & 2.0.1)发布,该版本新增许多重要功能,并进行了众多优化,以下将重点介绍:
Fluent Bit 新的部署方式: Fluent Bit Collector
Fluent Operator 降低了 Fluent Bit 以及 Fluentd 的使用门槛,能高效、快捷的处理可观测性相关的各种数据。使用 Fluent Operator 可以灵活且方便地部署、配置及管理 Fluent Bit 以及 Fluentd。同时, 社区还提供支持 Fluentd 以及 Fluent Bit 的海量插件,用户可以根据实际情况进行定制化配置。
Fluent Bit 对于处理的数据一直是中立的,在 v2.0 之前 Fluent Bit 主要被用于处理日志数据。 Fluent Bit v2.0 的发布是 Fluent Bit 全面支持可观测性所有类型数据(Logs, Metrics, Tracing)的一个标志和起点。自 Fluent Bit v2.0 开始,除了继续支持处理日志数据之外,也开始支持 Metrics 和 Tracing 数据的收集和发送,即全面支持 Prometheus 和 OpenTelemetry 生态体系。
自从 Fluent Bit 升级到 v2.0+ 后,添加了很多插件比如 Prometheus Scrape Metrics 插件。如果继续以 DaemonSet 的形式部署 Fluent Bit,会导致 Metrics 数据的重复收集。于是 Fluent Operator 自 v2.0 开始支持将 Fluent Bit 以 StatefulSet 的形式部署为 Fluent Bit Collector,这样可以通过网络接收可观测数据,适应更多的可观测数据收集的场景:
- OpenTelemetry
- prometheus-scrape-metrics
- collectd
- forward
- http
- mqtt
- nginx
- statsd
- syslog
- tcp
其中 prometheus-scrape-metrics 插件已由 Fluent Operator 社区提供,其他的输入插件将在未来的迭代中逐步添加。
其他变化
新功能
- 支持在 fluent-operator 部署添加注释
- 支持为 fluent-operator 和 fluent-bit pods 添加标签
- 新增在 fluent-bit-watcher 中添加外部插件标志
- 支持为 Fluent Bit DaemonSet 添加注释
- 在 fluent-bit-watcher 中增加进程终止超时
- 添加
dnsPolic和其他 Kubernetes 过滤器选项到 Fluent Bit CRD
增强功能
- 将
DockerModeParser参数添加到 Fluent Bit tail 插件 - 增加运算器内存限制到 60Mi
- 优化 fluent-operator 图表
- 更新 flushThreadCount 的定义
- 将 Fluent Bit 升级到 v2.0.9
- 将 Fluentd 升级到 v1.15.3
- 优化 e2e 测试脚本
- ...
更多的功能变化请通过 Release note 详细了解:
- v2.0.0
- v2.0.1
致谢贡献者
该版本共有 10 位贡献者参与,在此表示特别感谢。
这些贡献者的 GitHub ID 分别是:
- momoXD007(Michael Wieneke)
- wigust(Oleg Pykhalov)
- antrema(Anthony Treuillier, France)
- Garfield96(Christian Menges, Germany)
- benjaminhuo(Benjamin Huo)
- wenchajun(Elon Cheng)
- samanthacastille(Samantha Castille, Seattle)
- juhis135(Juhi Singh)
- Kristian-ZH(Kristian Zhelyazkov, SAP)
- jjsiv
值得指出的是,这 10 位贡献者中有 8 位来自国外,如德国、法国、美国西雅图以及保加利亚 SAP 等地。
也希望各位开源爱好者提交代码,帮助 Fluent Operator 逐渐完善,使其成为云原生日志管理的瑞士军刀。
本文由博客一文多发平台 OpenWrite 发布!

Fluent-UI 一套受 Fluent Design System 启发的 React 组件库
1. 前言
Website | Github
React 组件库已经有好多了,其中也有很多高质量的范例,但是如果你看多了其他组件库的样式,我相信 Fluent-UI 可以给你一个别致的选择。
2. 亮点
Acrylic

实现 Acrylic 效果的过程可谓是惊喜连连,最开始它的实现是继承父级的 background 并且通过 filter 附加模糊的效果,这样做不但依赖 background-attachment: fixed 而且一旦 background 写在父级之上(比如 body)就无能为力了。
后来发现 backdrop-filter 可以完美解决上面的两个问题,但是最开始的时候只有 safari 默认支持,chrome 必须开启 Experimental Web Platform Features,后来 chrome77 突然默认支持了???于是 filter 方案变成了 "polyfill"。
想体验 Acrylic 效果可以查看 Box 组件。
毛玻璃真香
Reveal

因为存在性能问题,目前这还是个试验中的功能。想体验的可以查看 Command、Navigation
除了使用特定组件以外,还封装了 hooks 的调用方式:
- 安装
yarn add @fluent-ui/hooks- 使用
import { useReveal } from ''@fluent-ui/hooks''

function App () {
  const [RevealWrapper] = useReveal(66)

  return (
    <div>
      <RevealWrapper><div>1</div></RevealWrapper>
      <RevealWrapper><div>2</div></RevealWrapper>
      <RevealWrapper><div>3</div></RevealWrapper>
    </div>
  )
}
Icon
Fluent-UI 的图标 基于 RemixIcon 二次开发。
所有图标基于 svg,这样你可以只打包引用的图标而不是加载整个字体文件。
- 安装
yarn add @fluent-ui/icons- 使用
import BankFillIcon from ''@fluent-ui/icons/BankFill''

function App () {
  return (
    <BankFillIcon />
  )
}
Box + theme
Fluent-UI 采用了 react-jss + styled-system 的组合,Box 组件可封装您的组件并且实现大部分 CSS 需求。
你可以在 Box 上直接使用主题内的 color shadow breakpoint 等,可以查看 默认主题或修改默认主题
<Box
  fontSize={4}
  fontWeight=''bold''
  padding={3}
  margin={[ 4, 5 ]}
  color=''standard.default''
  bg=''primary.default''
  boxShadow="1"
>
  Hello
</Box>
另外 Acrylic 是实现在 Box 组件上的,所以 Command、Navigation、Card 等基于 Box 的组件都默认支持 Acrylic 效果。
文档页

文档的框架考察了很久,最后使用了 GatsbyJS,因为他的 Markdown 插件实在让人难以拒绝,同时它丰富的生态能少踩不少坑。
还有要给大家安利一个超好用的部署方案 ZEIT Now,Gatsby 配合它一键部署,有兴趣的小伙伴可以了解一下,不要钱。
为了给大家带来更好的体验,还特意实现了网站的 可编辑code(react-live),换皮,换图,搜索(algolia),换语言功能。
3. 后话
从立项到这篇文章经历了 4 个月的时间,实现了 20+ 个组件,也花了大量时间在文档页的制作上,作者也是从这个过程中体会了开源项目的种种不易,各种包括 lerna、typescript、jss、打包 的坑是接连不断的踩,当然收获还是巨大的。
长期维护!
目前版本不适合用于生产环境,期待正式版
欢迎各位小伙伴 issues 提需求 提bug。
还有什么问题想要交流可以在帖子下边留言,或者加我微信 chensmoke,都会看。
4. 更新
最新版本 1.0.0-alpha.1
-
1.0.0-alpha.1- reveal 效果改用
css var()实现,性能有明显改善。 - 文档首页开始按钮不用再等那么久才能点啦~
- reveal 效果改用
关于如何设计新的@fluentui/react-button [v8 beta]?和如何设计新的商业模式的问题就给大家分享到这里,感谢你花时间阅读本站内容,更多关于BigBlueButton 1.0-beta 发布,远程教育平台、dart – Flutter – FloatingActionButton在中心、Fluent Operator v2.0 发布:Fluent Bit 新的部署方式——Fluent Bit Collector、Fluent-UI 一套受 Fluent Design System 启发的 React 组件库等相关知识的信息别忘了在本站进行查找喔。
此处将为大家介绍关于在 C# 中授权 OneDrive 用户导致程序神秘崩溃的详细内容,并且为您解答有关c# 授权码的相关问题,此外,我们还将为您介绍关于async void 导致程序崩溃、c – cv :: findcontours导致程序崩溃、C++ 扫描书面文本会导致程序崩溃?、Go语言使用defer+recover解决panic导致程序崩溃的问题的有用信息。
本文目录一览:- 在 C# 中授权 OneDrive 用户导致程序神秘崩溃(c# 授权码)
- async void 导致程序崩溃
- c – cv :: findcontours导致程序崩溃
- C++ 扫描书面文本会导致程序崩溃?
- Go语言使用defer+recover解决panic导致程序崩溃的问题
")
在 C# 中授权 OneDrive 用户导致程序神秘崩溃(c# 授权码)
您正在从非异步 async 调用 Main 方法,而不是等待结果。因此,您的 Handle() 方法会同步执行,直到它到达第一个异步调用。 (authResult = await credentials...) 然后将同步执行流程交还给 Main 方法,该方法无事可做,因此退出。如果 Main 方法结束,当然整个过程也会结束,因为运行时不会等待正在运行的任务完成,除非您明确告诉它这样做。
例如,您可以将 Wait() 用于 Main 方法中的任务
static void Main(string[] args)
{
  Task handleThing = (new Thing()).Handle();
  handleThing.Wait();
}
或者您也可以使您的 Main 异步,然后 await 您的 Handle() 任务
static async Task Main(string[] args)
{
  await (new Thing()).Handle();
}

async void 导致程序崩溃
来源:https://note.guoqianfan.com/2...
前言
之前都是在文档里看到:除了winform的事件可以使用async void,其他情况下绝对不能使用async void,而是要用async Task。
对于这个规范,虽然不是很明白内里原因,但是一直遵守着。
直到这天看到了这篇博客:在 ASP.NET Core 中誤用 async void 竟引發了 502(Bad Gateway),说async void里出现异常时会导致程序崩溃。研究测试了一番,终于明白原因。
摘录重点如下:
根據使用者提供的另一個線索「網站的某個功能壞了」,我們繼續往下追查,從程式碼當中我看到了一個近期新加的方法,它使用了 async void,沒錯,它使用了 async void,而且很不幸地它會發生 Exception,更慘的是這個 Exception 沒有被處理。
對 C# 非同步程式設計有了解的朋友,看到這邊應該大致上可以知道是發什麼問題了,async void 是建議應該避免使用的宣告方式,其中一個原因就是當 async void 方法發生 Exception 時無法從呼叫端捕獲,即使加了 try...catch... 也沒用,async void 方法就有點像是我們自己起了另一個 Thread 去執行程式一樣,執行的過程中如果發生 Exception 沒有去處理,Exception 就會一路被往上拋,最終在 AppDomain 層級被捕獲,然後我們的應用程式就掛了。
async-void-方法的异常无法被捕获
async void方法抛出的异常无法被捕获,异常会被一直往上面抛,最终在AppDomain层级被捕获,然后程序就挂了。
示例代码如下:
[HttpGet]
public async void Get()
{
    try
    {
        ThrowExceptionAsync();
    }
    catch (Exception ex)
    {
        //这里不能捕获到异常,程序崩溃!
        _logger.LogInformation(ex, "ex...");
    }
}

async void ThrowExceptionAsync()
{
    throw new Exception("async void ex!");
}
注意
前面所说的是 async void方法抛出的无法预知到的异常。在async void方法内部,我们仍然能够使用try catch,逻辑是正常逻辑。具体见下面的示例:
[HttpGet]
public async void Get()
{
    //在async void方法内部,我们仍然能够使用try catch,逻辑是正常逻辑。
    //此处try catch是有效的。异常被捕获处理了,async void方法执行无异常,不会导致程序崩溃。
    try
    {
        await Task.Run(() =>
        {
            throw new Exception("ex!");
        });
    }
    catch (Exception ex)
    {
        _logger.LogInformation(ex,"ex...");
    }
}
测试
崩溃
出现异常时能导致崩溃的代码有2种,如下:
[HttpGet]
public async void Get()
{
    //异常会导致程序崩溃
    throw new Exception("ex!");
}

[HttpGet]
public async void Get()
{
    //异常会导致程序崩溃
    await Task.Run(() =>
    {
        throw new Exception("ex!");
    });
}
注意
下面的async void代码不会抛异常。
[HttpGet]
public async void Get()
{
    Task.Run(() =>
    {
        throw new Exception("ex!");
    });
}代码里的async void没问题(不抛异常),其实也符合逻辑。因为async void里面没有异常,自然就不会导致程序崩溃。
异常在Task.Run里面,因为没有使用await进行等待,那么异常就是被线程池线程捕获的,它们捕获到后,不会再往上面抛了,直接自己内部消化掉了。
因为async void在执行时没有异常,自然就不会导致程序崩溃。
但是由于我们不能保证所有代码都没有异常,所以不要使用async void!
不崩溃
只要不是async void,就算请求处理程序抛出了异常,也不会影响到主线程的。最多就是这次请求出错,返回500 Internal Server Error而已。
测试的几种代码如下:
[HttpGet]
public async Task Get()
{
    //500错误码
    throw new Exception("ex!");
}

[HttpGet]
public async Task Get()
{
    //500错误码
    await Task.Run(() =>
    {
        throw new Exception("ex!");
    });
}
c – cv :: findcontours导致程序崩溃
cv::Mat frame,helpframe,yframe,frame32f;
 Videocapture cap(1);
.......
while(waitkey()){
cv::Mat result = cv::Mat::zeros(height,width,CV_32FC3);
cap >> frame; // get a new frame from camera
frame.convertTo(frame32f,CV_32FC3);
for ( int w = 0; w< 10;w ++){
            result += frame32f;
        }
         //Average the frame values.
        result *= (1.0/10);
        result /= 255.0f;
cvtColor(result,CV_RGB2YCrCb); // converting to ycbcr///// the code work fine when I use frame instead of result
extractChannel(yframe,0); //extracting the Y channel
cv::minMaxLoc(helpframe,&minValue,&maxValue,&min,&max);
std::vector<std::vector<cv::Point>> contours;
cv::findContours(helpframe,contours,CV_RETR_LIST /*CV_RETR_EXTERNAL*/,CV_CHAIN_APPROX_SIMPLE);
………………………………………….. ..
程序崩溃在findcontours,我debbug我收到此错误消息:
OpenCV Error: Unsupported format or combination of formats ([Start]FindContours
support only 8uC1 and 32sC1 images) in unkNown function,file ……\src\openc
v\modules\imgproc\src\contours.cpp,line 196@Niko感谢您的帮助我认为我必须将帮助框架转换为其他类型.
当我使用结果时,我得到了
helpframe.type()=>五
和框架我得到0
我不知道这是什么意思?但我会尝试找到转换帮助框架的方法.转换帮助框架后:
helpframe.convertTo(helpframe2,CV_8U)我什么都得不到helpframe2 = 0?当我尝试使用框架而不是结果框架时,转换工作?
知道我应该如何更改帮助框架类型,因为我使用结果而不是框架?
解决方法
// Binarize the image
cv::threshold(helpframe,50,255,CV_THRESH_BINARY);

// Convert from 32F to 8U
cv::Mat helpframe2;
helpframe.convertTo(helpframe2,CV_8U);

cv::findContours(helpframe2,...);

C++ 扫描书面文本会导致程序崩溃?
如何解决C++ 扫描书面文本会导致程序崩溃??
#include <stdio.h>
#include <stdlib.h>

int main(void)
{
    char first_name[10];
    char last_name[10];

    printf("What is your first name? >");
    scanf_s("%s\n",&first_name);

    printf("What is your last name? >");
    scanf_s("%s\n",&last_name);

    printf("Hello and welcome %s %s!\n",first_name,last_name);

    return 0;
}
如果我尝试使用 Ctrl+F5 运行这个程序,我可以输入我的名字,例如 alex,然后我的代码在其余部分崩溃并想退出?
错误之处请指教
谢谢
解决方法
我们通常希望从发布者那里得到编译器和链接器警告和错误(如果有)的输出,尤其是像您这样寻求调试帮助的发布者。我们还建议使用高警告设置进行编译,例如- Visual Studio 中 gcc 或 /W4 的迂腐。
Visual Studio 告诉我以下内容:
严重代码描述项目文件行抑制状态
警告 C6064 缺少对应于转换说明符“2”的“scanf_s”整数参数。 scanf-array C:\Users\Peter\source\repos\scanf-array\scanf-array.cpp 15
警告 C6064 缺少与转换说明符“2”相对应的“scanf_s”的整数参数。 scanf-array C:\Users\Peter\source\repos\scanf-array\scanf-array.cpp 18
警告 C4473 ''scanf_s'':没有足够的参数传递给格式字符串 scanf-array C:\Users\Peter\source\repos\scanf-array\scanf-array.cpp 15
警告 C4473 ''scanf_s'':没有足够的参数传递给格式字符串 scanf-array C:\Users\Peter\source\repos\scanf-array\scanf-array.cpp 18
因此,显然 scanf_s 需要另一个参数。我不知道那个函数,所以 I looked it up(我强调):
与 scanf 和 wscanf 不同,scanf_s 和 wscanf_s 要求您为某些参数指定缓冲区大小。指定所有 c、C、s、S 或字符串控制集 [] 参数的大小。 以字符为单位的缓冲区大小作为附加参数传递。它紧跟在指向缓冲区或变量的指针之后。例如,如果您正在读取一个字符串,则该字符串的缓冲区大小按如下方式传递:
char s[10];
scanf_s("%9s",s,(unsigned)_countof(s)); // buffer size is 10,width spec. is 9
当然,您可以在测试中简单地将 10 写为最后一个参数,如果您更改数组大小(无论如何都应该是定义),它的鲁棒性会降低。瞧,它奏效了。
@t.niese 顺便说一句,数组前面的地址运算符是错误的。该函数期望的是 char 的地址,该地址位于足以接受输入的缓冲区的开头;它不期望数组的地址。原因是10个数组的地址类型为char (*)[10],而20个数组的地址类型为char (*)[20]; 数组具有不同的、不相关的类型。它们不能相互替代,例如在参数声明中。
这在 Java 或 C# 等语言中有所不同,其中数组携带 运行时(而不是编译时)信息,并且可以简单地作为“字符数组,它将知道多长时间”传递:在 C 和 C++ 中,这是编译时间信息,被烘焙到类型中,使不同长度的数组不兼容。
C 程序员和像 scanf 这样的库函数使用这个技巧来简单地(按照惯例)传递第一个字符的地址(对于所有数组长度,其类型自然是相同的——char 的地址,或者甚至无效!)通常还有一个额外的长度参数。 memcpy 就是这样工作的。语言支持这个技巧:数组“衰减”,或者在标准语言中,在大多数表达式中被“调整”为指向它们的第一个元素的指针,例如当它们作为参数传递时。这恰好有助于“第一个元素的地址”兼容性技巧。
也就是说,数组的地址当然是它的第一个元素的地址;也就是说,(intptr_t)&first_name == (intptr_t)&first_name[0] 成立,所以虽然您传递的缓冲区地址的 type 是错误的,但地址本身是正确的,而且由于 scanf 不关心类型,除了对于它的第一个参数,它只是将它用作第一个字符的地址,事实上,它是。
旁边的另一个注释:不要在格式中包含\n,它需要用户在这里按两次回车。
使用 std::cin 而不是 scanf_s 。 它显示错误:错误 C4996:''scanf_s'':此函数或变量可能不安全
,来自 C 库的 IO 函数(printf*、scanf* 和朋友)是相当不错的老东西。因为它们强大而灵活。但这样做的代价是,应该谨慎使用它们,并深入了解您在做什么。
主要注意的是它们是可变参数。也就是说,最后一个参数的类型完全由程序员负责。这个函数族是以这样的方式构建的,这个可变参数应该对应于格式字符串的(强制)参数。更准确地说:到其中的格式说明符及其顺序。
因此,您指定了 %s。让我们阅读手册中关于此转换说明符的内容:
匹配一系列非空白字符(一个字符串)
如果使用宽度说明符,匹配到宽度或直到第一个 空白字符,以先出现者为准。总是存储一个空值 除了匹配的字符之外的字符(因此参数数组 必须有至少宽度+1个字符的空间)
在这里你可以读到“数组”这个词。因此,字符数组(C 字符串)参数应传递给 scanf 说明符的 %s。但是您将指针传递给了数组。我们可以说:指向指针的指针。因为 C 中的数组变量包含指向第一个数组元素的指针。 &array 表达式本身给出了 array 变量的地址,而不是数组。即,内存中放置 array 变量的地址。在您的示例中,scanf 忠实地尝试将您输入的字符串放在您传递的地址中 - 在 first_name 变量 存储的位置,不 在放置数组字节的地方。
所以,简而言之,& 运算符在您的代码中是浪费。
但是,即使您将它们删除,您的代码仍然有可能使您的程序崩溃。因为 first_name 和 last_name 数组的长度为 10 个字符,但用户可以输入 10 个以上的符号。在这种情况下,scanf 也会尝试将超大的尾部放置在阵列存储之外。这很可能会导致程序崩溃。正如您在 %s 描述的引用中所读到的,长度说明符可以与此说明符一起使用,它应该指的是目标数组的长度。在您的示例中,可以使用 %9s 转换说明符。字符串的最后一个字节将被 scanf 填充为 0,因此第 10 个字节保留用于此目的。
更新:
是的,scanf_s 版本需要一个 %c、%s 或 %[ 转换说明符的两个参数——通常的指针和 {{1} 类型的值}} 表示接收数组的大小,用 rsize_t 读入单个字符时可能为 1。

Go语言使用defer+recover解决panic导致程序崩溃的问题
案例:如果我们起了一个协程,但这个协程出现了panic,但我们没有捕获这个协程,就会造成程序的崩溃,这时可以在goroutine中使用recover来捕获panic,进行处理,这样主线程不会受到影响。
代码如下:
package main

import (
	"fmt"
	"time"
)

func sayHello()  {
	for i := 0; i < 10; i++ {
		time.Sleep(time.Second)
		fmt.Println("hello world")
	}
}
func test()  {
	//使用 defer + recover
	defer func() {
		//捕获test抛出的panic
		if err := recover();err!=nil{
			fmt.Println("test发生错误",err)
		}
	}()
	//定义一个map
	var myMap map[int]string
	myMap[0] = "golang" //error
}

func main() {

	go sayHello()
	go test()

	for i := 0; i < 10; i++ {
		fmt.Println("main() ok=",i)
		time.Sleep(time.Second)
	}
}
执行结果如下图:

到此这篇关于Go语言使用defer+recover解决panic导致程序崩溃的问题的文章就介绍到这了,更多相关Go panic程序崩溃内容请搜索以前的文章或继续浏览下面的相关文章希望大家以后多多支持!
- Golang异常处理之defer,panic,recover的使用详解
- Go基础教程系列之defer、panic和recover详解
- GoLang中panic与recover函数以及defer语句超详细讲解
今天关于在 C# 中授权 OneDrive 用户导致程序神秘崩溃和c# 授权码的讲解已经结束,谢谢您的阅读,如果想了解更多关于async void 导致程序崩溃、c – cv :: findcontours导致程序崩溃、C++ 扫描书面文本会导致程序崩溃?、Go语言使用defer+recover解决panic导致程序崩溃的问题的相关知识,请在本站搜索。
最近很多小伙伴都在问使用 use-http 和 react-hook-form 在 api 调用后更新 Material-UI TextField和react调用接口这两个问题,那么本篇文章就来给大家详细解答一下,同时本文还将给你拓展Flutter Bloc不会更改TextFormField initialValue、Flutter Textformfield 如何在 Textformfield 中居中文本、Flutter:使用ChangeNotifier更新TextFormField文本、iphone-使用TextField及关闭键盘(useing TextField for inputs、using the keyboard)等相关知识,下面开始了哦!
本文目录一览:- 使用 use-http 和 react-hook-form 在 api 调用后更新 Material-UI TextField(react调用接口)
- Flutter Bloc不会更改TextFormField initialValue
- Flutter Textformfield 如何在 Textformfield 中居中文本
- Flutter:使用ChangeNotifier更新TextFormField文本
- iphone-使用TextField及关闭键盘(useing TextField for inputs、using the keyboard)
")
使用 use-http 和 react-hook-form 在 api 调用后更新 Material-UI TextField(react调用接口)
如何解决使用 use-http 和 react-hook-form 在 api 调用后更新 Material-UI TextField?
当我发送 http 调用并将其传递给子组件而不是尝试使用 react-hook-form (setValue) 更新 TextField 时,浮动标签不会缩小。 请参阅下面的代码和框: https://codesandbox.io/s/romantic-bird-tq4sf?file=/src/App.js
解决方法
暂无找到可以解决该程序问题的有效方法,小编努力寻找整理中!
如果你已经找到好的解决方法,欢迎将解决方案带上本链接一起发送给小编。
小编邮箱:dio#foxmail.com (将#修改为@)

Flutter Bloc不会更改TextFormField initialValue
我也遇到了完全相同的问题。在添加 Unique Key 时,颤动不断构建小部件并且我的键盘每次都没有焦点。我解决的方法是在 TextField 的 onChanged 事件中添加去抖动。
class InputTextWidget extends StatelessWidget {
final Function(String) onChanged;
Timer _debounce;


void _onSearchChanged(String value) {
    if (_debounce?.isActive ?? false) _debounce.cancel();
    _debounce = Timer(const Duration(milliseconds: 2000),() {
      onChanged(value);
    });
  }

@override
  Widget build(BuildContext context) {
         return TextFormField(
          controller: TextEditingController(text: value)
            ..selection = TextSelection.fromPosition(
              TextPosition(offset: value.length),),onChanged: _onSearchChanged,onEditingComplete: onEditingCompleted,);
       }
     }
希望这对使用表单、集团和更新表单的人有所帮助。
编辑:虽然添加了去抖动帮助显示了什么。我已将代码更改为更健壮。这是变化。
InputTextWidget(已更改)
class InputTextWidget extends StatelessWidget {
final Function(String) onChanged;
final TextEditingController controller;


void _onSearchChanged(String value) {
    if (_debounce?.isActive ?? false) _debounce.cancel();
    _debounce = Timer(const Duration(milliseconds: 2000),() {
      onChanged(value);
    });
  }

@override
  Widget build(BuildContext context) {
         return TextFormField(
          controller: controller,);
       }
     }
在我的演讲结束时
class _NameField extends StatelessWidget {
  const _NameField({
    Key key,}) : super(key: key);

  @override
  Widget build(BuildContext context) {
    final TextEditingController _controller = TextEditingController();
    return BlocConsumer<SomeBloc,SomeState>(
      listenWhen: (previous,current) =>
          previous.name != current.name,listener: (context,state) {
        final TextSelection previousSelection = _controller.selection;
        _controller.text = state.name;
        _controller.selection = previousSelection;
      },buildWhen: (previous,builder: (context,state) => FormFieldDecoration(
        title: "Name",child: InputTextWidget(
          hintText: "AWS Certification",textInputType: TextInputType.name,controller: _controller,onChanged: (value) => context
              .read< SomeBloc >()
              .add(SomeEvent(
                  value)),);
  }
}
此编辑工作正常。
最终编辑:
我在我的区块状态中添加了一个 key? key 并将这个键传递给小部件。如果我需要再次重绘表单,我将事件中的键更改为 UniqueKey。这是迄今为止我将 bloc 和 form 一起实现的最简单的方法。如果需要解释,请在此评论,我稍后补充。
您可以复制粘贴以下运行完整代码1和2的代码
您可以向UniqueKey()或Scaffold提供TextFormField来强制重新创建
您可以参考https://medium.com/flutter/keys-what-are-they-good-for-13cb51742e7d了解详情
如果Element的键与相应的Widget的键不匹配。这会导致Flutter停用这些元素,并删除元素树中对元素的引用
解决方案1:
return Scaffold(
        key: UniqueKey(),body: Form(
解决方案2:
TextFormField(
               key: UniqueKey(),
工作演示

完整代码1 Scaffold与UniqueKey
import 'package:flutter/material.dart';
import 'package:bloc/bloc.dart';
import 'package:flutter_bloc/flutter_bloc.dart';
import 'dart:developer' as developer;

void main() {
  runApp(MyApp());
}

enum Event { first }

class ExampleBloc extends Bloc<Event,int> {
  ExampleBloc() : super(0);
  @override
  Stream<int> mapEventToState(Event event) async* {
    yield state + 1;
  }
}

class MyApp extends StatelessWidget {
  const MyApp({Key key}) : super(key: key);

  @override
  Widget build(BuildContext context) {
    print("build");
    return MaterialApp(
      home: BlocProvider(
        create: (_) => ExampleBloc(),child: Builder(
          builder: (contex) => SafeArea(
            child: BlocConsumer<ExampleBloc,int>(
                listener: (context,state) {},int state) {
                  print("state ${state.toString()}");
                  developer.log(state.toString());
                  return Scaffold(
                    key: UniqueKey(),body: Form(
                      child: Column(
                        children: [
                          TextFormField(
                            autocorrect: false,initialValue: state.toString(),RaisedButton(
                            child: Text('Press'),onPressed: () {
                              context.bloc<ExampleBloc>().add(Event.first);
                            },)
                        ],);
                }),);
  }
}
完整代码2 TextFormField与UniqueKey
import 'package:flutter/material.dart';
import 'package:bloc/bloc.dart';
import 'package:flutter_bloc/flutter_bloc.dart';
import 'dart:developer' as developer;

void main() {
  runApp(MyApp());
}

enum Event { first }

class ExampleBloc extends Bloc<Event,int state) {
                  print("state ${state.toString()}");
                  developer.log(state.toString());
                  return Scaffold(
                    body: Form(
                      child: Column(
                        children: [
                          TextFormField(
                            key: UniqueKey(),autocorrect: false,);
  }
}
您不应仅仅因为要更新Form的值,尝试使用TextFormField并更新侦听器上的值而重建整个TextEditingController。
TextEditingController _controller = TextEditingController();
BlocProvider(
    create: (_) => ExampleBloc(),child: Builder(
      builder: (contex) => SafeArea(
        child: BlocListener<ExampleBloc,int>(
            listener: (context,state) {
                _controller.text = state.toString();
            },child: Scaffold(
                body: Form(
                  child: Column(
                    children: [
                      TextFormField(
                        controller: _controller,initialValue: context.bloc<ExampleBloc>().state.toString()
                      ),RaisedButton(
                        child: Text('Press'),onPressed: () {
                          context.bloc<ExampleBloc>().add(Event.first);
                        },)
                    ],);
            }),
Flutter Textformfield 如何在 Textformfield 中居中文本
如何解决Flutter Textformfield 如何在 Textformfield 中居中文本?
如何将 Textformfield 中的文本居中?

这里我们看到两个 Textformfield 的值为 800 和 80。现在我想将内容居中,使 80 居中在 800 下方,如第二张图片所示。

我认为这只是一件小事。 感谢帮助
解决方法
使用 textAlign: TextAlign.center,

 SizedBox(
          width: 100,child: Column(
            children: [
              TextFormField(
                textAlign: TextAlign.center,),TextFormField(
                textAlign: TextAlign.center,],
Flutter:使用ChangeNotifier更新TextFormField文本
您运行的第二个示例在运行时没有任何错误:
import 'package:flutter/material.dart';
import 'package:provider/provider.dart';

void main() {
  runApp(MyApp());
}

class MyModel extends ChangeNotifier {
  void updateCounter() {
    ++_counter;
    notifyListeners();
  }

  MyModel() {
    _counter = 1;
  }

  int _counter;
  String get counter => _counter.toString();
}

class MyApp extends StatelessWidget {
  @override
  Widget build(BuildContext context) {
    return ChangeNotifierProvider(
      create: (context) => MyModel(),child: MaterialApp(
        title: 'Test',home: MyHomePage(),),);
  }
}

class MyHomePage extends StatefulWidget {
  MyHomePage({Key key}) : super(key: key);

  @override
  _MyHomePageState createState() => _MyHomePageState();
}

class _MyHomePageState extends State<MyHomePage> {
  var _text2Ctl = TextEditingController();

  @override
  Widget build(BuildContext context) {
    return Scaffold(
        body: Column(mainAxisAlignment: MainAxisAlignment.center,children: [
      FlatButton(
        onPressed: () {
          Provider.of<MyModel>(context,listen: false).updateCounter();
        },child: Text('Press me'),// 2nd attempt
      // Works but with `Another exception was thrown: setState() or markNeedsBuild() called during build.` because it changes text via controller (which implies a rebuild) during building.
      Consumer<MyModel>(builder: (context,model,child) {
        _text2Ctl.text = model.counter;
        return TextFormField(controller: _text2Ctl);
      })
    ]));
  }
}

")
iphone-使用TextField及关闭键盘(useing TextField for inputs、using the keyboard)
创建项目,名字为KeyBoard,我用的是xcode4.2!
在MainStoryboard.storyboard文件里拖四个label和四个TextField,如下界面:
填满内容:
点击完成Done键盘会消失!!
首先我先说说四个TextField的属性分别对应如下:
name:
age:keyboard改成Numbers and Punctuation
password:把Secure属性勾上
email:keyBoard发成E-mail Address
接下来是在KeyboardViewController.h文件定义如下:
- (IBAction)doneEdit:(id)sender;
在KeyboardViewController.m文件实现如下:
- (IBAction)doneEdit:(id)sender {
    [sender resignFirstResponder];
}
把四个TextFiled的Did End on Exit做连接出口 IBAction,连到doneEdit方法上!这个大家都知道怎么连哈!在此不给出图例了!
[sender resignFirstResponder],是要求文本字段第一响应者的地位辞职,这就意味着不再需要键盘与文本字段的交互了,使其隐藏!
这样,效果就达到了,还有人会想:“我不想按Done键使其隐藏,我想使它按下后面的背景就把键盘隐藏了。”,不要急,接下来就说这种情况!!!!
还在原来的项目中进行,在视图中添加一个按钮,一个很大的按钮,能把正个视图盖住,把Type属性改成Custom,并把按钮拉到所有控件的上面,也就是第一位置如下图,这样做是为了不让按钮挡住所有按钮!
在KeyboardViewController.h文件中添加代码如下:
@interface KeyboardViewController : UIViewController{
    UITextField *email;
    UITextField *password;
    UITextField *age;
    UITextField *name;
}
@property (retain, nonatomic) IBOutlet UITextField *email;
@property (retain, nonatomic) IBOutlet UITextField *password;
@property (retain, nonatomic) IBOutlet UITextField *age;
@property (retain, nonatomic) IBOutlet UITextField *name;
- (IBAction)buttonEdit:(id)sender;
- (IBAction)doneEdit:(id)sender;
@end
并把button按钮Touch Up Inside事件连接到buttonEdit;
在KeyboardViewController.m文件实现:
@synthesize email;
@synthesize password;
@synthesize age;
@synthesize name;
- (IBAction)buttonEdit:(id)sender {
    [email resignFirstResponder];
    [password resignFirstResponder];
    [age resignFirstResponder];
    [name resignFirstResponder];
}
这样就实现了点击背影就关闭键盘了。
还有人会想:“我想一打开应用就打开键盘并且光标在name框内”。
那么就在viewDidLoad 里写入代码:
- (void)viewDidLoad
{
    [name becomeFirstResponder];
    [super viewDidLoad];
}
嗯!
学习过程 中不怕麻烦,希望跟大家一块努力学习!有什么不好的地方,请多指出!!!
原文链接: http://blog.csdn.net/rhljiayou/article/details/7520853
今天的关于使用 use-http 和 react-hook-form 在 api 调用后更新 Material-UI TextField和react调用接口的分享已经结束,谢谢您的关注,如果想了解更多关于Flutter Bloc不会更改TextFormField initialValue、Flutter Textformfield 如何在 Textformfield 中居中文本、Flutter:使用ChangeNotifier更新TextFormField文本、iphone-使用TextField及关闭键盘(useing TextField for inputs、using the keyboard)的相关知识,请在本站进行查询。
对于想了解如何让简单的线程工作 Python的读者,本文将提供新的信息,我们将详细介绍python线程怎么写,并且为您提供关于(手写实现)BP神经网络python实现简单的线性回归、c# – 当它只有一个具体的时候,如何让简单的注入器自动解析接口?、C++比Python快50倍?如何让C++和Python优势互补?(Boost::Python)、PyQt应用程序中的线程:使用Qt线程还是Python线程?的有价值信息。
本文目录一览:- 如何让简单的线程工作 Python(python线程怎么写)
- (手写实现)BP神经网络python实现简单的线性回归
- c# – 当它只有一个具体的时候,如何让简单的注入器自动解析接口?
- C++比Python快50倍?如何让C++和Python优势互补?(Boost::Python)
- PyQt应用程序中的线程:使用Qt线程还是Python线程?
")
如何让简单的线程工作 Python(python线程怎么写)
您可以应用 ThreadPoolExecutor 移动代码执行请求以分离函数并将其作为参数传递:
import urllib3
import requests
from concurrent.futures import ThreadPoolExecutor,as_completed

urllib3.disable_warnings(urllib3.exceptions.InsecureRequestWarning)

def check_func(url):
    response = requests.get(url,verify=False,timeout=10)
    return response.status_code == 200

def main():
    with open("websites.txt") as website_f,open("para1.txt") as para1_f,open("para2.txt",'r') as para2_f,ThreadPoolExecutor(max_workers=4) as executor:
        tasks = {}
        for website in website_f:
            for para1 in para1_f:
                for para2 in para2_f:
                    url = website.rstrip() + para1.rstrip() + para2.rstrip()
                    tasks[executor.submit(check_func,url)] = url

        for task in as_completed(tasks):
            url = tasks[task]
            try:
                result = task.result()
            except KeyboardInterrupt:  # handling Ctrl + C
                for task in tasks:
                    task.cancel()      # won't cancel already finished or pending futures
            except CancelledError:     # will never happen (normally)
                pass
            except Exception as e:
                print(url,"-","ERROR",e)
            else:
                print(url,"GOOD" if result else "BAD")

if __name__ == "__main__":
    main()
P.S.我还没有测试过整个代码,所以如果它有任何问题 - 写在评论中。
BP神经网络python实现简单的线性回归")
(手写实现)BP神经网络python实现简单的线性回归
import numpy as np
import matplotlib.pyplot as plt
import random

#生成x数据集
qq = []
for i in range(100):
    qq.append([random.randint(0,100),random.randint(0,100)])
qq = np.mat(qq).reshape(-1,2)
# print(qq)
z_labels = qq*[[3],[4]] + 5
# print(z_label)

num_y = 2
num_x = 2
k = np.mat([[1.,2.],[3.,4.]])

qq = np.mat(qq).reshape(-1,2)
b = np.mat([[1.],[2.]])
B = 0
w = np.ones((num_y,1))
w = np.mat(w)
α = 0.000001
result = []
test_x = []
num = 0
m,n = qq.shape
for index in range(m):
    for i in range(5):
        x = qq[index,:]
        z_label = z_labels[index,:]
        # print(''x:'',x)
        # print(z_label)
        y = k * x.T + b
        # print(''y:'',y)
        a = y
        a[0,0] = max(0,a[0,0])
        a[1,0] = max(0,a[1,0])
        z = w.T * a + B
        # print("误差:",np.square(z-z_label),z,z_label)
        result.append(np.square(z-z_label)[0,0])
        if np.square(z - z_label) < 0.0001:
            # print(''收敛'')
            break
        error = (z - z_label)
        w -= α * error[0, 0] * a
        B -= α * error[0, 0]
        k -= α*error[0,0] * (w * x).T
        b -= α*error[0,0] * w

final = []
for i in qq:
    y = k * i.T + b
    a = y
    a[0, 0] = max(0, a[0, 0])
    a[1, 0] = max(0, a[1, 0])
    mm = w.T * a + B
    final.append(mm[0,0])
# print(final)
xx = np.linspace(0,100,100)
plt.grid()
plt.plot(xx,z_labels,''r--'')
plt.plot(xx,final,''g-'')

plt.show()
预测线性函数 z = w1 * x1 + w2 * x2

c# – 当它只有一个具体的时候,如何让简单的注入器自动解析接口?
readonly IQueryFactory queryFactory;
readonly ICommandFactory commandFactory;

public UserBenefitsController(
    IQueryFactory queryFactory,ICommandFactory commandFactory)
{
    this.queryFactory = queryFactory;
    this.commandFactory = commandFactory;
}
我使用简单的注入器来注册这两种类型.
container.RegisterWebApiRequest<IQueryFactory,QueryFactory>();
container.RegisterWebApiRequest<ICommandFactory,CommandFactory>();
但我发现,随着我继续开发我的应用程序,我继续有很多ISomeInterface以1:1的比例解析为ISomeConcrete.
是否有可能告诉简单的注入器在接口处查找并在WebApiRequest范围内只有1个具体的情况下自动解析它?
解决方法
Simple Injector文档解释了它 here
例如:
ScopedLifestyle scopedLifestyle = new WebApiRequestLifestyle();

var assembly = typeof(YourRepository).Assembly;

var registrations =
    from type in assembly.GetExportedTypes()
    where type.Namespace == "Acme.YourRepositories"
    where type.GetInterfaces().Any()
    select new
    {
        Service = type.GetInterfaces().Single(),Implementation = type
    };

foreach (var reg in registrations)
    container.Register(reg.Service,reg.Implementation,scopedLifestyle);
")
C++比Python快50倍?如何让C++和Python优势互补?(Boost::Python)
目录
- 1 为什么需要多语言联合编程?
- 2 Python调用C++的主要方式
- 2.1 SWIG
- 2.2 Boost::Python
- 2.3 ctypes
- 3 Boost::Python安装
- 4 测试实例:python继承C++接口
- 5 常见问题
- 6 参考文档
1 为什么需要多语言联合编程?

在大型工程项目中,经常会遇到多语言联合编程的情况,举个例子:
在一个远端控制系统中,前端Web使用html+css+js;后端采用python-flask作为服务端,底层控制采用C/C++
这是因为不同编程语言有各自的适用场景和语法特性,联合编程可使得各种语言发挥自己的特长。本文主要比较Python和C++,先列举各自特点如下:
| 对比项目 | C++ | Python |
|---|---|---|
| 本质 | 编译型语言 | 解释型语言 |
| 编程难度 | 难以掌握 | 易于上手 |
| 语法特性 | 静态 | 动态 |
| 垃圾回收 | 不支持 | 支持 |
| 安装 | 易 | 难(需要专门打包) |
| 数据类型 | 在编译时由关键字确定 | 在运行时由数值确定 |
| 函数 | 输入参数和返回值类型有限制 | 输入参数和返回值类型无限制 |
| 执行速度 | 快 | 慢 |
| 性能 | 高 | 低 |
国外有一个测试指出在相同复杂度算法中,C++约比Python快50倍左右。因此Python不适合用于底层算法的开发,应用在上层应用中作粘合剂或进行智能领域的研究比较占优;C/C++则适合用于底层控制算法编程。下面主要介绍Python调用C++,让C++和Python形成优势互补。
2 Python调用C++的主要方式
主要介绍三种C++/Python联合编程的方式:
2.1 SWIG
- 支持Python、Java、Ruby等语言调用C接口
- 文档全面,易于学习
- 绑定性能欠佳, 不支持属性和内部类封装
- C++支持不好
2.2 Boost::Python
- 支持Python2与python3调用C++接口
- 大量使用C++ templates,明显提高编译时间
- 非常可靠、稳定、经过充分测试
- 语法较复杂,且文档不详细

本文采用Boost::Python进行C++/Python联合编程。
2.3 ctypes
- 灵活,完全兼容C语言
- 使用较繁琐且不支持C++特性
3 Boost::Python安装
打开参考中的官方下载地址,根据不同的操作系统平台下载boost,UNIX和Windows的安装流程差不多,下面以Windows系统为例说明安装过程。

按下面步骤安装编译
Boost::Python
- 下载最新的
boost_1_79_0.zip并解压到本地目录 - 运行
bootstrap.bat在目录下产生b2.exe可执行文件 - 进入根目录新建
user-config.jam用户配置文件,存放本地C++/Python信息
其中using msvc : 14.2; using python : 3.7.5 : "D:/Anaconda/Anaconda/envs/test/python.exe" : "D:/Anaconda/Anaconda/envs/test/include" : "D:/Anaconda/Anaconda/envs/test/libs";msvc是Visual Studio对应的msvc toolset版本,具体对应关系如下:
python则定义了本地使用的python解释器相关路径和库 - 命令行执行自动化安装:
其中一些关键参数解释如下:b2 --with-python install --prefix="D:/3rdLib/boost/boost_1_79_0/bin/lib64-msvc-14.2" toolset=msvc-14.2 link=static address-model=64 --user-config=user-config.jam-
with-|without-:前者后接要编译的Boost库名,如本文中只需编译Boost下的Python库;后者即为编译除之外的所有库,缺省则为全部编译 -
stage|install:前者表示只生成库文件(.dll与.lib),后者会额外生成include目录包含库文件对应的头文件,推荐使用stage,因为安装完成后根目录下的boost与include目录文件完全一致,可直接作为头文件使用,节省编译时间 -
stagedir|prefix:表示编译生成文件的路径,前者对应stage安装模式,后者对应install安装模式。建议在根目录下新建bin目录管理生成的库文件# VS2019编译的x86库文件 bin/lib32-msvc-14.2 # VS2019编译的x64库文件 bin/lib64-msvc-14.2 -
toolset:表示编译器,可选gcc、msvc-14.2(VS2019)等 -
link:指定生成动态链接库shared还是静态链接库static,推荐使用静态库方式编译,这样发布程序时无需连带发布Boost的.dll文件,本文采用静态编译。
-
address-model:指定编译版本,可选32|64,该参数必须和本地安装的Python位数相对应,否则会编译出错 -
user-config:使用的本地用户配置文件路径
-
补充一下编译库文件的命名格式:
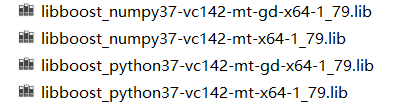
libboost_python37-vc142-mt-gd-x64-1_79
| ||   | |      | |   | || ||| | | |  |
 -  ---   ------   ---  -- - -  -   --
 1   2       3      4    5 6 7  8    9
- 静态库以
lib开头,动态库没有lib前缀 -
boost::python库名称和版本 - 编译器名称及版本
-
mt代表threading=multi,没有则代表threading=single -
s代表runtime-link=static,没有则代表runtime-link=shared -
gd代表debug版本,没有则代表release版本 -
x32代表32 位程序,x64代表64 位 - Boost库版本,
1_79代表Boost 1.79版本。
4 测试实例:python继承C++接口
新建工程文件夹,包含三个文件helloworld.cpp、helloworld.py与CMakeLists.txt
在helloworld.cpp中编写:
// 因为采用静态编译boost库,因此必须定义此宏,否则编译出错
#define BOOST_PYTHON_STATIC_LIB

#include<boost/python.hpp>
#include<boost/python/wrapper.hpp>
#include<string>
#include<iostream>

using namespace boost::python;
using namespace std;

struct Base
{
    virtual ~Base() {}
    virtual int f() { return 0; };
};

struct BaseWrap : Base, wrapper<Base>
{
    int f()
    {
        if (override f = this->get_override("f"))
            return f(); //如果函数进行重载了,则返回重载
        return Base::f(); //否则返回基类
    }
    int default_f() { return this->Base::f(); }
};

BOOST_PYTHON_MODULE(hello)
{
    class_<BaseWrap, boost::noncopyable>("Base")
        .def("f", &Base::f, &BaseWrap::default_f);
}
在CMakeLists.txt中编写编译规则
project(Boost_Test)
cmake_minimum_required(VERSION 2.8.3)

if(MSVC)
    # set(Boost_USE_STATIC_LIBS ON)
    set(Boost_DIR D:/3rdLib/boost/boost_1_79_0/stage/lib/cmake/Boost-1.79.0)
    set(PYTHON_INCLUDE_Dirs D:/Anaconda/Anaconda/envs/test/include)
    set(PYTHON_LIBRARIES D:/Anaconda/Anaconda/envs/test/libs/python37.lib)
    find_package(Boost 1.79.0 CONfig COMPONENTS python required)
    include_directories(${Boost_INCLUDE_DIR} ${PYTHON_INCLUDE_Dirs})
endif(MSVC)

set(MODULE_NAME hello)
add_library(${MODULE_NAME} SHARED
    helloword.cpp
	)

if (UNIX)
  set_target_properties(${MODULE_NAME}
    PROPERTIES
    PREFIX ""
  )
elseif (WIN32)
  set_target_properties(${MODULE_NAME}
  PROPERTIES
  SUFFIX ".pyd"
  )
endif()

target_link_libraries(${MODULE_NAME}
  ${Boost_LIBRARIES}
  ${PYTHON_LIBRARIES}
)
在工程目录下执行以下命令行:
mkdir build
cd build
cmake ..
make
即可编译出hello.pyd二进制文件,将该文件置于工程目录下(与helloworld.py在同一个目录),在helloworld.py中导入接口,测试多态:
import hello
base = hello.Base()
# 定义派生类,继承C++类
class Derived(hello.Base):
    def f(self):
        return 42

derived = Derived()
print( base.f())
print (derived.f())
输出以下内容,证明实验成功
>>> 0
>>> 42
5 常见问题
-
#include <boost\python.hpp>无法打开源文件'pyconfig.h'解决方案:首先确保当前虚拟环境下有
pyconfig,否则需要pip install。接着对于vscode,在c_cpp_properties.json中添加python的include目录 -
error LNK2019: 无法解析的外部符号 "__declspec(dllimport) class boost::python::xxx解决方案:库链接出错,对于静态编译的Boost::python库需要在C++文件中声明静态编译宏
#define BOOST_PYTHON_STATIC_LIB
6 参考文档
- Boost::Python官方文档
- Boost::Python下载官网

PyQt应用程序中的线程:使用Qt线程还是Python线程?
我正在编写一个GUI应用程序,该应用程序通过Web连接定期检索数据。由于此检索需要一段时间,因此这会导致UI在检索过程中无响应(无法拆分成较小的部分)。这就是为什么我想将Web连接外包给一个单独的工作线程。
[是的,我知道,现在我有两个问题。]
无论如何,该应用程序使用PyQt4,所以我想知道更好的选择是:使用Qt的线程还是使用Python threading模块?各自的优点/缺点是什么?还是您有完全不同的建议?
尽管在我的特定情况下,解决方案可能会使用非阻塞网络请求,例如Jeff Ober和LukášLalinský建议的(所以基本上将并发性问题留给了网络实现),但我仍然希望深入回答一般问题:
与本地Python线程(来自threading模块)相比,使用PyQt4(即Qt)线程有什么优缺点?
编辑2:谢谢大家的回答。尽管没有达成100%的协议,但似乎普遍的共识是答案是“使用Qt”,因为这样做的优点是与库的其余部分集成在一起,而没有造成真正的不利。
对于希望在这两种线程实现之间进行选择的任何人,我强烈建议他们阅读此处提供的所有答案,包括方丈链接到的PyQt邮件列表线程。
我考虑了一些悬赏的答案;最后,我选择了方丈作为非常相关的外部参考。然而,这是一个密切的电话。
再次感谢。
答案1
小编典典大致相同。主要区别在于QThreads与Qt(异步信号/插槽,事件循环等)更好地集成在一起。另外,您不能在Python线程中使用Qt(例如,不能通过QApplication.postEvent将事件发布到主线程):您需要一个QThread才能工作。
一般的经验法则是,如果您要以某种方式与Qt进行交互,则可以使用QThreads;否则,请使用Python线程。
PyQt的作者对此问题也发表了一些较早的评论:“它们都是相同的本机线程实现的包装器”。两种实现都以相同的方式使用GIL。
关于如何让简单的线程工作 Python和python线程怎么写的问题我们已经讲解完毕,感谢您的阅读,如果还想了解更多关于(手写实现)BP神经网络python实现简单的线性回归、c# – 当它只有一个具体的时候,如何让简单的注入器自动解析接口?、C++比Python快50倍?如何让C++和Python优势互补?(Boost::Python)、PyQt应用程序中的线程:使用Qt线程还是Python线程?等相关内容,可以在本站寻找。
在本文中,我们将为您详细介绍NavigationControl 在 Access 中以编程方式更改选项卡的相关知识,并且为您解答关于access代码编辑窗口的疑问,此外,我们还会提供一些关于android – 是否可以以编程方式更改actionbar选项卡、CLAdvanceNavigationController iOS 导航栏、DestinationViewController Segue和UINavigationController迅速、Implementing Navigation with UINavigationControlle的有用信息。
本文目录一览:- NavigationControl 在 Access 中以编程方式更改选项卡(access代码编辑窗口)
- android – 是否可以以编程方式更改actionbar选项卡
- CLAdvanceNavigationController iOS 导航栏
- DestinationViewController Segue和UINavigationController迅速
- Implementing Navigation with UINavigationControlle
")
NavigationControl 在 Access 中以编程方式更改选项卡(access代码编辑窗口)
问题似乎与应用 BrowseTo 之前关注的内容有关。 为了使完整路径有效,主窗体被聚焦而不是其中的任何子窗体。
Forms![frm_nav].SetFocus

DoCmd.BrowseTo ObjectType:=acBrowseToForm,_
ObjectName:="frm_subsrc_ma",_
PathToSubformControl:="frm_nav.navSubForm>frm_src_ma.reSubForm",_
DataMode:=acFormEdit

android – 是否可以以编程方式更改actionbar选项卡
>使用选项卡样式,我可以更改指示器颜色,但它将保留所有选项卡(我想为每个选项卡指定一个).
>使用选项卡自定义视图,我已经使用了带有TextView的选项卡标题的布局,以及用于管理指示器颜色的View.在java中,我动态地更改View的背景,但是问题在于View的背景与选项卡界限不匹配.
<TextView
    android:id="@+id/custom_tab_text"
    android:layout_width="match_parent"
    android:layout_height="match_parent"
    android:layout_centerInParent="true"
    android:layout_centerHorizontal="true"
    android:gravity="center|center_horizontal"
    android:text/>

<View
    android:id="@+id/custom_tab_view"
    android:layout_width="match_parent"
    android:layout_height="10dp"
    android:layout_alignParentBottom="true"/>
有人可以告诉我我哪里错了吗?还有另一种做法吗?谢谢
解决方法
tabs_selector_green.xml:
<!-- Non focused states -->
<item android:drawable="@android:color/transparent" android:state_focused="false" android:state_pressed="false" android:state_selected="false"/>
<item android:drawable="@drawable/layer_bg_selected_tabs_green" android:state_focused="false" android:state_pressed="false" android:state_selected="true"/>

<!-- Focused states -->
<item android:drawable="@android:color/transparent" android:state_focused="true" android:state_pressed="false" android:state_selected="false"/>
<item android:drawable="@drawable/layer_bg_selected_tabs_green" android:state_focused="true" android:state_pressed="false" android:state_selected="true"/>

<!-- pressed -->
<!-- Non focused states -->
<item android:drawable="@android:color/transparent" android:state_focused="false" android:state_pressed="true" android:state_selected="false"/>
<item android:drawable="@drawable/layer_bg_selected_tabs_green" android:state_focused="false" android:state_pressed="true" android:state_selected="true"/>

<!-- Focused states -->
<item android:drawable="@android:color/transparent" android:state_focused="true" android:state_pressed="true" android:state_selected="false"/>
<item android:drawable="@drawable/layer_bg_selected_tabs_green" android:state_focused="true" android:state_pressed="true" android:state_selected="true"/>
我还为每个xml背景创建了一个图层列表:
layer_bg_selected_tabs_green.xml
<item>
    <shape android:shape="rectangle" >
        <solid android:color="@color/tab_green" />

        <padding android:bottom="5dp" />
    </shape>
</item>
<item>
    <shape android:shape="rectangle" >
        <solid android:color="#FFFFFF" />
    </shape>
</item>
最后,在Java中,我使用选择的标签的自定义视图和索引动态购买背景:
private static final int[] TABS_BACKGROUND = {
        R.drawable.tabs_selector_orange,R.drawable.tabs_selector_green,R.drawable.tabs_selector_red,R.drawable.tabs_selector_blue,R.drawable.tabs_selector_yellow };
/*
BLA BLA BLA
*/
@Override
public void onTabSelected(Tab tab,FragmentTransaction ft) {
    // Todo Auto-generated method stub
    RelativeLayout tabLayout = (RelativeLayout) tab.getCustomView();
    tabLayout.setBackgroundResource(TABS_BACKGROUND[tab.getPosition()]);
    tab.setCustomView(tabLayout);
/* ... */
}
现在我们来添加一些截图:

CLAdvanceNavigationController iOS 导航栏
CLAdvanceNavigationController 介绍
CLAdvanceNavigationController 是页面切换时,拥有前进效果的导航栏。

使用方法:
在 AppDelegate.h 中声明全局导航栏
@class CLAdvanceNavigationController;
/**  全局导航栏 */
@property (strong, nonatomic) CLAdvanceNavigationController *navController;
在 AppDelegate.m 中初始化全局导航栏
- (BOOL)application:(UIApplication *)application didFinishLaunchingWithOptions:(NSDictionary *)launchOptions
{
    // 创建屏幕窗口视图
    self.window = [[UIWindow alloc] initWithFrame:[[UIScreen mainScreen] bounds]];
    self.window.backgroundColor = [UIColor whiteColor];
    // 创建并设置全局导航栏为window的根视图
    self.navController = [[CLAdvanceNavigationController alloc] init];
    self.window.rootViewController = self.navController;
    // 设置导航栏首页
    FirstViewController *firstVC = [[FirstViewController alloc] init];
    [self.navController pushViewController:firstVC animated:YES];
    return YES;
}
在做页面切换时,使用正常使用导航栏代码
ThridViewController *thridVC = [[ThridViewController alloc] init];
[self.navigationController pushViewController:thridVC animated:YES];
[self.navigationController popViewControllerAnimated:YES];
[self.navigationController popToRootViewControllerAnimated:YES];
CLAdvanceNavigationController 官网
https://github.com/changelee82/CLAdvanceNavigationController

DestinationViewController Segue和UINavigationController迅速
所以我有这样的prepareForSegue方法:
override func prepareForSegue(segue: UIStoryboardSegue, sender: AnyObject?) { if segue.identifier == "fromEventTableToAddEvent" { let addEventViewController: AddEventViewController = segue.destinationViewController as! AddEventViewController addEventViewController.newTagArray = newTagArray }}但是,在运行时,应用程序崩溃并记录了以下消息:
无法转换类型为’UINavigationController’的值
出现错误是因为addEventController嵌入在导航控制器中,但是我不确定如何设置segue,以便将destinationViewController设置为NavigationController,但还允许我将prepareForSegue方法中的变量传递给addEventController。
那么我将如何使用Swift做到这一点?
非常感谢您的帮助和时间。它可以帮助很多
答案1
小编典典您只需要访问导航控制器的topViewController,它将是AddEventViewController。这是代码:
override func prepareForSegue(segue: UIStoryboardSegue, sender: AnyObject?) { if segue.identifier == "fromEventTableToAddEvent" { let nav = segue.destinationViewController as! UINavigationController let addEventViewController = nav.topViewController as! AddEventViewController addEventViewController.newTagArray = newTagArray }}
Implementing Navigation with UINavigationControlle
问题:
你想要允许你的用户在视图之间来回切换
解决方法:
使用UINavigationController
讨论:
选择Empty Application取什么名字你随意,然后选择菜单文件选择New->New File...选择第一个objective-c Class这个文件,命名为FirstViewController,继承自UINavigationController。
基本文件搞定,然后我们开始,找到APP的代理文件 AppDelegate.m文件,然后写下如下代码:
#import “AppDelegate.h”
#import “FirstViewController.h”
@interface AppDelegate ()
@property(nonatiomic,strong) UINavigationController *navigationController;
@end
@implementation AppDelegate
…
现在我们要使用 initWithRootViewController : 方法初始化导航栏,并且传递我们的参数。然后导航栏就作为根视图出现在窗口上。这里千万不要混淆,UINavigationController是UIViewController的子类,这里的RootViewController可以是任何对象,所以我们希望我们的根视图控制器是一个导航控制器,就只需设置导航控制器为根视图控制器。 那么开始动手写代码
- (BOOL) application:(UIApplication *)application didFinishLauchingWithOptions: (NSDictionary *) lauchOptions
{
FirstViewController *viewController = [[FirstViewController alloc ] initWithName:nil bundle:nil];
self.navigationController = [[UINavigationController alloc ] initWithRootViewController:viewController];
self.window = [[UIWindow alloc] initWithName: [UIScreen mainScreen] bounds];
self.window.rootViewController = self.navigationController;
self.window.backgroundColor = [UIColor whiteColor];
[self.window makeKeyAndVisible];
return YES;
}
现在在模拟器中运行这个应用看: 应该出现这个图片:

图:1-33 显示导航栏控制器
可能会注意到导航栏显示“First Controller”,这难道是新的部件?并不是,这也是导航条,我们会在很多的导航中使用到那个bar,这里的bar显示的是一个文本,每个视图控制器指定了一个标题本身,一旦视图控制器被压入堆栈,导航控制器就会自动显示这个文本!
找到我们的根视图控制器的实现稳健,在ViewDidLoad方法里面,设置标题并且添加按钮,当用用户按下这个按钮,就会跳到第二个视图控制器! (还是在AppDelegate.m文件里,然后代码如下:)
#import “FirstController.h”
#import “SecondController.h”
@interface FirstViewController ()
@property (nonatomic, strong) UIButton *displaySecondViewController;
@end
@implemetation FirstViewController
- (void) performDisplaySecondViewController: (id)parmamSender
{
SecondViewController *secondController = [[SecondViewController alloc] initWithName:nil bundle:YES];
[self.navigationContoller pushViewContoller : secondController animated: YES];
}
- (void)viewDidLoad
{
[super viewDidLoad];
self.title = @“First Controller”;
self.displaySecondViewController = [UIButton buttonWithType:UIButtonTypeSystem];
[self.displaySecondViewController setTitle:@“Display Second View Controller” forState:UIControlStateNormal];
[self.displaySecondViewController sizeToFit];
self.displaySecondViewController.center = self.view.center;
[self.displaySecondViewController addTarget:self action:@selector (performDIsplaySecondViewController:) forControlEvents: UIControlEventTouchUpInside];
[self.view.addSubBiew: self.displaySecondViewController];
}
@end
现在创建第二个视图控制器,命名为SecondViewController,(就像创建FIrstViewController一样创建SecondViewController)既然创建了,那我们就给他一个标题
#import “SecondViewController.h”
@implementation SecondViewController
- (void)viewDidLoad
{
[super viewDidLoad];
self.title = @“Second Controller”;
}
两个视图都创建好了,接下来要做的就是实现从第一个视图跳转到第二个试图。使用popViewControllerAnimate:方法,取布尔作为参数。如果布尔值设置为YES ,就会在转到下一个视图控制器的时候会有动画效果,如果NO则反之。当显示屏幕上的第二个视图控制器,你会看到类似于图1-34所示的东西。

图:1-34
#import “SecondViewController”
@implementation SecondViewController
- (void)viewDidLoad
{
[super viewDidLoad];
self.title = @“Second Controller”;
}
- (void)goBack
{
[self.navigationController popViewControllerAnimates:YES];
}
- (void) viewDidAppear:(BOOL)paramAnimated
{
[super viewDidAppear : paramAnimated];
[self performSelector: @selector(goBack) withObject:nil afterDelay:5.0f];
}
@end
通过以上代码我们就完成了我们的需求了!
今天关于NavigationControl 在 Access 中以编程方式更改选项卡和access代码编辑窗口的分享就到这里,希望大家有所收获,若想了解更多关于android – 是否可以以编程方式更改actionbar选项卡、CLAdvanceNavigationController iOS 导航栏、DestinationViewController Segue和UINavigationController迅速、Implementing Navigation with UINavigationControlle等相关知识,可以在本站进行查询。
对于Bold Commerce - 订阅 - 向 Shopify 订单添加订单频率标签感兴趣的读者,本文将提供您所需要的所有信息,我们将详细讲解订单频率怎么定义,并且为您提供关于php – WooCommerce REST API – 检索订单属性(大小/颜色)、php – WooCommerce:将自定义Metabox添加到管理员订单页面、php – 使用Woocommerce中的订单项以编程方式创建订单、php – 在Woocommerce 3中以编程方式在订单中添加送货的宝贵知识。
本文目录一览:- Bold Commerce - 订阅 - 向 Shopify 订单添加订单频率标签(订单频率怎么定义)
- php – WooCommerce REST API – 检索订单属性(大小/颜色)
- php – WooCommerce:将自定义Metabox添加到管理员订单页面
- php – 使用Woocommerce中的订单项以编程方式创建订单
- php – 在Woocommerce 3中以编程方式在订单中添加送货
")
Bold Commerce - 订阅 - 向 Shopify 订单添加订单频率标签(订单频率怎么定义)
我不得不制作一个应用程序来做到这一点,因为 Yotpo 太糟糕了,无法提供。我确信 Bold 将其作为一项服务提供。如果没有,一个简单的应用程序就可以解决问题。至少要求他们破解它,如果它不是一件事。很简单,除了为您,他们的客户提供服务外,他们无事可做。
")
php – WooCommerce REST API – 检索订单属性(大小/颜色)
使用WooCommerce REST Client Library,我可以轻松提取正在处理的订单,如下所示:
$response = $wc_api->get_orders( array( 'status' => 'processing' ) );
但结果不包括属性(颜色,大小等),即使购买的产品设置了与产品变化相关的尺寸/颜色属性.那部分一切都很好.客户可以选择产品的大小和颜色,但该信息不会显示get_orders查询.
这是显示的内容:
<line_items>
     <XML_Serializer_Tag>
         <id>18</id>
         <subtotal>19.99</subtotal>
         <total>19.99</total>
         <total_tax>0.00</total_tax>
         <price>19.99</price>
         <quantity>1</quantity>
         <tax_class />
         <name>Cool T-Shirt You Just Bought!</name>
         <product_id>351</product_id>
         <sku>194953</sku>
     </XML_Serializer_Tag>
 </line_items>
如您所见,即使客户为变体选择了“大/黑”,它也不会显示在get_orders数据中.
我可以使用相同的库来提取产品的可用属性,但我需要为订单提取客户选择的属性.
解决方法:
我讨厌回答我自己的问题,但事实证明答案很简单:
即使WooCommerce将其作为V2资源链接,WooCommerce REST Client Library还没有针对API的V2进行更新.解决方案非常简单:
导航到〜/ class-wc-api-client.PHP并将第17行更改为:
const API_ENDPOINT =’wc-api / v2 /’;
当我执行get_orders()查询时,API立即返回正确的数据.

php – WooCommerce:将自定义Metabox添加到管理员订单页面
我目前正在向我的WooCommerce产品页面成功添加一个字段,该字段显示了以下值:
>在购物车(前端),
>在结帐页面(前端),
>在订单页面(前端),
>和管理员个人订单页面(后端).
问题:它没有在管理订单“自定义字段”MetaBox中显示为自定义字段,其中包含值,但仅作为订单页面中的文本.
这是我的工作代码:
// Add the field to the product
add_action('woocommerce_before_add_to_cart_button', 'my_custom_checkout_field');

function my_custom_checkout_field() {
    echo '<div id="my_custom_checkout_field"><h3>'.__('My Field').'</h3>';
    echo  '<label>fill in this field</label> <input type="text" name="my_field_name">';
    echo '</div>';
}

// Store custom field
function save_my_custom_checkout_field( $cart_item_data, $product_id ) {
    if( isset( $_REQUEST['my_field_name'] ) ) {
        $cart_item_data[ 'my_field_name' ] = $_REQUEST['my_field_name'];
        /* below statement make sure every add to cart action as unique line item */
        $cart_item_data['unique_key'] = md5( microtime().rand() );
    }
    return $cart_item_data;
}
add_action( 'woocommerce_add_cart_item_data', 'save_my_custom_checkout_field', 10, 2 );

// Render Meta on cart and checkout
function render_Meta_on_cart_and_checkout( $cart_data, $cart_item = null ) {
    $custom_items = array();
    /* Woo 2.4.2 updates */
    if( !empty( $cart_data ) ) {
        $custom_items = $cart_data;
    }
    if( isset( $cart_item['my_field_name'] ) ) {
        $custom_items[] = array( "name" => 'My Field', "value" => $cart_item['my_field_name'] );
    }
    return $custom_items;
}
add_filter( 'woocommerce_get_item_data', 'render_Meta_on_cart_and_checkout', 10, 2 );

// This is what I think needs changing?

function subscription_order_Meta_handler( $item_id, $values, $cart_item_key ) {
    if( isset( $values['my_field_name'] ) ) {
        wc_add_order_item_Meta( $item_id, "My Field", $values['my_field_name'] );
    }
}
add_action( 'woocommerce_add_order_item_Meta', 'subscription_order_Meta_handler', 1, 3 );
我认为这是代码的最后一点需要改变.它目前显示订单项下的文字,所以也许我需要将wc_add_order_item_Meta调整为其他内容?
我已经尝试了所有东西,但似乎没有用.当我的字段在结帐页面上时,我可以让它工作,但是当我从产品页面拉出它时,我可以使用它.
也许我错过了结帐流程片段?
解决方法:
UPDATE 2017/11/02 (Works perfectly in Woocommerce 3+)
首先,除了在订单页面中的后端“自定义字段”MetaBox中获取my_field_name的值之外,我已经完成了所有工作.
经过一场真正的噩梦之后,我找到了一个非常好的工作解决方案,比以前更好.在后端,您现在有一个自定义元数据框,其自定义字段my_field_name显示正确的值,如此屏幕截图所示:

我的代码分为两部分.
1)订单页面中的后端MetaBox,带有可编辑字段,显示来自产品页面上自定义字段的正确值(在前端):
// Adding Meta container admin shop_order pages
add_action( 'add_Meta_Boxes', 'mv_add_Meta_Boxes' );
if ( ! function_exists( 'mv_add_Meta_Boxes' ) )
{
    function mv_add_Meta_Boxes()
    {
        add_Meta_Box( 'mv_other_fields', __('My Field','woocommerce'), 'mv_add_other_fields_for_packaging', 'shop_order', 'side', 'core' );
    }
}

// Adding Meta field in the Meta container admin shop_order pages
if ( ! function_exists( 'mv_add_other_fields_for_packaging' ) )
{
    function mv_add_other_fields_for_packaging()
    {
        global $post;

        $Meta_field_data = get_post_meta( $post->ID, '_my_field_slug', true ) ? get_post_meta( $post->ID, '_my_field_slug', true ) : '';

        echo '<input type="hidden" name="mv_other_Meta_field_nonce" value="' . wp_create_nonce() . '">
        <phttps://www.jb51.cc/tag/ott/" target="_blank">ottom:solid 1px #eee;padding-bottom:13px;">
            <input type="text";" name="my_field_name" placeholder="' . $Meta_field_data . '" value="' . $Meta_field_data . '"></p>';

    }
}

// Save the data of the Meta field
add_action( 'save_post', 'mv_save_wc_order_other_fields', 10, 1 );
if ( ! function_exists( 'mv_save_wc_order_other_fields' ) )
{

    function mv_save_wc_order_other_fields( $post_id ) {

        // We need to verify this with the proper authorization (security stuff).

        // Check if our nonce is set.
        if ( ! isset( $_POST[ 'mv_other_Meta_field_nonce' ] ) ) {
            return $post_id;
        }
        $nonce = $_REQUEST[ 'mv_other_Meta_field_nonce' ];

        //Verify that the nonce is valid.
        if ( ! wp_verify_nonce( $nonce ) ) {
            return $post_id;
        }

        // If this is an autosave, our form has not been submitted, so we don't want to do anything.
        if ( defined( 'DOING_AUTOSAVE' ) && DOING_AUTOSAVE ) {
            return $post_id;
        }

        // Check the user's permissions.
        if ( 'page' == $_POST[ 'post_type' ] ) {

            if ( ! current_user_can( 'edit_page', $post_id ) ) {
                return $post_id;
            }
        } else {

            if ( ! current_user_can( 'edit_post', $post_id ) ) {
                return $post_id;
            }
        }
        // --- Its safe for us to save the data ! --- //

        // Sanitize user input  and update the Meta field in the database.
        update_post_Meta( $post_id, '_my_field_slug', $_POST[ 'my_field_name' ] );
    }
}
2)前端/后端:
•产品页面自定义字段(前端).
•在购物车,结帐页面和谢谢订单(前端)上显示此数据.
•在订单页面上显示数据(后端)
// Add the field to the product
add_action('woocommerce_before_add_to_cart_button', 'my_custom_product_field');
function my_custom_product_field() {
    echo '<div id="my_custom_field">
        <label>' . __( 'My Field') . ' </label>
        <input type="text" name="my_field_name" value="">
    </div><br>';
}

// Store custom field
add_filter( 'woocommerce_add_cart_item_data', 'save_my_custom_product_field', 10, 2 );
function save_my_custom_product_field( $cart_item_data, $product_id ) {
    if( isset( $_REQUEST['my_field_name'] ) ) {
        $cart_item_data[ 'my_field_name' ] = $_REQUEST['my_field_name'];
        // below statement make sure every add to cart action as unique line item
        $cart_item_data['unique_key'] = md5( microtime().rand() );
        WC()->session->set( 'my_order_data', $_REQUEST['my_field_name'] );
    }
    return $cart_item_data;
}

// Add a hidden field with the correct value to the checkout
add_action( 'woocommerce_after_order_notes', 'my_custom_checkout_field' );
function my_custom_checkout_field( $checkout ) {
    $value = WC()->session->get( 'my_order_data' );
    echo '<div id="my_custom_checkout_field">
            <input type="hidden"name="my_field_name" id="my_field_name" value="' . $value . '">
    </div>';
}

// Save the order Meta with hidden field value
add_action( 'woocommerce_checkout_update_order_Meta', 'my_custom_checkout_field_update_order_Meta' );
function my_custom_checkout_field_update_order_Meta( $order_id ) {
    if ( ! empty( $_POST['my_field_name'] ) ) {
        update_post_Meta( $order_id, '_my_field_slug', $_POST['my_field_name'] );
    }
}

// display field value on the order edit page (not in custom fields MetaBox)
add_action( 'woocommerce_admin_order_data_after_billing_address', 'my_custom_checkout_field_display_admin_order_Meta', 10, 1 );
function my_custom_checkout_field_display_admin_order_Meta($order){
    $my_custom_field = get_post_meta( $order->id, '_my_field_slug', true );
    if ( ! empty( $my_custom_field ) ) {
        echo '<p><strong>'. __("My Field", "woocommerce").':</strong> ' . get_post_meta( $order->id, '_my_field_slug', true ) . '</p>';
    }
}

// Render Meta on cart and checkout
add_filter( 'woocommerce_get_item_data', 'render_Meta_on_cart_and_checkout', 10, 2 );
function render_Meta_on_cart_and_checkout( $cart_data, $cart_item = null ) {
    $custom_items = array();
    if( !empty( $cart_data ) ) $custom_items = $cart_data;

    if( isset( $cart_item['my_field_name'] ) )
        $custom_items[] = array( "name" => 'My Field', "value" => $cart_item['my_field_name'] );

    return $custom_items;
}

// Add the information as Meta data so that it can be seen as part of the order
add_action('woocommerce_add_order_item_Meta','add_values_to_order_item_Meta', 10, 3 );
function add_values_to_order_item_Meta( $item_id, $cart_item, $cart_item_key ) {
    // lets add the Meta data to the order (with a label as key slug)
    if( ! empty( $cart_item['my_field_name'] ) )
        wc_add_order_item_Meta($item_id, __('My field label name'), $cart_item['my_field_name'], true);
}
现在一切都按预期工作了.

php – 使用Woocommerce中的订单项以编程方式创建订单
我需要以编程方式创建一个Woocommerce订单,但是使用“旧”Woocommerce使这个程序非常脏.
我必须使用许多update_post_Meta调用手动插入所有类型的数据库记录.
寻找更好的解决方案.
解决方法:
有了最新版本的WooCommerce可以尝试这样的东西
$address = array(
            'first_name' => 'Fresher',
            'last_name'  => 'StAcK OvErFloW',
            'company'    => 'stackoverflow',
            'email'      => 'test@test.com',
            'phone'      => '777-777-777-777',
            'address_1'  => '31 Main Street',
            'address_2'  => '',
            'city'       => 'Chennai',
            'state'      => 'TN',
            'postcode'   => '12345',
            'country'    => 'IN'
        );

        $order = wc_create_order();
        $order->add_product( get_product( '12' ), 2 ); //(get_product with id and next is for quantity)
        $order->set_address( $address, 'billing' );
        $order->set_address( $address, 'shipping' );
        $order->add_coupon('Fresher','10','2'); // accepted param $couponcode, $couponamount,$coupon_tax
        $order->calculate_totals();
使用您的函数调用上面的代码然后它将相应地工作.
请注意,它不适用于旧版本的WooCommerce,如2.1.12,它仅适用于WooCommerce 2.2.
希望能帮助到你

php – 在Woocommerce 3中以编程方式在订单中添加送货
我一直在尝试通过Woocommerce以编程方式设置运费(每个订单)的众多解决方案.我没有运气
我试过覆盖该项的元值:
update_post_Meta( $woo_order_id, '_order_shipping', $new_ship_price );
也试过这个问题[问题/答案] [1]
                    $item_ship = new WC_Order_Item_Shipping();

                    $item_ship->set_name( "flat_rate" );
                    $item_ship->set_amount( $new_ship_price );
                    $item_ship->set_tax_class( '' );
                    $item_ship->set_tax_status( 'none' );


                    // Add Shipping item to the order
                    $order->add_item( $item_ship );
但似乎都不起作用.
任何指针都非常受欢迎.
类似帖子:Add a fee to an order programmatically in Woocommerce 3
解决方法:
要在Woocommerce 3中处理此问题,请使用以下内容(来自WC_Order Order对象$order):
## ------------- ADD SHIPPING PROCESS ---------------- ##

// Get the customer country code
$country_code = $order->get_shipping_country();

// Set the array for tax calculations
$calculate_tax_for = array(
    'country' => $country_code,
    'state' => '', // Can be set (optional)
    'postcode' => '', // Can be set (optional)
    'city' => '', // Can be set (optional)
);

// Optionally, set a total shipping amount
$new_ship_price = 5.10;

// Get a new instance of the WC_Order_Item_Shipping Object
$item = new WC_Order_Item_Shipping();

$item->set_method_title( "Flat rate" );
$item->set_method_id( "flat_rate:14" ); // set an existing Shipping method rate ID
$item->set_total( $new_ship_price ); // (optional)
$item->calculate_taxes($calculate_tax_for);

$order->add_item( $item );

$order->calculate_totals();

$order->update_status('on-hold');

// $order->save(); // If you don't update the order status
测试了一件作品.
今天关于Bold Commerce - 订阅 - 向 Shopify 订单添加订单频率标签和订单频率怎么定义的介绍到此结束,谢谢您的阅读,有关php – WooCommerce REST API – 检索订单属性(大小/颜色)、php – WooCommerce:将自定义Metabox添加到管理员订单页面、php – 使用Woocommerce中的订单项以编程方式创建订单、php – 在Woocommerce 3中以编程方式在订单中添加送货等更多相关知识的信息可以在本站进行查询。
在本文中,我们将详细介绍Webhook 帖子的 Springboot 身份验证的各个方面,并为您提供关于springboot身份认证的相关解答,同时,我们也将为您带来关于java – 使用Spring Security对Facebook进行身份验证、java-study-springboot-基础学习-05-springboot web开发、JWT 身份验证 Spring Boot 和 Swagger UI、Spring Boot - 身份验证 null的有用知识。
本文目录一览:- Webhook 帖子的 Springboot 身份验证(springboot身份认证)
- java – 使用Spring Security对Facebook进行身份验证
- java-study-springboot-基础学习-05-springboot web开发
- JWT 身份验证 Spring Boot 和 Swagger UI
- Spring Boot - 身份验证 null
")
Webhook 帖子的 Springboot 身份验证(springboot身份认证)
我们可以知道哪个 3rd 方服务吗? 例如,PayPal/Stripe 已经有文档来解释如何验证数据。
如果您可以向 webhook 添加元数据/自定义字段,则可以对其进行签名。
至于检查签名/验证它,为什么不在@Contoller=>@Service 中执行此操作?

java – 使用Spring Security对Facebook进行身份验证
所以我的问题是,如何使用Spring安全性对Facebook用户进行身份验证?
解决方法

java-study-springboot-基础学习-05-springboot web开发
SpringBoot 之web开发
1、自动配置类说明
Web开发的自动配置类: org.springframework.boot.autoconfigure.web.WebMvcAutoConfiguration

比如:
spring mvc的前后缀配置

在WebMvcAutoConfiguration中对应方法
对应配置文件


2、静态资源配置说明
如果进入SpringMVC的规则为/时,SpringBoot的默认静态资源的路径为:
spring.resources.static-locations=classpath:/META-INF/resources/,classpath:/resources/,classpath:/static/,classpath:/public/
如果某个静态文件不在上面的配置路径中,那么从浏览器中就访问不到了
3、自定义消息转化器
- 原有的spring mvc 配置

- springboot 配置

4、自定义拦截器
- 继承org.springframework.web.servlet.config.annotation.WebMvcConfigurerAdapter
参考:https://github.com/chengbingh...

JWT 身份验证 Spring Boot 和 Swagger UI
如何解决JWT 身份验证 Spring Boot 和 Swagger UI?
我有一个像这样的 SwaggerConfig:
@Configuration
@EnableSwagger2
public class SwaggerConfiguration {

    public static final String AUTHORIZATION_HEADER = "Authorization";

    @Bean
    public Docket api() {
        return new Docket(DocumentationType.SWAGGER_2)
                .securityContexts(Arrays.asList(securityContext()))
                .securitySchemes(Arrays.asList(apiKey()))
                .select()
                .apis(RequestHandlerSelectors.any())
                .paths(PathSelectors.any())
                .build();
    }

    private ApiKey apiKey() {
        return new ApiKey("JWT",AUTHORIZATION_HEADER,"header");
    }

    private SecurityContext securityContext() {
        return SecurityContext.builder()
                .securityReferences(defaultAuth())
                .build();
    }

    List<SecurityReference> defaultAuth() {
        AuthorizationScope authorizationScope
                = new AuthorizationScope("global","accessEverything");
        AuthorizationScope[] authorizationScopes = new AuthorizationScope[1];
        authorizationScopes[0] = authorizationScope;
        return Arrays.asList(new SecurityReference("JWT",authorizationScopes));
    }

}
当我在 swagger ui 中测试 API 时,它会很好地发送 JWT,但它仍然给出
{
  "error": "Full authentication is required to access this resource"
}
在邮递员中尝试相同的令牌效果很好。
这是 swagger ui curl:
curl -X GET "http://localhost:8082/api/helloadmin" -H "accept: */*" -H "Authorization: eyJhbGciOiJIUzUxMiJ9.eyJzdWIiOiJuYXoiLCJpc0FkbWluIjp0cnVlLCJleHAiOjE2MTk1MzA3MTUsImlhdCI6MTYxOTUxMjcxNX0.GvEuOYqIPuS98DqhDrtHDFhjXrtwhGjLfylEXwkPeRTGRoWxcwIAYBEawl2Bl5qoQrI2zQOjKZGDq3KEZuyALQ"
我做错了什么?
解决方法
正确的标头格式是“授权:承载 [令牌]”

Spring Boot - 身份验证 null
您需要先确定 Authentication 是否存在:
public String home (Model model,Authentication auth) {
    if (auth != null && auth instanceof UserPrincipal) {
        UserPrincipal userPrincipal = (UserPrincipal) auth.getPrincipal();
        model.addAttribute("user",userPrincipal.getUser());
    }

    model.addAttribute("listPosts",postService.getAllPosts());

    return "home";
}
但是,您还需要在 thymeleaf 模板中处理作为 null 访问的用户。
如果不存在,您可以将其保留为 null 或注入 'Guest' User 对象来处理它。
关于Webhook 帖子的 Springboot 身份验证和springboot身份认证的介绍现已完结,谢谢您的耐心阅读,如果想了解更多关于java – 使用Spring Security对Facebook进行身份验证、java-study-springboot-基础学习-05-springboot web开发、JWT 身份验证 Spring Boot 和 Swagger UI、Spring Boot - 身份验证 null的相关知识,请在本站寻找。
在这里,我们将给大家分享关于这个 django settings.py python 列表中的正斜杠有什么作用?的知识,让您更了解python正斜杠和反斜杠的本质,同时也会涉及到如何更有效地Django 中 settings.py 相关配置说明、Django 框架(三)---- 设置 settings.py、django 项目 settings.py 的基础配置、Django-常用设置(settings.py)的内容。
本文目录一览:- 这个 django settings.py python 列表中的正斜杠有什么作用?(python正斜杠和反斜杠)
- Django 中 settings.py 相关配置说明
- Django 框架(三)---- 设置 settings.py
- django 项目 settings.py 的基础配置
- Django-常用设置(settings.py)
")
这个 django settings.py python 列表中的正斜杠有什么作用?(python正斜杠和反斜杠)
可能 const debounce = (func,limit) => {
let lastFunc;
return function(...args) {
const context = this;
clearTimeout(lastFunc);
lastFunc = setTimeout(() => {
func.apply(context,args)
},limit); //no calc here,just use limit
}
}
是一个 pathlib.Path 对象。 BASE_DIR 是路径组件连接运算符。
/默认情况下 BASE_DIR 将从 Django 3.1 设置为 (source):
if (/[aeiou]/.test(newStr[i])) {
  console.log("test");
}
BASE_DIR = Path(__file__).resolve().parent.parent
与 os.path.join() 的作用相同(pathlib 是 Python 3.4 中引入的新模块)作为 documented
斜线操作符有助于创建子路径,类似于 os.path.join()
例如
/会导致 /base/static

Django 中 settings.py 相关配置说明
settings.py 相关配置文件说明:
1、BASE_DIR = os.path.dirname(os.path.dirname(os.path.abspath(__file__)))
BASE_DIR:主要通过 os 模块读取当前项目在系统的具体路径,该代码在创建项目时自动生成,一般情况下无需修改。
2、秘钥配置 SECRET_KEY
SECRET_KEY = ''xkll_cxj%3#xc1+d4d2p)qhufso0rm8h-nma%$c3eq69oe*j#m''
主要用于重要数据的加密处理,提高系统安全性,避免遭到攻击者恶意破坏。密钥主要用于用户密码,CSRF 机制和会话 Session 等数据加密。
-
- 用户密码:Django 内置一套用户管理系统。该系统具有用户认证和存储用户信息等功能。在创建用户的时候,密码通过密钥进行加密,保证安全性。
- CSRF 机制:该机制主要用于表单提交,防止窃取网站的用户信息来制造恶意请求。
- 会话 Session:Session 的信息存放在 Cookies,以一串随机的字符串表示,用于标识当前访问网站的用户身份,记录相关用户信息。
3、调试模式 DEBUG
值为布尔类型,开发阶段设置为 True,即会自动检测代码是否发生修改,根据检测结果是否刷新重启系统。
4、ALLOWED_HOSTS 域名访问权限
当 DEBUG=True 时,切 ALLOWED_HOSTS 为空时,只允许以 localhost 或 127.0.0.1 在浏览器上访问;当 DEBUG=False 时,ALLOWED_HOSTS 为必填项,如果想允许所有 域名访问,可设置成 ALLOWED_HOSTS=["*"]
5、APP 列表 INSTALLED_APPS
告诉 Django 有哪些 App。Django 内置应用功能:admin、auth 和 session 等配置信息。
admin:内置后台管理系统。
auth:内置的用户认证系统。
contenttypes:记录项目中所有 model 元数据(Django 的 ORM 框架)
session:Session 会话功能,用于标识当前访问网站的用户身份,记录相关用户信息。
messages: 消息提示功能。
staticfiles:查找静态资源路径。
6、静态文件
CSS 和 JavaScript 以及图片等,这些文件的存放主要由配置文件 settings.py 设置,设置如下:
STATIC_URL=''/static/''
STATICFILES_DIRS=[ os.path.join(BASE_DIR,''static''),]
---- 设置 settings.py")
Django 框架(三)---- 设置 settings.py
Django 框架(三)
设置 settings.py 文件,关于 Django 项目所有的设置都在这里:
需要设置的有:
1、INSTALLED_APPS:当你使用命令创建了一个新的 app 时,需要将 app 的名字,添加进入这个列表中

2、TEMPLATES:需要设置其中的 DIRS , 在后面的列表中,加入 os.path.join (BASE_DIR, "templates")
# templates 文件夹 后续需要手动创建,是放置网页模板的文件夹
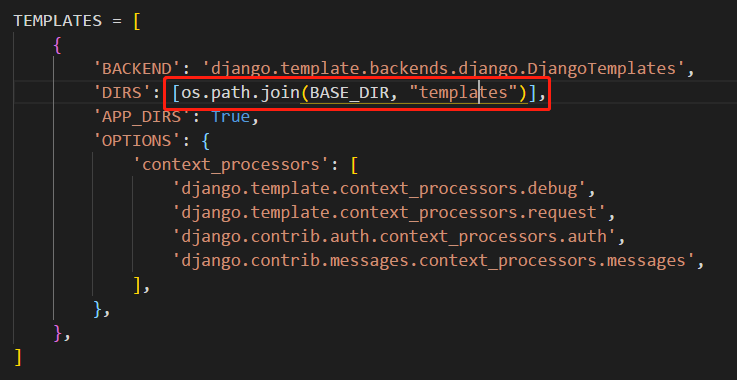
DIRS :定义了一个目录列表,引擎按照设置的路径顺序查找模板源文件
APP_DIRS :True 告诉引擎是否应该在已安装的应用程序中查找模板
3、DATABASES:设置数据库信息
Django 默认使用 sqlite3 数据库,还可以使用 MySQL,PostgreSQL,Oracle 数据库;
在此,先写 MySQL 数据库相关参数,其他等使用到再补充:
 1 DATABASES = {
 2     ''default'': {
 3         ''ENGINE'': ''django.db.backends.mysql'',
 4         ''NAME'': ''django_db'', # 提前创建一个空的数据库
 5         ''USER'': ''root'',
 6         ''PASSWORD'': ''123456'',
 7         ''HOST'': "localhost",
 8         ''PORT'': ''3306'',
 9     }
10 }
注意:Django 在链接 mysql 数据库时,默认使用的是 mysqldb 库,但是在 Python3 中,没有这个库,通常使用的是 pymysql 来连接,
因此,需要在 project/__init__.py 文件中加入:
4、ALLOWED_HOSTS:待定
5、LANGUAGE_CODE:设置语言,默认为 ''en-us'',可以改为 ''zh-Hans''
TIME_ZONE:设置时区,默认为 ''UTC'',可以改为 ''Asia/Shanghai''
6、STATIC_URL:静态文件地址,如 CSS,Javascript,images 等文件地址,
需要自行在 manage.py 文件一级的目录下,创建一个叫做 static 的目录
同时,在 settings.py 文件中添加入:
1 STATIC_URL = ''/static/''
2 STATICFILES_DIRS = [
3     os.path.join(BASE_DIR, ''static''),
4 ]

django 项目 settings.py 的基础配置
一个新的 django 项目初始需要配置 settings.py 文件:
1. 项目路径配置
新建一个 apps 文件夹,把所有的项目都放在 apps 文件夹下,比如 apps 下有一个 message 项目,如果不进行此项配置,引用时应该这样:
from apps.message import views由于所有的项目都在 apps 下,可以把 apps 设置为根路径:
(1) 在 pycharm 中右键点击 app 文件夹:
选择 ''Mark Directory as'', 选择 ''Sources Root''
(2) 在 settings 中如下配置:
import sys

sys.path.insert(0, os.path.join(BASE_DIR, ''apps''))
配置完成后,可以直接引用 message:
from message import views
2. 数据库配置 (*)
(1) 首先要在 navicat 里配置好一个数据库连接,并且在这个连接下新建一个数据库,假设新建的数据库名叫''testdjango''
(2) 在 settings.py 里如下配置:
DATABASES = {
    ''default'': {
        ''ENGINE'': ''django.db.backends.mysql'',
        ''NAME'': ''testdjango'',
        ''USER'': ''root'',
        ''PASSWORD'': ''**********'',
        ''HOST'': ''localhost''
    }
}
ENGINE 改成 mysql
NAME 就是前面新建的数据库的 name
USER 就是数据库连接里的 '' 用户名''
PASSWORD 就是数据库连接里的密码
HOST 需要注意下,需要和数据库连接里的 '' 主机 '' 保持一致,不能一个写 127.0.0.1, 另一个写 localhost. 不然会报错:
OperationalError: (2005, "Unknown MySQL server host ''...'' (11001)") 这个错误
3. templates 路径配置
项目里有一个 templates 文件夹是用来存放模板的,把它设置到 TEMPLATES 的 DIRS 下
修改红色的那句:
TEMPLATES = [
    {
        ''BACKEND'': ''django.template.backends.django.DjangoTemplates'',
        ''DIRS'': [os.path.join(BASE_DIR, ''templates'')],
        ''APP_DIRS'': True,
        ''OPTIONS'': {
            ''context_processors'': [
                ''django.template.context_processors.debug'',
                ''django.template.context_processors.request'',
                ''django.contrib.auth.context_processors.auth'',
                ''django.contrib.messages.context_processors.messages'',
            ],
        },
    },
]
4. 静态文件路径配置
新建一个 static 文件夹,用于存放样式表等静态文件,然后把它设置为 STATICFILES_DIRS
STATICFILES_DIRS = [os.path.join(BASE_DIR, ''static'')]
5. 配置 admin 语言:
LANGUAGE_CODE = ''zh-hans''
USE_TZ = False
")
Django-常用设置(settings.py)
BASE_DIR = os.path.dirname(os.path.dirname(os.path.abspath(__file__)))
当前项目的根目录,Django会依此来定位工程内的相关文件,我们也可以使用该参数来构造文件路径。
# 关闭调试模式 DEBUG = True
# 设置允许通过哪些主机访问, * 表示匹配所有(ip)
ALLOWED_HOSTS = [''*'']
LANGUAGE_CODE = ''en-us'' # 语言
TIME_ZONE = ''UTC'' # 时区
LANGUAGE_CODE = ''zh-hans'' # 语言设置为 中文
TIME_ZONE = ''Asia/Shanghai'' # 时区设置为 亚洲/上海,注意没有北京
# 访问静态文件用到的url前缀 STATIC_URL = ''/static/''
# 告知Django静态文件保存在哪个目录下 STATICFILES_DIRS = [os.path.join(BASE_DIR, ''static_files'')]
# 如果你配置的路径为index/ 你在浏览器中输入index Django帮你重新发送一个重定向get请求到index 默认为 APPEND_SLASH = True
from django.apps import AppConfig

 class UsersConfig(AppConfig):

     # 表示这个配置类是加载到哪个应用的,
     # 每个配置类必须包含此属性,默认自动生成
     name = ''users''
关于这个 django settings.py python 列表中的正斜杠有什么作用?和python正斜杠和反斜杠的问题我们已经讲解完毕,感谢您的阅读,如果还想了解更多关于Django 中 settings.py 相关配置说明、Django 框架(三)---- 设置 settings.py、django 项目 settings.py 的基础配置、Django-常用设置(settings.py)等相关内容,可以在本站寻找。
对于React-Redux 和 React Context API 可以在同一个项目中使用吗?感兴趣的读者,本文将提供您所需要的所有信息,我们将详细讲解react与redux,并且为您提供关于react + react-router + redux + ant-Desgin 搭建react管理后台 -- 初始化项目(一)、React Context vs React Redux, when should I use each one? [closed]、React Context vs React Redux,我什么时候应该使用每一个?、React Context vs React Redux,我应该什么时候使用它们?的宝贵知识。
本文目录一览:- React-Redux 和 React Context API 可以在同一个项目中使用吗?(react与redux)
- react + react-router + redux + ant-Desgin 搭建react管理后台 -- 初始化项目(一)
- React Context vs React Redux, when should I use each one? [closed]
- React Context vs React Redux,我什么时候应该使用每一个?
- React Context vs React Redux,我应该什么时候使用它们?
")
React-Redux 和 React Context API 可以在同一个项目中使用吗?(react与redux)
这真的取决于用例。
如果您正在寻找自上而下的 props 向下传递结构,其中相同的数据用于多个深度的组件(例如主题、身份验证等),那么 Context API 就是方法。
如果您正在寻找可以动态管理数据并不断更新数据的大型存储,那么 Redux 就是您的选择。
如果两者都需要,我认为这样做完全没问题。
它们不是很重,(我猜是 Redux ......一点点?)而且它们确实有不同的用途。
")
react + react-router + redux + ant-Desgin 搭建react管理后台 -- 初始化项目(一)
前言
学习总结使用,博客如中有错误的地方,请指正。改系列文章主要记录了搭建一个管后台的步骤,主要实现的功能有:使用路由模拟登录、退出、以及切换不同的页面;使用redux实现面包屑;引入使用其他常用的组件,比如highchart、富文本等,后续会继续完善。
github地址:https://github.com/huangtao5921/react-antDesgin-admin (欢迎Star)
项目展示地址:https://huangtao5921.github.io/react-admin/
一、安装yarn或者node
我用的是yarn,也可以用npm,详情可以查看yarn文档:
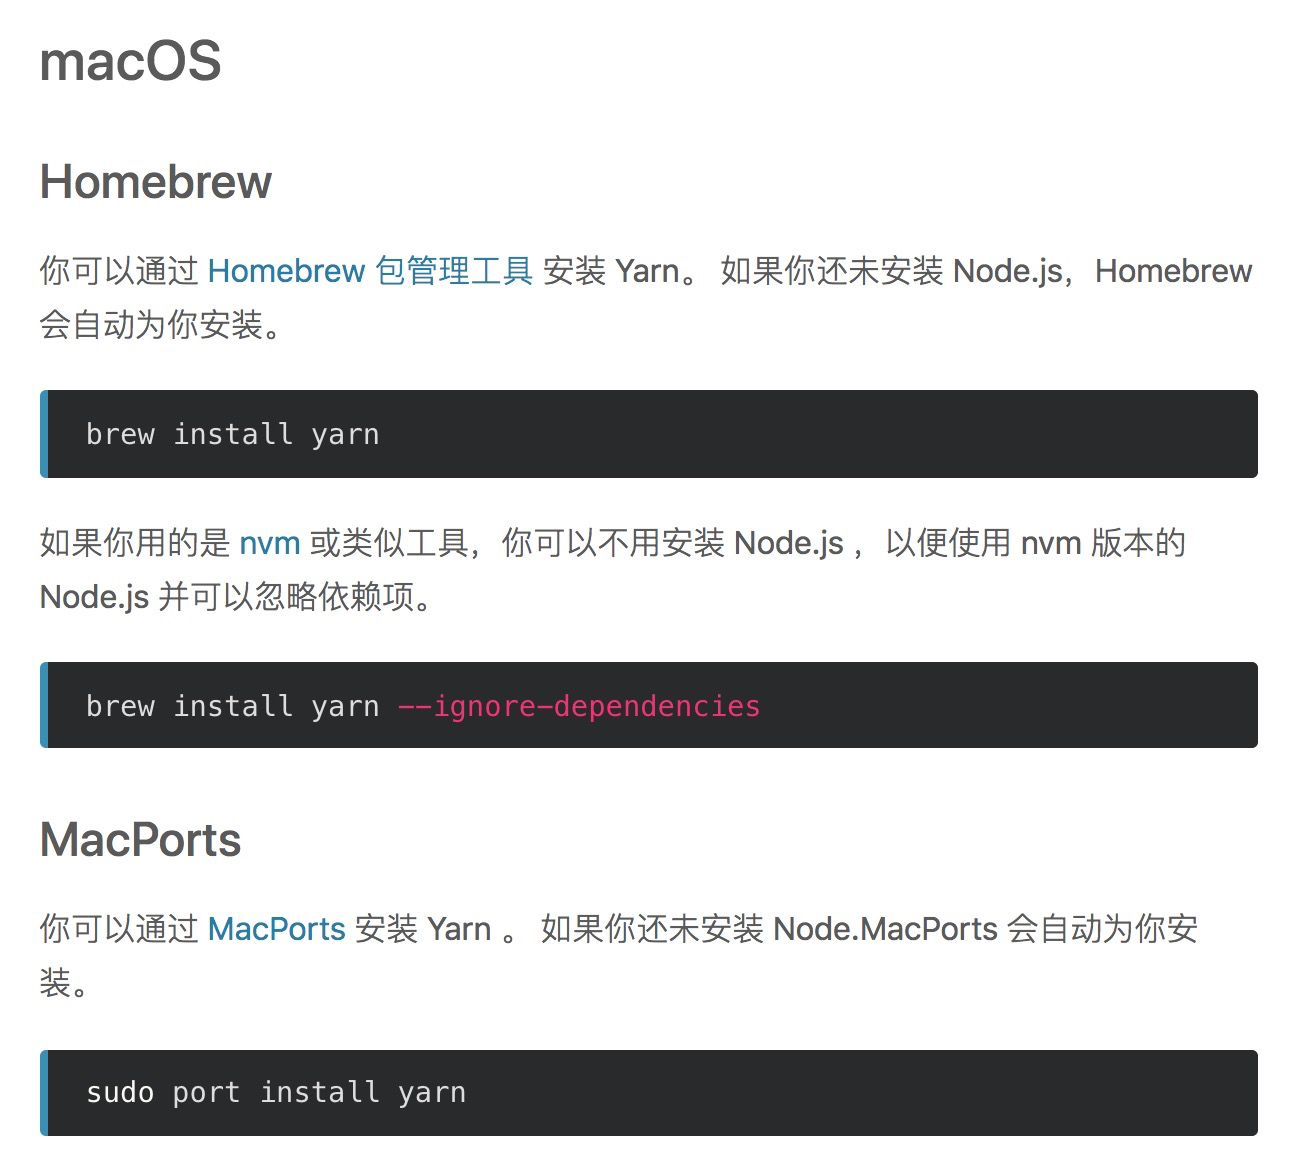
在命令行工具输入:yarn --version 出现版本号,说明安装成功:
二、初始化react项目
安装yarn之后,命令行进入到自己需要放置项目的目录下,我是将项目放在了桌面,执行 yarn create react-app+项目名称,会生成一个项目,进入项目cd + 项目名称,进入项目后云心 yarn start,依次用到的命令是如下:
$ yarn create react-app react-antdesign-admin
$ cd react-antdesign-admin
$ yarn start
此时一个基本的项目已经生成,并运行在我们的浏览器中 http://localhost:3000/,如下图所示:
打开项目,目录结构如下所示:
接下来执行 yarn eject 将webpack配置文件暴露出来,方便我们后期对webpack配置进行更改。执行完该命令之后,根目录下会多一个config的文件夹。
注:交流问题的可以加QQ群:531947619

下一篇:react + react-router + redux + ant-Desgin 搭建react管理后台 -- 新增项目文件(二)
![React Context vs React Redux, when should I use each one? [closed]](http://www.gvkun.com/zb_users/upload/2025/02/0198c955-32e8-46be-872c-13d85dd322581738920620977.jpg "React Context vs React Redux, when should I use each one? [closed]")
React Context vs React Redux, when should I use each one? [closed]
问题:
Want to improve this question? 想改善这个问题吗? Update the question so it can be answered with facts and citations by editing this post . 更新问题,以便通过编辑这篇文章用事实和引文来回答问题。
Closed 2 years ago . 2 年前关闭。
React 16.3.0 was released and the Context API is not an experimental feature anymore. React 16.3.0 已发布, Context API 不再是实验性功能。 Dan Abramov (the creator of Redux) wrote a good comment here about this, but it was 2 years when Context was still an Experimental feature. Dan Abramov(Redux 的创建者) 在这里写了一篇很好的评论,但是 Context 仍然是一个实验性功能已经 2 年了。
My question is, in your opinion/experience when should I use React Context over React Redux and vice versa? 我的问题是,根据您的意见 / 经验,我什么时候应该使用 React Context 而不是 React Redux ,反之亦然?
解决方案:
参考: https://stackoom.com/en/question/3Lyv3
React Context vs React Redux,我什么时候应该使用每一个?
React16.3.0已发布,并且ContextAPI不再是实验功能。DanAbramov(Redux的创建者)对此发表了很好的评论,但是Context仍然是实验性功能已经有两年了。
我的问题是,根据您的看法/经验,何时应该在 React Redux上* 使用 React Context ,反之亦然? *
答案1
小编典典由于 Context 不再是实验性功能,您可以直接在应用程序中使用Context,这对于将数据传递到为其设计的深层嵌套的组件方面非常有用。
正如Mark erikson在他的博客中所写的:
如果您只是在使用Redux来避免传递道具,那么上下文可以替换Redux-但是您可能一开始就不需要Redux。
上下文也不提供Redux DevTools,跟踪状态更新,middleware添加集中式应用程序逻辑以及其他Redux 启用这些功能的功能。
Redux具有更强大的功能,并提供了许多Context Api未提供的功能,就像 @danAbramov 提到的那样
React Redux在内部使用上下文,但未在公共API中公开这一事实。因此,通过ReactRedux使用上下文比直接使用上下文要安全得多,因为如果上下文发生更改,更新代码的负担将落在React Redux上,而不是您。
它由Redux负责实际更新其实现以符合最新的上下文API
最新的Context API可以用于您将仅使用Redux在组件之间传递数据的应用程序,但是使用集中式数据并在使用redux-thunk或redux-saga仍需要Redux的Action创建者中处理API请求的应用程序。除了这个Redux之外,还有其他关联的库,例如redux-persist允许您将存储数据保存在localStorage中,并在刷新时重新补水,这是上下文API仍不支持的。
正如@dan_abramov在他的博客中提到的,您可能不需要Redux,该redux具有有用的应用程序,例如
- 将状态持久保存到本地存储,然后从中启动,即可使用。
- 在服务器上预填充状态,以HTML格式将其发送到客户端,然后从中启动。
- 序列化用户操作,并将其与状态快照一起附加到自动错误报告,以便产品开发人员
可以重播它们以重现错误。 - 通过网络传递动作对象以实现协作环境,而无需对代码的编写进行重大更改。
- 保留撤消历史记录或实施乐观的更改,而无需对代码的编写方式进行重大更改。
- 在开发中的状态历史记录之间移动,并在代码更改时从动作历史记录重新评估当前状态(如TDD)。
- 为开发工具提供完整的检查和控制功能,以便产品开发人员可以为其
应用程序构建自定义工具。 - 在重用大多数业务逻辑的同时,提供备用UI。
拥有如此众多的应用程序,现在还不能说Redux将被新的Context API取代

React Context vs React Redux,我应该什么时候使用它们?
React 16.3.0
已发布,Context
API 不再是实验性功能。Dan Abramov(Redux
的创建者)在这里写了一篇很好的评论,但是 Context 仍然是一个实验性功能已经 2 年了。
我的问题是,根据您的意见/经验,我应该何时使用 React Context 而不是 React Redux ,反之亦然?
答案1
小编典典由于 Context 不再是一项实验性功能,您可以直接在应用程序中使用 Context,它将非常适合将数据传递到其设计用途的深度嵌套组件。
正如 Mark Erikson 在他的博客中所写:
如果你只是使用 Redux 来避免传递 props,那么 context 可以取代 Redux - 但是你可能一开始就不需要 Redux。
上下文也没有给你任何东西
ReduxDevTools,比如跟踪你的状态更新的能力,middleware添加集中的应用程序逻辑,以及其他强大的功能Redux。
Redux功能更强大,并提供了大量的功能,Context API正如 @danAbramov 提到的那样
React Redux 在内部使用上下文,但它并没有在公共 API 中公开这一事实。所以你应该觉得通过 React Redux
使用上下文比直接使用上下文更安全,因为如果它发生变化,更新代码的负担将落在 React Redux 而不是你身上。
由 Redux 实际更新其实现以遵守最新的 Context API。
最新的 Context API 可用于应用程序,您只需使用 Redux 在组件之间传递数据,但是使用集中数据并在 Action 创建者中处理 API
请求的应用程序使用redux-thunk或redux-saga仍然需要 Redux。除此之外,Redux 还有其他与之相关的库,例如redux-persist它允许您在 localStorage 中保存/存储数据并在刷新时重新水化,这是 Context API 仍然不支持的。
正如@dan_abramov 在他的博客中提到的你可能不需要 Redux,Redux 有一些有用的应用程序,比如
- 将状态持久化到本地存储,然后从它启动,开箱即用。
- 在服务器上预填充状态,以 HTML 格式将其发送到客户端,然后从它启动,开箱即用。
- 序列化用户操作并将它们与状态快照一起附加到自动错误报告中,以便产品开发人员
可以重放它们以重现错误。- 通过网络传递动作对象以实现协作环境,而无需对代码的编写方式进行重大更改。
- 维护撤消历史记录或实施乐观突变,而无需对代码的编写方式进行重大更改。
- 在开发中的状态历史之间穿梭,并在代码更改时从动作历史中重新评估 > 当前状态,也就是 TDD。
- 为开发工具提供完整的检查和控制功能,以便产品开发人员可以为他们的应用程序构建自定义工具。
- 在重用大部分业务逻辑的同时提供替代 UI。
有了这么多应用程序,现在说 Redux 将被新的 Context API 取代还为时过早。
今天关于React-Redux 和 React Context API 可以在同一个项目中使用吗?和react与redux的介绍到此结束,谢谢您的阅读,有关react + react-router + redux + ant-Desgin 搭建react管理后台 -- 初始化项目(一)、React Context vs React Redux, when should I use each one? [closed]、React Context vs React Redux,我什么时候应该使用每一个?、React Context vs React Redux,我应该什么时候使用它们?等更多相关知识的信息可以在本站进行查询。
此处将为大家介绍关于为什么 Python 不进入 For 循环以插入列表框?的详细内容,并且为您解答有关为什么python没有for循环的相关问题,此外,我们还将为您介绍关于API中的Python for循环以获取数据?、For循环中的Python列表、Python - 如何使用while循环和for循环从列表中随机删除一个项目直到列表为空、python datetime.timedelta进入列表的有用信息。
本文目录一览:- 为什么 Python 不进入 For 循环以插入列表框?(为什么python没有for循环)
- API中的Python for循环以获取数据?
- For循环中的Python列表
- Python - 如何使用while循环和for循环从列表中随机删除一个项目直到列表为空
- python datetime.timedelta进入列表
")
为什么 Python 不进入 For 循环以插入列表框?(为什么python没有for循环)
首先,您必须将文件光标放在文件的开头。或者只是使用上面建议的 r+ 模式。
其次,大写的变量通常指的是常量,在这种情况下 END 是从 tkinter 导入的。
from tkinter import *

root = Tk()
listbox = Listbox(root)
listbox.pack(expand=True,fill='both',padx=10,pady=10)

with open("chat.txt","a+") as chat:
   print("test")
   listbox.delete(first=0,last=END)
   chat.seek(0) # Position file cursor at beginning of file

   for x in chat:
      listbox.insert(END,x)
      print("another test")

API中的Python for循环以获取数据?
如何解决API中的Python for循环以获取数据??
所以我有这个项目的 url 是 this
我在 Inspect 模式下查看 Network Header,发现当我点击第二页评论时,有一个 API 地址。
我只想抓取“有评论”的评论
import requests
import pandas as pd
import csv

rows = []

url = "https://shopee.sg/api/v2/item/get_ratings"

params = {
    "filter": "1","flag": "1","itemid": "3734876291","limit": 6,# shows 6 reviews at a time
    "offset": 0,# starting at first page,raise increment by 6?
    "shopid": "234663159","type": "0"
    }

r = requests.get(url,params=params)
data = r.json()

# Total number of reviews
reviews = data[''data''][''item_rating_summary''][''rcount_with_context'']

for i in range (0,reviews,6):
    params["offset"] = i

    limit = reviews - i
    if limit < 6:
        params["limit"] = limit

#    offset = reviews - i
#    if offset < 6:
#       params["offset"] = offset


    for num,item in enumerate(data[''data''][''ratings'']):
        row = {}

        print(''Review:'',i + num + 1)

        # User Name
        user_name = item[''author_username'']
        row[''Name''] = user_name
        print(user_name)

        # Content
        content = item[''comment'']
        row[''Content''] = content
        print(content)

        # rating
        rating = item[''rating_star'']
        row[''rating''] = rating
        print(rating)

        rows.append(row)

df = pd.DataFrame(rows)
df = df[[''Name'',''Content'',''rating'']]
df.to_csv(''API Review DF.csv'',index=False)
这是我目前所拥有的,但我似乎获得了前 6 条评论 246 次(有评论的评论总数)
我肯定在 for 循环中做错了什么,但我不确定我需要修复哪一个来解决这个问题。 我需要更改什么才能正确获取所有 246 条评论的数据?
解决方法
你的大部分代码都是正确的。你只是忘记做请求。
我修改了你的代码。你可以在上面检查更改。
- 我将第一个请求
limit更改为 1,因为第一个请求我只想要rcount_with_context,因此不需要取回太多评论 - 在外部 for 循环中,我再次对 6 说
limit -
limitoffset组合表示:我想要 6 个项目(即limit)从第 10 个(即offset)开始。例如,这里有一个list1,2,3,4,5,6,7,8,9,10,如果limit为2,offset为2 2,结果为3,4,
import requests

rows = []

url = "https://shopee.sg/api/v2/item/get_ratings"

params = {
    "filter": "1","flag": "1","itemid": "3734876291","limit": 1,# only for the first time get count
    "offset": 0,# starting at first page,raise increment by 6?
    "shopid": "234663159","type": "0"
    }

r = requests.get(url,params=params)
data = r.json()

# Total number of reviews
reviews = data[''data''][''item_rating_summary''][''rcount_with_context'']

for i in range (0,reviews,6):
    params["offset"] = i
    params["limit"] = 6
    # limit = reviews - i
    # if limit < 6:
        # params["limit"] = limit

#    offset = reviews - i
#    if offset < 6:
#       params["offset"] = offset

    # after set params,we will call requests again to fetch new data
    r = requests.get(url,params=params)
    data = r.json()

    for num,item in enumerate(data[''data''][''ratings'']):
        row = {}

        print(''Review:'',i + num + 1)

        # User Name
        user_name = item[''author_username'']
        row[''Name''] = user_name
        print(user_name)

        # Content
        content = item[''comment'']
        row[''Content''] = content
        print(content)

        # Rating
        rating = item[''rating_star'']
        row[''Rating''] = rating
        print(rating)

        rows.append(row)

df = pd.DataFrame(rows)
df = df[[''Name'',''Content'',''Rating'']]
df.to_csv(''API Review DF.csv'',index=False)

For循环中的Python列表
我是Python的新手,并且有一个关于使用for循环更新列表的问题。这是我的代码:
urls = ['http://www.city-data.com/city/javascript:l("Abbott");','http://www.city-data.com/city/javascript:l("Abernathy");','http://www.city-data.com/city/Abilene-Texas.html','http://www.city-data.com/city/javascript:l("Abram-Perezville");','http://www.city-data.com/city/javascript:l("Ackerly");','http://www.city-data.com/city/javascript:l("Adamsville");','http://www.city-data.com/city/Addison-Texas.html']

for url in urls:
    if "javascript" in url:
        print url
        url = url.replace('javascript:l("','').replace('");','-Texas.html')
        print url

for url in urls:
    if "javascript" in url:
        url = url.replace('javascript:l("','-Texas.html')
print "\n"
print urls
我使用了第一个for循环来检查语法是否正确,并且工作正常。但是第二个for循环是我要使用的代码,但是无法正常工作。如何使用第二个for循环全局更新列表,以便可以在for循环外打印或存储更新的列表?

Python - 如何使用while循环和for循环从列表中随机删除一个项目直到列表为空
如何解决Python - 如何使用while循环和for循环从列表中随机删除一个项目直到列表为空?
我一直在尝试使用 while 循环和 for 循环从列表中删除随机项目。对于 while 循环,它应该将其打印到控制台,直到列表 -days- 为空。
这是我目前的代码-
while 循环:
days = [''monday'',''tuesday'',''wednesday'',''thursday'',''friday'',''saturday'',''sunday'']

while len(days) > 0:
    days = days.pop(0)
for 循环:
for day in range(len(days)):
    day = days.pop(0)
输出:for循环:
AttributeError: ''str'' object has no attribute ''pop''
我是一名新手程序员,我正在努力纠正这个问题。有没有办法从while循环中弹出项目?有人可以解释属性错误以及我收到此消息的原因吗?
解决方法
如果你想随机删除
days = [''monday'',''tuesday'',''wednesday'',''thursday'',''friday'',''saturday'',''sunday'']

from random import randrange
while len(days) > 0:
    index=randrange(0,len(days))
    days.pop(index)
    print(days)

print(''End'')
您的第一个循环是正确的方法。但是您正在用第一个元素覆盖列表。你想要
while days:
    day = days.pop(0)
for 循环不是好的做法。在迭代列表时修改列表是危险的。想想看。第一次循环时,"day" 为 0。你弹出元素 0。现在,曾经是 [1] 的元素在 [0] 槽中,但是当你再次循环时,day 将是 1并且您的编号已关闭。
再次,您正在用弹出的结果覆盖循环变量 (day)。小心你的变量名。
要随机删除可以使用numpy生成一个随机数,然后使用.pop()从列表中删除一个项目并同时打印:
import numpy as np
days = [''monday'',''sunday'']

while days:
    index = int(np.round((np.random.rand(1)-0.5)*len(days)))
    print(days.pop(index))

python datetime.timedelta进入列表
就像我在评论中写道的那样,您必须转换datetime.timedelta对象:
import datetime

new_time = datetime.time(minute=7)
print(new_time)
# >> 00:07:00
print(type(new_time))
# >> <class 'datetime.time'>

new_time_list: list = [new_time]
print(new_time_list)
# >> ['00:07:00']
print(type(new_time_list[0]))
# >> <class 'datetime.time'>

new_time_list: list = [str(new_time)]
print(new_time_list)
# >> ['00:07:00']
print(type(new_time_list[0]))
# >> <class 'str'>

new_time_list = [new_time.isoformat()]
print(new_time_list)
# >> ['00:07:00']
print(type(new_time_list[0]))
# >> <class 'str'>
输入您的代码
from datetime import datetime

list_dt_obj: list  = []
list_str: list = []
date_now = datetime.now()
now = date_now.strftime("%H:%M")
timeB = datetime.strptime(now,"%H:%M")

temps_arret_aller = ["00:00","00:07","00:14","00:21"]

for temp in temps_arret_aller:
    timeA = datetime.strptime(temp,"%H:%M")

    newTime = timeA - timeB

    print(newTime)  # print datetime.timedelta obj: output as string
    list_dt_obj.append(newTime) # add datetime.timedelta obj
    list_str.append(str(newTime))  # toString

print(list_dt_obj)  # list of datetime.timedelta obj
print(list_str)  # list of strings

# output:
# -1 day,10:19:00
# -1 day,10:26:00
# -1 day,10:33:00
# -1 day,10:40:00
# [datetime.timedelta(-1,37140),datetime.timedelta(-1,37560),37980),38400)]
# ['-1 day,10:19:00','-1 day,10:26:00',10:33:00',10:40:00']
打印项目时,将在该项目上调用.__str__()。当您打印容器时,.__repr__()会在容器中的每个项目上被调用。
import datetime

time_delta = datetime.timedelta(seconds=1000)
print(time_delta)  # 0:16:40
print(time_delta.__str__())  # 0:16:40
print(time_delta.__repr__())  # datetime.timedelta(seconds=1000)

my_list = [time_delta,time_delta]
print(my_list)  # [datetime.timedelta(seconds=1000),datetime.timedelta(seconds=1000)]
print([str(delta) for delta in my_list])  # ['0:16:40','0:16:40']
从最后一行可以看到,您可以手动调用容器中每个项目的str()来获取所需的内容。
关于为什么 Python 不进入 For 循环以插入列表框?和为什么python没有for循环的介绍现已完结,谢谢您的耐心阅读,如果想了解更多关于API中的Python for循环以获取数据?、For循环中的Python列表、Python - 如何使用while循环和for循环从列表中随机删除一个项目直到列表为空、python datetime.timedelta进入列表的相关知识,请在本站寻找。
本文将带您了解关于如何使用 System.Text.Json 对未知对象进行漂亮的打印的新内容,同时我们还将为您解释system.object 未定义的相关知识,另外,我们还将为您提供关于(de) 使用 System.Text.Json 序列化流、.NET 6中System.Text.Json的七个特性、.NET Core 内置的 System.Text.Json 使用注意、C# 通过Dynamic访问System.Text.Json对象的实用信息。
本文目录一览:- 如何使用 System.Text.Json 对未知对象进行漂亮的打印(system.object 未定义)
- (de) 使用 System.Text.Json 序列化流
- .NET 6中System.Text.Json的七个特性
- .NET Core 内置的 System.Text.Json 使用注意
- C# 通过Dynamic访问System.Text.Json对象
")
如何使用 System.Text.Json 对未知对象进行漂亮的打印(system.object 未定义)
这有效:
using System.Text.Json;
public static string JsonPrettify(this string json)
{
    var jDoc = JsonDocument.Parse(json);
    return JsonSerializer.Serialize(jDoc,new JsonSerializerOptions { WriteIndented = true });
}
 使用 System.Text.Json 序列化流")
(de) 使用 System.Text.Json 序列化流
如何解决(de) 使用 System.Text.Json 序列化流?
我正在尝试使用 System.Text.Json 的 JsonSerializer 将对象序列化为 MemoryStream。我无法在文档中找到它的实现/方法。有人可以分享使用 System.Text.Json 进行序列化和反序列化的示例实现吗?
解决方法
不清楚问题出在哪里,或者缺少哪些文档和示例,因为 docs.microsoft.com 中有多个部分以及数百篇博文和文章。在文档中,JSON serialization and deserialization 是一个很好的起点,How to serialize and deserialize (marshal and unmarshal) JSON in .NET 包括 Serialize to UTF8 部分。
MemoryStream 无论如何都只是 byte[] 数组上的 Stream 包装器,因此序列化为 MemoryStream 与直接序列化为 byte[] 数组相同。这可以通过 JsonSerializer.SerializeToUtf8Bytes:
byte[] jsonUtf8Bytes =JsonSerializer.SerializeToUtf8Bytes(weatherForecast);
最后,在 .NET 中,任何需要序列化的东西都通过 Reader 和 Writer 对象工作,例如 TextReader、StreamReader、TextReader 和 -Writers。在 JSON.NET 的情况下,这是通过 Utf8JsonWriter 对象完成的。 JsonSerializer.Serialize 具有写入 Utf8JsonWriter 的重载:
using var stream=File.OpenWrite(somePath);
using var writer=new Utf8JsonWriter(stream);
JsonSerializer.Serialize(writer,myObject);
不过,这是使用 System.Text.Json 的缓慢方式。使用缓冲区意味着分配和清理它们,这很昂贵,尤其是在 Web 应用程序中。出于这个原因,ASP.NET Core 使用 IO pipelines 而不是流来接收和发送数据到套接字,使用从缓冲池租用的可重用缓冲区,并在 ASP.NET Core 管道中的每个步骤中传递。传递 byte[] 缓冲区会复制它们的内容,因此 .NET Core 引入了 Span<> 和 Memory<> 类型,它们表示现有(可能是池化的)缓冲区上的 view .这样,ASP.NET Core 会传递缓冲区的这些“视图”,而不是缓冲区本身。
System.Text.Json 旨在使用管道和可重用内存而不是流,从而允许 ASP.NET Core 在高流量网站中使用最少的内存和尽可能少的分配。 ASP.NET Core 使用 Utf8JsonWriter(IBufferWriter) 构造函数通过 PipeWriter 写入输出管道。
我们可以使用相同的重载来写入带有 ArrayBufferWriter 的可重用缓冲区。这相当于使用 MemoryStream BUT 输出通过 ReadOnlySpan<byte> 或 Memory<byte> 访问,因此不必复制:>
using var buffer=new ArrayBufferWriter<byte>(65536);
using var writer=new Utf8JsonWriter(buffer);
JsonSerializer.Serialize(writer,myObject);

ReadOnlySpan<byte> data=buffer.WrittenSpan;
更好的选择是使用 newtonsoft.json。
它有很多例子

.NET 6中System.Text.Json的七个特性
忽略循环引用
在 .NET 5 中,如果存在循环依赖, 那么序列化的时候会抛出异常, 而在 .NET 6 中, 你可以选择忽略它。
Category dotnet = new()
{
    Name = ".NET 6",
};
Category systemTextJson = new()
{
    Name = "System.Text.Json",
    Parent = dotnet
};
dotnet.Children.Add(systemTextJson);

JsonSerializerOptions options = new()
{
    ReferenceHandler = ReferenceHandler.IgnoreCycles,
    WriteIndented = true
};

string dotnetJson = JsonSerializer.Serialize(dotnet, options);
Console.WriteLine($"{dotnetJson}");

public class Category
{
    public string Name { get; set; }
    public Category Parent { get; set; }
    public List<Category> Children { get; set; } = new();
}

// 输出:
// {
//   "Name": ".NET 6",
//   "Parent": null,
//   "Children": [
//     {
//       "Name": "System.Text.Json",
//       "Parent": null,
//       "Children": []
//     }
//   ]
// }
序列化和反序列化通知
在 .NET 6 中,System.Text.Json 公开序列化和反序列化的通知。
有四个新接口可以根据您的需要进行实现:
- IJsonOnDeserialized
- IJsonOnDeserializing
- IJsonOnSerialized
- IJsonOnSerializing
Product invalidProduct = new() { Name = "Name", Test = "Test" };
JsonSerializer.Serialize(invalidProduct);
// The InvalidOperationException is thrown

string invalidJson = "{}";
JsonSerializer.Deserialize<Product>(invalidJson);
// The InvalidOperationException is thrown

class Product : IJsonOnDeserialized, IJsonOnSerializing, IJsonOnSerialized
{
    public string Name { get; set; }

    public string Test { get; set; }

    public void OnSerialized()
    {
        throw new NotImplementedException();
    }

    void IJsonOnDeserialized.OnDeserialized() => Validate(); // Call after deserialization
    void IJsonOnSerializing.OnSerializing() => Validate();   // Call before serialization

    private void Validate()
    {
        if (Name is null)
        {
            throw new InvalidOperationException("The ''Name'' property cannot be ''null''.");
        }
    }
}
序列化支持属性排序
在 .NET 6 中, 添加了 JsonPropertyOrderAttribute 特性,允许控制属性的序列化顺序,以前,序列化顺序是由反射顺序决定的。
Product product = new()
{
    Id = 1,
    Name = "Surface Pro 7",
    Price = 550,
    Category = "Laptops"
};

JsonSerializerOptions options = new() { WriteIndented = true };
string json = JsonSerializer.Serialize(product, options);
Console.WriteLine(json);

class Product : A
{
    [JsonPropertyOrder(2)]
    public string Category { get; set; }

    [JsonPropertyOrder(1)]
    public decimal Price { get; set; }

    public string Name { get; set; }

    [JsonPropertyOrder(-1)]
    public int Id { get; set; }
}

class A
{
    public int Test { get; set; }
}

// 输出:
// {
//   "Id": 1,
//   "Name": "Surface Pro 7",
//   "Price": 550,
//   "Category": "Laptops"
// }
使用 Utf8JsonWriter 编写 JSON
.NET 6 增加了 System.Text.Json.Utf8JsonWriter,你可以方便的用它编写原始Json。
JsonWriterOptions writerOptions = new() { Indented = true, };

using MemoryStream stream = new();
using Utf8JsonWriter writer = new(stream, writerOptions);

writer.WriteStartObject();
writer.WriteStartArray("customJsonFormatting");
foreach (double result in new double[] { 10.2, 10 })
{
    writer.WriteStartObject();
    writer.WritePropertyName("value");
    writer.WriteRawValue(FormatNumberValue(result), skipInputValidation: true);
    writer.WriteEndObject();
}
writer.WriteEndArray();
writer.WriteEndObject();
writer.Flush();

string json = Encoding.UTF8.GetString(stream.ToArray());
Console.WriteLine(json);

static string FormatNumberValue(double numberValue)
{
    return numberValue == Convert.ToInt32(numberValue)
        ? numberValue.ToString() + ".0"
        : numberValue.ToString();
}

// 输出:
// {
//    "customJsonFormatting": [
//      {
//        "value": 10.2
//      },
//      {
//        "value": 10.0
//      }
//  ]
// }
IAsyncEnumerable 支持
在 .NET 6 中, System.Text.Json 支持 IAsyncEnumerable。
static async IAsyncEnumerable<int> GetNumbersAsync(int n)
{
    for (int i = 0; i < n; i++)
    {
        await Task.Delay(1000);
        yield return i;
    }
}
// Serialization using IAsyncEnumerable
JsonSerializerOptions options = new() { WriteIndented = true };
using Stream 输出Stream = Console.OpenStandard输出();
var data = new { Data = GetNumbersAsync(5) };
await JsonSerializer.SerializeAsync(输出Stream, data, options);
// 输出:
// {
//    "Data": [
//      0,
//      1,
//      2,
//      3,
//      4
//  ]
// }

// Deserialization using IAsyncEnumerable
using MemoryStream memoryStream = new(Encoding.UTF8.GetBytes("[0,1,2,3,4]"));
// Wraps the UTF-8 encoded text into an IAsyncEnumerable<T> that can be used to deserialize root-level JSON arrays in a streaming manner.
await foreach (int item in JsonSerializer.DeserializeAsyncEnumerable<int>(memoryStream))
{
    Console.WriteLine(item);
}
// 输出:
// 0
// 1
// 2
// 3
// 4
IAsyncEnumerable 的序列化的动图。

序列化支持流
在 .NET 6 中, 序列化和反序列化支持流。
string json = "{\"Value\":\"Deserialized from stream\"}";
byte[] bytes = Encoding.UTF8.GetBytes(json);

// Deserialize from stream
using MemoryStream ms = new MemoryStream(bytes);
Example desializedExample = JsonSerializer.Deserialize<Example>(ms);
Console.WriteLine(desializedExample.Value);
// 输出: Deserialized from stream

// ==================================================================

// Serialize to stream
JsonSerializerOptions options = new() { WriteIndented = true };
using Stream 输出Stream = Console.OpenStandard输出();
Example exampleToSerialize = new() { Value = "Serialized from stream" };
JsonSerializer.Serialize<Example>(输出Stream, exampleToSerialize, options);
// 输出:
// {
//    "Value": "Serialized from stream"
// }

class Example
{
    public string Value { get; set; }
}
像 DOM 一样使用 JSON
.NET 6 添加了下面的新类型, 支持像操作 DOM 一样访问 Json 元素。
- JsonArray
- JsonNode
- JsonObject
- JsonValue
// Parse a JSON object
JsonNode jNode = JsonNode.Parse("{\"Value\":\"Text\",\"Array\":[1,5,13,17,2]}");
string value = (string)jNode["Value"];
Console.WriteLine(value); // Text
                          // or
value = jNode["Value"].GetValue<string>();
Console.WriteLine(value); // Text

int arrayItem = jNode["Array"][1].GetValue<int>();
Console.WriteLine(arrayItem); // 5
                              // or
arrayItem = jNode["Array"][1].GetValue<int>();
Console.WriteLine(arrayItem); // 5

// Create a new JsonObject
var jObject = new JsonObject
{
    ["Value"] = "Text",
    ["Array"] = new JsonArray(1, 5, 13, 17, 2)
};
Console.WriteLine(jObject["Value"].GetValue<string>());  // Text
Console.WriteLine(jObject["Array"][1].GetValue<int>());  // 5

// Converts the current instance to string in JSON format
string json = jObject.ToJsonString();
Console.WriteLine(json); // {"Value":"Text","Array":[1,5,13,17,2]}
以上所述是小编给大家介绍的.NET 6中System.Text.Json的七个特性,希望对大家有所帮助。在此也非常感谢大家对网站的支持!
- .NET 6新特性试用之System.Text.Json功能改进

.NET Core 内置的 System.Text.Json 使用注意
System.Text.Json 是 .NET Core 3.0 新引入的高性能 json 解析、序列化、反序列化类库,武功高强,但毕竟初入江湖,炉火还没纯青,使用时需要注意,以下是我们在实现使用中遇到的一下问题。
1)默认设置下中文会被编码
序列化时中文会被编码,详见博问 .NET Core 3.0 中使用 System.Text.Json 序列化中文时的编码问题 。
解决方法:
public void ConfigureServices(IServiceCollection services)
{
    services.AddControllers().AddJsonOptions(options =>
    {
        options.JsonSerializerOptions.Encoder = JavaScriptEncoder.Create(UnicodeRanges.All);
    });
}
2)不能序列化公有字段(成员变量),只能序列化公有属性。
比如
public class FollowBloggerRequest
{
    public Guid blogUserGuid;
}
要改为
public class FollowBloggerRequest
{
    public Guid blogUserGuid { get; set; }
}
3)全是数字的字符串不能隐式反序列化为 int 类型
比如 { "postId": "12345" } 不能反序列化为 int PostId ,github 上的相关 issue : System.Text.Json: Deserialization support for quoted numbers
4)对于枚举类型属性值(非数字型)的序列化,需要加 [JsonStringEnumConverter] 特性
比如
[JsonConverter(typeof(JsonStringEnumConverter))]
public SiteCategoryType CategoryType { get; set; }
Json.NET 对应的是 StringEnumConverter
5)反序列化 Guid 的问题
详见博问:https://q.cnblogs.com/q/120383/
注:对应类型转换问题,可以通过实现自定义 JsonConverter<T> 解决,参考 corefx#36639 (comment)

C# 通过Dynamic访问System.Text.Json对象
❝有时在处理Http请求的时候,偷懒不想定义一个Model来处理,使用Dynamic来直接操作请求的数据是非常方便的
C#中dynamic关键字
❝dynamic关键字和动态语言运行时(DLR)是.Net 4.0中新增的功能。
什么是"动态"
-
编程语言有时可以划分为静态类型化语言和动态类型化语言。C#和Java经常被认为是静态化类型的语言,而Python、Ruby和JavaScript是动态类型语言。
-
一般而言,动态语言在编译时不会对类型进行检查,而是在运行时识别对象的类型。这种方法有利有弊:代码编写起来更快、更容易,但无法获取编译器错误,只能通过单元测试和其他方法来确保应用正常运行。
-
C#最初是作为纯静态语言创建的,但是C#4添加了一些动态元素,用于改进与动态语言和框架之间的互操作性。C# 团队考虑了多种设计选项,但最终确定添加一个新关键字来支持这些功能:dynamic。
-
dynamic关键字可充当C#类型系统中的静态类型声明。这样,C#就获得了动态功能,同时仍然作为静态类型化语言而存在。由于编译时不会去检查类型,所以导致IDE的IntellSense失效。
dynamic、object还是var?
那么,dynamic、Object和var之间的实际区别是什么?何时使用它们?
-
先说说var,经常有人会拿dynamic和var进行比较。实际上,var和dynamic完全是两个概念,根本不应该放在一起做比较。
-
var实际上编译器抛给我们的语法糖,一旦被编译,编译器就会自动匹配var变量的实际类型,并用实际类型来替换该变量的声明,等同于我们在编码时使用了实际类型声明。而dynamic被编译后是一个Object类型,编译器编译时不会对dynamic进行类型检查。
-
再说说Object,上面提到dynamic类型再编译后是一个Object类型,同样是Object类型,那么两者的区别是什么呢?
-
除了在编译时是否进行类型检查之外,另外一个重要的区别就是类型转化,这也是dynamic很有价值的地方,dynamic类型的实例和其他类型的实例间的转换是很简单的,开发人员能够很方便地在dyanmic和非dynamic行为间切换。任何实例都能隐式转换为dynamic类型实例,见下面的例子:
dynamic d1 = 7;
dynamic d2 = "a string";
dynamic d3 = System.DateTime.Today;
dynamic d4 = System.Diagnostics.Process.GetProcesses();
-
反之亦然,类型为dynamic的任何表达式也能够隐式转换为其他类型。
int i = d1;
string str = d2;
DateTime dt = d3;
System.Diagnostics.Process[] procs = d4;
前面整理过一篇关于dynamic类型与Newtonsoft.Json来操作请求的数据,请参考如下文章
C# Dynamic与Newtonsoft.Json的应用
参考Nettonsoft.Json中的访问,同样定义一个JTextAccessor,代码如下
❝dynamic是C#里面的动态类型,可在未知类型的情况访问对应的属性,非常灵活和方便。如果有已知强类型,如果有已知对应的强类型,可以直接转成对应的类型。但如果没有,要访问Json里面对应的数据的时候,就显得比较麻烦。再根据Asp.Net Core WebAPI中的FromBody传递内容就是一个JsonElement,我们可以借助DynamicObject来方便的访问对应的属性。
public class JTextAccessor : DynamicObject
{
    private readonly JsonElement _content;

    public JTextAccessor(JsonElement content)
    {
        _content = content;
    }

    public override bool TryGetMember(GetMemberBinder binder, out object? result)
    {
        result = null;
        if (_content.TryGetProperty(binder.Name, out JsonElement value))
        {
            result = Obtain(value);
        }
        else return false;
        return true;
    }

    private object? Obtain(in JsonElement element)
    {
        switch (element.ValueKind)
        {
            case JsonValueKind.String: return element.GetString();
            case JsonValueKind.Null: return null;
            case JsonValueKind.False: return false;
            case JsonValueKind.True: return true;
            case JsonValueKind.Number: return element.GetDouble();
            default: break;
        }

        if (element.ValueKind == JsonValueKind.Array)
        {
            var list = new List<object>();
            foreach (var item in element.EnumerateArray())
            {
                list.Add(Obtain(item));
            }

            return list;
        }
        // Undefine、Object
        else return new JTextAccessor(element);
    }
}
编写一个Controller来验证
[HttpPost]
public IActionResult Post([FromBody] dynamic value)
{
    dynamic ja = new JTextAccessor(value);
    string Name = ja.Name;
    int Age = (int)ja.Age;
    var list = ja.List;
    string childName = list[0].Name;
    string str = JsonSerializer.Serialize(value);
    _logger.LogInformation(str);
    return Ok(new
              {
                  code = "0",
                  message = "成功",
                  reqCode = ""
              });
}
设置好断点,调试
-
调试断点

-
使用postman做请求测试
-
查看调试的结果非常理想,成功偷懒省了事
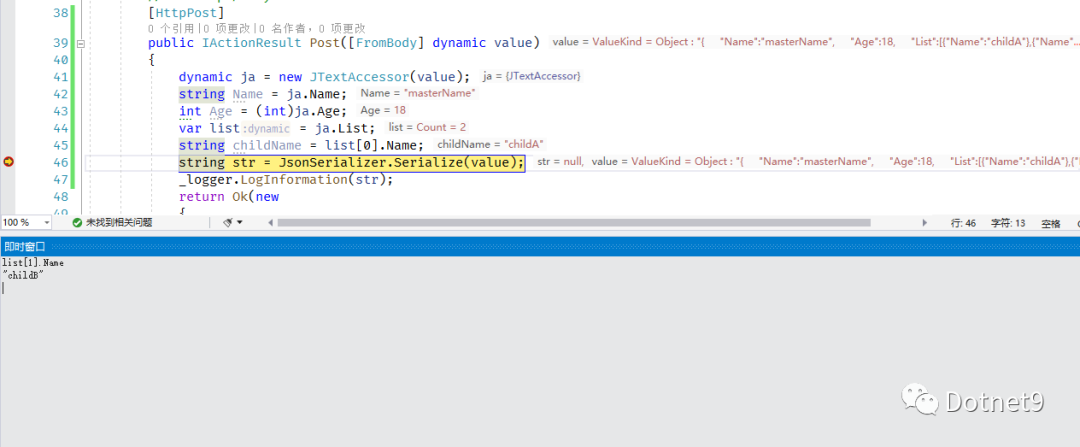
一些推荐
-
【开源Blazor控件库】Ant Design Blazor、Bootstrap风格
-
【开源B/S项目】WTM
-
【开源WPF控件库】MaterialDesignInXAML、MaterialDesignExtensions、Panuon.UI.Silver、HandyControl、AduSkin-UI、ModernWpf
-
【开源WPF项目】Accelerider.Windows、TerminalMACS.ManagerForWPF
-
【开源Xamarin项目】全球优秀Xamarin.Forms项目收集
-
【开源Winform控件库】HZHControls、SunnyUI】
-
【开源Winform项目】SiMay远程控制管理系统
-
【开源Qt控件库】QWidgetDemo、Material风格的Qt控件
-
【开源Qt项目】开源Android实时投屏软件
-
【其他】大屏数据展示模板
❝时间如流水,只能流去不流回。
公众号:Dotnet9 作者:非法关键字 原文:【C# Dynamic与Newtonsoft.Json的应用、C# 通过Dynamic访问System.Text.Json对象】 编辑:沙漠之尽头的狼 日期:2020-12-02 
微信公众号:Dotnet9
本文分享自微信公众号 - Dotnet9(dotnet9_com)。
如有侵权,请联系 support@oschina.cn 删除。
本文参与“OSC源创计划”,欢迎正在阅读的你也加入,一起分享。
关于如何使用 System.Text.Json 对未知对象进行漂亮的打印和system.object 未定义的问题就给大家分享到这里,感谢你花时间阅读本站内容,更多关于(de) 使用 System.Text.Json 序列化流、.NET 6中System.Text.Json的七个特性、.NET Core 内置的 System.Text.Json 使用注意、C# 通过Dynamic访问System.Text.Json对象等相关知识的信息别忘了在本站进行查找喔。
想了解在 AWS Lambda 脚本中使用多个 Python 函数的新动态吗?本文将为您提供详细的信息,我们还将为您解答关于aws lambda function的相关问题,此外,我们还将为您介绍关于AWS Lambda Python 文件夹结构、AWS Lambda python函数对我的图片没有任何作用、AWS Lambda 函数在调用另一个 Lambda 函数时超时、AWS Lambda中的Python请求超时的新知识。
本文目录一览:- 在 AWS Lambda 脚本中使用多个 Python 函数(aws lambda function)
- AWS Lambda Python 文件夹结构
- AWS Lambda python函数对我的图片没有任何作用
- AWS Lambda 函数在调用另一个 Lambda 函数时超时
- AWS Lambda中的Python请求超时
")
在 AWS Lambda 脚本中使用多个 Python 函数(aws lambda function)
基于评论。
该问题是由于 my_function 函数未在 lambda 处理程序内调用所致。
解决方案是将 my_function() 添加到处理程序 lambda_handler 中,以便实际调用 my_function。

AWS Lambda Python 文件夹结构
如何解决AWS Lambda Python 文件夹结构?
我正在尝试创建一个 Python lambda,它使用我通过 pip 安装的第三方包。我将其打包为 zip 文件并上传。文件结构如下所示:
pyMysqL/
   ___init___.py
   constants/
      ER.py
PyMysqL-1.0.2.dist-info/
   WHEEL
test-lambda.py
问题是,当我上传该 zip 文件时,它会使文件夹结构变平,因此我的 test-lambda.py 文件无法再找到 pyMysqL 模块。我上传后的新文件夹结构如下所示:
pyMysqL/___init___.py
pyMysqL/constants/ER.py
PyMysqL-1.0.2.dist-info/WHEEL
test-lambda.py
文件名已替换为文件路径。我一开始以为这只是它表示文件夹结构的方式,但我可以在控制台中创建文件夹,它们是不同的。我正在用 terraform 构建 lambda,这是配置:
resource "aws_lambda_function" "lambda" {
   function_name = "test-lambda"

   s3_bucket = "recipeapp-deployment-bucket"
   s3_key    = "test-lambda.zip"

   handler = "test-lambda.handleRequest"
   runtime = "python3.8"

   role = var.lambda_role_arn
}
我需要在配置中添加一些东西来解决这个问题吗?
解决方法
暂无找到可以解决该程序问题的有效方法,小编努力寻找整理中!
如果你已经找到好的解决方法,欢迎将解决方案带上本链接一起发送给小编。
小编邮箱:dio#foxmail.com (将#修改为@)

AWS Lambda python函数对我的图片没有任何作用
对该库不熟悉,但是我建议在调整大小时分配一个新变量。更改此:
image.resize(basewidth,hsize)
image.save(resized_path)
对此:
resizedImage = image.resize(basewidth,hsize)
resizedImage.save(resized_path)

AWS Lambda 函数在调用另一个 Lambda 函数时超时
如何解决AWS Lambda 函数在调用另一个 Lambda 函数时超时?
我有一个 Lambda 函数(触发器),它调用另一个 Lambda 函数(工作器)。两者都是用 Python 3.8 编写的。
调用是通过 boto3:
invokeResponse = lambdaClient.invoke(
            # FunctionName="worker_function",FunctionName="somearn",InvocationType="Event",LogType="Tail",Payload=payload,)
触发器脚本到达调用行,然后挂起直到超时(触发器测试长达 8 分钟)。 worker 函数可以手动测试成功,并在
两个脚本都在同一个 VPC 中,所以我认为这不是网络连接问题?
为了排除权限问题,我尝试授予触发器 AWSLambda_FullAccess,但仍然没有变化。
我错过了什么?
解决方法
我很生气。
我的头撞在这堵砖墙上好几个小时了。
原来我没有为 Lambda 添加 VPC 终端节点。
我认为把它全部写出来的行为可能让我有了一些清晰的认识。
已解决。

AWS Lambda中的Python请求超时
我正在尝试从我的AWS Lambda发出http请求,但是超时。
我的代码与此类似:
import requests

def lambda_handler(event,context):
    print('Im making the request')
    request.get('http://www.google.com')
    print('I recieved the response')
但是,当我对此进行测试时,我会超时。
输出是
Im making the request
END RequestId: id
REPORT RequestId: id    Duration: 15003.25 ms   Billed Duration: 15000 ms   Memory Size: 128 MB Max Memory Used: 18 MB
2016-04-08T20:33:49.951Z id Task timed out after 15.00 seconds
所以我知道问题不是它没有找到请求包,而是在运行我的python代码。我只是想知道为什么该请求超时。
关于在 AWS Lambda 脚本中使用多个 Python 函数和aws lambda function的问题就给大家分享到这里,感谢你花时间阅读本站内容,更多关于AWS Lambda Python 文件夹结构、AWS Lambda python函数对我的图片没有任何作用、AWS Lambda 函数在调用另一个 Lambda 函数时超时、AWS Lambda中的Python请求超时等相关知识的信息别忘了在本站进行查找喔。
此处将为大家介绍关于在命令行上使用 Python 上下文管理器而不使用的详细内容,并且为您解答有关在命令行中运行python的相关问题,此外,我们还将为您介绍关于python 上下文管理器使用方法小结、Python 中的 with 语句与上下文管理器、python 之 with 语句结合上下文管理器、Python 深入上下文管理器的有用信息。
本文目录一览:- 在命令行上使用 Python 上下文管理器而不使用(在命令行中运行python)
- python 上下文管理器使用方法小结
- Python 中的 with 语句与上下文管理器
- python 之 with 语句结合上下文管理器
- Python 深入上下文管理器
")
在命令行上使用 Python 上下文管理器而不使用(在命令行中运行python)
如何解决在命令行上使用 Python 上下文管理器而不使用?
我正在使用由 Google 编写的用于生产用途的上下文管理器,但我也想以交互方式在命令行上使用它。
通常,上下文管理器是这样使用的:
with some_context_manager():
    do_something()
在命令行上这样做很乏味,尤其是当在 with 块中需要执行多个语句时。
是否可以使用 Python 命令行进行一些偷偷摸摸的操作,以便能够执行以下操作:
>>> start_context_manager(some_context_manager)
>>> do_something()
>>> stop_context_manager(some_context_manager)
我意识到这违背了拥有上下文管理器的初衷,但它会让我的生活更轻松。
如果细节很重要,这是我正在使用的上下文管理器:
from google.cloud import ndb
datastore_client = ndb.Client()
with datastore_client.context():
    do_something()
解决方法
暂无找到可以解决该程序问题的有效方法,小编努力寻找整理中!
如果你已经找到好的解决方法,欢迎将解决方案带上本链接一起发送给小编。
小编邮箱:dio#foxmail.com (将#修改为@)

python 上下文管理器使用方法小结
上下文管理器最常用的是确保正确关闭文件,
with open('/path/to/file','r') as f:
 f.read()
with 语句的基本语法,
with expression [as variable]:
with-block
expression是一个上下文管理器,其实现了enter和exit两个函数。当我们调用一个with语句时, 依次执行一下步骤,
1.首先生成一个上下文管理器expression, 比如open('xx.txt').
2.执行expression.enter()。如果指定了[as variable]说明符,将enter()的返回值赋给variable.
3.执行with-block语句块.
4.执行expression.exit(),在exit()函数中可以进行资源清理工作.
with语句不仅可以管理文件,还可以管理锁、连接等等,如,
#管理锁
import threading
lock = threading.lock()
with lock:
 #执行一些操作
 pass

#数据库连接管理
def test_write():
 sql = """  #具体的sql语句
 """
 con = DBConnection()
 with con as cursor:
  cursor.execute(sql)
  cursor.execute(sql)
  cursor.execute(sql)
自定义上下文管理器
上下文管理器就是实现了上下文协议的类,也就是要实现 __enter__()和__exit__()两个方法。
__enter__():主要执行一些环境准备工作,同时返回一资源对象。如果上下文管理器open("test.txt")的enter()函数返回一个文件对象。
__exit__():完整形式为exit(type,value,traceback),这三个参数和调用sys.exec_info()函数返回值是一样的,分别为异常类型、异常信息和堆栈。如果执行体语句没有引发异常,则这三个参数均被设为None。否则,它们将包含上下文的异常信息。_exit()方法返回True或False,分别指示被引发的异常有没有被处理,如果返回False,引发的异常将会被传递出上下文。如果exit()函数内部引发了异常,则会覆盖掉执行体的中引发的异常。处理异常时,不需要重新抛出异常,只需要返回False,with语句会检测exit()返回False来处理异常。
class test_query:
  def __init__(self):
    pass

  def query(self):
    print('query')

  def __enter__(self):
    # 如果是数据库连接就可以返回cursor对象
    # cursor = self.cursor
    # return cursor
    print('begin query,')
    return self #由于这里没有资源对象就返回对象

  def __exit__(self,exc_type,exc_value,traceback):
    if traceback is None:
      print('End')
    else:
      print('Error')

    # 如果是数据库连接提交操作
    # if traceback is None:
    #  self.commit()
    # else:
    #  self.rollback()

if __name__ == '__main__':
  with test_query() as q:
    q.query()
contextlib
编写enter和exit仍然很繁琐,因此Python的标准库contextlib提供了更简单的写法,
基本语法
  @contextmanager
    def some_generator(<arguments>):
      <setup>
      try:
        yield <value>
      finally:
        <cleanup>
生成器函数some_generator就和我们普通的函数一样,它的原理如下:
some_generator函数在在yield之前的代码等同于上下文管理器中的enter函数.
yield的返回值等同于enter函数的返回值,即如果with语句声明了as <variable>,则yield的值会赋给variable.
然后执行<cleanup>代码块,等同于上下文管理器的exit函数。此时发生的任何异常都会再次通过yield函数返回。
例,
自动加括号
import contextlib

@contextlib.contextmanager
def tag(name):
  print('<{}>'.format(name))
  yield
  print('</{}>'.format(name))


if __name__ == '__main__':
  with tag('h1') as t:
    print('hello')
    print('context')
管理锁
@contextmanager
def locked(lock):
  lock.acquire()
  try:
    yield
  finally:
    lock.release()

with locked(myLock):
  #代码执行到这里时,myLock已经自动上锁
  pass
  #执行完后会,会自动释放锁
管理文件关闭
@contextmanager
def myopen(filename,mode="r"):
  f = open(filename,mode)
  try:
    yield f
  finally:
    f.close()

with myopen("test.txt") as f:
  for line in f:
    print(line)
管理数据库回滚
@contextmanager
def transaction(db):
  db.begin()
  try:
    yield
  except:
    db.rollback()
    raise
  else:
    db.commit()

with transaction(mydb):
  mydb.cursor.execute(sql)
  mydb.cursor.execute(sql)
  mydb.cursor.execute(sql)
  mydb.cursor.execute(sql)
这就很方便!
如果一个对象没有实现上下文,我们就不能把它用于with语句。这个时候,可以用closing()来把该对象变为上下文对象。它的exit函数仅仅调用传入参数的close函数.
例如,用with语句使用urlopen():
import contextlib
from urllib.request import urlopen

if __name__ == '__main__':
  with contextlib.closing(urlopen('https://www.python.org')) as page:
    for line in page:
      print(line)
closing也是一个经过@contextmanager装饰的generator,这个generator编写起来其实非常简单:

@contextmanager
def closing(thing):
  try:
    yield thing
  finally:
    thing.close()
嵌套使用
import contextlib
from urllib.request import urlopen

if __name__ == '__main__':
  with contextlib.closing(urlopen('https://www.python.org')) as page,\
      contextlib.closing(urlopen('https://www.python.org')) as p:
    for line in page:
      print(line)
        print(p)
在2.x中需要使用contextlib.nested()才能使用嵌套,3.x中可以直接使用。
更多函数可以参考官方文档https://docs.python.org/3/library/contextlib.html

Python 中的 with 语句与上下文管理器
对象,是 Python 对数据的抽象概念。Python 中的所有数据都是以对象或对象间的关系来实现的。(某种意义上,代码也是由对象来实现的,这与冯·诺依曼的“stored program computer”模型相一致)。每个对象都有 id、type、和 value。对象的 id 从创建之时起就不再改变,你可以把它想象成对象在内存中的地址。is 运算符就是比较的两个对象的 id,或者你也可以通过内建的 id() 函数来直接查看。
正文:
-
with 语句
with 语句是被设计用来简化“try / finally”语句的。通常的用处在于共享资源的获取和释放,比如文件、数据库和线程资源。它的用法如下:
with context_exp [as var]:
with_suit
with 语句也是复合语句的一种,就像 if、try 一样,它的后面也有个“:”,并且紧跟一个缩进的代码块 with_suit。context_exp 表达式的作用是提供一个上下文管理器(Context Manager),整个 with_suit 代码块都是在这个上下文管理器的运行环境下执行的。context_exp 可以直接是一个上下文管理器的引用,也可以是一句可执行的表达式,with 语句会自动执行这个表达式以获得上下文管理对象。with 语句的实际执行流程是这样的:
- 执行 context_exp 以获取上下文管理器
- 加载上下文管理器的 __exit__() 方法以备稍后调用
- 调用上下文管理器的 __enter__() 方法
- 如果有 as var 从句,则将 __enter__() 方法的返回值赋给 var
- 执行子代码块 with_suit
- 调用上下文管理器的 __exit__() 方法,如果 with_suit 的退出是由异常引发的,那么该异常的 type、value 和 traceback 会作为参数传给 __exit__(),否则传三个 None
- 如果 with_suit 的退出由异常引发,并且 __exit__() 的返回值等于 False,那么这个异常将被重新引发一次;如果 __exit__() 的返回值等于 True,那么这个异常就被无视掉,继续执行后面的代码
即,可以把 __exit__() 方法看成是“try / finally”的 finally,它总是会被自动调用。Python 里已经有了一些支持上下文管理协议的对象,比如文件对象,在使用 with 语句处理文件对象时,可以不再关心“打开的文件必须记得要关闭”这个问题了:
>>> with open(''test.py'') as f:
	print(f.readline())


#!/usr/bin/env python

>>> f.readline()
Traceback (most recent call last):
  File "<pyshell#3>", line 1, in <module>
    f.readline()
ValueError: I/O operation on closed file.
可以看到在 with 语句完成后,f 已经自动关闭了,这个过程就是在 f 的__exit__() 方法里完成的。然后下面再来详细介绍一下上下文管理器:
-
内建类型:上下文管理器类型(Context Manager Types)
Python 使用上下文管理协议定义了一种运行时上下文环境(runtime context)。上下文管理协议由包含了一对方法的上下文管理对象实现:它会在子代码块运行前进入一个运行时上下文,并在代码块结束后退出该上下文。我们一般使用 with 语句来调用上下文管理对象,这样代码清晰度较好。
上下文管理器的两个方法:
contextmanager.__enter__()
- 本方法进入运行时上下文环境,并返回自身或另一个与运行时上下文相关的对象。返回值会赋给 as 从句后面的变量,as 从句是可选的
- 举一个返回自身的栗子比如文件对象。因为文件对象自身就是一个上下文管理器 ,所以“open()”语句返回的文件对象既被 with 获取,也会经由本方法传给 as。由下例可见,文件对象内就包含了上下文管理器的两个方法:
>>> with open(''test.py'') as f:
	''__enter__'' in dir(f)
	''__exit__'' in dir(f)


True
True- 返回一个相关对象的例子比如 decimal.localcontext() 所返回的对象。这个对象的 __enter__() 将 decimal 的主动上下文(active context)放到了一份原版 decimal 上下文的拷贝中并返回。这使得用户在改动 with 语句内的上下文环境时不会影响到语句外的部分:
>>> import decimal
>>> with decimal.localcontext() as ctx:
	ctx.prec = 22
	print(decimal.getcontext().prec)


22
>>> print(decimal.getcontext().prec)
28- 有一种 with 的用法是直接使用“with f=open(''test.py''):”这样的语句,不用 as。这种做法在上面提到的 __enter__() 返回 self 时还好说,但如果返回的是另一个对象比如第二个例子的时候,就不好了。所以这里的话还是推荐一律使用 as 来赋值。
contextmanager.__exit__(exc_type,exc_val,exc_tb)
- 本方法退出当前运行时上下文并返回一个布尔值,该布尔值标明了“如果 with_suit 的退出是由异常引发的,该异常是否须要被忽略”。如果 __exit__() 的返回值等于 False,那么这个异常将被重新引发一次;如果 __exit__() 的返回值等于 True,那么这个异常就被无视掉,继续执行后面的代码
- 另外当 with_suit 的执行过程中抛出异常时,本方法会立即执行,并且异常的三个参数也会传进来。下面我们自定义一个上下文管理器,并可以通过一个参数设定是否要忽略异常:
>>> class Ctx(object):
	def __init__(self,ign=None):
		self.ign = ign
	def __enter__(self):
		pass
	def __exit__(self,exc_type,exc_val,exc_tb):
		return self.ign


>>> with Ctx(True):
	raise TypeError(''Ignored?'')

>>> with Ctx(False):
	raise TypeError(''Ignored?'')

Traceback (most recent call last):
  File "<pyshell#28>", line 2, in <module>
    raise TypeError(''Ignored?'')
TypeError: Ignored?- 如果在本方法中又引发了新的异常,那么这个新异常将覆盖掉 with_suit 中的异常

python 之 with 语句结合上下文管理器
所谓上下文管理器即在一个类中重写了__enter__方法和__exit__方法的类就可以成为上下文管理器类。
我们可以通过 with 语句结合上下文管理器简化一些操作。
使用 with 语句结合自定义上下文管理器完成数据库相应的操作,代码实现如下:
# 1. 导入模块
import pymysql # 创建自定义上下文管理器对象
class MyDatabase(object): # 接收参数并创建数据库连接对象
    def __init__(self, host, port, user, passwd, database): self.__db = pymysql.Connection(host, port, user, passwd, database, charset=''utf8'') # 返回数据库连接对象
    def __enter__(self): return self.__db

    # 关闭数据库连接
    def __exit__(self, exc_type, exc_val, exc_tb): self.__db.close() def main(): # 使用with关键字接收enter返回的对象给db
    with MyDatabase(''localhost'', 3306, ''root'', ''mysql'', ''JDDB'') as db: # 利用db创建游标
        cur = db.cursor() sql = ''''''select * from %s'''''' cur.execute(sql, (goods,)) result = cur.fetchall() for i in result: print(i) # 关闭游标
 cur.close() # 程序入口
if __name__ == ''__main__'': main()
上下文管理器类的代码流程:
1. 编写__init__方法用来接收参数,并创建数据库连接对象;
2. 重写__enter__方法,返回数据库连接对象;
3. 重写__exit__方法,用来关闭数据库连接;
with 语句代码流程:
1. 当将创建对象的语句放到 with 语句里时不会创建对象,而是接受__enter__方法返回的对象并给对象起个别名;
2. 使用接受到的对象即数据库连接对象,创建游标;
3. 编写 SQL 语句,并通过游标执行 SQL 语句;
4. 获取 SQL 语句的查询结果,并显示出来;
5. 关闭游标;
6. 当 with 语句内的代码执行完毕后自动执行__exit__方法关闭数据库连接。
注意:with MyDatabase() as db ---> db = MyDatabase().__enter__()
利用 with 结合自定义上下文类实现 HTTP 服务端:
# 1.导入socket模块
import socket class MySocket(object): # 2.编写init方法接收port参数
    def __init__(self, port): self.__port = port # 3.创建socket对象
        self.__sk = socket.socket(socket.AF_INET, socket.SOCK_STREAM) # 4.编写enter方法返回套接字对象
    def __enter__(self): # 设置端口复用
        self.__sk.setsockopt(socket.SOL_SOCKET, socket.SO_REUSEADDR, True) # 绑定端口
        self.__sk.bind(self.__port) # 设置端口监听
        self.__sk.listen(128) # 返回套接字对象
        return self.__sk

    # 5.编写exit方法关闭套接字对象
    def __exit__(self, exc_type, exc_val, exc_tb): self.__sk.close() def main(): # 使用with关键字 并接受返回的套接字对象给sk
    with MySocket(8000) as sk: # 等待客户端连接
        clicent, ip_port = sk.accept() recv_data = clicent.recv(1024) print(recv_data.decode(''utf-8'')) # 编写HTTP响应报文
        http_line = ''HTTP/1.1 GET 200 OK\r\n'' http_header = ''Server PWS/1.0\r\n'' http_body = ''Welcome to index!\r\n'' send_data = (http_line + http_header + ''\r\n'' + http_body).encode(''utf-8'') clicent.send(send_data) # 关闭客户端连接
 clicent.close() # 编写程序入口
if __name__ == ''__main__'': main()
自定义上下文管理器类的代码解读:
1. 编写__init__方法,用来接收参数并创建套接字对象;
2. 编写__enter__方法,并使用套接字对象设置端口复用、绑定端口、并设置监听,然后返回套接字对象;
3. 编写__exit__方法,关闭套接字对象。
with 语句代码解读:
1. 接收 enter 返回的套接字对象,并起个别名,
2. 通过返回套接字对象等待客户端连接,
3. 接收客户端连接成功后会返回一个新的套接字和 IP 端口号,
4. 使用客户端套接字发送 HTTP 响应报文
5. 关闭客户端连接
6. 当 with 语句中的代码执行完毕后自动执行__exit__方法,关闭服务器连接

Python 深入上下文管理器
上下文管理器 (context manager) 是 Python2.5 开始支持的一种语法,用于规定某个对象的使用范围。一旦进入或者离开该使用范围,会有特殊操作被调用 (比如为对象分配或者释放内存)。它的语法形式是 with…as…
关闭文件
我们会进行这样的操作:打开文件,读写,关闭文件。程序员经常会忘记关闭文件。上下文管理器可以在不需要文件的时候,自动关闭文件。
下面我们看一下两段程序:
# without context manager
f = open("new.txt", "w")
print(f.closed)               # whether the file is open
f.write("Hello World!")
f.close()
print(f.closed)
以及:
# with context manager
with open("new.txt", "w") as f:
    print(f.closed)
    f.write("Hello World!")
print(f.closed)
两段程序实际上执行的是相同的操作。我们的第二段程序就使用了上下文管理器 (with…as…)。上下文管理器有隶属于它的程序块。当隶属的程序块执行结束的时候 (也就是不再缩进),上下文管理器自动关闭了文件 (我们通过 f.closed 来查询文件是否关闭)。我们相当于使用缩进规定了文件对象 f 的使用范围。
上面的上下文管理器基于 f 对象的__exit__() 特殊方法 (还记得我们如何利用特殊方法来实现各种语法?参看特殊方法与多范式)。当我们使用上下文管理器的语法时,我们实际上要求 Python 在进入程序块之前调用对象的__enter__() 方法,在结束程序块的时候调用__exit__() 方法。对于文件对象 f 来说,它定义了__enter__() 和__exit__() 方法 (可以通过 dir (f) 看到)。在 f 的__exit__() 方法中,有 self.close () 语句。所以在使用上下文管理器时,我们就不用明文关闭 f 文件了。
自定义
任何定义了__enter__() 和__exit__() 方法的对象都可以用于上下文管理器。文件对象 f 是内置对象,所以 f 自动带有这两个特殊方法,不需要自定义。
下面,我们自定义用于上下文管理器的对象,就是下面的 myvow:
# customized object

class VOW(object):
    def __init__(self, text):
        self.text = text
    def __enter__(self):
        self.text = "I say: " + self.text    # add prefix
        return self                          # note: return an object
    def __exit__(self,exc_type,exc_value,traceback):
        self.text = self.text + "!"          # add suffix

with VOW("I''m fine") as myvow:
    print(myvow.text)

print(myvow.text)
我们的运行结果如下:
I say: I''m fine
I say: I''m fine!
我们可以看到,在进入上下文和离开上下文时,对象的 text 属性发生了改变 (最初的 text 属性是”I’m fine”)。
__enter__() 返回一个对象。上下文管理器会使用这一对象作为 as 所指的变量,也就是 myvow。在__enter__() 中,我们为 myvow.text 增加了前缀 (“I say: “)。在__exit__() 中,我们为 myvow.text 增加了后缀 (“!”)。
注意: __exit__() 中有四个参数。当程序块中出现异常 (exception),__exit__() 的参数中 exc_type, exc_value, traceback 用于描述异常。我们可以根据这三个参数进行相应的处理。如果正常运行结束,这三个参数都是 None。在我们的程序中,我们并没有用到这一特性。
总结:
通过上下文管理器,我们控制对象在程序不同区间的特性。上下文管理器 (with EXPR as VAR) 大致相当于如下流程:
# with EXPR as VAR:

VAR = EXPR
VAR = VAR.__enter__()
try:
    BLOCK
finally:
    VAR.__exit__()
由于上下文管理器带来的便利,它是一个值得使用的工具。
今天关于在命令行上使用 Python 上下文管理器而不使用和在命令行中运行python的介绍到此结束,谢谢您的阅读,有关python 上下文管理器使用方法小结、Python 中的 with 语句与上下文管理器、python 之 with 语句结合上下文管理器、Python 深入上下文管理器等更多相关知识的信息可以在本站进行查询。
本文将带您了解关于使用 Selenium 和 Python 从搜索结果列表中进行选择的新内容,同时我们还将为您解释selenium查找的相关知识,另外,我们还将为您提供关于java+selenium, python+selenium浏览界面,滑动页面、Python selenium 将表值放入列表列表中、Python Selenium无法选择搜索栏、Python+Selenium+Unittest 框架使用 ——Selenium—— 定位元素(二)的实用信息。
本文目录一览:- 使用 Selenium 和 Python 从搜索结果列表中进行选择(selenium查找)
- java+selenium, python+selenium浏览界面,滑动页面
- Python selenium 将表值放入列表列表中
- Python Selenium无法选择搜索栏
- Python+Selenium+Unittest 框架使用 ——Selenium—— 定位元素(二)
")
使用 Selenium 和 Python 从搜索结果列表中进行选择(selenium查找)
页面上的定位器存在一些问题,即获取搜索结果的定位器。
除此之外,在 for 循环中,当找到所需的值时,您需要一个 break,因为您不想在找到后继续搜索其他结果。
    driver.get("https://simplywall.st/dashboard")
    driver.maximize_window()
    wait = WebDriverWait(driver,10)
    wait.until(EC.element_to_be_clickable((By.CSS_SELECTOR,'[name="username"]'))).send_keys(email)
    driver.find_element_by_css_selector('[name="password"]').send_keys(password)
    driver.find_element_by_css_selector('[data-cy-id="button-submit-login"]').click()

    ticker = 'DB:0NU'
    search = WebDriverWait(driver,15).until(EC.element_to_be_clickable((By.CSS_SELECTOR,'[name="search-search-field"]'))).send_keys(ticker)

    elements = wait.until(EC.presence_of_all_elements_located((By.CSS_SELECTOR,'[data-cy-id="search-results-list"] p')))

    for element in elements:
        print(element.text)
        try:
            if element.text == ticker:
                element.click()
                company = wait.until(EC.presence_of_element_located((By.CSS_SELECTOR,'[data-cy-id="company-header-title"]'))).text
                print(company)
                break
        except:
            pass

java+selenium, python+selenium浏览界面,滑动页面
用到selenium的时候,有时需要滑动屏幕,模拟浏览,这时候就可以用到下边的代码了:
首先是java的selenium滑屏代码(不知道为啥后边就乱了排版,自己调整下就好~)
private static Random random = new Random();private void pretendScrolling(JavascriptExecutor js, int sum) throws InterruptedException {
sum--;
int step;
int length;
switch (sum) {
case 0:
step = random.nextInt(30) + 1 + 50;
length = random.nextInt(3000) + 1 + 3000;
smoothlyScrolling(js, 0, step, length, true);
smoothlyScrolling(js, 0, step, length, false);
smoothlyScrolling(js, 0, step, length, true);
smoothlyScrolling(js, length, step, 8000, true);
step = random.nextInt(20) + 1 + 80;
smoothlyScrolling(js, 0, step, 8000, false);
length = random.nextInt(2000) + 1 + 3000;
smoothlyScrolling(js, 0, step, length, true);
smoothlyScrolling(js, 0, 20, length, false);
break;
case 1:
step = random.nextInt(10) + 1 + 40;
smoothlyScrolling(js, 0, step, 6000, true);
Thread.sleep(3000);
smoothlyScrolling(js, 0, step, 6000, false);
length = random.nextInt(1500) + 1 + 1000;
step = random.nextInt(10) + 1 + 40;
Thread.sleep(3000);
smoothlyScrolling(js, 0, step, length, true);
Thread.sleep(5000);
step = random.nextInt(10) + 1 + 40;
smoothlyScrolling(js, length, step, 7000, true);
Thread.sleep(3000);
step = random.nextInt(20) + 1 + 80;
smoothlyScrolling(js, 0, step, 8000, false);
Thread.sleep(3000);
break;
case 2:
step = random.nextInt(10) + 1 + 30;
length = random.nextInt(1300) + 1 + 1000;
smoothlyScrolling(js, 0, step, length, true); Thread.sleep(8000); step = random.nextInt(10) + 1 + 20; smoothlyScrolling(js, length, step, 6000, true); Thread.sleep(3000); length = random.nextInt(1500) + 1 + 1500; step = random.nextInt(20) + 1 + 40; smoothlyScrolling(js, length, step, 6000, false); Thread.sleep(3000); step = random.nextInt(30) + 1 + 70;
smoothlyScrolling(js, length, step, 6000, true);
Thread.sleep(4000);
step = random.nextInt(20) + 1 + 30;
smoothlyScrolling(js, 0, step, 6000, false);
Thread.sleep(3000);
break;
case 3:
step = random.nextInt(10) + 1 + 30;
smoothlyScrolling(js, 0, step, 7000, true);
Thread.sleep(3000);
step = random.nextInt(30) + 1 + 20;
smoothlyScrolling(js, 0, step, 7000, false);
Thread.sleep(3000);
break;
case 4:
step = random.nextInt(10) + 1 + 50;
smoothlyScrolling(js, 0, step, 7000, true);
Thread.sleep(3000);
length = random.nextInt(1500) + 1 + 2000;
step = random.nextInt(25) + 1 + 20;
smoothlyScrolling(js, length, step, 7000, false);
Thread.sleep(3000);
step = random.nextInt(20) + 1 + 30;
smoothlyScrolling(js, length, step, 7000, true);
Thread.sleep(3000);
step = random.nextInt(20) + 1 + 40;
smoothlyScrolling(js, 0, step, 7000, false);
Thread.sleep(2000);
break;
case 5:
step = random.nextInt(20) + 1 + 30;
smoothlyScrolling(js, 0, step, 2500, true);
Thread.sleep(3000);
step = random.nextInt(30) + 1 + 40;
smoothlyScrolling(js, 0, step, 2500, false);
Thread.sleep(3000);
step = random.nextInt(20) + 1 + 30;
smoothlyScrolling(js, 0, step, 7000, true);
Thread.sleep(6000);
step = random.nextInt(20) + 1 + 30;
smoothlyScrolling(js, 0, step, 7000, false);
Thread.sleep(2000);
break;
default:
case 6:
step = random.nextInt(30) + 1 + 30;
length = random.nextInt(1500) + 1 + 2500;
smoothlyScrolling(js, 0, step, length, true);
step = random.nextInt(30) + 1 + 70;
smoothlyScrolling(js, 0, step, length, false);
step = random.nextInt(20) + 1 + 40;
smoothlyScrolling(js, 0, step, 7000, true);
step = random.nextInt(25) + 1 + 20;
smoothlyScrolling(js, 0, step, 7000, false);
Thread.sleep(3000);
step = random.nextInt(25) + 1 + 20;
length = random.nextInt(1500) + 1 + 3000;
smoothlyScrolling(js, 0, step, length, true);
Thread.sleep(3000);
step = random.nextInt(15) + 1 + 30;
smoothlyScrolling(js, 0, step, length, false);
break;
}
}private void smoothlyScrolling(JavascriptExecutor js, int floor, int step, int celling, boolean direction) {
if (direction) {
for (int i = floor; i <= celling; i += step) {
js.executeScript("scrollTo(0," + i + ")");
}
} else {
for (int i = celling; i >= floor; i -= step) {
js.executeScript("scrollTo(0," + i + ")");
}
}
}
用法如下:
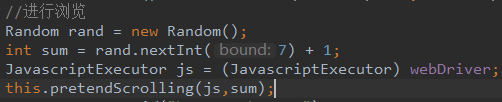
两个参数,其中js表示的是driver, sum是一个随机数,表示随机的从7中浏览方式之间选一种
再然后是在python selenium中的应用,我专门写了一个类出来存放浏览界面的代码,然后在需要用到它的地方导入,引用
import random
import time


class PretendScrolling:
    @staticmethod
 def pretend_scrolling(driver, sum):
 step = 1
 length = 1
 if sum == 1:
 step = random.randint(0, 30) + 1 + 50
 length = random.randint(0, 3000) + 1 + 3000
 smoothlyScrolling(driver, 0, step, length, True)
 smoothlyScrolling(driver, 0, step, length, False)

 smoothlyScrolling(driver, 0, step, length, True)
 smoothlyScrolling(driver, length, step, 8000, False)
 step = random.randint(0, 20)+ 1+80
 smoothlyScrolling(driver, 0 ,step, 8000, False)

 length = random.randint(0, 2000) + 1 + 3000
 smoothlyScrolling(driver, 0 , step, length, True)
 smoothlyScrolling(driver, 0 , 20, length, False)
 elif sum == 2:
 step = random.randint(0, 10) + 1 + 40
 smoothlyScrolling(driver, 0, step, 6000, True)
 time.sleep(3)
 smoothlyScrolling(driver, 0, step, 6000, False)

 length = random.randint(0, 1500) + 1 + 1000
 step = random.randint(0, 10) + 1 + 40
 time.sleep(3)
 smoothlyScrolling(driver, 0, step, length, True)
 time.sleep(5)
 step = random.randint(0, 10)+1+40
 smoothlyScrolling(driver, length, step, 7000, True)
 time.sleep(3)

 step = random.randint(0, 20)+1+80
 smoothlyScrolling(driver, 0, step, 8000, False)
 time.sleep(3)
 elif sum == 3:
 step = random.randint(0, 10) + 1 + 30
 length = random.randint(0, 1300) + 1 + 1000
 smoothlyScrolling(driver, 0, step, length, True)
 time.sleep(8)
 step = random.randint(0, 10) + 1 + 20
 smoothlyScrolling(driver, length, step, 6000, True)
 time.sleep(3)
 length = random.randint(0, 1500) + 1 + 1500
 step = random.randint(0, 20) + 1 + 40
 smoothlyScrolling(driver, length, step, 6000, False)
 time.sleep(3)
 step = random.randint(0, 30) + 1 + 70
 smoothlyScrolling(driver, length, step, 6000, True)
 time.sleep(4)
 step = random.randint(0, 20) + 1 + 30
 smoothlyScrolling(driver, 0, step, 6000, False)
 time.sleep(3)
 elif sum == 4:
 step = random.randint(0, 10) + 1 + 30
 smoothlyScrolling(driver, 0, step, 7000, True)
 time.sleep(3)
 step = random.randint(0, 30) + 1 + 20
 smoothlyScrolling(driver, 0, step, 7000, False)
 time.sleep(3)
 elif sum == 5:
 step = random.randint(0, 10) + 1 + 50
 smoothlyScrolling(driver, 0, step, 7000, True)
 time.sleep(3)
 length = random.randint(0, 1500) + 1 + 2000
 step = random.randint(0, 25) + 1 + 20
 smoothlyScrolling(driver, length, step, 7000, False)
 time.sleep(3)
 step = random.randint(0, 20) + 1 + 30
 smoothlyScrolling(driver, length, step, 7000, True) time.sleep(3) step = random.randint(0, 20) + 1 + 40 smoothlyScrolling(driver, 0, step, 7000, False) time.sleep(2) elif sum == 6: step = random.randint(0, 20) + 1 + 30 smoothlyScrolling(driver, 0, step, 2500, True) time.sleep(3)
 step = random.randint(0, 30) + 1 + 40
 smoothlyScrolling(driver, 0, step, 2500, False)
 time.sleep(3)
 step = random.randint(0, 20) + 1 + 30
 smoothlyScrolling(driver, 0, step, 7000, True)
 time.sleep(6)
 step = random.randint(0, 20) + 1 + 30
 smoothlyScrolling(driver, 0, step, 7000, False)
 time.sleep(2)
 elif sum == 7:
 step = random.randint(0, 30) + 1 + 30
 length = random.randint(0, 1500) + 1 + 2500
 smoothlyScrolling(driver, 0, step, length, True)
 step = random.randint(0, 30) + 1 + 70
 smoothlyScrolling(driver, 0, step, length, False)
 step = random.randint(0, 20) + 1 + 40
 smoothlyScrolling(driver, 0, step, 7000, True)
 step = random.randint(0, 25) + 1 + 20
 smoothlyScrolling(driver, 0, step, 7000, False)
 time.sleep(3)
 step = random.randint(0, 25) + 1 + 20
 length = random.randint(0, 1500) + 1 + 3000
 smoothlyScrolling(driver, 0, step, length, True)
 time.sleep(3)
 step = random.randint(0, 15) + 1 + 30
 smoothlyScrolling(driver, 0, step, length, False)
 else:
 pass


#(不知道为啥会乱排版,这是另一个方法)def smoothlyScrolling(driver, floor, step, celling, direction):
 if direction is True:
 i = floor
 while i <= celling:
 i += step
 jscript = "window.scrollTo(1, {height_i})".format(height_i=i)
 driver.execute_script(jscript)
 else:
 i = celling
 while i >= floor:
 i -= step
 jscript = "window.scrollTo(1, {height_i})".format(height_i=i)
 driver.execute_script(jscript)
在python的其它类中引用如下:
首先先在相关类中引入滚动界面的类
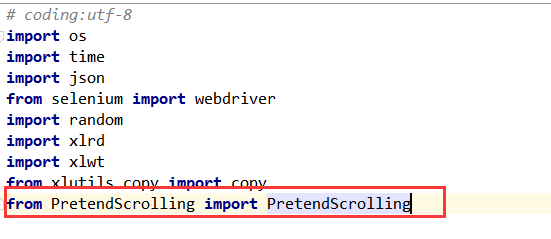
然后调用:以上就是selenium里边滑动界面的一组方法了,支持java和python. 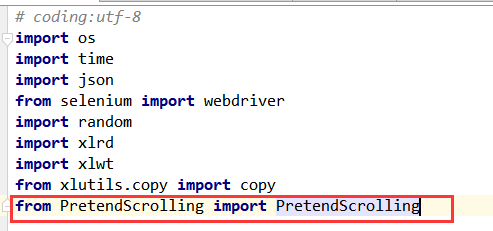

因为图片好像没有加载出来,所以再放一下.然后也不知道为啥排版会乱,要用的话自己调整一下即可.

Python selenium 将表值放入列表列表中
如何解决Python selenium 将表值放入列表列表中?
我只是想从这个表中获取数据: https://www.listcorp.com/asx/sectors/materials
并将所有值(文本)放入列表列表中。
我尝试了很多不同的方法,使用--> xpath、getByClassName、By.tag
------------
rws = driver.find_elements_by_xpath("//table/tbody/tr/td")
---------------
table = driver.find_element_by_class_name("v-datatable v-table theme--light")
--------------
findElements(By.tagName("table"))
--------------
# to identify the table rows
l = driver.find_elements_by_xpath ("//*[@v-datatable.v-
table.theme--light'']/tbody/tr")
# to get the row count len method
print (len(l))
# THIS RETURNS ''1'' which cant be right because theres hundreds of rows
并且似乎没有任何方法可以以简单的方式获取值以理解方式。
(编辑解决)
在做下面的解决方案之前。
首先做: time.sleep(10) 这将允许页面加载,以便可以实际检索表。然后只需将所有单元格附加到一个新列表中。您将需要多个列表来容纳所有行。
解决方法
所以基本上你可以使用 find_elements_by_tag_name
并使用此代码
row = driver.find_elements_by_tag_name("tr")
data = driver.find_elements_by_tag_name("td")

print(''Rows --> {}''.format(len(row)))
print(''Data --> {}''.format(len(data)))

for value in row:
    print(value.text)
有适当的等待来填充数据。

Python Selenium无法选择搜索栏
页面包含id = keyword的多个元素,因此结果为列表。要发送密钥,请从列表中选择第一个元素:
尝试以下代码:
search = css('keyword')[0] #("span.show.clearfix input")#css("#keyword")#get search field
您可能应该更改函数css的名称,因为它实际上是按元素ID搜索的。
您只需执行此操作即可将密钥发送到该元素。在页面加载后等待元素出现,并将密钥发送到元素。
search=WebDriverWait(driver,10).until(EC.presence_of_element_located((By.XPATH,"//input[@id='keyword']"))).send_keys("ANCH 028")
导入
from selenium.webdriver.common.by import By
from selenium.webdriver.support.ui import WebDriverWait
from selenium.webdriver.support import expected_conditions as EC
这对我有用:-
driver.get('https://catalog.swarthmore.edu/')
btn = driver.find_element_by_xpath('''/html/body/table/tbody/tr[3]/td[1]/table/tbody/tr[2]/td[2]/table/tbody/tr[1]/td/form/fieldset/span[3]/input[1]''')
btn.click() #you have to click it first
btn.send_keys("ANCH 028")
")
Python+Selenium+Unittest 框架使用 ——Selenium—— 定位元素(二)
1、定位元素(id、name、class、link、partial link)
(1)find_element_by_id()
用百度定位测试,用 firebug 查看定位元素 ,输入框的 id 为 “kw”,【百度一下】按钮的 id 为 “su”。


from selenium import webdriver                            #导入selenium的webdriver包
driver = webdriver.Firefox()
driver.get("https://www.baidu.com")
driver.find_element_by_id("kw").send_keys("python")       #输入框输入“python”
driver.find_element_by_id("su").click()            #点击【百度一下】按钮
(2)find_element_by_name()
用百度定位测试,用 firebug 查看定位元素 ,输入框的 name 为 “wd”,【百度一下】按钮没有 name 属性,这里用 id 定位,id 为 “su”。
from selenium import webdriver                          #导入selenium的webdriver包
driver = webdriver.Firefox()
driver.get("https://www.baidu.com")
driver.find_element_by_name("wd").send_keys("python")     #输入框输入“python”
driver.find_element_by_id("su").click()                  #点击【百度一下】按钮
(3)find_element_by_class_name()
百度的 class 属性值是包含空格,用 class 无法定位百度。这里我改用 bing 搜索为测试实例,用 firebug 查看定位元素 ,输入框的 class 为 “b_searchbox”,搜索按钮的 class 为 “”b_searchboxSubmit“”
from selenium import webdriver                                            #导入selenium的webdriver包
driver = webdriver.Firefox()
driver.get("https://cn.bing.com/")
driver.find_element_by_class_name("b_searchbox").send_keys("python")     #输入框输入“python”
driver.find_element_by_class_name("b_searchboxSubmit").click()           #点击【百度一下】按钮
(4)find_element_by_link_text()
find_element_by_link_text () 是根据链接的文本来定位。以百度为定位测试,找百度页面 “新闻” 这个元素
from selenium import webdriver                          #导入selenium的webdriver包
driver = webdriver.Firefox()
driver.get("https://www.baidu.com")
driver.find_element_by_link_text("新闻").click()        #打开新闻链接
(5)find_element_by_partial_link_text()
find_element_by_partial_link_text () 是根据链接的文本包含某个字符来定位。以百度为定位测试,找百度页面 “新闻” 中的 “闻”:
from selenium import webdriver                          #导入selenium的webdriver包
driver = webdriver.Firefox()
driver.get("https://www.baidu.com")
driver.find_element_by_partial_link_text("闻").click()   #打开新闻链接
2、xpath 定位元素
(1)通过绝对路径定位。一般很少用这种绝对路径定位,除非其他定位元素无法准确定位,才会用到。

用百度定位测试,用 firebug 和 firepath 查看定位元素 ,输入框的绝对路径为 “html/body/div [1]/div [1]/div/div [1]/div/form/span [1]”,【百度一下】按钮的绝对路径为 “html/body/div [1]/div [1]/div/div [1]/div/form/span [2]/input”。
from selenium import webdriver                          #导入selenium的webdriver包
driver = webdriver.Firefox()
driver.get("https://www.baidu.com")
driver.find_element_by_xpath("html/body/div[1]/div[1]/div/div[1]/div/form/span[1]").send_keys("python")     #输入框输入“python”
driver.find_element_by_xpath("html/body/div[1]/div[1]/div/div[1]/div/form/span[2]/input").click()
通过以上代码去执行,找不到输入框位置。是因为输入框定位位置不准确。firebug 和 firepath 只是辅助工具,有时会出错,需要更新手动定位。
所以输入框的绝对路径为 “html/body/div [1]/div [1]/div/div [1]/div/form/span [1]/input”,【百度一下】按钮的绝对路径为 “html/body/div [1]/div [1]/div/div [1]/div/form/span [2]/input”。
from selenium import webdriver                          #导入selenium的webdriver包
driver = webdriver.Firefox()
driver.get("https://www.baidu.com")
driver.find_element_by_xpath("html/body/div[1]/div[1]/div/div[1]/div/form/span[1]/input").send_keys("python")     #输入框输入“python”
driver.find_element_by_xpath("html/body/div[1]/div[1]/div/div[1]/div/form/span[2]/input").click()
(2)简化 xpath
WebDriver ELement Locator 定位神器,可以快速定位。点鼠标右键

a. 通过元素属性进行定位 - id
from selenium import webdriver                          #导入selenium的webdriver包
driver = webdriver.Firefox()
driver.get("https://www.baidu.com")
driver.find_element_by_xpath("//input[@id=''kw'']").send_keys("python")     #输入框输入“python”
driver.find_element_by_xpath("//input[@id=''su'']").click()                   #点击【百度一下】按钮
b. 通过元素属性进行定位 - name
from selenium import webdriver                          #导入selenium的webdriver包
driver = webdriver.Firefox()
driver.get("https://www.baidu.com")
driver.find_element_by_xpath("//input[@name=''wd'']").send_keys("python")     #输入框输入“python”
driver.find_element_by_xpath("//input[@id=''su'']").click() #点击【百度一下】按钮还有很多定位没有讲,掌握以上定位可以满足工作需求,不需要大家全部掌握。后续我会再补充。
我们今天的关于使用 Selenium 和 Python 从搜索结果列表中进行选择和selenium查找的分享已经告一段落,感谢您的关注,如果您想了解更多关于java+selenium, python+selenium浏览界面,滑动页面、Python selenium 将表值放入列表列表中、Python Selenium无法选择搜索栏、Python+Selenium+Unittest 框架使用 ——Selenium—— 定位元素(二)的相关信息,请在本站查询。
本篇文章给大家谈谈PyAudio 无法在 macOS 11.1,以及pyaudio安装失败的知识点,同时本文还将给你拓展AudioRecord和AudioTrack使用实例、AVAudioEngine 在 macOS/iOS 上协调/同步输入/输出时间戳、AVMediaTypeAudio无法在ios 11中运行、CENTOS7 Python3.7 PyAudio 安装等相关知识,希望对各位有所帮助,不要忘了收藏本站喔。
本文目录一览:- PyAudio 无法在 macOS 11.1(pyaudio安装失败)
- AudioRecord和AudioTrack使用实例
- AVAudioEngine 在 macOS/iOS 上协调/同步输入/输出时间戳
- AVMediaTypeAudio无法在ios 11中运行
- CENTOS7 Python3.7 PyAudio 安装
")
PyAudio 无法在 macOS 11.1(pyaudio安装失败)
如何解决PyAudio 无法在 macOS 11.1?
我正在尝试使用 PyAudio 录制扬声器输出。我安装了 BackgroundMusic,它声称允许记录系统输出。我不认为这是问题所在,但我可能是错的。
代码
import pyaudio

p = pyaudio.PyAudio()

stream = p.open(
    format=pyAudio.paInt16,channels=1,rate=44100,input=True,frames_per_buffer=2048
)

# code to do stuff with stream.read(),not relevant here
错误
||PaMacCore (AUHAL)|| AUHAL component not found.Traceback (most recent call last):
  File ".../script.py",line 5,in <module>
    stream = p.open(
  File "/opt/homebrew/lib/python3.9/site-packages/pyaudio.py",line 750,in open
    stream = Stream(self,*args,**kwargs)
  File "/opt/homebrew/lib/python3.9/site-packages/pyaudio.py",line 441,in __init__
    self._stream = pa.open(**arguments)
OSError: [Errno -9999] Unanticipated host error
一些系统信息
$ brew config
HOMEBREW_VERSION: 2.7.2
...
cpu: octa-core 64-bit arm_firestorm_icestorm
Clang: 12.0 build 1200
macOS: 11.1-arm64
CLT: 12.3.0.0.1.1607026830
Xcode: 12.3
Rosetta 2: false

$ brew info python
python@3.9: stable 3.9.1 (bottled)
...

$ brew info portaudio
portaudio: stable 19.6.0 (bottled),HEAD
...

$ pip show pyaudio
Version: 0.2.11
...
根据this thread,我需要授予麦克风访问权限?在终端中运行时,它不会要求访问麦克风,而且我认为无法在系统偏好设置中添加它。
该线程还指出 this PortAudio function 作为从该错误中获取更多信息的一种方式,但我不确定如何准确地破解 PyAudio 库以获取该信息。
我希望得到一些正确方向的指导。提前致谢。
解决方法
暂无找到可以解决该程序问题的有效方法,小编努力寻找整理中!
如果你已经找到好的解决方法,欢迎将解决方案带上本链接一起发送给小编。
小编邮箱:dio#foxmail.com (将#修改为@)

AudioRecord和AudioTrack使用实例
AudioRecord和AudioTrack是Android平台上录制和播放PCM音频数据两个重要类,与MediaRecorder和MediaPlayer类不同,
后者是在前者的基础上新增了部分编解码库,例如:amr、3GP等,如果想对Android的音频进行操纵掌握这两个类的使用至关重要;
具体使用方法可参考以下代码
注:在同一个机器上边录边播可能会有啸叫,所以本程序是先将录制的声音放在一个buffer中,录完后再播
添加权限
<uses-permission android:name="android.permission.RECORD_AUDIO"/>
audio_act.xml
<?xml version="1.0" encoding="utf-8"?>
<LinearLayout xmlns:android="http://schemas.android.com/apk/res/android"
    xmlns:tools="http://schemas.android.com/tools"
    android:layout_width="fill_parent"
    android:layout_height="fill_parent"
    android:paddingBottom="@dimen/activity_vertical_margin"
    android:paddingLeft="@dimen/activity_horizontal_margin"
    android:paddingRight="@dimen/activity_horizontal_margin"
    android:paddingTop="@dimen/activity_vertical_margin"
    android:orientation="vertical" >

    <Button android:id="@+id/audio_act_record"
        android:layout_width="fill_parent"
        android:layout_height="wrap_content"
        android:text="Record(Off)"/>

    <Button android:id="@+id/audio_act_play"
        android:layout_width="fill_parent"
        android:layout_height="wrap_content"
        android:text="Play(Off)" />

    <Button android:id="@+id/audio_act_read_buffer"
        android:layout_width="fill_parent"
        android:layout_height="wrap_content"
        android:text="Read buffer" />

    <TextView android:id="@+id/audio_act_info"
        android:layout_width="fill_parent"
        android:layout_height="wrap_content" />

</LinearLayout>
IAudioRecCallback
package com.example.audio;

/**
 * @project SampleAndroid.workspace
 * @class IAudioRecCallback
 * @description
 * @author yxmsw2007
 * @version
 * @email yxmsw2007@gmail.com
 * @data 2015-7-9 下午10:41:55
 */
public interface IAudioRecCallback {

	public void read(byte[] data);

}
AudioAct
package com.example.audio;

import java.util.LinkedList;

import com.example.app.R;

import android.app.Activity;
import android.os.Bundle;
import android.util.Log;
import android.view.View;
import android.view.View.OnClickListener;
import android.widget.Button;
import android.widget.TextView;

/**
 * @project SampleAndroid.workspace
 * @class AudioAct
 * @description
 * @author yxmsw2007
 * @version
 * @email yxmsw2007@gmail.com
 * @data 2015-7-7 下午11:48:21
 */
public class AudioAct extends Activity implements IAudioRecCallback, OnClickListener {

	private static final String TAG = AudioAct.class.getSimpleName();

	private LinkedList<byte[]> mAudioBuffer = new LinkedList<byte[]>();

	private AudioPlay mAudioPlay = new AudioPlay();

	private AudioRec mAudioRec = new AudioRec(this);

	private Button audio_act_record;
	private Button audio_act_play;
	private Button audio_act_read_buffer;
	private TextView audio_act_info;

	@Override
	protected void onCreate(Bundle savedInstanceState) {
		super.onCreate(savedInstanceState);
		setContentView(R.layout.audio_act);
		audio_act_record = (Button) findViewById(R.id.audio_act_record);
		audio_act_play = (Button) findViewById(R.id.audio_act_play);
		audio_act_read_buffer = (Button) findViewById(R.id.audio_act_read_buffer);
		audio_act_info = (TextView) findViewById(R.id.audio_act_info);

		audio_act_record.setOnClickListener(this);
		audio_act_play.setOnClickListener(this);
		audio_act_read_buffer.setOnClickListener(this);

	}

	@Override
	public void read(byte[] data) {
		Log.d(TAG, "" + data.length);
		mAudioBuffer.add(data);
	}

	@Override
	public void onClick(View v) {
		switch (v.getId()) {
		case R.id.audio_act_record:
			if (mAudioRec.isRecording()) {
				mAudioRec.stopRecord();
			} else {
				mAudioRec.startRecord();
			}
			break;
		case R.id.audio_act_play:
			if (mAudioPlay.isPlaying()) {
				mAudioPlay.stopPlay();
			} else {
				mAudioPlay.startPlay();
			}
			break;
		case R.id.audio_act_read_buffer:
			if (!mAudioPlay.isPlaying()) {
				mAudioPlay.startPlay();
			}
			readBuffer();
			break;

		default:
			break;
		}
		updateView();
	}

	private void updateView() {
		audio_act_record.setText(mAudioRec.isRecording() ? "Record(On)" : "Record(Off)");
		audio_act_play.setText(mAudioPlay.isPlaying() ? "Play(On)" : "Play(Off)");
	}

	public void readBuffer() {
		for (int i = 0; i < mAudioBuffer.size(); i++) {
			mAudioPlay.playAudio(mAudioBuffer.remove(0));
		}
	}

}
AudioPlay
package com.example.audio;

import android.media.AudioFormat;
import android.media.AudioManager;
import android.media.AudioRecord;
import android.media.AudioTrack;
import java.util.LinkedList;

/**
 * @project SampleAndroid.workspace
 * @class AudioPlay
 * @description
 * @author yxmsw2007
 * @version
 * @email yxmsw2007@gmail.com
 * @data 2015-7-6 下午10:04:49
 */
public class AudioPlay {

	public final static int PCM16_FRAME_SIZE = 320;
	public final static int DELAY_FRAMES = 50 * 10;

//	public final static int STREAM_TYPE = AudioManager.STREAM_MUSIC;
	public final static int STREAM_TYPE = AudioManager.STREAM_VOICE_CALL;
	public final static int SAMPLE_RATE_IN_HZ = 8000;
	public final static int CHANNEL_CONFIG = AudioFormat.CHANNEL_OUT_MONO;
	public final static int AUDIO_FORMAT = AudioFormat.ENCODING_PCM_16BIT;

	private static final String TAG = AudioPlay.class.getSimpleName();
	private LinkedList<byte[]> mAudioBuffer = new LinkedList<byte[]>();
	private boolean mIsRunning;

	public AudioPlay() {
		mIsRunning = false;
	}

	private class PlayThread extends Thread {

		public PlayThread() {
			super("PlayThread");
		}

		public void run() {
			android.os.Process.setThreadPriority(android.os.Process.THREAD_PRIORITY_URGENT_AUDIO);
			int minBufferSize = android.media.AudioTrack.getMinBufferSize(SAMPLE_RATE_IN_HZ, CHANNEL_CONFIG, AUDIO_FORMAT);
			AudioTrack audioTrack = null;
			// 有极小的概率会初始化失败
			while (mIsRunning
					&& (audioTrack == null
					|| (audioTrack.getState() != AudioRecord.STATE_INITIALIZED))) {
				if (audioTrack != null) {
					audioTrack.release();
				}
				audioTrack = new AudioTrack(STREAM_TYPE,
						SAMPLE_RATE_IN_HZ, CHANNEL_CONFIG, AUDIO_FORMAT, minBufferSize, AudioTrack.MODE_STREAM);
				yield();
			}
			audioTrack.setStereoVolume(AudioTrack.getMaxVolume(), AudioTrack.getMaxVolume());
			audioTrack.play();
			while (mIsRunning) {
				synchronized (mAudioBuffer) {
					if (!mAudioBuffer.isEmpty()) {
						byte[] data = mAudioBuffer.remove(0);
						audioTrack.write(data, 0, data.length);
					}
				}
			}
			audioTrack.stop();
			audioTrack.release();
		}
	};

	public void startPlay() {
		if (mIsRunning) {
			return;
		}
		mIsRunning = true;
		synchronized (mAudioBuffer) {
			mAudioBuffer.clear();
		}
		PlayThread playThread = new PlayThread();
		playThread.start();
	}

	// 停止播放
	public void stopPlay() {
		mIsRunning = false;
	}

	public void playAudio(byte[] data) {
		if (!mIsRunning) {
			return;
		}
		mAudioBuffer.add(data);
	}

	public boolean isPlaying() {
		return mIsRunning;
	}

}
AudioRec <br>
package com.example.audio;

import android.media.AudioFormat;
import android.media.AudioManager;
import android.media.AudioRecord;
import android.media.MediaRecorder;
import android.util.Log;

import java.util.LinkedList;

/**
 * @project SampleAndroid.workspace
 * @class AudioRec
 * @description
 * @author yxmsw2007
 * @version
 * @email yxmsw2007@gmail.com
 * @data 2015-7-6 下午11:10:13
 */
public class AudioRec {

	private static final String TAG = AudioRec.class.getSimpleName();

	private final static int PCM16_FRAME_SIZE = 320;

	public final static int STREAM_TYPE = MediaRecorder.AudioSource.MIC;
	public final static int SAMPLE_RATE_IN_HZ = 8000;
	public final static int CHANNEL_CONFIG = AudioFormat.CHANNEL_IN_MONO;
	public final static int AUDIO_FORMAT = AudioFormat.ENCODING_PCM_16BIT;

	private boolean mIsRunning;
	private boolean mIsMute;

	private IAudioRecCallback mCallback;

	public AudioRec(IAudioRecCallback callback) {
		this.mCallback = callback;
	}

	public AudioRec() {
		super();
		mIsRunning = false;
		mIsMute = false;
	}

	private class RecordThread extends Thread {

		public RecordThread() {
			super("RecordThread");
		}

		public void run() {
			android.os.Process.setThreadPriority(android.os.Process.THREAD_PRIORITY_URGENT_AUDIO);
			int minBufferSize = android.media.AudioRecord.getMinBufferSize(
					SAMPLE_RATE_IN_HZ, CHANNEL_CONFIG, AUDIO_FORMAT);
			AudioRecord audioRecord = null;
			// 当手机有程序正在使用麦克风时,会初始化失败
			while (mIsRunning
					&& (audioRecord == null
					|| (audioRecord.getState() != AudioRecord.STATE_INITIALIZED))) {
				if (audioRecord != null) {
					audioRecord.release();
				}
				audioRecord = new AudioRecord(
						STREAM_TYPE, SAMPLE_RATE_IN_HZ,
						CHANNEL_CONFIG, AUDIO_FORMAT, minBufferSize);
				yield();
			}
			audioRecord.startRecording();
			byte[] buffer = new byte[minBufferSize];
			while (mIsRunning) {
				int len = audioRecord.read(buffer, 0, buffer.length);
				if (len > 0 && !mIsMute) {
					byte[] data = new byte[len];
					System.arraycopy(buffer, 0, data, 0, len);
					mCallback.read(data);
				}
			}
			if (audioRecord.getState() == AudioRecord.STATE_INITIALIZED) {
				audioRecord.stop();
				audioRecord.release();
			}

		}
	};

	public void startRecord() {
		if (mIsRunning) {
			return;
		}
		mIsRunning = true;
		RecordThread recordThread = new RecordThread();
		recordThread.start();
	}

	// 停止录音
	public void stopRecord() {
		mIsRunning = false;
		mIsMute = false;
	}

	public boolean ismIsMute() {
		return mIsMute;
	}

	public void setmIsMute(boolean mIsMute) {
		this.mIsMute = mIsMute;
	}

	public boolean isRecording() {
		return mIsRunning;
	}

}
源码下载
SampleAndroid
参考资料

AVAudioEngine 在 macOS/iOS 上协调/同步输入/输出时间戳
我可能无法回答您的问题,但我相信您的问题中没有提到的属性确实报告了额外的延迟信息。
我只在 HAL/AUHAL 层工作过(从未 AVAudioEngine),但在关于计算整体延迟的讨论中,会出现一些音频设备/流属性:kAudioDevicePropertyLatency 和 {{1 }}。
仔细研究了一下,我看到了 kAudioStreamPropertyLatency 的 AVAudioIONode 属性 (https://developer.apple.com/documentation/avfoundation/avaudioionode/1385631-presentationlatency) 的文档中提到的那些属性。我希望驱动程序报告的硬件延迟会在那里。 (我怀疑标准 presentationLatency 属性报告输入样本出现在“正常”节点的输出中的延迟,并且 IO 情况很特殊)
它不在 latency 的上下文中,但这里有来自 CoreAudio 邮件列表的一条消息,其中谈到了使用可能提供一些额外背景的低级属性:https://lists.apple.com/archives/coreaudio-api/2017/Jul/msg00035.html

AVMediaTypeAudio无法在ios 11中运行
如何在iOS 11中访问音频文件路径?
NSArray *path;
path = [NSArray arrayWithObjects:
        [NSSearchPathForDirectoriesInDomains(NSDocumentDirectory,NSUserDomainMask,YES) lastObject],[Nsstring stringWithFormat:@"%@%@",trackName,(i==0) ?
        (_editRecoding) ? fileExtension : @".mp3" : ([trackName
        isEqualToString:@"temp"]) ? @".mp3" : @""],nil];

AVURLAsset* audioAsset = [[AVURLAsset alloc] initWithURL:[NSURL
                          fileURLWithPathComponents:path] options:nil];


 NSLog(@"audioAsset : %@",audioAsset);
 NSLog(@"AVMediaTypeAudio : %@",[audioAsset tracksWithMediaType:AVMediaTypeAudio]);
iOS 10中的输出:
audioAsset : <AVURLAsset: 0x17422b480,URL = file:///var/mobile/Containers/Data/Application/6E092FA1-BE2C-4ECC-897F-3599005F2936/Documents/temp.mp3>

 AVMediaTypeAudio : (
    "<AVAssetTrack: 0x170011fb0,trackID = 1,mediaType = soun>"
)
iOS 11中的输出:
audioAsset : <AVURLAsset: 0x1c4437ba0,URL = file:///var/mobile/Containers/Data/Application/EC64309F-7E09-4DAE-B19C-2A8F160627C3/Documents/temp.mp3>

AVMediaTypeAudio : (
)
解决方法
How can i access the audio path in ios 11?
没有比你已经使用过的方法不同的方法.
根据AVMediaType documentation,IOS11没有任何变更.
解:
我打赌你的IOS 11版本是11.0.2,所以你应该升级到11.0.3,他们修复了这个版本的音频问题,看一下发行说明.
Apple的iOS 11.0.3发行说明列出了针对两个特定问题的修复:
1.修复了某些iPhone 7和iPhone 7 Plus设备无法使用音频和触觉反馈的问题
2.解决了某些iPhone 6s显示器上的触摸输入没有响应的问题,因为它们不是真正Apple部件的服务
并且在您更新到最新的第一次之前检查升级后我将遇到的新问题.
Prevention is better than cure
在决定你应该做什么之后,请查看11.0.3 update.

CENTOS7 Python3.7 PyAudio 安装
出现错误:
 gcc -pthread -Wno-unused-result -Wsign-compare -DNDEBUG -g -fwrapv -O3 -Wall -fPIC -fPIC -I/usr/local/python371/include/python3.7m -c src/_portaudiomodule.c -o build/temp.linux-aarch64-3.7/src/_portaudiomodule.o
    src/_portaudiomodule.c:29:23: fatal error: portaudio.h: No such file or directory
     #include "portaudio.h"
                           ^
    compilation terminated.
    error: command ''gcc'' failed with exit status 1
安装依赖包:
sudo yum -y install portaudio portaudio-devel
今天关于PyAudio 无法在 macOS 11.1和pyaudio安装失败的讲解已经结束,谢谢您的阅读,如果想了解更多关于AudioRecord和AudioTrack使用实例、AVAudioEngine 在 macOS/iOS 上协调/同步输入/输出时间戳、AVMediaTypeAudio无法在ios 11中运行、CENTOS7 Python3.7 PyAudio 安装的相关知识,请在本站搜索。
如果您对在 mongodb 聚合管道的 $match 阶段使用的 $in 子句的限制和mongodb聚合管道操作符感兴趣,那么这篇文章一定是您不可错过的。我们将详细讲解在 mongodb 聚合管道的 $match 阶段使用的 $in 子句的限制的各种细节,并对mongodb聚合管道操作符进行深入的分析,此外还有关于egg(28)--mongoose使用聚合管道、egg(29)--mongoose使用聚合管道多表关联查询、egg学习笔记第二十一天:MongoDB的高级查询aggregate聚合管道、Golang mongodb 聚合错误:管道阶段规范对象必须仅包含一个字段的实用技巧。
本文目录一览:- 在 mongodb 聚合管道的 $match 阶段使用的 $in 子句的限制(mongodb聚合管道操作符)
- egg(28)--mongoose使用聚合管道
- egg(29)--mongoose使用聚合管道多表关联查询
- egg学习笔记第二十一天:MongoDB的高级查询aggregate聚合管道
- Golang mongodb 聚合错误:管道阶段规范对象必须仅包含一个字段
")
在 mongodb 聚合管道的 $match 阶段使用的 $in 子句的限制(mongodb聚合管道操作符)
如何解决在 mongodb 聚合管道的 $match 阶段使用的 $in 子句的限制?
我在聚合管道中使用了一个带有 $in 子句的匹配阶段,并且在 in 子句中有大约 50k 个项目
db.mycollection.aggregate([{$match:{field1:{$in:[1,2,3,4,5,6,...50000]} }},{$project: {field1: 1,field2:1,field3:1,_id:0}}]).forEach(printjson);
但我一直收到以下错误
E QUERY [js] SyntaxError: missing ] after element list @(shell):2:0
当我将 $in 子句限制为 250 项时,同样的查询有效。 此外,对于 $in 子句中的 50k+ 个项目,只需常规查找即可,因为它没有限制。但看起来聚合管道有一个隐含的限制。有任何想法吗 ? 我绝对需要聚合管道,因为我需要在结果集中投影有限的字段。
解决方法
暂无找到可以解决该程序问题的有效方法,小编努力寻找整理中!
如果你已经找到好的解决方法,欢迎将解决方案带上本链接一起发送给小编。
小编邮箱:dio#foxmail.com (将#修改为@)
--mongoose使用聚合管道")
egg(28)--mongoose使用聚合管道
文件内容
导入数据
db.order.insert({"order_id":"1","uid":10,"trade_no":"111","all_price":100,"all_num":2})
db.order.insert({"order_id":"2","uid":7,"trade_no":"222","all_price":90,"all_num":2})
db.order.insert({"order_id":"3","uid":9,"trade_no":"333","all_price":20,"all_num":6})
db.order_item.insert({"order_id":"1","title":"商品鼠标 1","price":50,num:1})
db.order_item.insert({"order_id":"1","title":"商品键盘 2","price":50,num:1})
db.order_item.insert({"order_id":"1","title":"商品键盘 3","price":0,num:1})
db.order_item.insert({"order_id":"2","title":"牛奶","price":50,num:1})
db.order_item.insert({"order_id":"2","title":"酸奶","price":40,num:1})
db.order_item.insert({"order_id":"3","title":"矿泉水","price":2,num:5})
db.order_item.insert({"order_id":"3","title":"毛巾","price":10,num:1})
db.js
var mongoose = require(''mongoose'');
mongoose.connect(''mongodb://eggadmin:123456@127.0.0.1:27017/eggcms'',{ useNewUrlParser: true },function(err){
    if(err){
        console.log(err)
        return
    }
    console.log("数据库连接成功")
})

module.exports = mongoose;
order.js
var mongoose = require(''./db.js'');
var OrderSchema = mongoose.Schema({
    order_id:{
        type:String,
    },
    uid:Number,
    trade_no:String,
    all_price:Number,
    all_num:Number,
})

var OrderSchema = mongoose.model(''Order'',OrderSchema,''order'');
module.exports = OrderSchema
order_item.js
var mongoose = require(''./db.js'');
var OrderItemSchema = mongoose.Schema({
    order_id:{
        type:String,
    },
    title:String,
    price:Number,
    num:Number,
})

var OrderItemSchema = mongoose.model(''OrderItem'',OrderItemSchema,''order_item'');
module.exports = OrderItemSchema
关联查询
app.js
var OrderModel = require(''./order.js'');
OrderModel.aggregate([{
    $lookup:{
        from:"order_item",
        localField:"order_id",
        foreignField:"order_id",
        as:"item"
    }
}],function(err,docs){
    if(err){
        console.log(err);
        return;
    }
    console.log(JSON.stringify(docs))
})
$project 修改文档的结构
可以用来重命名,增加或者删除文档中的字段
要求查找 order 只返回文档中 trade_no 和 all_price 字段
app.js
OrderModel.aggregate([
{
    $project:{
        trade_no:1,
        all_price:1
    }
}
], function (err, docs) {
    if (err) {
        console.log(err);
        return;
    }
    console.log(docs)
})
$match,筛选
得到总价格>90的数据
app.js
var OrderModel = require(''./order.js'');
var OrderItemModel = require(''./order_item.js'');
OrderModel.aggregate([{
    $lookup: {
        from: "order_item",
        localField: "order_id",
        foreignField: "order_id",
        as: "item"
    },
}, {
    $match: {
        "all_price": {
            $gte: 90
        }
    }
}], function (err, docs) {
    if (err) {
        console.log(err);
        return;
    }
    // console.log(docs)
    console.log(JSON.stringify(docs))
})
$group
将集合中的文档进行分组,可用于统计结果。
统计每个订单的订单数量,按照订单号分组
app.js
OrderItemModel.aggregate([{
    $group:{
        _id:"$order_id",
        total:{$sum:"$sum"}
    }
}],function (err, docs) {
    if (err) {
        console.log(err);
        return;
    }
    // console.log(docs)
    console.log(JSON.stringify(docs))
})
$sort 排序
1为升序,-1为降序
app.js
OrderModel.aggregate([
{
    $project:{
        trade_no:1,
        all_price:1
    }
},
{
    $sort:{"all_price":1}
}
], function (err, docs) {
    if (err) {
        console.log(err);
        return;
    }
    console.log(docs)
})
$limit 限制
只查一条
app.js
OrderModel.aggregate([
{
    $project:{
        trade_no:1,
        all_price:1
    }
},

{
    $sort:{"all_price":1}
},
{
    $limit:1
}
], function (err, docs) {
    if (err) {
        console.log(err);
        return;
    }
    console.log(docs)
})
$skip 跳过
app.js
OrderModel.aggregate([
{
    $project:{
        trade_no:1,
        all_price:1
    }
},

{
    $sort:{"all_price":1}
},
{
    $skip:1
}
], function (err, docs) {
    if (err) {
        console.log(err);
        return;
    }
    console.log(docs)
})
根据order_item,查询order的信息
查询order_item,找出商品名称是酸奶的商品,酸奶这个商品对应的订单的订单号和订单总价格等信息

第一种方式
app.js
var OrderModel = require(''./order.js'');
var OrderItemModel = require(''./order_item.js'');
OrderItemModel.find({
    "_id": "5bffa9bbd8cb3dff1d3d6658"
}, function (err, docs) {
    var order_item = JSON.parse(JSON.stringify(docs));
    var order_id = order_item[0].order_id;

    OrderModel.find({
        "order_id": order_id
    }, function (err, order) {
        order_item.order_info = order[0];
        console.log(order_item)
    })
})
第二种方式
app.js
var OrderItemModel = require(''./order_item.js'');
var mongoose = require("mongoose")
OrderItemModel.aggregate([{
    $lookup: {
        from: ''order'',
        localField: "order_id",
        foreignField: "order_id",
        as: "order_info"
    }
}, {
    $match: {
        "_id":mongoose.Types.ObjectId(''5bffa9bbd8cb3dff1d3d6658'')
    }
}], function (err, docs) {
    if (err) {
        console.log(err);
        return;
    }
    console.log(JSON.stringify(docs))
})
--mongoose使用聚合管道多表关联查询")
egg(29)--mongoose使用聚合管道多表关联查询
db.js
var mongoose = require(''mongoose'');
mongoose.connect(''mongodb://eggadmin:123456@127.0.0.1:27017/eggcms'',{ useNewUrlParser: true },function(err){
    if(err){
        console.log(err)
        return
    }
    console.log("数据库连接成功")
})

module.exports = mongoose;
articlecate.js
var mongoose = require(''./db.js'');
var ArticleCateSchema = mongoose.Schema({
    title:{
        type:String,
        unique:true
    },
    description:String,
    addtime:{
        type:Date,
        default:Date.now
    }
})

var ArticleCateSchema = mongoose.model(''ArticleCate'',ArticleCateSchema,''articleCate'');
module.exports = ArticleCateSchema
user.js
var mongoose = require(''./db.js'');
var UserSchema = mongoose.Schema({
username:{
type:String,
unique:true
},
password:String,
name:String,
age:Number,
tel:Number,
status:{
type:Number,
default:1
}
})
var UserSchema = mongoose.model(''User'',UserSchema,''user'');
module.exports = UserSchemaarticle.js
var mongoose = require(''./db.js'');
var ArticleSchema = mongoose.Schema({
title:{
type:String,
unique:true
},
cid:{//分类id
type:mongoose.Types.ObjectId
},
author_id:{//用户id
type:mongoose.Types.ObjectId
},
author_name:{
type:String
},
description:String,
content:String
})
var ArticleSchema = mongoose.model(''Article'',ArticleSchema,''article'');
module.exports = ArticleSchema新增数据
app.js
var mongoose = require("mongoose")
var ArticleCateModel = require(''./articlecate.js'');
var ArticleModel = require(''./article.js'');
var UserModel = require(''./user.js'');
var cate = new ArticleCateModel({
title:"广东新闻",
description:"广东新闻"
})
cate.save()
var user = new UserModel({
username:"lishi",
password:"123456",
name:"李四",
age:20,
tel:13737241111
})
user.save()
var article = new ArticleModel({
// title:"习访问美国",
title:"广东新闻发生大火",
// cid:"5c00d3dcceb92704e4d30248", //国际
cid:"5c00d400a7998c2a885ab9ba", //国内
// author_id:"5c00d46fb004c9247c6f90ca", //张三
cid:"5c00d82bf252ca209c90facb",
author_id:"5c00d47be5fcb430b0cbf290", //李四
// 5c00d47be5fcb430b0cbf290,李四
// author_name:"张三",
author_name:"李四",
description:"东莞发生大火........",
content:"东莞发生大火........"
})
article.save()查询数据
app.js
var ArticleModel = require(''./article.js'');
ArticleModel.aggregate([{
$lookup: {
from: ''articleCate'',
localField: "cid",
foreignField: "_id",
as: "cate"
}
}, {
$lookup: {
from: ''user'',
localField: "author_id",
foreignField: "_id",
as: "user"
}
}], function (err, docs) {
if (err) {
console.log(err);
return;
}
console.log(JSON.stringify(docs))
})

egg学习笔记第二十一天:MongoDB的高级查询aggregate聚合管道
一、MongoDB聚合管道
使用聚合管道可以对集合中的文档进行变换和组合。实际项目:表的关联查询、数据的统计。
MongoDB中使用db.COLLECTION_NAME.aggregate([{<stage>},...])方法来构建和使用聚合管道,先看下官网给的实例,感受一下聚合管道的用法。

二、常见的管道操作符:
| 管道操作符 |
Description |
|
| $project |
增加、删除、重命名字段 |
|
| $match |
条件匹配。只满足条件的文档才能进入下一阶段 |
|
| $limit |
限制结果的数量 |
|
| $skip |
跳过文档的数量 |
|
| $sort |
条件排序。 |
|
| $group |
条件组合结果 统计 |
|
| $lookup |
$lookup 操作符 用以引入其它集合的数据 (表关联查询) |
|
三、SQL和NOSQL对比:
| WHERE |
$match |
| GROUP BY |
$group |
| HAVING |
$match |
| SELECT |
$project |
| ORDER BY |
$sort |
| LIMIT |
$limit |
| SUM() |
$sum |
| COUNT() |
$sum |
| join |
$lookup |
四、管道表达式:
管道操作符作为“键”,所对应的“值”叫做管道表达式。
例如{$match:{status:"A"}},$match称为管道操作符,而status:"A"称为管道表达式,是管道操作符的操作数(Operand)。
每个管道表达式是一个文档结构,它是由字段名、字段值、和一些表达式操作符组成的。
| 常用表达式操作符 |
Description |
| $addToSet |
将文档指定字段的值去重 |
| $max |
文档指定字段的最大值 |
| $min |
文档指定字段的最小值 |
| $sum |
文档指定字段求和 |
| $avg |
文档指定字段求平均 |
| $gt |
大于给定值 |
| $lt |
小于给定值 |
| $eq |
等于给定值 |
五、模拟数据
db.order.insert({"order_id":"1","uid":10,"trade_no":"111","all_price":100,"all_num":2})
db.order.insert({"order_id":"2","uid":7,"trade_no":"222","all_price":90,"all_num":2})
db.order.insert({"order_id":"3","uid":9,"trade_no":"333","all_price":20,"all_num":6})
db.order_item.insert({"order_id":"1","title":"商品鼠标1","price":50,num:1})
db.order_item.insert({"order_id":"1","title":"商品键盘2","price":50,num:1})
db.order_item.insert({"order_id":"1","title":"商品键盘3","price":0,num:1})
db.order_item.insert({"order_id":"2","title":"牛奶","price":50,num:1})
db.order_item.insert({"order_id":"2","title":"酸奶","price":40,num:1})
db.order_item.insert({"order_id":"3","title":"矿泉水","price":2,num:5})
db.order_item.insert({"order_id":"3","title":"毛巾","price":10,num:1})六、$project
修改文档的结构,可以用来重命名、增加或删除文档中的字段。
①order表只显示订单号和总价格
首先查看order表中的所有数据:

聚合管道可以将这个表中的指定字段查询
db.order.aggregate([
{
$project:{ trade_no:1, all_price:1 }
}
])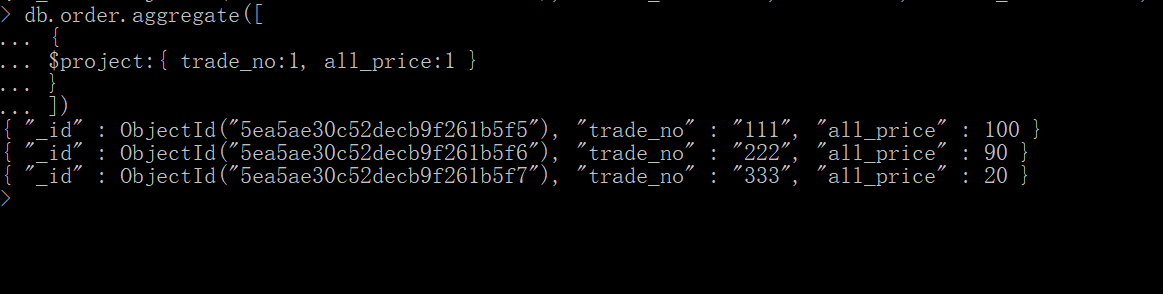
七、$match
作用
用于过滤文档。用法类似于 find() 方法中的参数。
先过滤出trade_no和all_price两个字段,在匹配all_price大于90的
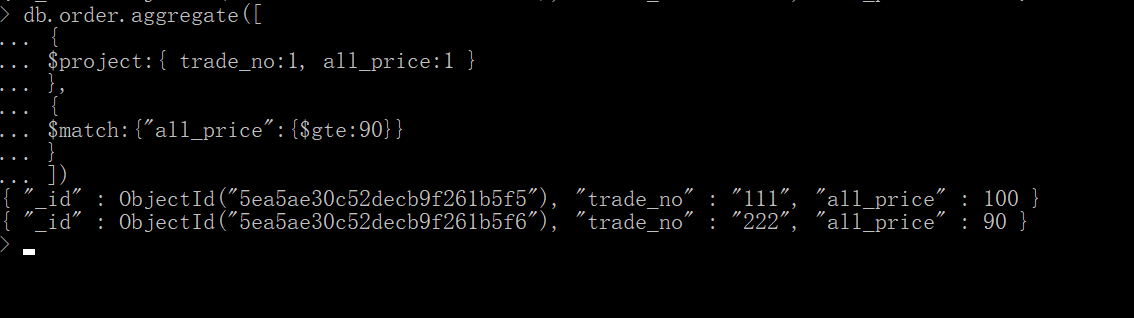
八、$group
分组
将集合中的文档进行分组,可用于统计结果。
统计每个订单的订单数量,按照订单号分组。
db.order_item.aggregate(
[
{
$group: {_id: "$order_id", total: {$sum: "$num"}}
}
]
)
九、$sort
将集合中的文档进行排序。
筛选字段--》过滤--》排序(-1从大到小)
db.order.aggregate([
{
$project:{ trade_no:1, all_price:1 }
},
{
$match:{"all_price":{$gte:90}}
},
{
$sort:{"all_price":-1}
}
])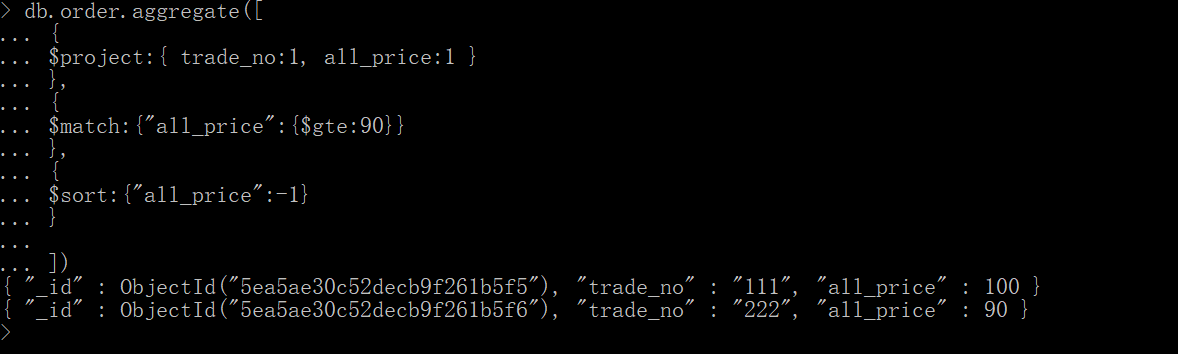
十、$limit
筛选字段--》过滤--》排序(-1从大到小)--》只选一个
db.order.aggregate([
{
$project:{ trade_no:1, all_price:1 }
},
{
$match:{"all_price":{$gte:90}}
},
{
$sort:{"all_price":-1}
},
{
$limit:1
}
])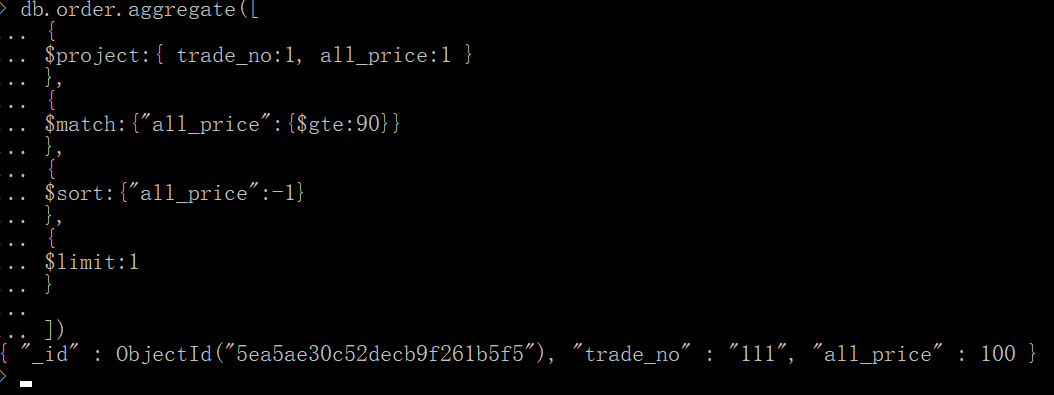
十一、$skip
降序跳过了一个
db.order.aggregate([
{
$project:{ trade_no:1, all_price:1 }
},
{
$match:{"all_price":{$gte:90}}
},
{
$sort:{"all_price":-1}
},
{
$skip:1
}
])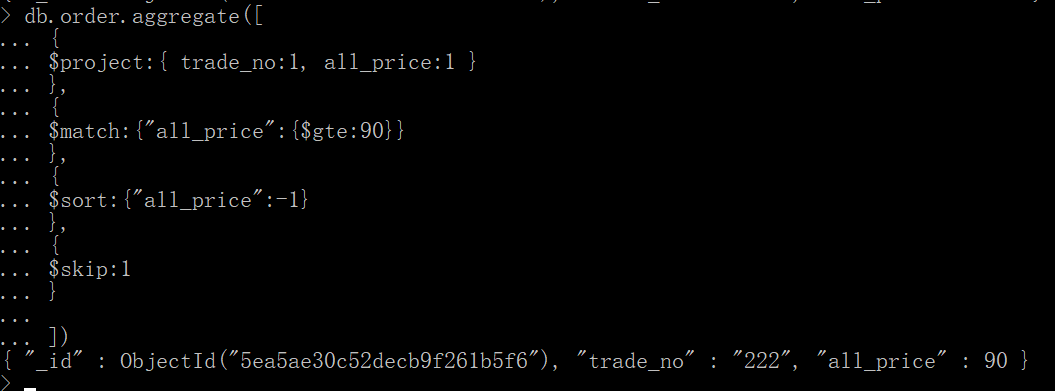
十二、$lookup 表关联
db.order.aggregate([
{
$lookup:
{
from: "order_item",
localField: "order_id",
foreignField: "order_id",
as: "items"
}
}
])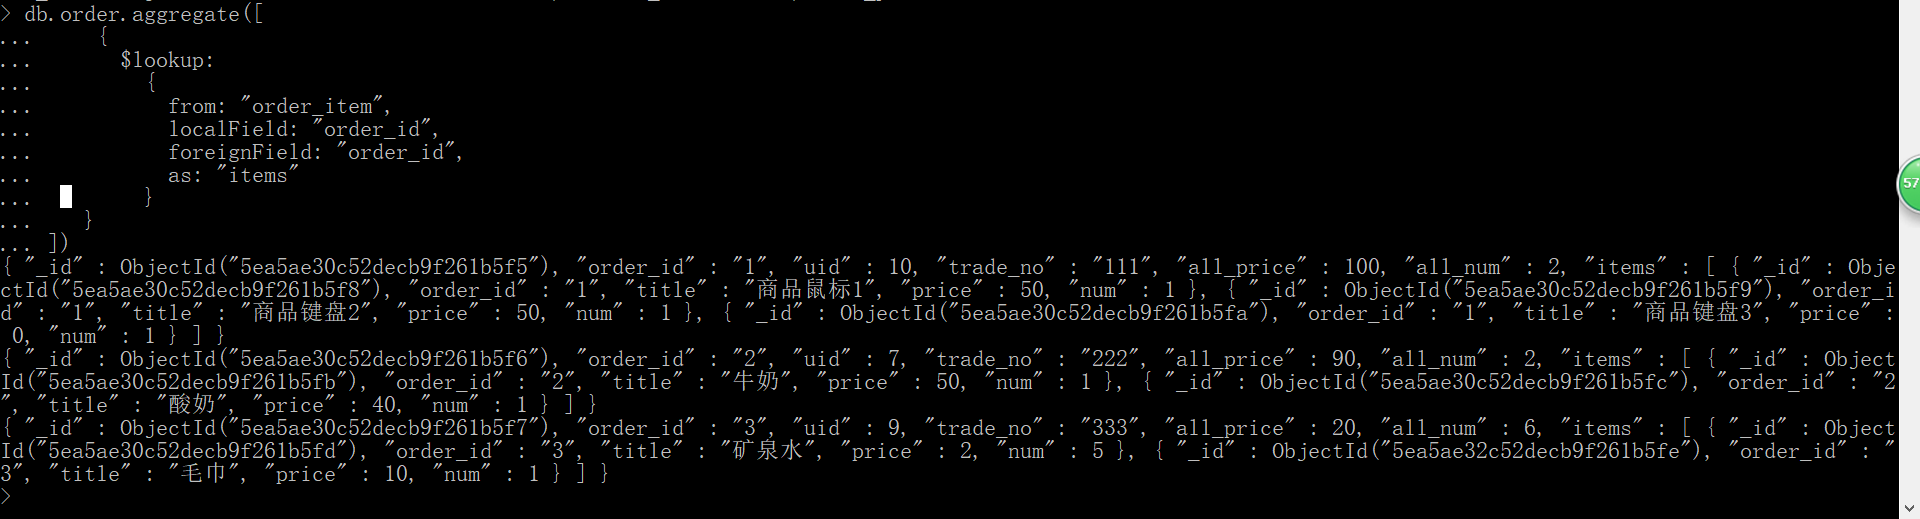
十三、$lookup 表关联+筛选+过滤+排序
db.order.aggregate([
{
$lookup:
{
from: "order_item",
localField: "order_id",
foreignField: "order_id",
as: "items"
}
},
{
$project:{ trade_no:1, all_price:1,items:1 }
},
{
$match:{"all_price":{$gte:90}}
},
{
$sort:{"all_price":-1}
},
])
休息休息。

Golang mongodb 聚合错误:管道阶段规范对象必须仅包含一个字段

我想获取过去一个月内按名称分组的计数。当我尝试在 golang mongo 客户端中运行以下查询时。我收到错误:
error: 管道阶段规范对象必须仅包含一个字段。
cond := &bson.D{
bson.E{Key: "$createTime", Value: bson.E{Key: "$gte", Value: time.Now().AddDate(0, -1, 0)}},
}
match := bson.D{{Key: "$match", Value: cond}}
group := bson.D{{Key: "$group", Value: bson.D{
{Key: "_id", Value: "$name"},
{Key: "count", Value: bson.D{{Key: "$sum", Value: 1}}},
}}}
cursor, err := col.Aggregate(ctx, mongo.Pipeline{match, group})我不知道该怎么办?
正确答案
通过进行以下调整,我能够获得所需的结果:
立即学习“go语言免费学习笔记(深入)”;
- $createTime 更改为 createTime,我假设您的字段名称不以 $ 开头
- bson.E{Key: "$gte", Value: time.Now().AddDate(0, -1, 0)} 更改为 bson.D{{Key: "$gte", Value: time .Now().AddDate(0, -1, 0)}}
cond := &bson.D{
bson.E{Key: "createTime", Value: bson.D{{Key: "$gte", Value: time.Now().AddDate(0, -1, 0)}}},
}
match := bson.D{{Key: "$match", Value: cond}}
group := bson.D{{Key: "$group", Value: bson.D{
{Key: "_id", Value: "$name"},
{Key: "count", Value: bson.D{{Key: "$sum", Value: 1}}},
}}}
cursor, err := col.Aggregate(context.TODO(), mongo.Pipeline{match, group})
if err != nil {
log.Println("Error: ", err)
}调试此类问题的一些技巧:
- 始终检查 err 变量中返回的错误消息
- 您可以通过以下方式启用原始数据库命令日志记录:
uri := options.Client().ApplyURI(appSettings.MongoDbUri)
if appSettings.LogDatabaseCommands {
cmdMonitor := &event.CommandMonitor{
Started: func(_ context.Context, evt *event.CommandStartedEvent) {
log.Print(evt.Command)
},
}
uri.SetMonitor(cmdMonitor)
}以上就是Golang mongodb 聚合错误:管道阶段规范对象必须仅包含一个字段的详细内容,更多请关注php中文网其它相关文章!
今天关于在 mongodb 聚合管道的 $match 阶段使用的 $in 子句的限制和mongodb聚合管道操作符的分享就到这里,希望大家有所收获,若想了解更多关于egg(28)--mongoose使用聚合管道、egg(29)--mongoose使用聚合管道多表关联查询、egg学习笔记第二十一天:MongoDB的高级查询aggregate聚合管道、Golang mongodb 聚合错误:管道阶段规范对象必须仅包含一个字段等相关知识,可以在本站进行查询。
在本文中,我们将为您详细介绍我正在使用 mongoose populate 从 2 个文档中的 mongodb 中获取数据,但结果没有来自引用文档的数据的相关知识,此外,我们还会提供一些关于4,MongoDB 之 $关键字 及 $修改器 $set $inc $push $pull $pop MongoDB、javascript – 如何使用mongoose从MongoDb获取数据?、MongoDB / Mongoose:在等待查询之前获取查询的文档数、MongoDB 之 $关键字 及 $修改器 $set $inc $push $pull $pop MongoDB - 4的有用信息。
本文目录一览:- 我正在使用 mongoose populate 从 2 个文档中的 mongodb 中获取数据,但结果没有来自引用文档的数据
- 4,MongoDB 之 $关键字 及 $修改器 $set $inc $push $pull $pop MongoDB
- javascript – 如何使用mongoose从MongoDb获取数据?
- MongoDB / Mongoose:在等待查询之前获取查询的文档数
- MongoDB 之 $关键字 及 $修改器 $set $inc $push $pull $pop MongoDB - 4

我正在使用 mongoose populate 从 2 个文档中的 mongodb 中获取数据,但结果没有来自引用文档的数据
如何解决我正在使用 mongoose populate 从 2 个文档中的 mongodb 中获取数据,但结果没有来自引用文档的数据?
这两个模型是用户和个人资料
const userSchema = new mongoose.Schema({
email: String,password: String,googleId: String,profile: {
type: mongoose.Schema.Types.ObjectId,ref: "Profile"
}
});
const User = mongoose.model("User",userSchema);
const profileSchema = new mongoose.Schema({
firstName: String,lastName: String,workEmail: String,dateOfBirth: Date,location: String,employee: {
type: mongoose.Schema.Types.ObjectId,ref: "User"
}
})
const Profile = mongoose.model("Profile",profileSchema);
我想使用 populate 链接用户和个人资料,以便我可以获得当前在会话中的用户的个人资料 (req.user.id),但我的 populate 函数只返回没有个人资料详细信息的用户 这是我的获取路线
app.get("/employeeprofile",function (req,res) {
User.find({_id : req.user.id}).populate(''profile'')
.exec(function (err,user) {
if (err) {
console.log(err);
}
if(user){
console.log(user);
return user;
}
})
})
用户在没有引用的配置文件的情况下登录控制台。我该如何解决这个问题,以便将用户和配置文件作为一个文档返回(不嵌入,仅使用引用)并且不会出现未定义的错误
解决方法
暂无找到可以解决该程序问题的有效方法,小编努力寻找整理中!
如果你已经找到好的解决方法,欢迎将解决方案带上本链接一起发送给小编。
小编邮箱:dio#foxmail.com (将#修改为@)

4,MongoDB 之 $关键字 及 $修改器 $set $inc $push $pull $pop MongoDB
MongoDB中的关键字有很多, $lt $gt $lte $gte 等等,这么多我们也不方便记,这里我们说说几个比较常见的
一.查询中常见的 等于 大于 小于 大于等于 小于等于
等于 : 在MongoDB中什么字段等于什么值其实就是 " : " 来搞定 比如 "name" : "路飞学城"

大于 : 在MongoDB中的 大于 > 号 我们用 : $gt 比如 : "score" : { $gt : 80 } 就是 得到 "score" 大于 80 的数据

小于 : 在MongoDB中的 小于 < 号 我们用 : $lt 比如 : "score" : { $lt : 80 } 就是 得到 "score" 小于 80 的数据

大于等于 : 在MongoDB中的 大于等于 >= 号 我们用 : $gte 比如 : "score" : { $gte : 80 } 就是 得到 "score" 大于等于 80 的数据

小于等于 : 在MongoDB中的 小于等于 <= 号 我们用 : $lte 比如 : "score" : { $lte : 80 } 就是 得到 "score" 小于等于 80 的数据

这就是MongoDB中的运算符,是不是很类似我们使用的ORM中的运算符啊,没错,最开始的时候我们就已经说了,MongoDB的操作就是很类似ORM的
二.MongoDB中的那些个update修改器: $inc $set $unset $push $pull
在此前的update中,我们用过$set,对数据进行过更新,其实在update中还存在很多的$关键字,我们把update中的这些关键字叫做 修改器
修改器很多,这里挑一些重要的来说一说:
1.$inc : Python中的 变量 += 1 , 将查询到的结果 加上某一个值 然后保存

还是刚才Collection数据,我们来试一下$inc , 让不及格的 "路飞学城2" 变成 60 分

成功了 , {$inc:{"score":1}}的意思是,"score"的原有数值上面 +1,那我们再来实验一次,把60改为20,这怎么操作呢,其实可以理解为在 60 上加一个 -40

又成功了 , {$inc:{"score":-20}},$inc 的用法很简单,就是原有基础上在增加多少
2.$set : 此前我们已经提到过 $set 的用法和特性(没有就自动添加一条)了
再做一个例子:把 "score" 为 100 分 的 "english_name" 赋值为 "LuffyCity"

再把 "score" 为 20 分的 "score" 赋值为 59 分

3.$unset : 用来删除Key(field)的
做一个小例子 : 刚才我们有一个新的"english_name" 这个field ,现在我们来删除它

成功了! {$unset:{"english_name" : 1}} 就是删除 "english_name" 这个 field 相当于 关系型数据库中删除了 字段
4. $push : 它是用来对Array (list)数据类型进行 增加 新元素的,相当于Python中 list.append() 方法
做一个小例子 :首先我们要先对原有数据增加一个Array类型的field:

使用update $set 的方法只能为Document中的第一条添加

使用updateMany $set 的方法 可以为所有满足条件的 Document 添加 "test_list" , 注意我这里的条件为空 " {} " 就算是为空,也要写上"{}" 记住记住记住
接下来我们就要队列表进行添加了: 将 "score" 为 100 的Document 中"test_list" 添加一个 6

$push 是在 Array(list) 的尾端加入一个新的元素 {$push : {"test_list" : 6}}
5.$pull : 有了$push 对Array类型进行增加,就一定有办法对其内部进行删减,$pull 就是指定删除Array中的某一个元素
做一个例子: 把我们刚才$push进去的 6 删除掉

问题来了,如果 Array 数据类型中 如果有 多个 6 怎么办呢?

全部删掉了.....
得出了一个结论,只要满足条件,就会将Array中所有满足条件的数据全部清除掉
6. $pop : 指定删除Array中的第一个 或 最后一个 元素
做个小例子: 删除"score" 等于 100 分 test_list 的最后一个元素

怎么删除第一个呢?

{$pop:{"test_list" : -1}} -1 代表最前面, 1 代表最后边 (这和我们大Python正好相反) 记住哦

javascript – 如何使用mongoose从MongoDb获取数据?
database -> skeletonDatabase collection -> adminLogin
当我从命令行运行db.adminLogin.find()时,我得到:
{ "_id" : ObjectId("52lhafkjasfadsfea"),"username" : "xxxx","password" : "xxxx" }
我的连接(这是有效的,只是添加它FYI)
module.exports = function(mongoose)
{
mongoose.connect('mongodb://localhost/skeletonDatabase');
var db = mongoose.connection;
db.on('error',console.error.bind(console,'connection error:'));
db.once('open',function callback () {
console.log('Conntected To Mongo Database');
});
}
我的-js-
module.exports = function(mongoose)
{
var Schema = mongoose.Schema;
// login schema
var adminLogin = new Schema({
username: String,password: String
});
var adminLoginModel = mongoose.model('adminLogin',adminLogin);
var adminLogin = mongoose.model("adminLogin");
adminLogin.find({},function(err,data){
console.log(">>>> " + data );
});
}
我的console.log()返回>>>>
那么我在这里做错了什么?为什么我的控制台日志中没有任何数据?在此先感谢您的帮助.
解决方法
var adminLogin = new Schema({
username: String,password: String
},{collection: 'adminLogin'});

MongoDB / Mongoose:在等待查询之前获取查询的文档数
如何解决MongoDB / Mongoose:在等待查询之前获取查询的文档数?
我使用.skip()和.limit()来分页我的MongoDB查询。但是我想在通过这些功能剪切文档之前先阅读所有文档。
- 是的,我可以等待查询并读取其长度。但是然后我将等待两次相同的查询。
- 我尝试使用estimatedDocumentCount()函数,但是看不到任何结果
致谢,谢谢
解决方法
暂无找到可以解决该程序问题的有效方法,小编努力寻找整理中!
如果你已经找到好的解决方法,欢迎将解决方案带上本链接一起发送给小编。
小编邮箱:dio#foxmail.com (将#修改为@)

MongoDB 之 $关键字 及 $修改器 $set $inc $push $pull $pop MongoDB - 4
我们在之前的 MongoDB 之 手把手教你增删改查 MongoDB - 2 中提到过 $set 这个系统关键字,用来修改值的对吧
但是MongoDB中类似这样的关键字有很多, $lt $gt $lte $gte 等等,这么多我们也不方便记,这里我们说说几个比较常见的
一.查询中常见的 等于 大于 小于 大于等于 小于等于
等于 : 在MongoDB中什么字段等于什么值其实就是 " : " 来搞定 比如 "name" : "路飞学城"

大于 : 在MongoDB中的 大于 > 号 我们用 : $gt 比如 : "score" : { $gt : 80 } 就是 得到 "score" 大于 80 的数据

小于 : 在MongoDB中的 小于 < 号 我们用 : $lt 比如 : "score" : { $lt : 80 } 就是 得到 "score" 小于 80 的数据

大于等于 : 在MongoDB中的 大于等于 >= 号 我们用 : $gte 比如 : "score" : { $gte : 80 } 就是 得到 "score" 大于等于 80 的数据

小于等于 : 在MongoDB中的 小于等于 <= 号 我们用 : $lte 比如 : "score" : { $lte : 80 } 就是 得到 "score" 小于等于 80 的数据

这就是MongoDB中的运算符,是不是很类似我们使用的ORM中的运算符啊,没错,最开始的时候我们就已经说了,MongoDB的操作就是很类似ORM的
二.MongoDB中的那些个update修改器: $inc $set $unset $push $pull
在此前的update中,我们用过$set,对数据进行过更新,其实在update中还存在很多的$关键字,我们把update中的这些关键字叫做 修改器
修改器很多,这里挑一些重要的来说一说:
1.$inc : Python中的 变量 += 1 , 将查询到的结果 加上某一个值 然后保存

还是刚才Collection数据,我们来试一下$inc , 让不及格的 "路飞学城2" 变成 60 分

成功了 , {$inc:{"score":1}}的意思是,"score"的原有数值上面 +1,那我们再来实验一次,把60改为20,这怎么操作呢,其实可以理解为在 60 上加一个 -40

又成功了 , {$inc:{"score":-20}}也来越喜欢英俊潇洒又不会翻车的自己了
$inc 的用法是不是很简单啊,就是原有基础上在增加多少对吧
2.$set : 此前我们已经提到过 $set 的用法和特性(没有就自动添加一条)了
再做一个例子:把 "score" 为 100 分 的 "english_name" 赋值为 "LuffyCity"

再把 "score" 为 20 分的 "score" 赋值为 59 分

完美~
3.$unset : 用来删除Key(field)的
做一个小例子 : 刚才我们有一个新的"english_name" 这个field ,现在我们来删除它

成功了! {$unset:{"english_name" : 1}} 就是删除 "english_name" 这个 field 相当于 关系型数据库中删除了 字段
4. $push : 它是用来对Array (list)数据类型进行 增加 新元素的,相当于我们大Python中 list.append() 方法
做一个小例子 :首先我们要先对原有数据增加一个Array类型的field:

使用update $set 的方法只能为Document中的第一条添加

使用updateMany $set 的方法 可以为所有满足条件的 Document 添加 "test_list" , 注意我这里的条件为空 " {} " 就算是为空,也要写上"{}" 记住记住记住
接下来我们就要队列表进行添加了: 将 "score" 为 100 的Document 中"test_list" 添加一个 6

$push 是在 Array(list) 的尾端加入一个新的元素 {$push : {"test_list" : 6}}
5.$pull : 有了$push 对Array类型进行增加,就一定有办法对其内部进行删减,$pull 就是指定删除Array中的某一个元素
做一个例子: 把我们刚才$push进去的 6 删除掉

问题来了,如果 Array 数据类型中 如果有 多个 6 怎么办呢?

全部删掉了.....
得出了一个结论,只要满足条件,就会将Array中所有满足条件的数据全部清除掉
6. $pop : 指定删除Array中的第一个 或 最后一个 元素
做个小例子: 删除"score" 等于 100 分 test_list 的最后一个元素

怎么删除第一个呢?

{$pop:{"test_list" : -1}} -1 代表最前面, 1 代表最后边 (这和我们大Python正好相反) 记住哦
今天关于我正在使用 mongoose populate 从 2 个文档中的 mongodb 中获取数据,但结果没有来自引用文档的数据的介绍到此结束,谢谢您的阅读,有关4,MongoDB 之 $关键字 及 $修改器 $set $inc $push $pull $pop MongoDB、javascript – 如何使用mongoose从MongoDb获取数据?、MongoDB / Mongoose:在等待查询之前获取查询的文档数、MongoDB 之 $关键字 及 $修改器 $set $inc $push $pull $pop MongoDB - 4等更多相关知识的信息可以在本站进行查询。
本文标签:


![[转帖]Ubuntu 安装 Wine方法(ubuntu如何安装wine)](https://www.gvkun.com/zb_users/cache/thumbs/4c83df0e2303284d68480d1b1378581d-180-120-1.jpg)

