在本文中,我们将给您介绍关于Cocos2d-x游戏开发——图片伸缩CCScaleToCCScaleBy的详细内容,此外,我们还将为您提供关于1cocos2dx扩展库UI控件,CCControlSlid
在本文中,我们将给您介绍关于Cocos2d-x游戏开发——图片伸缩CCScaleToCCScaleBy的详细内容,此外,我们还将为您提供关于1cocos2dx扩展库UI控件,CCControlSlider,CCScale9Sprite(九妹图),CCControlSwitch,CCControlButton、Android cocos2dx游戏开发——示例程序HelloCpp源码分析、CCScaleTo 与 CCScaleBy 比较、Cocos2d 卡牌塔防 游戏 cocos2d-x游戏开发之旅 第14 15 16 章 源代码调试 注意点 出现无法打开包括文件:“cocos2d.h”: No such file or direct的知识。
本文目录一览:- Cocos2d-x游戏开发——图片伸缩CCScaleToCCScaleBy
- 1cocos2dx扩展库UI控件,CCControlSlider,CCScale9Sprite(九妹图),CCControlSwitch,CCControlButton
- Android cocos2dx游戏开发——示例程序HelloCpp源码分析
- CCScaleTo 与 CCScaleBy 比较
- Cocos2d 卡牌塔防 游戏 cocos2d-x游戏开发之旅 第14 15 16 章 源代码调试 注意点 出现无法打开包括文件:“cocos2d.h”: No such file or direct

Cocos2d-x游戏开发——图片伸缩CCScaleToCCScaleBy
效果图:
Init()代码:
,CCControlSwitch,CCControlButton")
1cocos2dx扩展库UI控件,CCControlSlider,CCScale9Sprite(九妹图),CCControlSwitch,CCControlButton
-
UI控件来自cocos2dx的扩展库,完善了UI方面的元素,使cocos2dx更加丰富多彩。使用扩展库需包含:
| #include “cocos-ext.h” USING_NS_CC_EXT; |
- CCControlSlider
| CCControlSlider * slider = CCControlSlider::create(“sliderTrack.png”,”sliderProgress.png”,”sliderThumb.png”); |
第一个参数表示,slider滑动的轨道,即背景色。第二个参数表示滑动的进度。第三个参数表示拖动的按钮。
| slider->setMaximumValue(2.0f); //设置滑动最大值 slider->setMinimumValue(0.0f); //设置滑动最小值
slider->setValue(0.5f); //设置默认值 slider->setMaximumAllowedValue(1.2f); //设置某一个范围内的最大值 slider->setMinimumAllowedValue(0.3f); //设置某一个范围内的最小值 |
| slider->addTargetWithActionForControlEvents(this, cccontrol_selector(T12UI::controlCallback), CCControlEventValueChanged); |
设置事件的响应函数
| typedef unsigned int CCControlEvent; typedef void (CCObject::*SEL_CCControlHandler)(CCObject*,CCControlEvent); #define cccontrol_selector(_SELECTOR)(SEL_CCControlHandler)(&_SELECTOR); |
关于CCControlEvent
| /** Kinds of possible events for the control objects. */ enum { CCControlEventTouchDown = 1 << 0, // A touch-down event in the control. CCControlEventTouchDragInside = 1 << 1, // An event where a finger is dragged inside the bounds of the control. CCControlEventTouchDragOutside = 1 << 2, // An event where a finger is dragged just outside the bounds of the control. CCControlEventTouchdragenter = 1 << 3, // An event where a finger is dragged into the bounds of the control. CCControlEventTouchDragExit = 1 << 4, // An event where a finger is dragged from within a control to outside its bounds. CCControlEventTouchUpInside = 1 << 5, // A touch-up event in the control where the finger is inside the bounds of the control. CCControlEventTouchUpOutside = 1 << 6, // A touch-up event in the control where the finger is outside the bounds of the control. CCControlEventTouchCancel = 1 << 7, // A system event canceling the current touches for the control. CCControlEventValueChanged = 1 << 8 // A touch dragging or otherwise manipulating a control,causing it to emit a series of different values. }; typedef unsigned int CCControlEvent; |
- slider案例说明:
| T12UI.h |
| #ifndef __T12UI_H__ #define __T12UI_H__
#include "cocos2d.h" #include "TBack.h" #include "cocos-ext.h" USING_NS_CC; USING_NS_CC_EXT;
class T12UI :public TBack { public: static CCScene * scene(); CREATE_FUNC(T12UI); bool init();
cclabelAtlas * atlas;
//slider的回调函数 void sliderCallBack(CCObject* sender,CCControlEvent event); };
#endif |
| T12UI.cpp |
| #include "T12UI.h" #include "AppMacros.h" #include "SimpleAudioEngine.h" using namespace CocosDenshion;
CCScene *T12UI::scene() { scene = CCScene::create(); T12UI * layer = create(); scene->addChild(layer); return scene; }
//UI控件来自cocos2dx的扩展库,完善了UI方面的元素,使cocos2dx更加丰富多彩。使用扩展库需要包含 bool init() { TBack::init();
//第一个参数表示slider滑动的轨道,即背景色。第二个参数表示滑动的进度。 //第三个参数表示拖动的按钮 CCControlSlider *slider = CCControlSlider::create("sliderTrack.png","sliderProgress.png",21); font-family:新宋体; font-size:9.5pt">"sliderThumb.png");
//设置滑动最大值 slider->setMaximumValue(2.0f); //设置滑动的最小值 slider->setMinimumValue(0.0f);
//设置默认值 slider->setValue(0.5f); //设置某一范围内的最大值,当移动到了1.2之后移动不了了 slider->setMaximumAllowedValue(1.2f); //设置某一范围内的最小值,向左移动到0.3之后移动不了了 slider->setMinimumAllowedValue(0.3f); //设置slider的所在位置 slider->setPosition(ccp(winSize.width / 2,winSize.height/2 - 30));
slider->addTargetWithActionForControlEvents( this, cccontrol_selector(sliderCallBack),138); font-family:新宋体; font-size:9.5pt">CCControlEventValueChanged);
CCString *str = CCString::createWithFormat("%.2g",slider->getValue()); //第一个参数表示要显示的字符串 //第二个参数表示从哪张图片中取值 //第三个参数表示的是每个字的宽度width //第四个参数表示的是每个字的高度 //第五个参数表示的是起始的字符 /* creates the cclabelAtlas with a string,a char map file(the atlas), the width and height of each element and the starting char of the atlas */ atlas = cclabelAtlas::create( str->getCString(), "fonts/fps_images.png", 12,32,21); font-family:新宋体; font-size:9.5pt">'.'); atlas->setAnchorPoint(ccp(0.5,0.5)); //设置字体的放大效果 atlas->setScale(2.0f); atlas->winSize.height / 2 + 30)); addChild(atlas);
slider->setValue(1.3f);
addChild(slider);
return true; }
//设置slider的回调函数 //这里的sender表示发送的一者 void CCControlEvent event) { CCControlSlider * slider = (CCControlSlider *)sender;
getValue()); //因为成为了全局的了,所以能够访问的到 atlas->setString(str->getCString()); } |
| 运行结果: 最大值
最小范围:
最大范围: 运行结果在0.3和1.2之间 |
- CCControlSwitch
第一个参数,掩底背景图片,第二个参数为开的图片,第三个参数为关的图片,第四个参数为手指划到按钮,第五,六个参数分别为开和关显示的文字。
| CCControlSwitch * sw = CCControlSwitch::create( CCSprite::create("switch-mask.png"), CCSprite::create("switch-on.png"), CCSprite::create("switch-off.png"), CCSprite::create("switch-thumb.png"), cclabelTTF::create("ON","Courier New",20), cclabelTTF::create("OFF",20) ); |
设置时间触发后的响应函数
| sw->addTargetWithActionForControlEvents(this,cccontrol_selector(T12UI::switchCallback), CCControlEventValueChanged) |
如何在响应函数中获取选项
| void T12UI::switchCallback(CCObject * sender,CCControlEvent event) { CCControlSwitch * sw = (CCControlSwitch *)sender; If(sw->isOn()) { cclog(“On”); } else { cclog(“off”); } } |
5 CCControlSwitch案例说明
| T12UI.h |
| init();
//开关的回调函数 void switchCallBack(init();
//通过SimpleAudioEngine的方式实现加载音乐 SimpleAudioEngine::sharedEngine()->preloadBackgroundMusic("audio/start.wav"); //创建开关、 //第一个参数为:掩底背景CCSprite //第二个参数为开的CCSprite //第三个参数为关的CCSprite //第四个参数为手指滑到CCSprite //第五个参数on的label //第六个参数为off的label CCControlSwitch *sw = CCControlSwitch::create( CCSprite::"switch-mask.png"), "switch-on.png"),21); font-family:新宋体; font-size:9.5pt">"switch-off.png"),21); font-family:新宋体; font-size:9.5pt">"switch-thumb.png"),133); font-family:新宋体; font-size:9.5pt">cclabelTTF::"ON",21); font-family:新宋体; font-size:9.5pt">"Courier New",21); font-family:新宋体; font-size:9.5pt">"OFF",20) ); //设置开关的位置 sw->winSize.height / 2)); sw->addTargetWithActionForControlEvents(this,0); font-family:新宋体; font-size:9.5pt">switchCallBack),138); font-family:新宋体; font-size:9.5pt">CCControlEventValueChanged);
//设置开关默认是关闭的 sw->seton(false); //将开关添加到Layer中去 addChild(sw);
return true; }
//开关的回调函数 void CCControlSwitch * sw = (CCControlSwitch *)sender; if (sw->isOn()) { cclog("click On"); //通过playBackgroundMusic打开音乐 playBackgroundMusic("audio/start.wav"); } else { //通过stopBackgroundMusic()关闭音乐 stopBackgroundMusic("audio/start.wav"); "click off"); } } |
| 运行结果:
|
- CCScale9Sprite九妹图
CCScale9Sprite对象,是一种CCSprite对象的变形,它的用法和CCSprite类似,不同点是:CCScale9Sprite对象有个特性就是缩放贴图时可以尽量不失帧。比如QQ聊天内边框
原理:
CCScale9Sprite的实现非常巧妙,是通过1个CCSpriteBatchNode和9个CCSprite来实现的,原理很简单,通过将原纹理资源切割成9部分(PS:这也是叫九宫图的原因)。根据想要的尺寸,完成以下三个步骤:
- 保持4个角部分不变形
-
单向拉伸4条边(即在4个角两两之间的边,比如上边,只做横向拉伸)
- 双向拉伸中间部分(即九宫图的中间部分,横向,纵向同时拉伸,PS:拉伸比例不一定相同)
CCSpriteBatchNode的资源为整个的纹理,9 个CCSprite 对应于纹理的9
个部分(根据纹理不同,9 部分所占比例会有所不同),根据想要的尺寸,
将9 部分拼装在一起!
- 需要包含的头文件
#include “cocos-ext.h” //包含cocos-ext.h头文件
using namespace cocos2d::extension; //引用cocos2d::extension 命名空间
使用说明:
CCScale9Sprite::create(const char* file,CCRect rect,CCRect,capInsets);
第一个参数为文件,第二个参数使用文件的大小,第三个参数如下,若未设置,或设置图分别如下:
我们知道CCSprite的拉伸方式是通过setScale();来实现的,而对于CCScale9Sprite则不同。它是通过setContentSize(constCCSize & size);来实现图片的拉伸。
测试代码:
| CCScale9Sprite * spr = CCScale9Sprite::create("scale9.png",CCRectMake(0,116,102),CCRectMake(40,30,40)); spr->setPosition(ccp(winSize.width/2,winSize.height/2)); addChild(spr); //spr->setScale(4.0f); spr->setPreferredSize(CCSizeMake(400,200)); |
关于CCScale9Sprite::create()
| T12UI.h |
| init(); };
#endif |
| CCScale9Sprite * s9spr = CCScale9Sprite::create( "scale9.png",138); font-family:新宋体; font-size:9.5pt">CCRectMake(0,138); font-family:新宋体; font-size:9.5pt">CCRectMake(30,40,56,20)); s9spr->winSize.height / 2)); addChild(s9spr); s9spr->setPreferredSize(CCSize(500,100)); return true; } |
| 运行结果:
|
- CControlButton
| CCScale9Sprite * bgbutton = CCScale9Sprite::create("button.png"); //背景色图片 CCScale9Sprite * bgbuttonlighted = CCScale9Sprite::create("buttonHighlighted.png"); //背景色高亮图片 cclabelTTF * titlebutton = cclabelTTF::create("Touch Me","Courier New",30); //按钮的文本 CCControlButton * button = CCControlButton::create(titlebutton,bgbutton); //创建按钮 button->setColor(ccc3(159,168,176)); //调色 button->setBackgroundSpriteForState(bgbuttonlighted, CCControlStateHighlighted); //按下后背景高亮 button->setTitleColorForState(ccwHITE, CCControlStateHighlighted); //按下后文本高亮 button->addTargetWithActionForControlEvents(this,cccontrol_selector(T12UI::buttonTouchDown)); button->addTargetWithActionForControlEvents(this,cccontrol_selector(T12UI::buttonTouchDown),CCControlEventTouchDown); button->addTargetWithActionForControlEvents(this,cccontrol_selector(T12UI::buttonTouchDragInside),CCControlEventTouchDragInside); |
响应的事件类型如下:
| /** Kinds of possible events for the control objects. */ enum {
}; typedef unsigned int CCControlEvent; |
| T12UI.h |
| init();
void touchDownCallBack(CCControlEvent event); void touchDragInsideCallBack(scene; }
bool init(); CCScale9Sprite *bgButton = "button.png"); CCScale9Sprite *bgButtonLighted = "buttonHighlighted.png"); cclabelTTF * text = "Touch Me",21); font-family:新宋体; font-size:9.5pt">"Couier New",50);
CCControlButton * button = CCControlButton::create(text,bgButton); //为按钮添加位置 button->winSize.height / 2)); button->setBackgroundSpriteForState(bgButtonLighted,138); font-family:新宋体; font-size:9.5pt">CCControlStateHighlighted); button->setTitleColorForState(ccRED,138); font-family:新宋体; font-size:9.5pt">CCControlStateHighlighted); addChild(button);
//为按钮添加监听事件,添加的是按钮被点击的事件 button->touchDownCallBack),138); font-family:新宋体; font-size:9.5pt">CCControlEventTouchDown); //为按钮添加监听事件,添加的是按钮Drag的事件 button->touchDragInsideCallBack),138); font-family:新宋体; font-size:9.5pt">CCControlEventTouchDragInside);
return true; }
void CCControlEvent event) { "touchDownCallBack"); }
void "touchDragInsideCallBack"); } |
| 运行结果:
|

Android cocos2dx游戏开发——示例程序HelloCpp源码分析
本文通过分析cocos2dx提供的示例程序HelloCpp来分析cocos2dx的启动过程。
我们从HelloCpp.java开始:
[java] view plaincopy![]()
![]()
package org.cocos2dx.hellocpp;
import org.cocos2dx.lib.Cocos2dxActivity;
import android.os.Bundle;
public class HelloCpp extends Cocos2dxActivity{
protected void onCreate(Bundle savedInstanceState){
super.onCreate(savedInstanceState);
}
static {
System.loadLibrary("hellocpp");
}
}
HelloCpp是一个Activity,首先会执行静态代码块,加载libhellocpp.so库,然后就是执行onCreate方法,这里调用了父类的onCreate方法。我们看看Cocos2dxActivity的onCreate方法,该类在cocos2dx的库工程libcocos2dx中:
[java] view plaincopy![]()
![]()
@Override
protected void onCreate(final Bundle savedInstanceState) {
super.onCreate(savedInstanceState);
sContext = this;
this.mHandler = new Cocos2dxHandler(this);
this.init();
Cocos2dxHelper.init(this, this);
}
这里主要是执行初始化过程,Cocos2dxHandler主要处理显示Dialog的消息,Cocos2dxHelper是个辅助类,我们主要看init()方法:
[java] view plaincopy![]()
![]()
public void init() {
// FrameLayout
ViewGroup.LayoutParams framelayout_params =
new ViewGroup.LayoutParams(ViewGroup.LayoutParams.FILL_PARENT,
ViewGroup.LayoutParams.FILL_PARENT);
FrameLayout framelayout = new FrameLayout(this);
framelayout.setLayoutParams(framelayout_params);
// Cocos2dxEditText layout
ViewGroup.LayoutParams edittext_layout_params =
new ViewGroup.LayoutParams(ViewGroup.LayoutParams.FILL_PARENT,
ViewGroup.LayoutParams.WRAP_CONTENT);
Cocos2dxEditText edittext = new Cocos2dxEditText(this);
edittext.setLayoutParams(edittext_layout_params);
// ...add to FrameLayout
framelayout.addView(edittext);
// Cocos2dxGLSurfaceView
this.mGLSurfaceView = this.onCreateView();
// ...add to FrameLayout
framelayout.addView(this.mGLSurfaceView);
// Switch to supported OpenGL (ARGB888) mode on emulator
if (isAndroidEmulator())
this.mGLSurfaceView.setEGLConfigChooser(8 , 8, 8, 8, 16, 0);
this.mGLSurfaceView.setCocos2dxRenderer(new Cocos2dxRenderer());
this.mGLSurfaceView.setCocos2dxEditText(edittext);
// Set framelayout as the content view
setContentView(framelayout);
}
这里就是为Activity绑定View Hierarchy,大家做Android开发的对着一定很熟悉。View Hierarchy的根View是个FrameLayout,FrameLayout又包含一个EditText和一个GLSurfaceView,这个GLSurfaceView就是cocos引擎用来绘制游戏画面的关键View,我们来详细分析一下它。首先看一下Cocos2dxActivity的onCreateView方法:
[java] view plaincopy![]()
![]()
public Cocos2dxGLSurfaceView onCreateView() {
return new Cocos2dxGLSurfaceView(this);
}
该方法就是新建一个Cocos2dxGLSurfaceView,Cocos2dxGLSurfaceView又继承于GLSurfaceView。我们都知道GLSurfaceView的核心就是Renderer,初始化时会调用Renderer的onSurfaceCreated方法,每一帧的绘制是通过调用Renderer的onDrawFrame方法。Cocos2dxGLSurfaceView的Renderer是一个Cocos2dxRenderer对象,我们先来看Cocos2dxRenderer对象的onSurfaceCreated方法:
[java] view plaincopy![]()
![]()
@Override
public void onSurfaceCreated(final GL10 pGL10, final EGLConfig pEGLConfig) {
Cocos2dxRenderer.nativeInit(this.mScreenWidth, this.mScreenHeight);
this.mLastTickInNanoSeconds = System.nanoTime();
}
这里调用了一个本地方法nativeInit(final int pWidth, final int pHeight),本地方法的实现在jni/hellocpp/main.cpp中实现的:
[java] view plaincopy![]()
![]()
void Java_org_cocos2dx_lib_Cocos2dxRenderer_nativeInit(JNIEnv* env, jobject thiz, jint w, jint h)
{
if (!CCDirector::sharedDirector()->getOpenGLView())
{
CCEGLView *view = CCEGLView::sharedOpenGLView();
view->setFrameSize(w, h);
AppDelegate *pAppDelegate = new AppDelegate();
CCApplication::sharedApplication()->run();
}
else
{
......
}
}
CCDirector是游戏的导演类,一个游戏只有一个导演类用来控制和管理场景。CCDirector::sharedDirector()是个静态方法,用来获取导演类的单例对象:
[java] view plaincopy![]()
![]()
CCDirector* CCDirector::sharedDirector(void)
{
if (!s_SharedDirector)
{
s_SharedDirector = new CCDisplayLinkDirector();
s_SharedDirector->init();
}
return s_SharedDirector;
}
CCCCDisplayLinkDirector是CCDirector的子类。我们再回到nativeinit方法中,获取到导演类的单例对象后又调用了它的getOpenGLView()方法:
[java] view plaincopy![]()
![]()
inline CCEGLView* getOpenGLView(void) { return m_pobOpenGLView; }
该方法返回用于游戏绘制的CCEGLView,在Android平台下,这个CCEGLView其实没有什么作用,因为游戏都是绘制在Cocos2dxGLSurfaceView上的。由于我们是初始化过程,所以此时m_pobOpenGLView为null,所以if (!CCDirector::sharedDirector()->getOpenGLView())条件成立,执行以下的代码:
[java] view plaincopy![]()
![]()
CCEGLView *view = CCEGLView::sharedOpenGLView();
view->setFrameSize(w, h);
AppDelegate *pAppDelegate = new AppDelegate();
CCApplication::sharedApplication()->run();
同样,我们先获取一个CCEGLView的单例对象,接下来又新建了一个AppDelegate对象,大家可能在工程中找不到AppDelegate类。我们打开工程目录的上一级目录: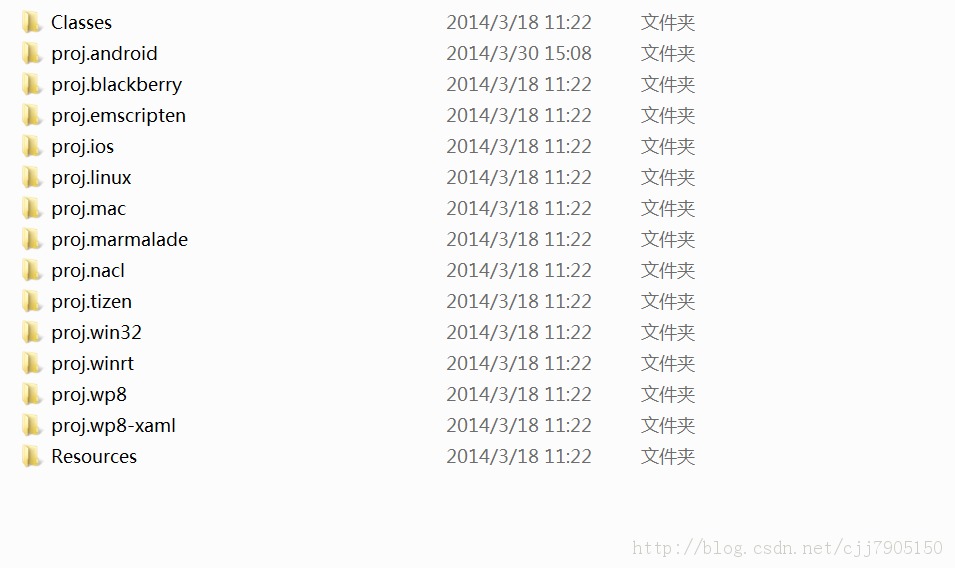
我们的Android工程是在proj.android文件夹中,而AppDelegate类就在Classes文件夹中。因为cocos2dx是跨平台的,而AppDelegate在各个平台之间是通用的不需要修改的,所以就放在一个公用的目录下。
[java] view plaincopy![]()
![]()
#ifndef _APP_DELEGATE_H_
#define _APP_DELEGATE_H_
#include "cocos2d.h"
/**
@brief The cocos2d Application.
The reason for implement as private inheritance is to hide some interface call by CCDirector.
*/
class AppDelegate : private cocos2d::CCApplication
{
public:
AppDelegate();
virtual ~AppDelegate();
/**
@brief Implement CCDirector and CCScene init code here.
@return true Initialize success, app continue.
@return false Initialize failed, app terminate.
*/
virtual bool applicationDidFinishLaunching();
/**
@brief The function be called when the application enter background
@param the pointer of the application
*/
virtual void applicationDidEnterBackground();
/**
@brief The function be called when the application enter foreground
@param the pointer of the application
*/
virtual void applicationWillEnterForeground();
};
#endif // _APP_DELEGATE_H_
AppDelegate是继承CCApplication类的,我们看一下CCApplication的构造方法:
[java] view plaincopy![]()
![]()
// sharedApplication pointer
CCApplication * CCApplication::sm_pSharedApplication = 0;
CCApplication::CCApplication()
{
CCAssert(! sm_pSharedApplication, "");
sm_pSharedApplication = this;
}
我们看到在新建CCApplication对象时,会把该对象赋给一个全局变量sm_pSharedApplication。所以我们在new AppDelegate()的时候,就把它象赋给全局变量sm_pSharedApplication。我们再看下CCApplication的CCApplication::sharedApplication方法:
[java] view plaincopy![]()
![]()
CCApplication* CCApplication::sharedApplication()
{
CCAssert(sm_pSharedApplication, "");
return sm_pSharedApplication;
}
此时,sm_pSharedApplication指向的是一个AppDelegate对象。所以我们执行CCApplication::sharedApplication()->run()时其实执行的是AppDelegate对象的run方法。现在我们应该明白这个类为什么叫AppDelegate了,因为CCApplication的工作实际都委托给了AppDelegate类了。看一下AppDelegate的方法:
[java] view plaincopy![]()
![]()
int CCApplication::run()
{
// Initialize instance and cocos2d.
if (! applicationDidFinishLaunching())
{
return 0;
}
return -1;
}
[java] view plaincopy![]()
![]()
bool AppDelegate::applicationDidFinishLaunching() {
// initialize director
CCDirector* pDirector = CCDirector::sharedDirector();
CCEGLView* pEGLView = CCEGLView::sharedOpenGLView();
pDirector->setOpenGLView(pEGLView);
CCSize frameSize = pEGLView->getFrameSize();
// Set the design resolution
#if (CC_TARGET_PLATFORM == CC_PLATFORM_WINRT) || (CC_TARGET_PLATFORM == CC_PLATFORM_WP8)
pEGLView->setDesignResolutionSize(designResolutionSize.width, designResolutionSize.height, kResolutionShowAll);
#else
pEGLView->setDesignResolutionSize(designResolutionSize.width, designResolutionSize.height, kResolutionNoBorder);
#endif
vector<string> searchPath;
// In this demo, we select resource according to the frame''s height.
// If the resource size is different from design resolution size, you need to set contentScaleFactor.
// We use the ratio of resource''s height to the height of design resolution,
// this can make sure that the resource''s height could fit for the height of design resolution.
// if the frame''s height is larger than the height of medium resource size, select large resource.
if (frameSize.height > mediumResource.size.height)
{
searchPath.push_back(largeResource.directory);
pDirector->setContentScaleFactor(MIN(largeResource.size.height/designResolutionSize.height, largeResource.size.width/designResolutionSize.width));
}
// if the frame''s height is larger than the height of small resource size, select medium resource.
else if (frameSize.height > smallResource.size.height)
{
searchPath.push_back(mediumResource.directory);
pDirector->setContentScaleFactor(MIN(mediumResource.size.height/designResolutionSize.height, mediumResource.size.width/designResolutionSize.width));
}
// if the frame''s height is smaller than the height of medium resource size, select small resource.
else
{
searchPath.push_back(smallResource.directory);
pDirector->setContentScaleFactor(MIN(smallResource.size.height/designResolutionSize.height, smallResource.size.width/designResolutionSize.width));
}
// set searching path
CCFileUtils::sharedFileUtils()->setSearchPaths(searchPath);
// turn on display FPS
pDirector->setDisplayStats(true);
// set FPS. the default value is 1.0/60 if you don''t call this
pDirector->setAnimationInterval(1.0 / 60);
// create a scene. it''s an autorelease object
CCScene *pScene = HelloWorld::scene();
// run
pDirector->runWithScene(pScene);
return true;
}

CCScaleTo 与 CCScaleBy 比较
Cocos2d-x 中提供了 CCScaleTo 和 CCScaleBy 两个拉伸动作,虽然两个都是拉伸动作,但是功能上还是有差别的,下面解释一下他们的区别。
CCScaleTo 的 create 函数:
static CCScaleTo* CCScaleTo::create(float duration , float sx , float sy);

    /*
     * duration是动作执行持续时间,单位为秒;

     * sx是X方向的拉伸值(注意,是拉伸值!);

     * sy是Y方向的拉伸值;
     */
对于一般精灵创建时,拉伸值是 1.0f,所以如果 sx 的值为 0.5f 时,精灵完成动作后,水平方向的拉伸值就会变为 0.5f;如果 sx 的值为 2.0f 时,精灵完成动作后,水平方向拉伸值就会变为 2.0f。
如果精灵原来的拉伸值为 2.0f 时,对于 sx 的值为 0.5f 时,精灵完成动作后,水平方向的拉伸值就会变为 0.5f;如果 sx 的值为 2.0f 时,精灵完成动作后,水平方向拉伸值就会变为 2.0f。
总的来说,CCScaleTo 动作实现的其实就是 Sprite::setScale 函数的内容,只不过它是一个动作,而且还可以从 X,Y 两个方向上设置拉伸值而已。
CCScaleBy 的 create 函数:
 Static CCScaleBy* CCScaleBy::create(float duration , float sx , float sy);

    /*
     * duration是动作执行持续时间

     * sx是X方向的拉伸倍数(注意,现在是倍数!);

     * sy是Y方向的拉伸倍数;
     */
对于倍数的话,想必大家也就很容易明白。
如果原来精灵的拉伸值是 2.0f,对于 sx 的值为 0.5f 的情况,那么完成动作后,水平拉伸值变为 1.0f;对于 sx 的值为 2.0f 的情况,那么完成动作后,水平拉甚至变为 4.0f。
总的来说就是,CCScaleBy 是将精灵原来的拉伸值乘上相应的倍数。
对于纯文字的说明,想必大家可能不太明白,而且也会觉得很烦躁,毕竟我也是实现派,总喜欢用实例来说明和自己动手实践,所以我们还是通过下面的例子来说明吧。
创建一个名为 ScaleAction 的 Cocos2d-x 项目后,我们修改 HelloWorldScene.cpp 里面 init() 函数的代码如下:
bool MyHelloWorldScene::init(){
	bool bRet=false;
	do
	{
		CC_BREAK_IF(!CCLayer::init());


	       /*
		*  创建第一个精灵,并将拉伸值设为2.0f
		*/
		CCSprite* sprite1=CCSprite::create("fly.png");
		sprite1->setPosition(ccp(100,200));
		sprite1->setScale(2.0f);
		this->addChild(sprite1);

	       /*
	        *  创建第二个精灵,拉伸值同样设为2.0f
		*/
		CCSprite*sprite2=CCSprite::create("fly.png");
		sprite2->setPosition(ccp(400,200));
		sprite2->setScale(2.0f);
		this->addChild(sprite2);


		bRet=true;

	} while (0);

	return bRet;
}
这时候我们可以先看一下运行效果:

bool MyHelloWorldScene::init(){
	bool bRet=false;
	do
	{
		CC_BREAK_IF(!CCLayer::init());


	       /*
		*  创建第一个精灵,并将拉伸值设为2.0f
		*/
		CCSprite* sprite1=CCSprite::create("fly.png");
		sprite1->setPosition(ccp(200,200));
		sprite1->setScale(2.0f);
		this->addChild(sprite1);

	       /*
	        *  创建第二个精灵,拉伸值同样设为2.0f
		*/
		CCSprite*sprite2=CCSprite::create("fly.png");
		sprite2->setPosition(ccp(600,200));
		sprite2->setScale(2.0f);
		this->addChild(sprite2);

		/*
		 * 创建CCScaleTo动作

		 * 动作持续时间设为3秒

		 * X方向拉伸值变为1.5

		 * Y方向拉伸值变为1.5
		 */
		CCScaleTo*scaleTo=CCScaleTo::create(3.0f,1.5f,1.5f);

		/*
		 * 创建CCScaleBy动作

		 * 动作持续时间为3秒

		 * X方向拉伸为原来的1.5倍

		 * Y方向拉伸为原来的1.5倍
		 */
		CCScaleBy*scaleBy=CCScaleBy::create(3.0f,1.5f,1.5f);

		sprite1->runAction(scaleTo);
		sprite2->runAction(scaleBy);
		bRet=true;

	} while (0);

	return bRet;
} 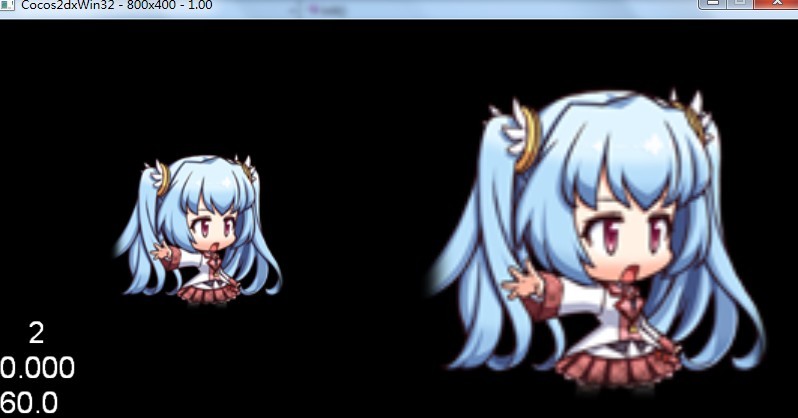
由运行效果大家就可以看得出 CCScaleTo 将精灵的拉伸值由原来的 2.0f 变为 1.5f,所以大小就等于原来的四分之三了;而 CCScaleBy 是将 2.0f 乘上 1.5 倍,所以大小就变为原来的 1.5 倍了。
本文就到此为止了,对于 Coco2d-x,我也是个初学者,所以希望大家能够一起交流,共同进步。谢谢。

Cocos2d 卡牌塔防 游戏 cocos2d-x游戏开发之旅 第14 15 16 章 源代码调试 注意点 出现无法打开包括文件:“cocos2d.h”: No such file or direct
Cocos2d 卡牌塔防 游戏 cocos2d-x游戏开发之旅 第14 15 16 章 源代码调试 注意点
出现无法打开包括文件:“cocos2d.h”: No such file or directory
第一步:把书中源代码文件夹拷贝到以下目录。
打开此文件夹后,显示如下:
用VS2012打开proj.win32里边的Chapter16_2_CardDefence08.win32.vcxproj,按下图打开:
第二步:在附加包含目录中,添加如下代码:
如果出现fatalerror C1083: 无法打开包括文件:“cocos2d.h”:No such file or directory
解决方法如下:选择项目属性--》C/C++--》附件包含目录设置为:
复制:$(ProjectDir)..\..\..\cocos2dx;$(ProjectDir)..\..\..\cocos2dx\include;$(ProjectDir)..\..\..\cocos2dx\kazmath\include;$(ProjectDir)..\..\..\cocos2dx\platform\win32;$(ProjectDir)..\..\..\cocos2dx\platform\third_party\win32\OGLES;..\Classes;%(AdditionalIncludeDirectories);
同时注意把E:\cocos2d-x-2.2.3\extensions
E:\cocos2d-x-2.2.3\cocosDenshion\android
E:\ cocos2d-x-2.2.3\cocos2dx\platform\third_party\win32\libraries
加到C/C++--》附件包含目录中去。
第三步:把E:\cocos2d-x-2.2.3\Debug.win32下的所有lib文件和dll文件拷贝至自己项目的Debug.win32下面。
最终运行成功画面如下:
关于Cocos2d-x游戏开发——图片伸缩CCScaleToCCScaleBy的问题我们已经讲解完毕,感谢您的阅读,如果还想了解更多关于1cocos2dx扩展库UI控件,CCControlSlider,CCScale9Sprite(九妹图),CCControlSwitch,CCControlButton、Android cocos2dx游戏开发——示例程序HelloCpp源码分析、CCScaleTo 与 CCScaleBy 比较、Cocos2d 卡牌塔防 游戏 cocos2d-x游戏开发之旅 第14 15 16 章 源代码调试 注意点 出现无法打开包括文件:“cocos2d.h”: No such file or direct等相关内容,可以在本站寻找。
本文标签:


![[转帖]Ubuntu 安装 Wine方法(ubuntu如何安装wine)](https://www.gvkun.com/zb_users/cache/thumbs/4c83df0e2303284d68480d1b1378581d-180-120-1.jpg)

