想了解【转】web.xmlServlet2.3,2.4,2.5+3.0配置模板的新动态吗?本文将为您提供详细的信息,此外,我们还将为您介绍关于dispatcher-servlet.xml文件配置模板、
想了解【转】web.xml Servlet 2.3, 2.4, 2.5+3.0 配置模板的新动态吗?本文将为您提供详细的信息,此外,我们还将为您介绍关于dispatcher-servlet.xml 文件配置模板、Eclipse新建Servlet时候,不会自动生成mapping到web.xml,而是在代码中加入注解@WebServlet、IDEA创建Servlet并配置web.xml、j2ee 之 web.xml (Servlet 3.0)配置讲解的新知识。
本文目录一览:- 【转】web.xml Servlet 2.3, 2.4, 2.5+3.0 配置模板
- dispatcher-servlet.xml 文件配置模板
- Eclipse新建Servlet时候,不会自动生成mapping到web.xml,而是在代码中加入注解@WebServlet
- IDEA创建Servlet并配置web.xml
- j2ee 之 web.xml (Servlet 3.0)配置讲解

【转】web.xml Servlet 2.3, 2.4, 2.5+3.0 配置模板
web.xml 2.3
<?xml version="1.0" encoding="ISO-8859-1"?>
<!DOCTYPE web-app PUBLIC "-//Sun Microsystems, Inc.//DTD Web Application 2.3//EN" "http://java.sun.com/dtd/web-app_2_3.dtd">

<web-app>

</web-app>
web.xml 2.4
<?xml version="1.0" encoding="UTF-8"?>
<web-app id="WebApp_9" version="2.4" xmlns="http://java.sun.com/xml/ns/j2ee"
    xmlns:xsi="http://www.w3.org/2001/XMLSchema-instance"
    xsi:schemaLocation="http://java.sun.com/xml/ns/j2ee http://java.sun.com/xml/ns/j2ee/web-app_2_4.xsd">

</web-app>
web.xml 2.5
<?xml version="1.0" encoding="UTF-8"?>

<web-app xmlns="http://java.sun.com/xml/ns/javaee"

xmlns:xsi="http://www.w3.org/2001/XMLSchema-instance"

xsi:schemaLocation="http://java.sun.com/xml/ns/javaee http://java.sun.com/xml/ns/javaee/web-app_2_5.xsd"

version="2.5">

</web-app>
web.xml 3.0
<?xml version="1.0" encoding="UTF-8"?>

<web-app
        version="3.0"
        xmlns="http://java.sun.com/xml/ns/javaee"
        xmlns:xsi="http://www.w3.org/2001/XMLSchema-instance"
        xsi:schemaLocation="http://java.sun.com/xml/ns/javaee http://java.sun.com/xml/ns/javaee/web-app_3_0.xsd">

</web-app>
web-fragment.xml
<web-fragment xmlns="http://java.sun.com/xml/ns/javaee"
              xmlns:xsi="http://www.w3.org/2001/XMLSchema-instance"
              xsi:schemaLocation="
        http://java.sun.com/xml/ns/javaee http://java.sun.com/xml/ns/javaee/web-fragment_3_0.xsd" version="3.0">

</web-fragment>

dispatcher-servlet.xml 文件配置模板
完整代码如下:
<?xml version="1.0" encoding="UTF-8"?>
<beans xmlns="http://www.springframework.org/schema/beans"
       xmlns:xsi="http://www.w3.org/2001/XMLSchema-instance"
       xmlns:context="http://www.springframework.org/schema/context"
       xmlns:mvc="http://www.springframework.org/schema/mvc"
       xsi:schemaLocation="http://www.springframework.org/schema/beans http://www.springframework.org/schema/beans/spring-beans.xsd http://www.springframework.org/schema/context http://www.springframework.org/schema/context/spring-context.xsd http://www.springframework.org/schema/mvc http://www.springframework.org/schema/mvc/spring-mvc.xsd">
    <!--启动注解识别,是对包进行扫描,实现注释驱动Bean定义,同时将bean自动注入容器中使用-->
    <context:annotation-config/>
    <!--后台controller程序的路径-->
    <context:component-scan base-package="com.controller"/>

    <!--开通静态资源的访问,即jsp或html文件-->
    <mvc:default-servlet-handler/>
    <!--让所有的Controller能够解析,不可缺少,<mvc:annotation-driven>里面那一整段,用来解决@ResponseBody传输字符串中文乱码问题-->
    <mvc:annotation-driven>
        <mvc:message-converters>
            <bean class="org.springframework.http.converter.StringHttpMessageConverter">
                <property name="supportedMediaTypes">
                    <list>
                        <value>application/json;charset=UTF-8</value>
                    </list>
                </property>
            </bean>
        </mvc:message-converters>
    </mvc:annotation-driven>
    <!-- 视图解析器/定位 -->
    <bean id="internalResourceViewResolver" class="org.springframework.web.servlet.view.InternalResourceViewResolver">
        <!-- 配置前缀 -->
        <property name="prefix" value="/WEB-INF/jsp/"/>
        <!-- 配置后缀 -->
        <property name="suffix" value=".jsp"/>
    </bean>
    <!--文件上传  -->
    <bean id="multipartResolver" class="org.springframework.web.multipart.commons.CommonsMultipartResolver"/>
</beans>

部分截图如下: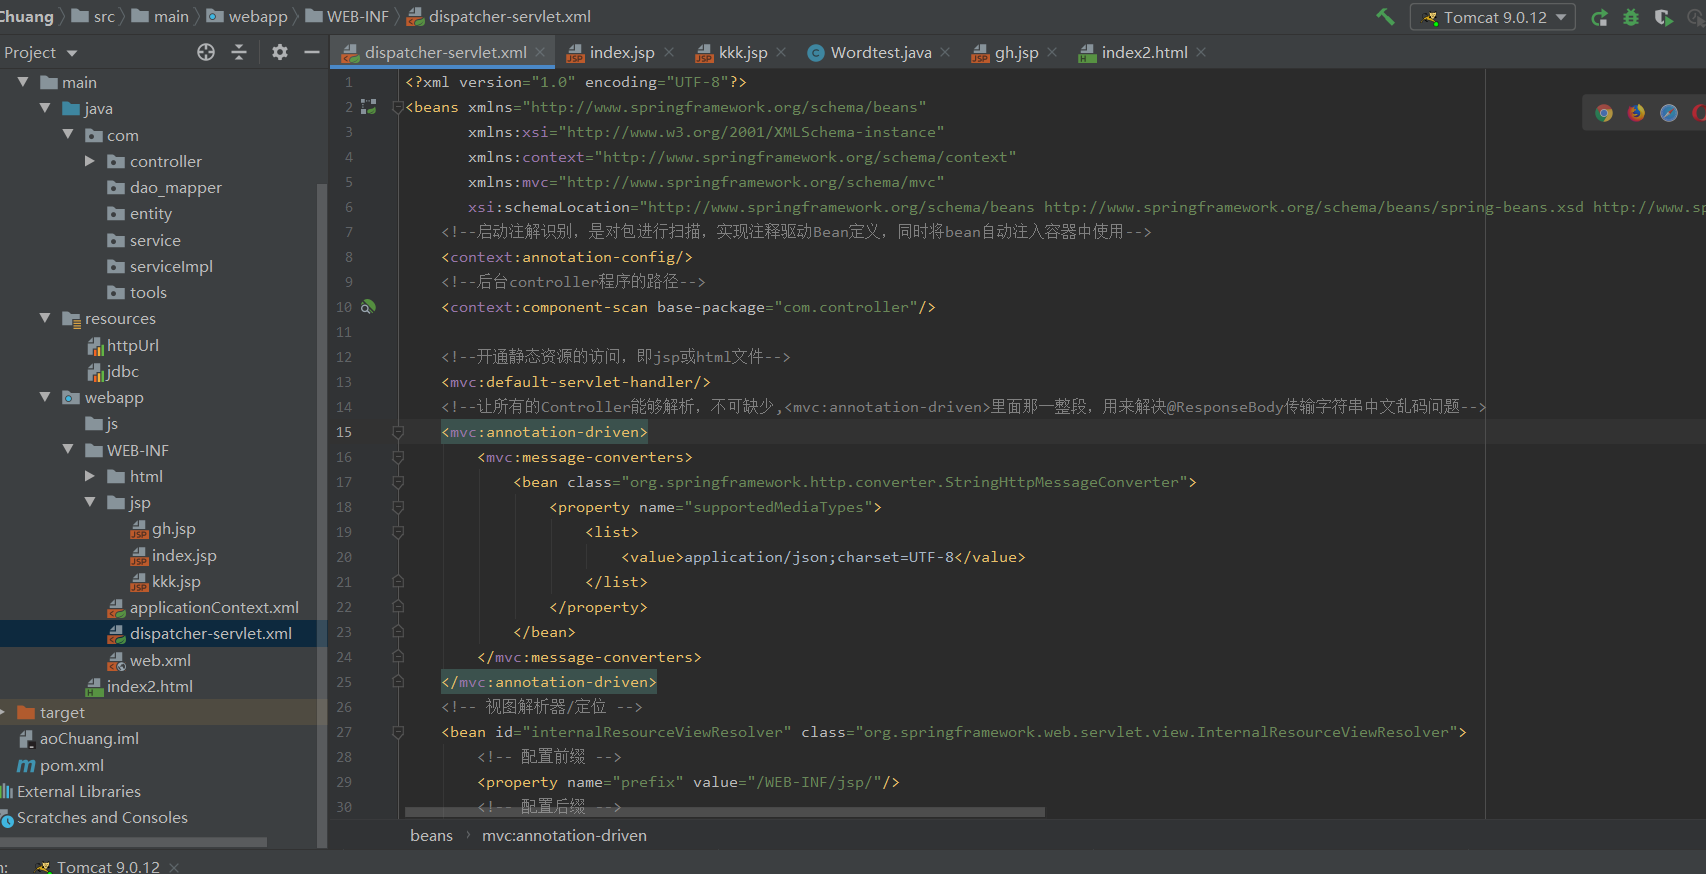

Eclipse新建Servlet时候,不会自动生成mapping到web.xml,而是在代码中加入注解@WebServlet
现象:
用Eclipse新版本新建servlet时候,发现创建Servlet后,Eclipse不会自动在web.xml中生成该Servlet对应的mapping信息,而是在Servlet代码中加入注解@WebServlet,如下
分析:
查找文档发现,这是Servlet3.0新特性(得Tomcat7.0版本及以上),@WebServlet 用于将一个类声明为 Servlet,该注解将会在部署时被容器处理,容器将根据具体的属性配置将相应的类部署为 Servlet。该注解具有下表给出的一些常用属性(以下所有属性均为可选属性,但是 value 或者 urlPatterns 通常是必需的,且二者不能共存,如果同时指定,通常是忽略 value 的取值)
解决方法:
在@WebServlet 中定义Servlet的name、urlPatterns等信息
import javax.servlet.annotation.WebInitParam;
import javax.servlet.annotation.WebServlet;
@WebServlet(
displayName = "This is Login Action", //描述
name = "LoginAction", //servlet名称
urlPatterns = { "/servlet/LoginAction" },//url
loadOnStartup = 1, //启动项
initParams = { @WebInitParam(name = "username", value = "张三") }//初始化参数
)
public class LoginAction extends HttpServlet {
/**
* Constructor of the object.
*/
public LoginAction() {
super();
}
}
Servlet的访问URL是Servlet的必选属性,可以选择使用urlPatterns或者value定义。
像上面的LoginAction可以描述成@WebServlet(name="LoginAction",value="/LoginAction")。
也定义多个URL访问:
如@WebServlet(name="LoginAction",urlPatterns={"/LoginAction","/LoginAction2"})
或者@WebServlet(name="LoginAction",value={"/LoginAction","/LoginAction2"})
这样的简化形式也可以,相当于设置了name和urlPattern
@WebServlet("/servlet/LoginAction")
在新建Servlet时候在URL mapping中可以直接输入

IDEA创建Servlet并配置web.xml
module与project区别
IntelliJ IDEA 中,project相当于eclipse的WorkSpace,module相当于eclipse的project;
IntelliJ中一个 Project 可以包括多个 Module ;
Eclipse中一个 Workspace 可以包括多个 Project。
创建module
创建一个 module

选择Java项目
输入项目名称,选择存储空间,点击 finish 完成创建

添加框架
选中创建的module,右键选择Add Framework Support

选中Web Application

点击OK,这时module下面就会出现相关的web文件

配置Tomcat
点击顶部的Add Configuration...

点击 “ + ” 号,下拉找到 Tomcat Server ,点击 Local
注意:不是TomEE Server

找到Deployment
找到右边 “ + ” 号,选择 Artifact...

最后点击OK,完成配置
创建Servlet并配置web.xml
新建一个servlet

点击 OK

这时候应该会报错,点击Add Java EE 6 JARs to module dependencies

如果有的话导入就行了;没有的话点击 Download ,会自动下载一个。

在上面加上下面这句代码,就OK了
@WebServlet(name = " ",urlPatterns = "/ ")
此时会注意到左边的web已经发生了变化

也可以手动在web.xml文件里进行配置

此时我们就可以通过 /login 去访问了
配置讲解")
j2ee 之 web.xml (Servlet 3.0)配置讲解
web.xml :
是 j2ee 项目最基本的配置文件,是服务器加载项目的入口,
当然 3.0 开始也可以在代码中中配置项目所需要的一系列参数。
在 tomcat conf 中存在 web.xml,项目中的配置都会继承和覆盖该文件的配置。
基本配置:
1. 欢迎文件设置:
<welcome-file-list>
<welcome-file>index.html</welcome-file>
<welcome-file>index.htm</welcome-file>
<welcome-file>index.jsp</welcome-file>
</welcome-file-list>这是 tomcat 中 web.xml 的默认配置,在项目中定义会覆盖之。
2. 错误处理设置:
<error-page>
<error-code>404</error-code>
<location>/notFileFound.jsp</location>
</error-page>
<error-page>
<exception-type>java.lang.NullPointerException</exception-type>
<location>/null.jsp</location>
</error-page>
如果某文件资源没有找到,服务器要报 404 错误,按上述配置则会调用 \webapps\ROOT\notFileFound.jsp。
如果执行的某个 JSP 文件产生 NullPointException ,则会调用 \webapps\ROOT\null.jsp
3. 回话超时设置:
<session-config>
<session-timeout>30</session-timeout>
</session-config>
设置 session 的过期时间,单位是分钟,
tomcat 默认值是 30min.
从 servlet3.0 开始带了许多安全性的设置:
 <session-config>
    会话连接,保持状态的设置:
    <cookie-config>
    <secure>true</secure>
    只允许在SSL下进行交互,默认值为false.
    <http-only>true</http-only> 确保cookie不能被客户端脚本访问。这帮助减轻了一些常见的XSS攻击,默认值为false
    <comment></comment> 会话备注
    <domain></domain> 会话保存域
    <max-age></max-age> 会话保存最大时间,默认值:-1
    <name></name> 会话名称 默认值:JSESSIONID
    <path></path> 会话保存路径

    </cookie-config>
    <tracking-mode>COOKIE</tracking-mode>
    允许你定义JSESSIONID是存储在cookie中还是URL参数中
</session-config>
4. 过滤器设置:
<filter>
    <filter-name>openEntityManagerInViewFilter</filter-name>
    <filter-class>org.springframework.orm.jpa.support.OpenEntityManagerInViewFilter</filter-class>
    <async-supported>true</async-supported>
    </filter>
    <filter-mapping>
    <filter-name>openEntityManagerInViewFilter</filter-name>
    <url-pattern>/*</url-pattern>
</filter-mapping>
1) 身份验证的过滤 Authentication Filters
2) 日志和审核的过滤 Logging and Auditing Filters
3) 图片转化的过滤 Image conversion Filters
4) 数据压缩的过滤 Data compression Filters
5) 加密过滤 Encryption Filters
6) Tokenizing Filters
7) 资源访问事件触发的过滤 Filters that trigger resource access events XSL/T 过滤 XSL/T filters
8) 内容类型的过滤 Mime-type chain Filter 注意监听器的顺序,如:先安全过滤,然后资源,
然后内容类型等,这个顺序可以自己定。
tomcat 内置 filter:SSIFilter ,SetCharacterEncodingFilter, FailedRequestFilter ..
默认为开启。
5.Servlet 管理:
<servlet>
    <servlet-name>default</servlet-name>
    <servlet-class>org.apache.catalina.servlets.DefaultServlet</servlet-class>
    <init-param>
    <param-name>debug</param-name>
    <param-value>0</param-value>
    </init-param>
    <init-param>
    <param-name>listings</param-name>
    <param-value>false</param-value>
    </init-param>
    <load-on-startup>1</load-on-startup>
</servlet>
tomcat 内置 servlet
有默认开启:DefaultServlet,JspServlet,
默认关闭:SSIServlet,CGIServlet
6. 应用 图片表示:
<icon>
    <small-icon>/images/small.gif</small-icon>
    <large-icon>/images/large.gif</large-icon>
</icon>
small :16 X 16,large:32 X 32 。 后缀扩展名:.gif 或.jpg.
7. 应用全局上下文参数
<context-param>
    <param-name>param_name</param-name>
    <param-value>param_value</param-value>
</context-param>
8. 监听器 listener:
<listener>
    <listener-class>org.springframework.web.context.ContextLoaderListener</listener-class>
</listener>
监听器负责监听服务器和应用的各种事件状态。
tomcat 中内容的监听器有
AprLifecycleListener,JasperListener,JreMemoryLeakPreventionListener,
GlobalResourcesLifecycleListener,ThreadLocalLeakPreventionListener
这些监听器都默认配置在 server.xml 中。
9. 媒体映射 <mime-mapping>
<mime-mapping>
    <extension>doc</extension>
    <mime-type>application/msword</mime-type>
</mime-mapping>
在请求静态资源时,tomcat 会根据后缀名来映射媒体类型自动加上 Content-Type 头。
tomcat 内置包含了很多映射配置,如果需要自定义在 web.xml 中追加。
备注:如果自定义代码下载文件一定得加上响应的 Content-Type 头。
10.jsp 配置 <jsp-config>
jsp-config 元素主要用来设定 JSP 的相关配置,<jsp:config> 包括 < taglib > 和 < jsp-property-group > 两个子元素。
<jsp-config>
    <taglib>
        taglib元素包含两个子元素taglib-uri和taglib-location.用来设定JSP网页用到的Tag Library路径.
        <taglib-uri>URI</taglib-uri>
        taglib-uri定义TLD文件的URI,JSP网页的taglib指令可以经由这个URI存取到TLD文件.
        <taglib-location>/WEB-INF/lib/xxx.tld</taglib-laction>
        TLD文件对应Web站台的存放位置.
    </taglib>
    <jsp-property-group>
        <description>Description</descrition>
        此设定的说明
        <display-name>Name</display-name>
        此设定的名称
        <url-pattern>URL</url-pattern>
        设定值所影响的范围,如:/CH2 或者/*.jsp
        <el-ignored>true|false</el-ignored>
        若为true,表示不支持EL语法.
        <scripting-invalid>true|false</scripting-invalid>
        若为true表示不支持<%scription%>语法.
        <page-encoding>encoding</page-encoding>
        设定JSP网页的编码
        <include-prelude>.jspf</include-prelude>
        设置JSP网页的抬头,扩展名为.jspf
        <include-coda>.jspf</include-coda>
        设置JSP网页的结尾,扩展名为.jspf
    </jsp-property-group>
<jsp-config>
11、资源管理对象配置
 <resource-env-ref>
<resource-env-ref-name>jms/StockQueue</resource-env-ref-name>
</resource-env-ref>
12、资源工厂配置
 <resource-ref>
    <res-ref-name>mail/Session</res-ref-name>
    <res-type>javax.mail.Session</res-type>
    <res-auth>Container</res-auth>
</resource-ref>
配置数据库连接池就可在此配置:
<resource-ref>
    <description>JNDI JDBC DataSource of shop</description>
    <res-ref-name>jdbc/sample_db</res-ref-name>
    <res-type>javax.sql.DataSource</res-type>
    <res-auth>Container</res-auth>
</resource-ref>
13、安全限制配置
<security-constraint>
    <display-name>Example Security Constraint</display-name>
    <web-resource-collection>
    <web-resource-name>Protected Area</web-resource-name>
    <url-pattern>/jsp/security/protected/*</url-pattern>
    <http-method>DELETE</http-method>
    <http-method>GET</http-method>
    <http-method>POST</http-method>
    <http-method>PUT</http-method>
    </web-resource-collection>
    <auth-constraint>
    <role-name>tomcat</role-name>
    <role-name>role1</role-name>
    </auth-constraint>
</security-constraint>
14、登陆验证配置
<login-config>
    <auth-method>FORM</auth-method>
    <realm-name>Example-Based Authentiation Area</realm-name>
    <form-login-config>
    <form-login-page>/jsp/security/protected/login.jsp</form-login-page>
    <form-error-page>/jsp/security/protected/error.jsp</form-error-page>
    </form-login-config>
</login-config>
15、安全角色:security-role 元素给出安全角色的一个列表,这些角色将出现在 servlet 元素内的 security-role-ref 元素的 role-name 子元素中。
分别地声明角色可使高级 IDE 处理安全信息更为容易。
<security-role>
    <role-name>tomcat</role-name>
</security-role>
16、Web 环境参数:env-entry 元素声明 Web 应用的环境项
<env-entry>
    <env-entry-name>minExemptions</env-entry-name>
    <env-entry-value>1</env-entry-value>
    <env-entry-type>java.lang.Integer</env-entry-type>
</env-entry>
可参考:
http://www.cnblogs.com/JesseV/archive/2009/11/17/1605015.html
tomcat 如何就加载和解析 web.xml?
加载顺序为:
context-param->listener->filter->servlet
可以参考一下:
http://www.csdn123.com/html/blogs/20130919/71581.htm
http://blog.csdn.net/insistgogo/article/details/22598001
今天关于【转】web.xml Servlet 2.3, 2.4, 2.5+3.0 配置模板的介绍到此结束,谢谢您的阅读,有关dispatcher-servlet.xml 文件配置模板、Eclipse新建Servlet时候,不会自动生成mapping到web.xml,而是在代码中加入注解@WebServlet、IDEA创建Servlet并配置web.xml、j2ee 之 web.xml (Servlet 3.0)配置讲解等更多相关知识的信息可以在本站进行查询。
本文标签:


![[转帖]Ubuntu 安装 Wine方法(ubuntu如何安装wine)](https://www.gvkun.com/zb_users/cache/thumbs/4c83df0e2303284d68480d1b1378581d-180-120-1.jpg)

