这篇文章主要围绕[android]切换界面的通用处理和android页面切换展开,旨在为您提供一份详细的参考资料。我们将全面介绍[android]切换界面的通用处理的优缺点,解答android页面切换
这篇文章主要围绕[android] 切换界面的通用处理和android 页面切换展开,旨在为您提供一份详细的参考资料。我们将全面介绍[android] 切换界面的通用处理的优缺点,解答android 页面切换的相关问题,同时也会为您带来Android popwindow和fragment结合 左侧弹出下拉菜单 切换界面、Android Studio安卓学习笔记(三)Android用户界面的设计布局与组件(一)用户界面布局设计(1)、android Tabhost底部无法完成切换界面、Android UI 界面的问题的实用方法。
本文目录一览:- [android] 切换界面的通用处理(android 页面切换)
- Android popwindow和fragment结合 左侧弹出下拉菜单 切换界面
- Android Studio安卓学习笔记(三)Android用户界面的设计布局与组件(一)用户界面布局设计(1)
- android Tabhost底部无法完成切换界面
- Android UI 界面的问题
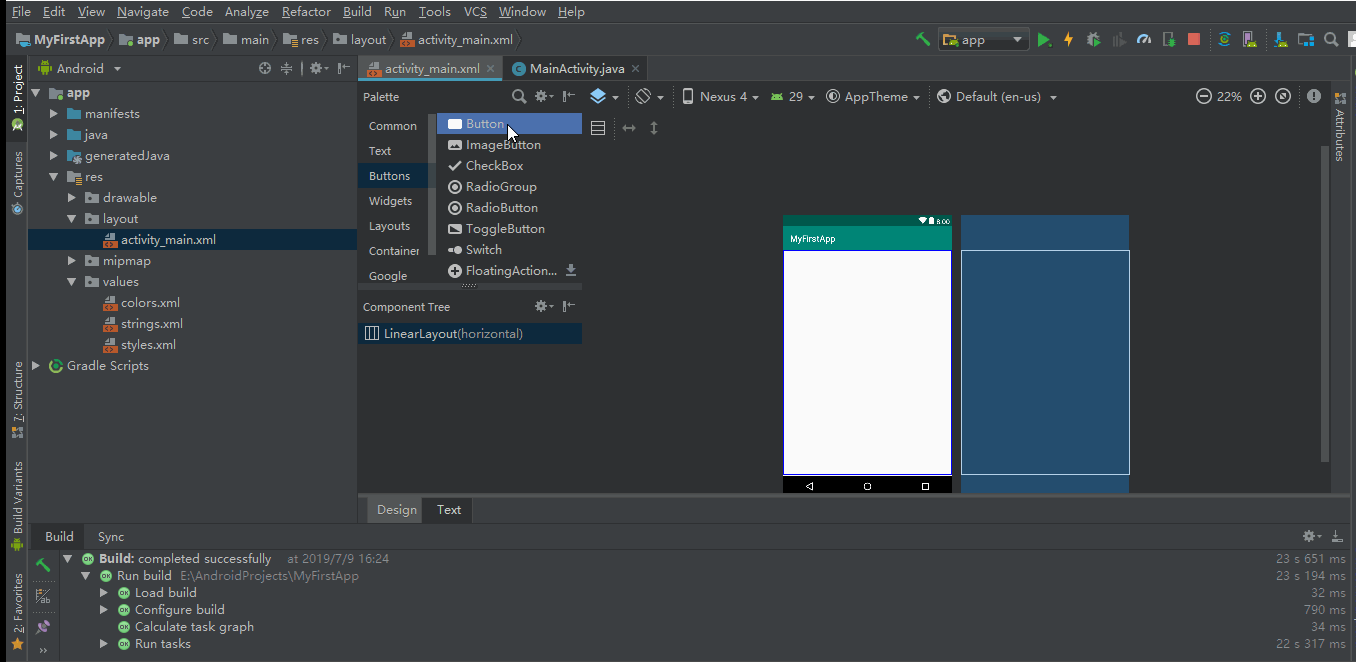
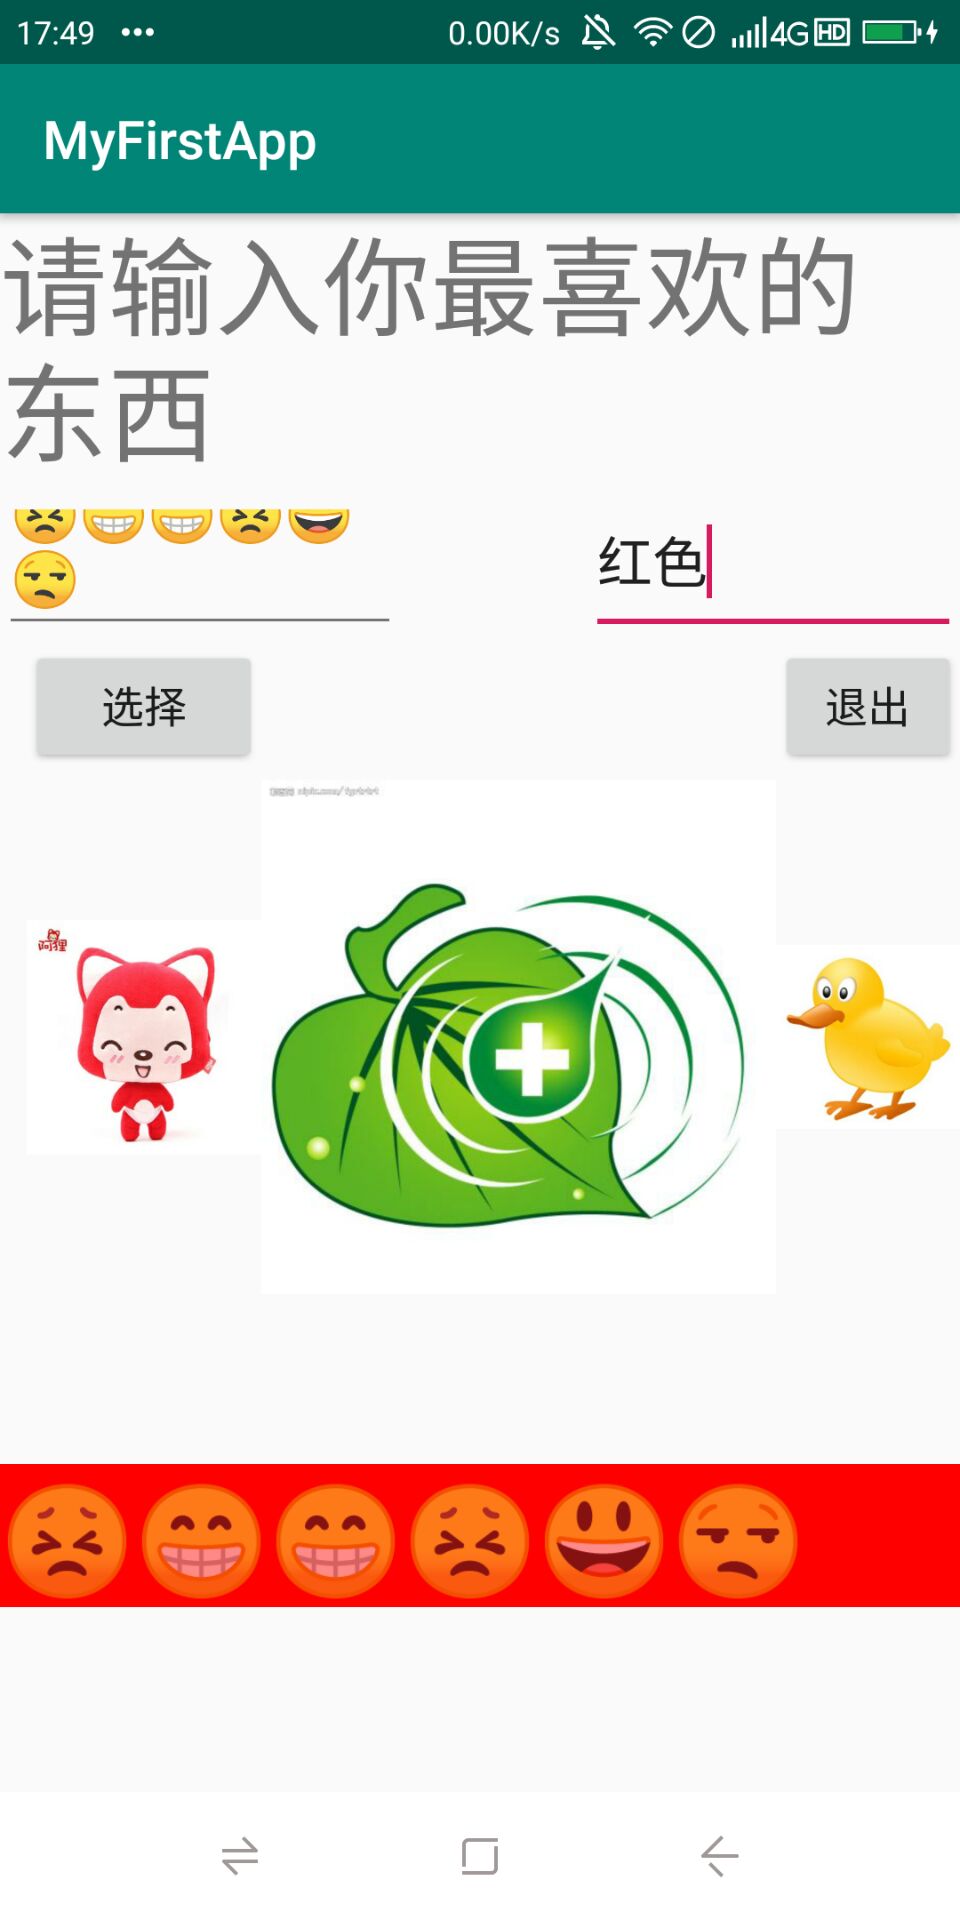
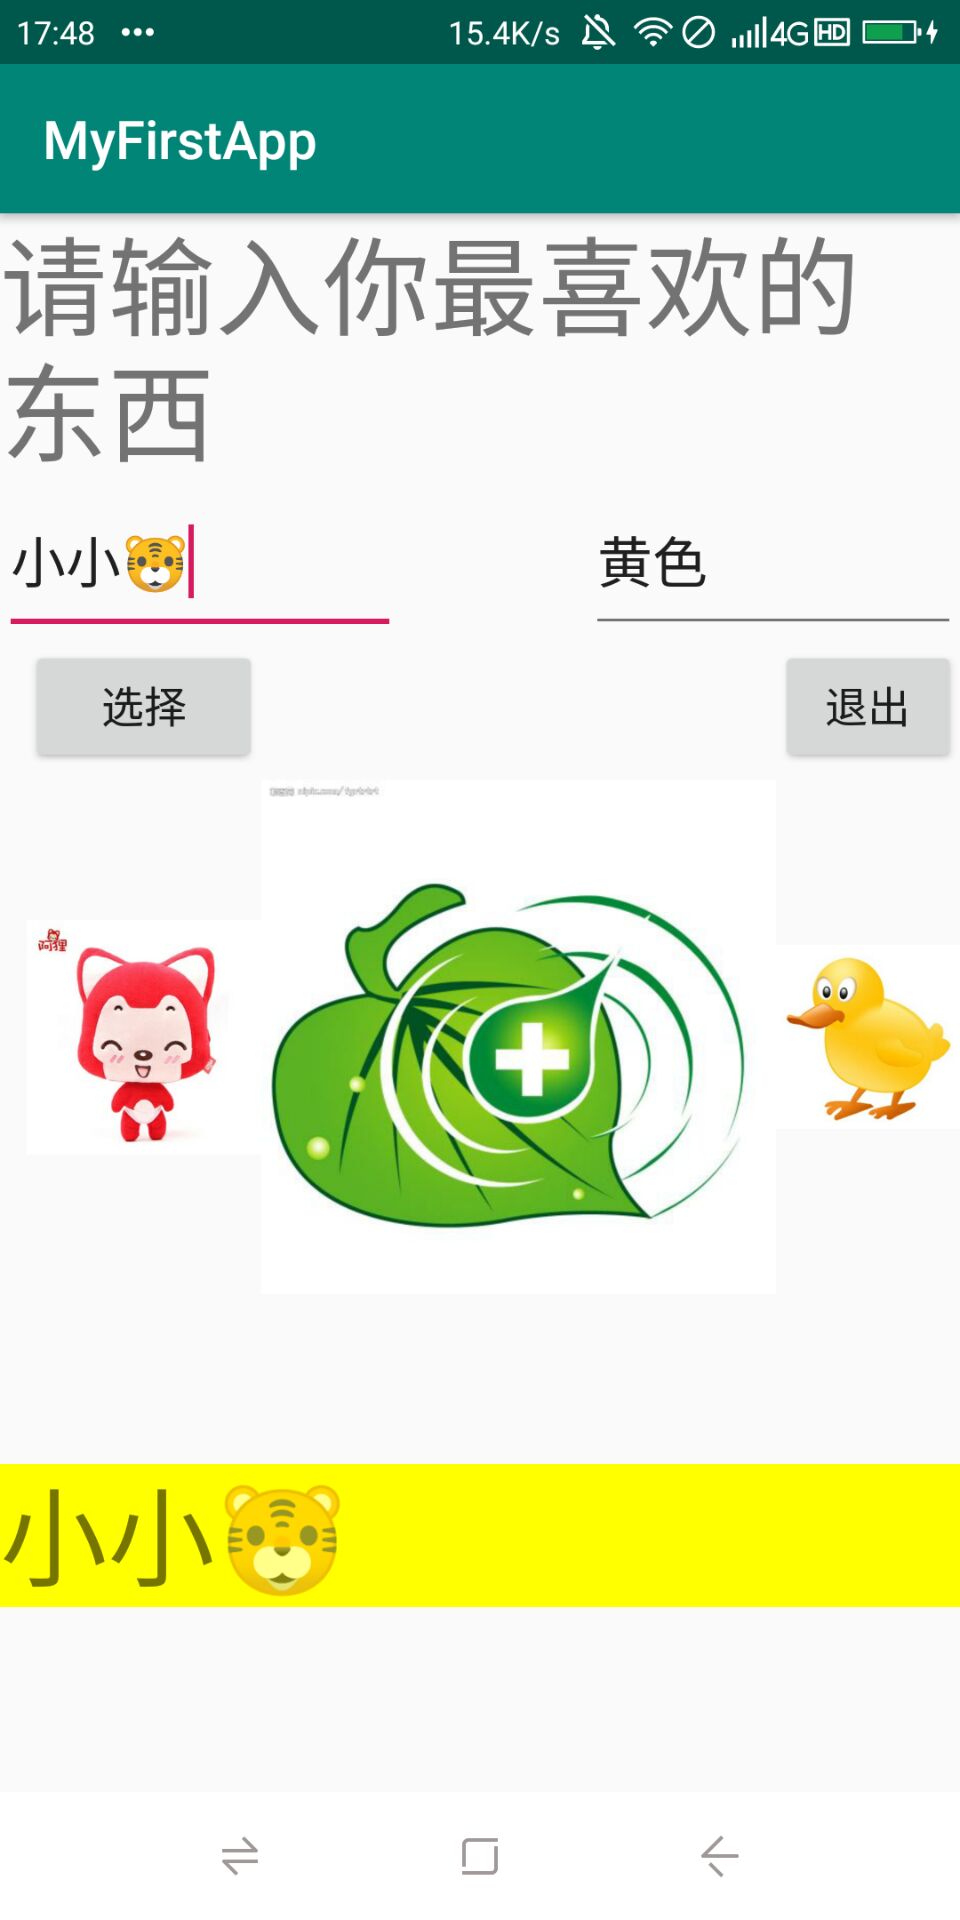
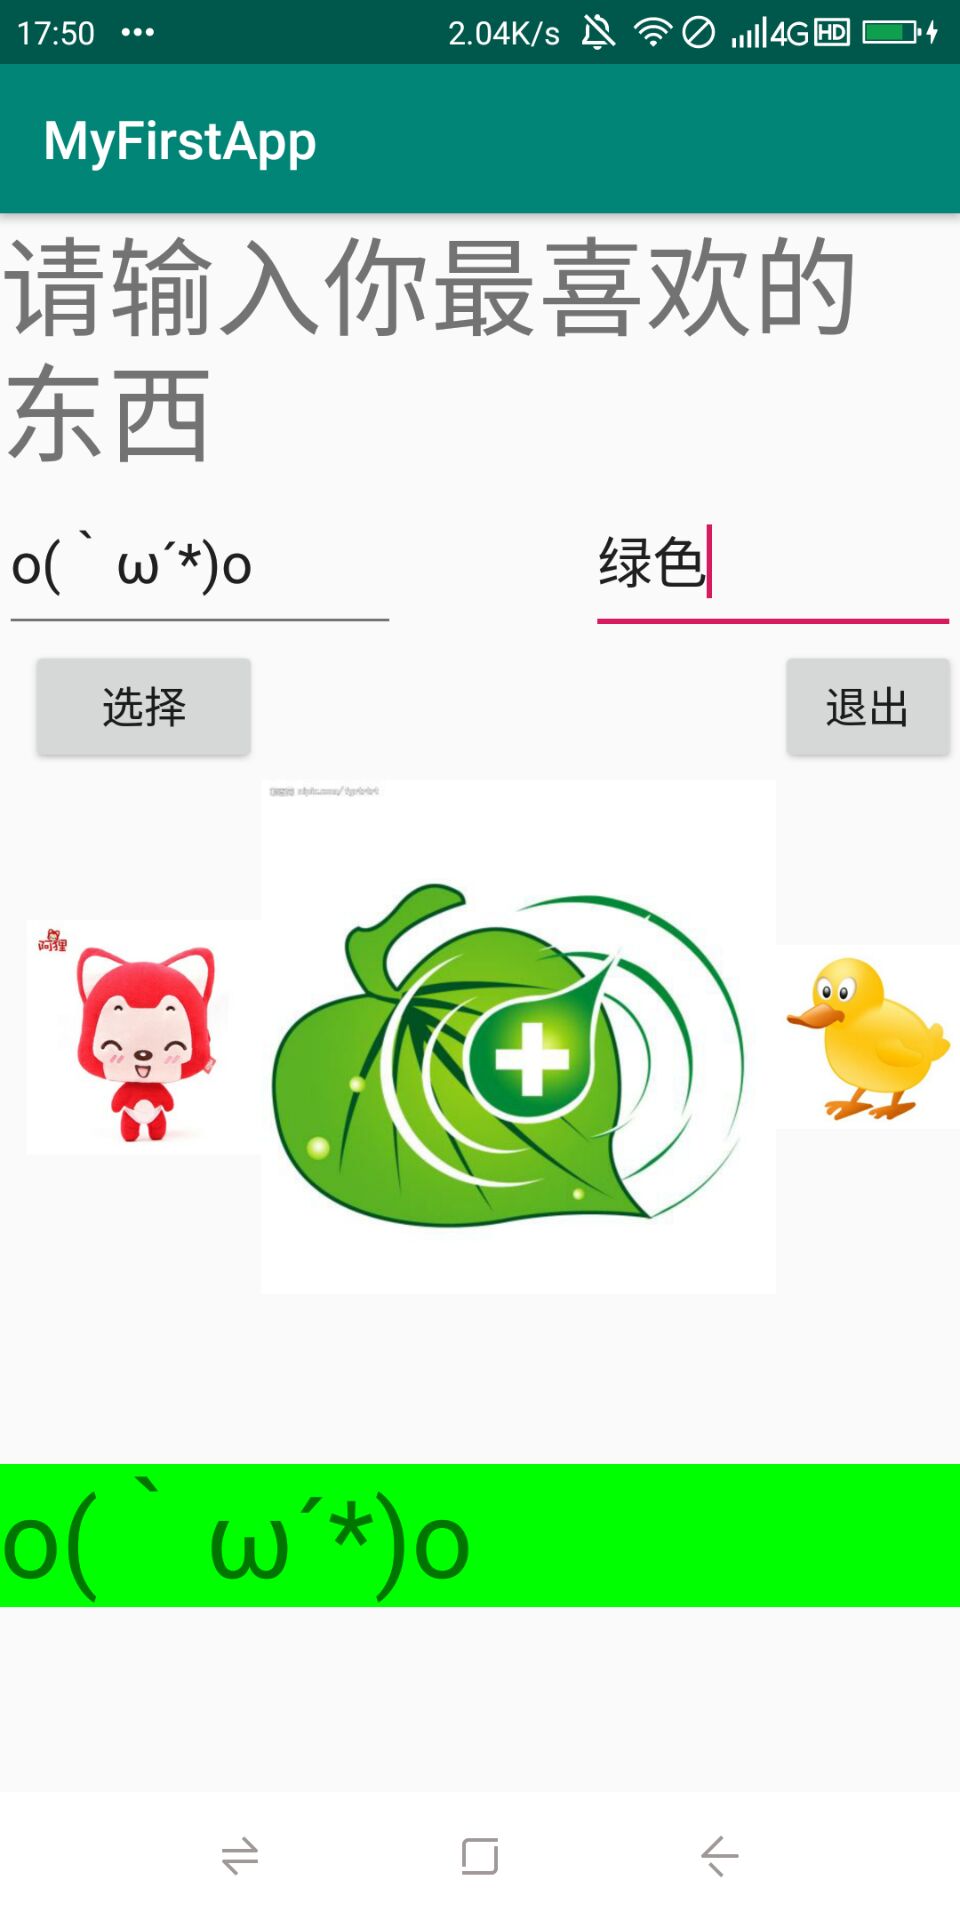
![[android] 切换界面的通用处理(android 页面切换)](http://www.gvkun.com/zb_users/upload/2025/02/b5bc3f27-5e2d-481f-bee7-d464706b7fa91740556959553.jpg "[android] 切换界面的通用处理(android 页面切换)")
[android] 切换界面的通用处理(android 页面切换)
实现不改变activity,只切换View
抽取View界面的基类
利用面向对象多态的思路,实现通用

TitleManager.java 管理标题
package com.tsh.lottery.views;

import android.app.Activity;
 android.view.View;
 android.view.View.OnClickListener;
 android.widget.Button;
 android.widget.RelativeLayout;

 com.tsh.lottery.R;
/**
 * 标题管理
 * @author taoshihan
 *
 */
public class TitleManager {
    private RelativeLayout generalTitle,unloginTitle,loginTitle;
     Button title_login_btn,title_unlogin_btn;
     Activity activity;
    //单例
    private static TitleManager instance=new TitleManager();
     TitleManager(){}
    static TitleManager getInstance(){
        return instance;
    }

     * 初始化标题
     * @param activity
     */
    void init(Activity activity){
        this.activity=activity;
        generalTitle=(RelativeLayout) activity.findViewById(R.id.title_general);
        loginTitle=(RelativeLayout) activity.findViewById(R.id.title_login);
        unloginTitle=(RelativeLayout) activity.findViewById(R.id.title_unlogin);

        title_login_btn=(Button) activity.findViewById(R.id.title_login_btn);
        title_unlogin_btn=(Button) activity.findViewById(R.id.title_unlogin_btn);
        setListener();
    }

     * 设置点击事件
      setListener() {
        登陆按钮
        title_login_btn.setonClickListener( OnClickListener() {
            @Override
             onClick(View v) {
                showLoginTitle();

                BaseView indexView= IndexView(activity);
                MiddleManager.getInstance().loadView(indexView);
            }
        });
        退出按钮
        title_unlogin_btn.setonClickListener( onClick(View v) {
                showUnloginTitle();

                BaseView loginView= LoginView(activity);
                MiddleManager.getInstance().loadView(loginView);
            }
        });
    }

     * 隐藏所有标题
      hideTitle(){
        generalTitle.setVisibility(View.GONE);
        unloginTitle.setVisibility(View.GONE);
        loginTitle.setVisibility(View.GONE);
    }

     * 显示通用的标题
      showGeneralTitle() {
        hideTitle();
        generalTitle.setVisibility(View.VISIBLE);
    }

     * 显示未登录的标题
      showUnloginTitle() {
        hideTitle();
        unloginTitle.setVisibility(View.VISIBLE);
    }

     * 显示已经登陆的标题
      showLoginTitle() {
        hideTitle();
        loginTitle.setVisibility(View.VISIBLE);
    }
}
MiddleManager.java 管理主体内容
 android.view.animation.AnimationUtils;
 com.tsh.lottery.R;

 MiddleManager {
     RelativeLayout mainContainer;
    static MiddleManager manager= MiddleManager();
     MiddleManager(){};
     MiddleManager getInstance(){
         manager;
    }
     setMainContainer(RelativeLayout mainContainer) {
        this.mainContainer = mainContainer;
    }

     * 加载界面
      loadView(BaseView baseView) {
        mainContainer.removeAllViews();
        View child=baseView.getView();
        mainContainer.addView(child);
        child.startAnimation(AnimationUtils.loadAnimation(mainContainer.getContext(),R.anim.left_to_right));
    }
}
BaseView.java
 android.content.Context;

 * 主体View基类
 * abstract  BaseView {
    public Context context;
     BaseView(Context context) {
        this.context = context;
    }
    abstract View getView();
}
IndexView.java
 android.util.AttributeSet;
 android.view.ViewGroup.LayoutParams;
 android.widget.TextView;

 * 会员界面
 * class IndexView extends BaseView{
     IndexView(Context context) {
        super(context);
    }
    @Override
     View getView() {
        TextView tv= TextView(context);
        LayoutParams params= LayoutParams(LayoutParams.MATCH_PARENT,LayoutParams.WRAP_CONTENT);
        tv.setLayoutParams(params);
        tv.setText("我是会员界面");
         tv;
    }
}
MainActivity.java 管理容器
 com.tsh.lottery;

 java.lang.reflect.Field;

 android.os.Bundle;
 android.os.Handler;
 android.os.Message;
 android.view.Menu;
 android.view.MenuInflater;
 android.view.ViewConfiguration;
 com.tsh.lottery.views.BaseView;
 com.tsh.lottery.views.IndexView;
 com.tsh.lottery.views.LoginView;
 com.tsh.lottery.views.MiddleManager;
 com.tsh.lottery.views.TitleManager;

class MainActivity  Activity {
     RelativeLayout mainContainer;
    @Override
    protected  onCreate(Bundle savedInstanceState) {
        .onCreate(savedInstanceState);
        setContentView(R.layout.il_main);
        getActionBar();
        setoverflowMenuQues();
        initTitle();
        initMiddle();
    }

     * 初始化主体
      initMiddle() {
        mainContainer=(RelativeLayout) findViewById(R.id.il_main);
        BaseView loginView=new LoginView(this);
        MiddleManager.getInstance().setMainContainer(mainContainer);
        MiddleManager.getInstance().loadView(loginView);
    }

     * 初始化标题
      initTitle() {
        TitleManager manager=TitleManager.getInstance();
        manager.init();
        manager.showUnloginTitle();
    }

Android popwindow和fragment结合 左侧弹出下拉菜单 切换界面
延续上一篇文章Android 实现对话框圆角功能 ,在项目推进的过程当中,之前是已经用popwindow实现了点击按钮,在按钮下方弹出下拉菜单,实现了类似微信右上角加好友的功能,有兴趣的朋友,可以下载这个资源。回归主题,之前popwindow的使用,是固定在了登陆刚进去的界面,假设现在点击了左侧菜单的其他按钮,这就要求标题下方的内容必须更新所要显示的内容,一开始想都没想,就用了如下代码进行跳转:
- Intent intent = new Intent(Intent.ACTION_EDIT, null);
- startActivity(intent);
这样做的确是能跳转到另一个显示界面,但所有的xml文件、下拉popwindow菜单,都得重新在activity重复使用,关键是跳转到这个界面,如果点击下拉菜单的其他按钮,这个时候又得重新写
- Intent intent = new Intent(Intent.ACTION_EDIT, null);
- startActivity(intent);
陷入了一个死循环,假设有10个菜单项,我就得写相同的代码10次,而且intent跳来跳去的,代码太乱,无法进行管理,非常难以忍受。所以就想着android应该有提供这样的类可以保持左侧不变,或者其他部分可以动态更新,很高兴找到了actvitygroup这个类,下载的demo运行之后,的确是能解决,但已经不推荐使用这个类,所以就决定使用fragment来进行界面的动态切换。下面是工程代码:
1.主界面文件,里面存放着一个FrameLayout,可以用你想呈现的界面进行更换,也就是fragment,类似于单独的activity。
- <LinearLayout xmlns:android="http://schemas.android.com/apk/res/android"
- xmlns:tools="http://schemas.android.com/tools"
- android:layout_width="match_parent"
- android:layout_height="match_parent"
- android:orientation="vertical"
- tools:context=".MainActivity" >
- <RelativeLayout
- android:layout_width="fill_parent"
- android:layout_height="50dp"
- android:background="@color/menu_background"
- android:orientation="horizontal" >
- <Button
- android:id="@+id/popBtn"
- android:layout_width="30dp"
- android:layout_height="30dp"
- android:layout_marginTop="8dp"
- android:background="@drawable/image2"
- android:textColor="@color/white" />
- <TextView
- android:id="@+id/textView1"
- android:layout_width="fill_parent"
- android:layout_height="wrap_content"
- android:layout_centerInParent="true"
- android:gravity="center"
- android:text="测试"
- android:textColor="@color/white"
- android:textSize="30dp" />
- <Button
- android:id="@+id/menu_person"
- android:layout_width="30dp"
- android:layout_height="30dp"
- android:layout_alignParentRight="true"
- android:layout_marginTop="8dp"
- android:background="@drawable/image1" />
- </RelativeLayout>
- <span style="font-size:18px;color:#ff0000;background-color: rgb(255, 255, 102);"><strong>//这是关键点,用来动态替换frament,更换界面</strong></span>
- <FrameLayout
- android:id="@+id/fragment_container"
- android:layout_width="fill_parent"
- android:layout_height="fill_parent"
- android:layout_weight="1"
- android:background="@color/background"
- />
- </LinearLayout>
2.定义好了主界面,就得编写你要替换的界面xml文件,就是不同的布局文件如下:
- <?xml version="1.0" encoding="utf-8"?>
- <LinearLayout xmlns:android="http://schemas.android.com/apk/res/android"
- android:layout_width="fill_parent"
- android:layout_height="fill_parent"
- android:background="@color/background"
- android:orientation="vertical" >
- <!-- 用戶狀態欄 -->
- <LinearLayout
- android:layout_width="fill_parent"
- android:layout_height="25dp"
- android:orientation="horizontal" >
- <TextView
- android:layout_width="fill_parent"
- android:layout_height="match_parent"
- android:layout_weight="1"
- android:gravity="center"
- android:text="测试"
- android:textColor="@color/white"
- android:textSize="12dp" />
- <TextView
- android:id="@+id/price_trademargin"
- android:layout_width="fill_parent"
- android:layout_height="match_parent"
- android:layout_weight="1"
- android:gravity="center"
- android:textColor="@color/white"
- android:textSize="12dp" />
- <TextView
- android:layout_width="fill_parent"
- android:layout_height="match_parent"
- android:layout_weight="1"
- android:gravity="center"
- android:text="测试"
- android:textColor="@color/white"
- android:textSize="12dp" />
- <TextView
- android:id="@+id/price_floatpl"
- android:layout_width="fill_parent"
- android:layout_height="match_parent"
- android:layout_weight="1"
- android:gravity="center"
- android:textColor="@color/white"
- android:textSize="12dp" />
- </LinearLayout>
- </LinearLayout>
第二个fragment2的布局文件:
- <?xml version="1.0" encoding="utf-8"?>
- <LinearLayout xmlns:android="http://schemas.android.com/apk/res/android"
- android:layout_width="fill_parent"
- android:layout_height="fill_parent"
- android:background="@color/background"
- android:orientation="vertical">
- <!-- 用戶狀態欄 -->
- <LinearLayout
- android:layout_width="fill_parent"
- android:layout_height="25dp"
- android:orientation="horizontal" >
- <TextView
- android:layout_width="fill_parent"
- android:layout_height="match_parent"
- android:layout_weight="1"
- android:gravity="center"
- android:text="@string/trademargin"
- android:textColor="@color/white"
- android:textSize="12dp" />
- <TextView
- android:id="@+id/price_trademargin"
- android:layout_width="fill_parent"
- android:layout_height="match_parent"
- android:layout_weight="1"
- android:gravity="center"
- android:textColor="@color/white"
- android:textSize="12dp" />
- <TextView
- android:layout_width="fill_parent"
- android:layout_height="match_parent"
- android:layout_weight="1"
- android:gravity="center"
- android:text="@string/floatpl"
- android:textColor="@color/white"
- android:textSize="12dp" />
- <TextView
- android:id="@+id/price_floatpl"
- android:layout_width="fill_parent"
- android:layout_height="match_parent"
- android:layout_weight="1"
- android:gravity="center"
- android:textColor="@color/white"
- android:textSize="12dp" />
- </LinearLayout>
- <LinearLayout
- android:layout_width="fill_parent"
- android:layout_height="wrap_content"
- android:orientation="horizontal" >
- <TextView
- android:layout_width="@dimen/activity_price_inst_width"
- android:layout_height="@dimen/price_table_comm_height"
- android:background="@drawable/tableheader"
- android:gravity="center"
- android:text="@string/price_table_ccy"
- android:textColor="@color/price_tableheader_forcolor"
- android:textSize="@dimen/price_table_header_font_size" />
- <TextView
- android:layout_width="@dimen/activity_price_chart_width"
- android:layout_height="@dimen/price_table_comm_height"
- android:background="@drawable/tableheader"
- android:gravity="center"
- android:text=""
- android:textColor="@color/white" />
- <com.android.fragmentnormal.AlloneHorizontalScrollView
- android:id="@+id/HorizontalScrollView_1"
- android:layout_width="fill_parent"
- android:layout_height="wrap_content"
- android:scrollbars="none" >
- </com.android.fragmentnormal.AlloneHorizontalScrollView>
- </LinearLayout>
- <ScrollView
- android:layout_width="fill_parent"
- android:layout_height="fill_parent"
- android:background="@color/background" >
- <RelativeLayout
- android:layout_width="fill_parent"
- android:layout_height="match_parent"
- android:background="@color/background" >
- <TableLayout
- android:id="@+id/left_table"
- android:layout_width="@dimen/price_left_table_width"
- android:layout_height="fill_parent"
- android:background="@color/background"
- android:orientation="vertical" >
- </TableLayout>
- <com.android.fragmentnormal.AlloneHorizontalScrollView
- android:id="@+id/HorizontalScrollView_2"
- android:layout_width="fill_parent"
- android:layout_height="wrap_content"
- android:layout_toRightOf="@+id/left_table"
- android:background="@color/background" >
- <TableLayout
- android:id="@+id/data_table"
- android:layout_width="fill_parent"
- android:layout_height="fill_parent"
- android:background="@color/background"
- android:orientation="vertical" >
- </TableLayout>
- </com.android.fragmentnormal.AlloneHorizontalScrollView>
- </RelativeLayout>
- </ScrollView>
- </LinearLayout>
3.编写主类,对你的两个fragment进行管理,决定一开始显示哪个,点击按钮之后切换显示哪个fragment。
- package com.android.fragmentnormal;
- import android.os.Bundle;
- import android.support.v4.app.Fragment;
- import android.support.v4.app.FragmentActivity;
- import android.support.v4.app.FragmentManager;
- import android.support.v4.app.FragmentTransaction;
- import android.util.DisplayMetrics;
- import android.view.MotionEvent;
- import android.view.View;
- import android.view.View.OnClickListener;
- import android.view.ViewGroup;
- import android.widget.Button;
- import android.widget.PopupWindow;
- public class MainActivity extends FragmentActivity {
- FragmentManager manager ;
- Fragment f1,f2,f3 ;
- Button pop;
- private PopupWindow popupWindow;
- @Override
- protected void onCreate(Bundle savedInstanceState) {
- super.onCreate(savedInstanceState);
- setContentView(R.layout.activity_main);
- manager= getSupportFragmentManager() ;
- FragmentTransaction transaction = manager.beginTransaction() ;
- f1 = new Fragment1();
- f2 = new Fragment2();
- f3 = new Fragment3();
- pop = (Button) findViewById(R.id.popBtn);
- pop.setOnClickListener(popClick);
- transaction.add(R.id.fragment_container, f2);
- transaction.commit();
- }
- // 点击弹出左侧菜单的显示方式
- OnClickListener popClick = new OnClickListener() {
- @Override
- public void onClick(View v) {
- /*Toast toast = Toast.makeText(MainActivity.this, "这是一个代图片的Toast!", Toast.LENGTH_LONG);
- toast.show();*/
- getPopupWindow();
- // 这里是位置显示方式,在按钮的左下角
- popupWindow.showAsDropDown(v);
- }
- };
- /**
- * 创建PopupWindow
- */
- protected void initPopuptWindow() {
- // 获取自定义布局文件pop.xml的视图
- View popupWindow_view = getLayoutInflater().inflate(R.layout.pop, null,
- false);
- DisplayMetrics dm = new DisplayMetrics();
- getWindowManager().getDefaultDisplay().getMetrics(dm);
- // 创建PopupWindow实例,200,150分别是宽度和高度
- popupWindow = new PopupWindow(popupWindow_view, 350,
- ViewGroup.LayoutParams.MATCH_PARENT, true);
- // popupWindow.setWidth(350);
- // popupWindow.setHeight(dm.heightPixels * 20 / 2);
- // 设置动画效果
- popupWindow.setAnimationStyle(R.style.AnimationFade);
- // 点击其他地方消失
- popupWindow_view.setOnTouchListener(new View.OnTouchListener() {
- @Override
- public boolean onTouch(View v, MotionEvent event) {
- if (popupWindow != null && popupWindow.isShowing()) {
- popupWindow.dismiss();
- popupWindow = null;
- }
- return false;
- }
- });
- // pop.xml视图里面的控件
- initOpenMenuItem(popupWindow_view);
- initOpenMenuOther(popupWindow_view);
- initOpenPosition(popupWindow_view);
- }
- /*
- * 2015年7月13日17:35:24,
- * author:qiulinhe
- * 添加对于开仓单的监听和界面增加
- */
- private void initOpenPosition(View popupWindow_view) {
- DrawableCenterTextView menu_open = (DrawableCenterTextView) popupWindow_view
- .findViewById(R.id.menu_open);
- // pop.xml视图里面的控件触发的事件
- menu_open.setOnClickListener(new OnClickListener() {
- <span style="font-size:18px;color:#ff0000;"><strong>FragmentTransaction transaction ;//对fragment进行跳转控制。</strong></span>
- @Override
- public void onClick(View v) {
- <strong><span style="font-size:18px;color:#ff0000;">transaction = manager.beginTransaction();
- transaction.replace(R.id.fragment_container, f1);//把f1的界面替换container
- transaction.commit();
- popupWindow.dismiss();</span></strong>
- }
- });
- }
- <strong><span style="font-size:18px;color:#33cc00;">//初始化左侧下拉菜单的按钮</span></strong>
- private void initOpenMenuOther(View popupWindow_view) {
- DrawableCenterTextView menu_open = (DrawableCenterTextView) popupWindow_view
- .findViewById(R.id.menu_open);
- DrawableCenterTextView menu_order = (DrawableCenterTextView) popupWindow_view
- .findViewById(R.id.menu_order);
- DrawableCenterTextView menu_orderhis = (DrawableCenterTextView) popupWindow_view
- .findViewById(R.id.menu_orderhis);
- DrawableCenterTextView menu_closehis = (DrawableCenterTextView) popupWindow_view
- .findViewById(R.id.menu_closehis);
- DrawableCenterTextView menu_summary = (DrawableCenterTextView) popupWindow_view
- .findViewById(R.id.menu_summary);
- DrawableCenterTextView menu_pricewarning = (DrawableCenterTextView) popupWindow_view
- .findViewById(R.id.menu_pricewarning);
- DrawableCenterTextView menu_news = (DrawableCenterTextView) popupWindow_view
- .findViewById(R.id.menu_news);
- DrawableCenterTextView menu_margin = (DrawableCenterTextView) popupWindow_view
- .findViewById(R.id.menu_margin);
- DrawableCenterTextView menu_message = (DrawableCenterTextView) popupWindow_view
- .findViewById(R.id.menu_message);
- DrawableCenterTextView menu_syssett = (DrawableCenterTextView) popupWindow_view
- .findViewById(R.id.menu_syssett);
- DrawableCenterTextView menu_about = (DrawableCenterTextView) popupWindow_view
- .findViewById(R.id.menu_about);
- }
- private void initOpenMenuItem(View popupWindow_view) {
- DrawableCenterTextView menu_price = (DrawableCenterTextView) popupWindow_view
- .findViewById(R.id.menu_price);
- // 打开
- menu_price.setOnClickListener(new OnClickListener() {
- @Override
- public void onClick(View v) {
- }
- });
- }
- /***
- * 获取PopupWindow实例
- */
- private void getPopupWindow() {
- if (null != popupWindow) {
- popupWindow.dismiss();
- return;
- } else {
- initPopuptWindow();
- }
- }
- }
4.frament1的代码如下:河北哪里找富婆包养男人 内蒙古哪里找富婆包养男人 吉林哪里找富婆包养男人 上海哪里找富婆包养男人 福建哪里找富婆包养男人 山东哪里找富婆包养男人 湖北哪里找富婆包养男人 广东哪里找富婆包养男人 重庆哪里找富婆包养男人 四川哪里找富婆包养男人 云南哪里找富婆包养男人 陕西哪里找富婆包养男人 青海哪里找富婆包养男人 西城哪里找富婆包养男人 丰台哪里找富婆包养男人 海淀哪里找富婆包养男人 宝坻哪里找富婆包养男人 昌平哪里找富婆包养男人 平谷哪里找富婆包养男人 延庆哪里找富婆包养男人 河西哪里找富婆包养男人 红桥哪里找富婆包养男人 西青哪里找富婆包养男人 北辰哪里找富婆包养男人 宁河哪里找富婆包养男人 静海哪里找富婆包养男人 宁波哪里找富婆包养男人 绍兴哪里找富婆包养男人 舟山哪里找富婆包养男人 合肥哪里找富婆包养男人 蚌埠哪里找富婆包养男人 马鞍山哪里找富婆包养男人 铜陵哪里找富婆包养男人 六安哪里找富婆包养男人 厦门哪里找富婆包养男人 三明哪里找富婆包养男人 连云港哪里找富婆包养男人 盐城哪里找富婆包养男人 秦州哪里找秦富婆包养男人 广州哪里找富婆包养男人 深圳哪里找富婆包养男人 汕头哪里找富婆包养男人 江门哪里找富婆包养男人 惠州哪里找富婆包养男人 汕尾哪里找富婆包养男人 阳江哪里找富婆包养男人 东莞哪里找富婆包养男人 萧山哪里找富婆包养男人 揭阳哪里找富婆包养男人 南宁哪里找富婆包养男人 北海哪里找富婆包养男人 来宾哪里找富婆包养男人 九江哪里找富婆包养男人 宜春哪里找富婆包养男人 惠州怎么找富婆包养男人 汕尾怎么找富婆包养男人 汕头怎么找富婆包养男人 青岛哪里找富婆包养男人 洛阳哪里找富婆包养男人 安阳哪里找富婆包养男人 焦作哪里找富婆包养男人 许昌哪里找富婆包养男人 三门峡哪里找富婆包养男人 商丘哪里找富婆包养男人 周口哪里找富婆包养男人 济源哪里找富婆包养男人 十堰哪里找富婆包养男人 荆州哪里找富婆包养男人 咸宁哪里找富婆包养男人 天门哪里找富婆包养男人 神农架哪里找富婆包养男人 湘潭哪里找富婆包养男人 张家界哪里找富婆包养男人 益阳哪里找富婆包养男人 永州哪里找富婆包养男人 湘西哪里找富婆包养男人 齐齐哈尔哪里找富婆包养男人 鹤岗哪里找富婆包养男人 大庆哪里找富婆包养男人 佳木斯哪里找富婆包养男人 黄浦哪里找富婆包养男人 徐汇哪里找富婆包养男人 静安哪里找富婆包养男人 闸北哪里找富婆包养男人 杨浦哪里找杨富婆包养男人 无锡哪里找富婆包养男人 渝中哪里找富婆包养男人 江北哪里找富婆包养男人 九龙坡哪里找富婆包养男人 北碚哪里找富婆包养男人 双桥哪里找富婆包养男人 巴南哪里找富婆包养男人 綦江哪里找富婆包养男人 铜梁哪里找富婆包养男人 荣昌哪里找富婆包养男人 梁平哪里找富婆包养男人 丰都哪里找富婆包养男人 武隆哪里找富婆包养男人 开县哪里找富婆包养男人 奉节哪里找富婆包养男人 巫溪哪里找富婆包养男人 石柱哪里找富婆包养男人 江津哪里找富婆包养男人 永川哪里找富婆包养男人 成都哪里找富婆包养男人 攀枝花哪里找富婆包养男人 德阳哪里找富婆包养男人 广元哪里找富婆包养男人 内江哪里找富婆包养男人 眉山哪里找富婆包养男人 广安哪里找富婆包养男人 雅安哪里找富婆包养男人 阿坝哪里找富婆包养男人 凉山哪里找富婆包养男人 六盘水哪里找富婆包养男人 安顺哪里找富婆包养男人 黔西南哪里找富婆包养男人 黔东南哪里找富婆包养男人 昆明哪里找富婆包养男人 玉溪哪里找富婆包养男人 昭通哪里找富婆包养男人 普洱哪里找富婆包养男人 楚雄哪里找富婆包养男人 文山哪里找富婆包养男人 大理哪里找富婆包养男人 怒江哪里找富婆包养男人 昌都哪里找富婆包养男人 日喀则哪里找富婆包养男人 阿里哪里找富婆包养男人 西安哪里找富婆包养男人 宝鸡哪里找富婆包养男人 渭南哪里找富婆包养男人 汉中哪里找富婆包养男人 兰州市哪里找富婆包养男人 金昌哪里找富婆包养男人 天水哪里找富婆包养男人 张掖哪里找富婆包养男人 酒泉哪里找富婆包养男人 定西哪里找富婆包养男人 临夏哪里找富婆包养男人 西宁哪里找富婆包养男人 海北哪里找富婆包养男人 海南哪里找富婆包养男人 玉树哪里找富婆包养男人 银川哪里找富婆包养男人 邯郸哪里找富婆包养男人 保定哪里找富婆包养男人 廊坊哪里找富婆包养男人 太原哪里找富婆包养男人 阳泉哪里找富婆包养男人 晋城哪里找富婆包养男人 晋中哪里找富婆包养男人 忻州哪里找富婆包养男人 吕梁哪里找富婆包养男人 包头哪里找富婆包养男人 鄂尔多斯哪里找富婆包养男人 巴彦淖尔哪里找富婆包养男人 兴安哪里找富婆包养男人 阿拉善哪里找富婆包养男人 大连哪里找富婆包养男人 抚顺哪里找富婆包养男人 丹东哪里找富婆包养男人 营口哪里找富婆包养男人 辽阳哪里找富婆包养男人 长春哪里找富婆包养男人 铁岭哪里找富婆包养男人 辽源哪里找富婆包养男人 白山哪里找富婆包养男人 白城哪里找富婆包养男人 杨浦哪里找富婆包养男人 宝山哪里找富婆包养男人 浦东新哪里找富婆包养男人 松江哪里找富婆包养男人 南京哪里找富婆包养男人 秀山哪里找富婆包养男人 酉阳哪里找富婆包养男人 承德哪里找富婆包养男人 徐州哪里找富婆包养男人 苏州哪里找富婆包养男人 彭水哪里找富婆包养男人 南川哪里找富婆包养男人 漳州哪里找富婆包养男人 南平哪里找富婆包养男人 南昌哪里找富婆包养男人 格尔木哪里找富婆包养男人 同仁哪里找富婆包养男人 丰都哪里找富婆包养男人 贵池哪里找富婆包养男人 屯溪哪里找富婆包养男人 福安哪里找富婆包养男人 敦煌哪里找富婆包养男人 金昌哪里找富婆包养男人 顺德哪里找富婆包养男人 开平哪里找富婆包养男人 凯里哪里找富婆包养男人 新城哪里找富婆包养男人 伊春哪里找富婆包养男人 武穴哪里找富婆包养男人 常熟哪里找富婆包养男人 江都哪里找富婆包养男人 昆山哪里找富婆包养男人 周庄哪里找富婆包养男人 同里哪里找富婆包养男人 沭阳哪里找富婆包养男人 庐山哪里找富婆包养男人 珲春哪里找富婆包养男人 东胜哪里找富婆包养男人 集宁哪里找富婆包养男人 莱芜哪里找富婆包养男人 离石哪里找富婆包养男人 商州哪里找富婆包养男人 汶川哪里找富婆包养男人 乐山哪里找富婆包养男人 马尔康哪里找富婆包养男人 吉林哪里找富婆包养男人 福建哪里找富婆包养男人 湖北哪里找富婆包养男人 重庆哪里找富婆包养男人 云南哪里找富婆包养男人 青海哪里找富婆包养男人 丰台哪里找富婆包养男人 宝坻哪里找富婆包养男人 平谷哪里找富婆包养男人 天津怎么找富婆包养 山西怎么找富婆包养 辽宁怎么找富婆包养 黑龙江怎么找富婆包养 安徽怎么找富婆包养 江西怎么找富婆包养 湖南怎么找富婆包养 广西怎么找富婆包养 四川怎么找富婆包养 云南怎么找富婆包养 陕西怎么找富婆包养 青海怎么找富婆包养 东城怎么找富婆包养 丰台怎么找富婆包养 海淀怎么找富婆包养 通州怎么找富婆包养 宝坻怎么找富婆包养 大兴怎么找富婆包养 平谷怎么找富婆包养 怀柔怎么找富婆包养 怀柔怎么找富婆包养 密云怎么找富婆包养 延庆怎么找富婆包养 南开怎么找富婆包养 西青怎么找富婆包养 宁河怎么找富婆包养 青海怎么找富婆包养 温州怎么找富婆包养 福州怎么找富婆包养 莆田怎么找富婆包养 徐州怎么找富婆包养 南通区怎么找富婆包养 广州怎么找富婆包养 韶关怎么找富婆包养 珠海怎么找富婆包养 佛山怎么找富婆包养 惠州怎么找富婆包养 汕尾怎么找富婆包养 东莞怎么找富婆包养 潮州怎么找富婆包养 云浮怎么找富婆包养 九江怎么找富婆包养 郑州怎么找富婆包养 长沙怎么找富婆包养 南京怎么找富婆包养 淮北怎么找富婆包养 兰州怎么找富婆包养 柳州怎么找富婆包养 天津哪里找富婆包养 江苏哪里找富婆包养 河北哪里找富婆包养 山西哪里找富婆包养 内蒙古哪里找富婆包养 辽宁哪里找富婆包养 黑龙江哪里找富婆包养 安徽哪里找富婆包养 福建哪里找富婆包养 山东哪里找富婆包养 湖北哪里找富婆包养 广东哪里找富婆包养 广西哪里找富婆包养 四川哪里找富婆包养 云南哪里找富婆包养 陕西哪里找富婆包养 青海哪里找富婆包养 宁夏哪里找富婆包养 温州哪里找富婆包养 厦门哪里找富婆包养 徐州哪里找富婆包养 苏州哪里找富婆包养 连云港哪里找富婆包养 广州哪里找富婆包养 深圳哪里找富婆包养 汕头哪里找富婆包养 江门哪里找富婆包养 萧山区哪里找富婆包养 清远哪里找富婆包养 中山哪里找富婆包养 揭阳哪里找富婆包养 南宁哪里找富婆包养 桂林哪里找富婆包养 青岛哪里找富婆包养 武汉哪里找富婆包养 长春哪里找富婆包养 无锡哪里找富婆包养 淮北哪里找富婆包养 兰州哪里找富婆包养 甘肃怎么找富婆包养 西藏怎么找富婆包养 贵州怎么找富婆包养 重庆怎么找富婆包养 广西怎么找富婆包养 湖南怎么找富婆包养 延庆怎么找富婆包养男人 怀柔怎么找富婆包养男人 昌平怎么找富婆包养男人 通州怎么找富婆包养男人 东城怎么找富婆包养男人 青海怎么找富婆包养男人 云南怎么找富婆包养男人 四川怎么找富婆包养男人 广西怎么找富婆包养男人 湖南怎么找富婆包养男人 黑龙江怎么找富婆包养男人 山西怎么找富婆包养男人 天津怎么找富婆包养男人 密云怎么找富婆包养男人 怀柔怎么找富婆包养男人 平谷怎么找富婆包养男人 大兴怎么找富婆包养男人 河南找怎么找富婆包养 山东怎么找富婆包养
- package com.android.fragmentnormal;
- import android.os.Bundle;
- import android.support.v4.app.Fragment;
- import android.view.LayoutInflater;
- import android.view.View;
- import android.view.ViewGroup;
- import android.widget.ArrayAdapter;
- import android.widget.ListAdapter;
- import android.widget.Toast;
- public class Fragment1 extends Fragment{
- @Override
- public View onCreateView(LayoutInflater inflater, ViewGroup container,
- Bundle savedInstanceState) {
- <span style="color:#ff0000;"><strong>View vi = inflater.inflate(R.layout.activity_openposition, container,false);</strong></span>
- //实现下方长按弹出listview,2015年7月14日10:01:19
- ActionSlideExpandableListView list = (ActionSlideExpandableListView)vi.findViewById(R.id.list);
- list.setAdapter(buildDummyData());
- list.setItemActionListener(
- new ActionSlideExpandableListView.OnActionClickListener() {
- @Override
- public void onClick(View listView, View buttonview,
- int position) {
- String actionName = "";
- if (buttonview.getId() == R.id.duichong) {
- actionName = "duichong";
- }
- Toast.makeText(
- getActivity(),
- "你点击了对冲按钮",
- Toast.LENGTH_SHORT).show();
- }
- }, R.id.duichong);
- return vi;
- }
- /**
- * qiulinhe
- * 2015年7月14日10:02:03
- * 实现开仓单下方长按,弹出两个按钮功能
- */
- public ListAdapter buildDummyData() {
- final int SIZE = 20;
- String[] values = new String[SIZE];
- for (int i = 0; i < SIZE; i++) {
- values[i] = "單號";
- }
- return new ArrayAdapter<String>(getActivity(), R.layout.expandable_list_item,
- R.id.text, values);
- }
- }
5.fragment2的代码如下:
- package com.android.fragmentnormal;
- import android.os.Bundle;
- import android.support.v4.app.Fragment;
- import android.view.LayoutInflater;
- import android.view.View;
- import android.view.ViewGroup;
- public class Fragment2 extends Fragment{
- @Override
- public View onCreateView(LayoutInflater inflater, ViewGroup container,
- Bundle savedInstanceState) {
- return inflater.inflate(R.layout.frament2, container,false);
- }
- }
代码基本完毕,如果想要demo可以到这个链接:csdn资源可以下载点击打开链接,其实原理很简单,就是通过fragment来管理
Android用户界面的设计布局与组件(一)用户界面布局设计(1)")
Android Studio安卓学习笔记(三)Android用户界面的设计布局与组件(一)用户界面布局设计(1)
当我们创建了一个安卓项目后,我们会发现真正建立一个完善的安卓项目并不是想象的那么容易。其实和设计GUI可视化界面一样,开发安卓也需要考虑很多方面,主要考虑的还是界面布局和需要的组件。
一:Android用户界面布局管理
Android系统按照MVC(模型(model)-视图(view)-控制器(controller))设计模式将应用程序的界面设计与功能控制设计分离,类似于前后端分离,可以单独哦修改用户界面和后面的控制代码,而在AS中,前端的界面布局文件是在生成的应用程序框架项目的res资源目录的layout子目录中,文件名为activity_main.xml(创建新项目时可以改名字),可以用界面化的和XML文件共同管理。如果要调用资源文件,就使用R.java的R类,把res目录中的资源与id编号进行映射,用id号进行资源管理。
1.布局文件的规范
(1)布局文件作为项目的资源存放在res\layout目录下,是一个xml文件,默认文件名为activity_main.xml。
(2)布局文件的根节点通常是一个布局方式,在根节点内可以添加组件作为结点。
(3)布局文件的根节点必须包含一个命名空间,为了与其他项目进行分离。
如下:
xmlns:android="http://schemas.android.com/apk/res/android"(4)如果要实现Java程序中控制界面的组件,则必须为界面文件的组件定义一个id,也就是通过id把资源文件以及组件引用过来进行控制。
组件定义格式如下:
android:id="@+id/<组件id>"
2.布局文件常用的重要属性值
(1)设置组件大小的属性值
wrap_contont:强制性地使视图扩展以显示全部内容,完整显示其内部的文本和图像,根据组件内容的大小来决定组件的大小。
match_parent:Android2.2以上和fill_parent通用,填充在容器的所有空间。
fill_parent:强制性地使构件扩展,以填充布局单元内尽可能多的空间,就是强制性让它布满整个屏幕。
(2)设置组件大小的单位
px(pixels):像素,即屏幕上的发光点。
dp(或dip,全称为device independent pixels):设备独立像素,一种支持多分辨率设备的抽象单位,和硬件相关。
sp(scaled pixels):比例像素,设置字体大小。
(3)设置组件的对齐方式
在组件中由"android:gravity"属性控制组件的对齐方式,其属性有上(top),下(bottom),坐(left),右(right),水平方向居中(center_horizontal),垂直方向居中(center_vertical)等。
3.常见的布局
有关用户界面的布局有下面常见的七种布局。
线性布局(LinearLayout),帧布局(FrameLayout),表格布局(TableLayout),相对布局(RelativeLayout),绝对布局(AbsolateLayout),网格布局(GridLayout),约束布(ConstraintLayout)。而相对布局已使用约束布局替代,绝对布局难以实现多分辨率适配,不建议使用。
(1)线性布局(LinearLayout)
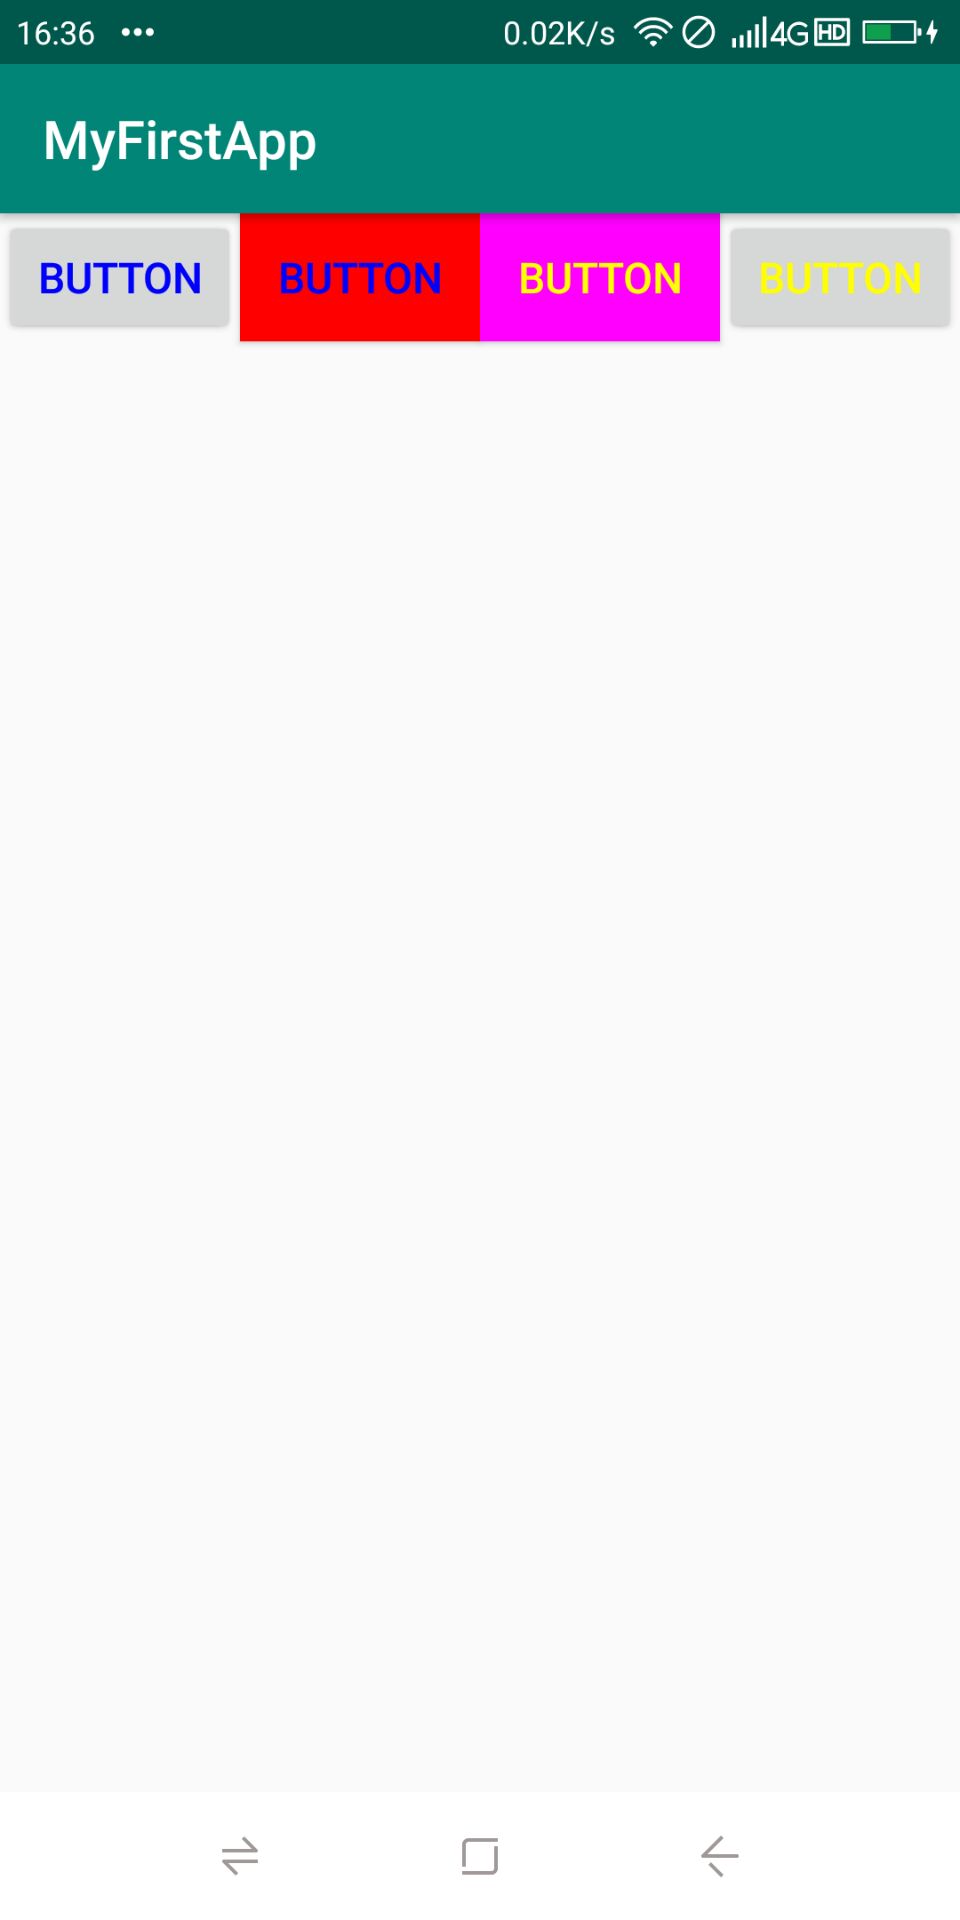
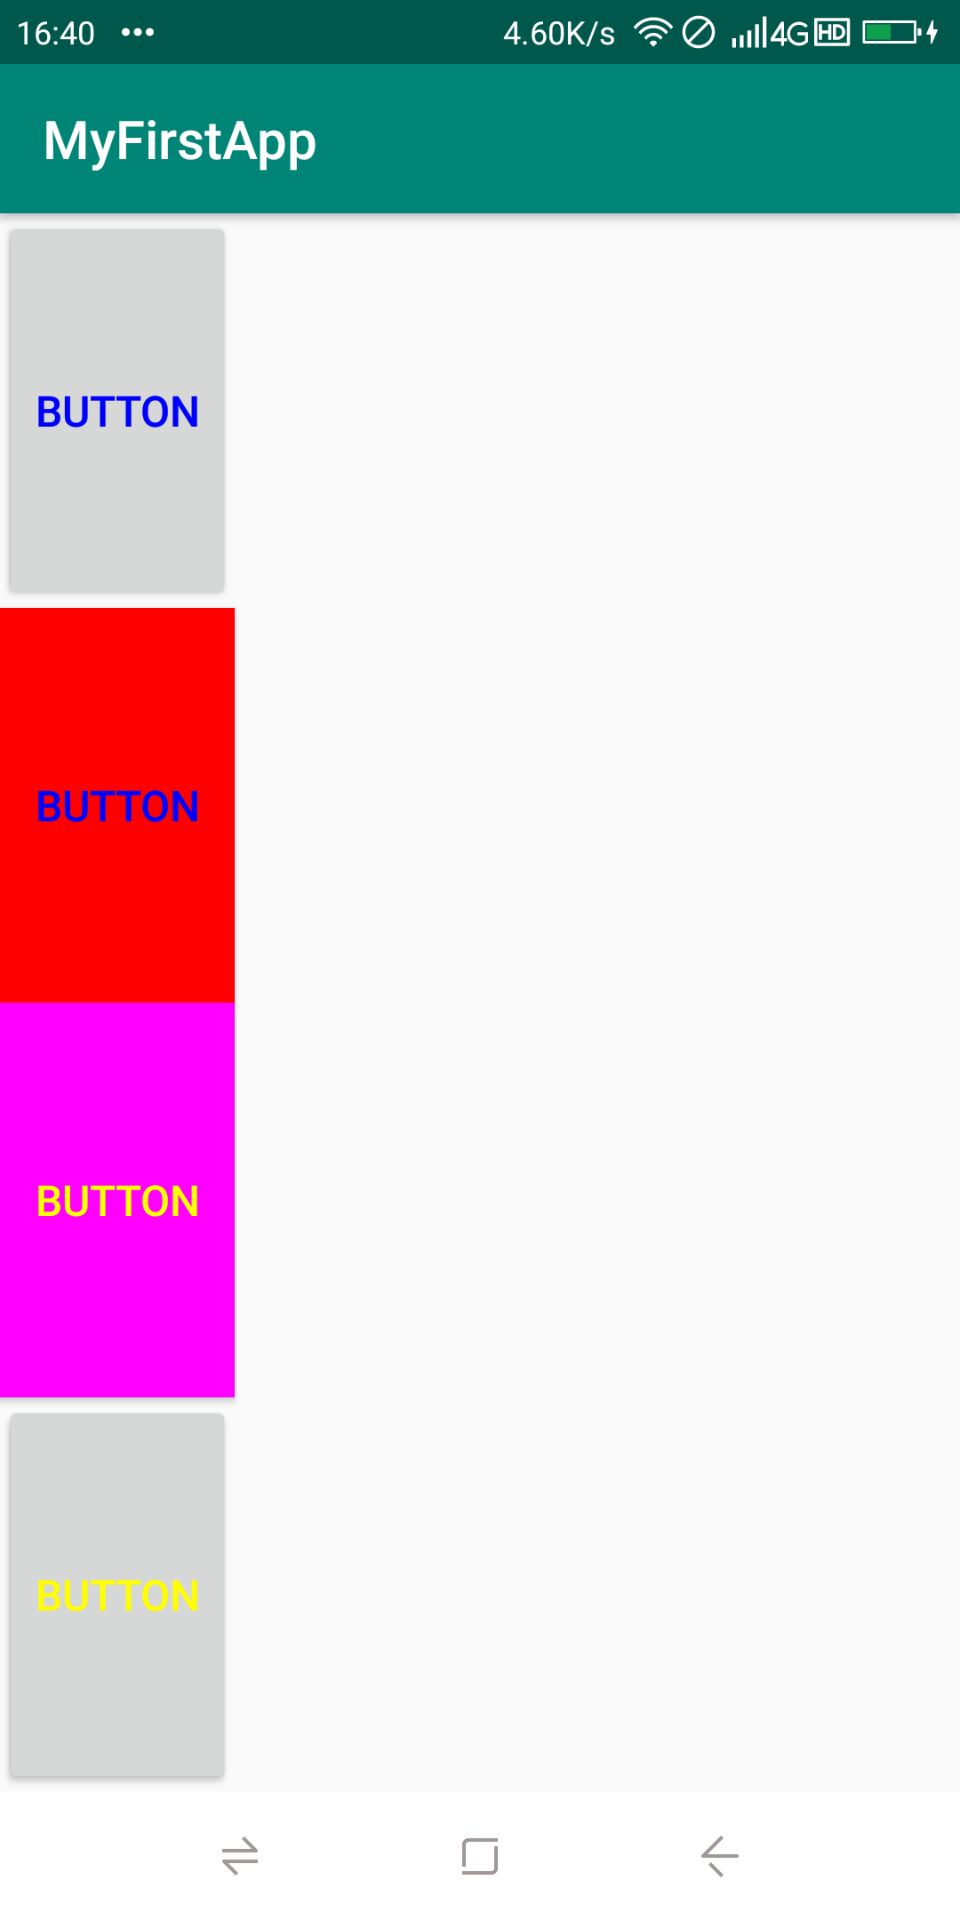
特点:将组件按照水平或垂直方向排列。
特殊属性:由"android:orientation"属性控制排列方式,其属性值有水平(horizontal)和垂直(vertical)两种。
实例:按水平和垂直方向线性布局显示几个按钮。
水平:
结果如下:
竖直方向的结果如下:
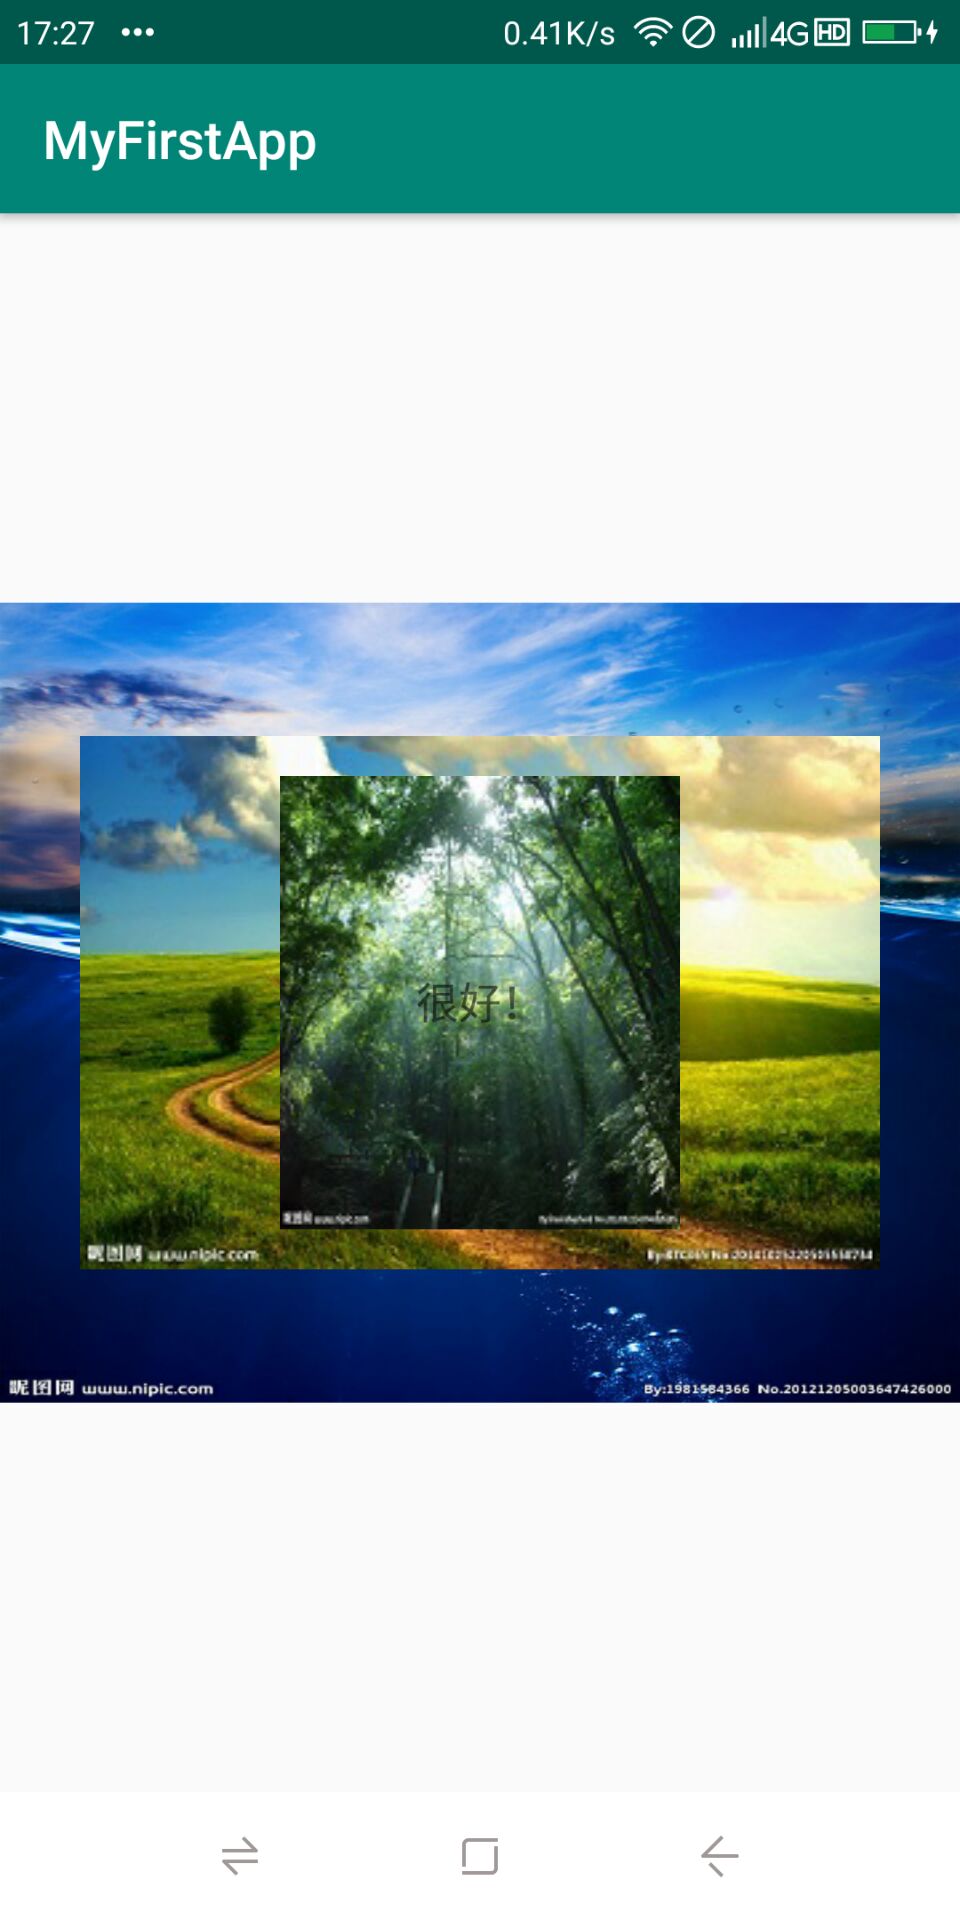
(2)帧布局(FrameLayout)
特点:将组件放置在左上角位置,当添加多个组件时后面的组件将遮盖前面的组件。帧布局会按照添加顺序层叠在一起,默认层叠在左上角位置。
特殊属性:用"layout_gravity"可以设置层叠的位置。
实例:将不同大小的图片进行层叠,这里引用图片的方法可以在用户界面,也可以在源程序控制文件中。

运行结果如下:
(3)表格布局(TableLayout)
特点:将页面分为由行,列构成的单元格。
特殊属性:表格的列数由android:shrinkColumns定义,例如android:shrikColumns = "0,1,2"表示表格为三列,编号为1,2,3。
-
android:collapseColumns:设置需要被隐藏的列的序号
-
android:shrinkColumns:设置允许被收缩的列的列序号
-
android:stretchColumns:设置运行被拉伸的列的列序号
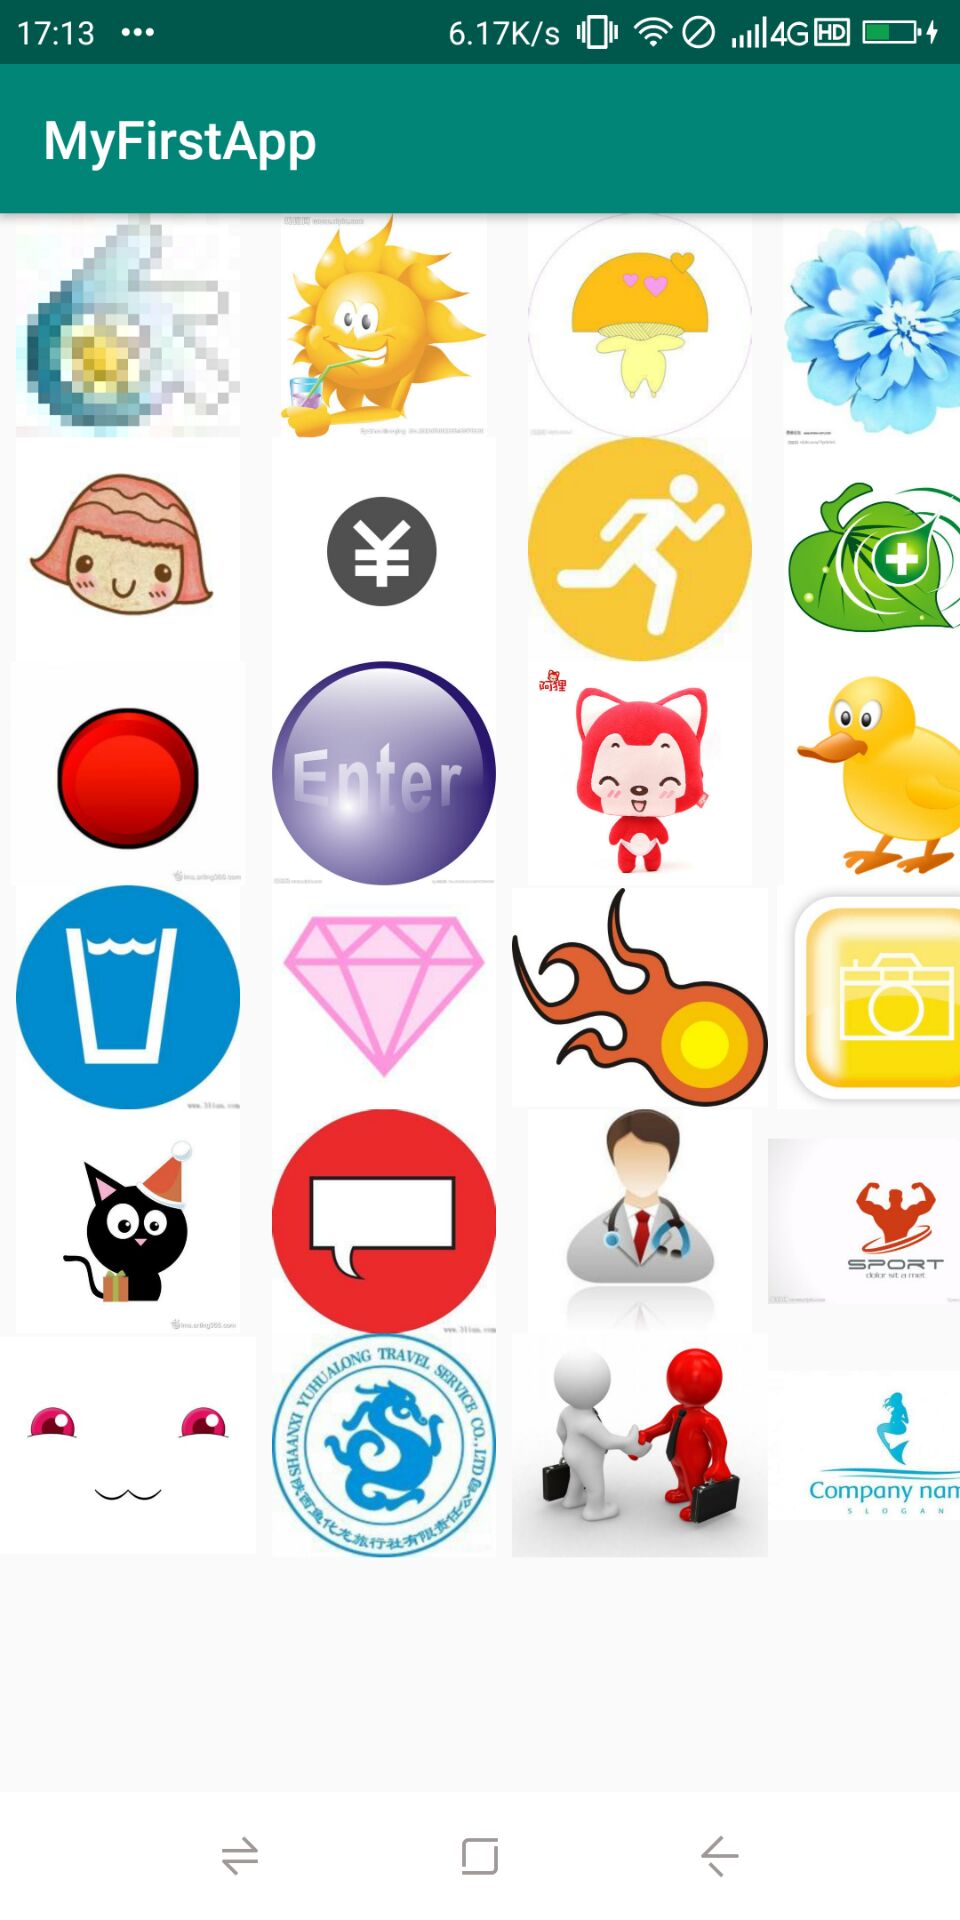
实例:实现类似手机待机界面的六行四列的表格。
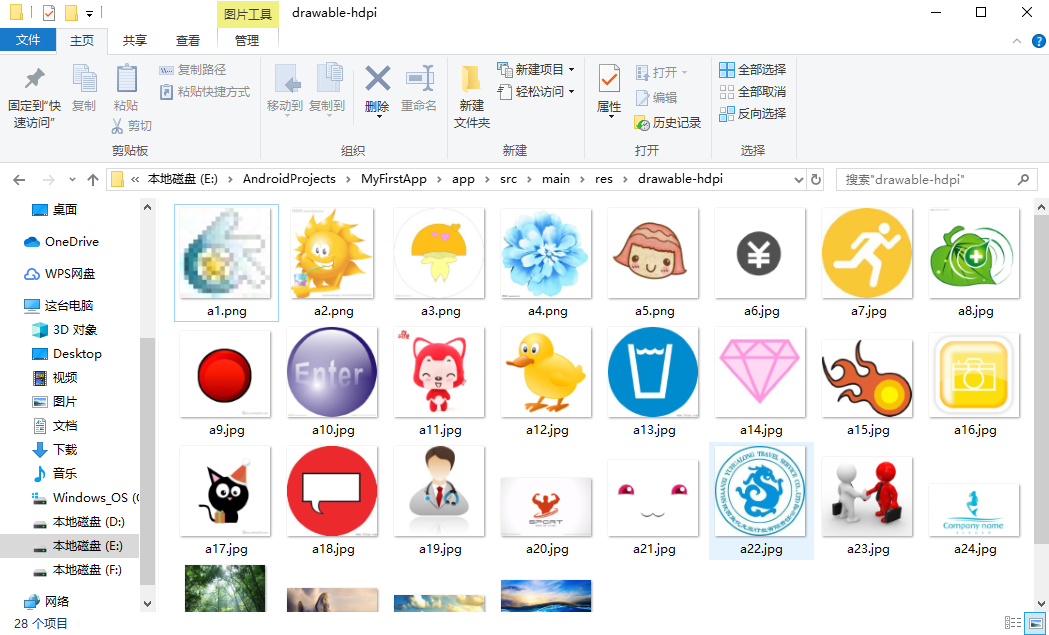
首先,将所要显示的图片添加到res资源目录文件drawable-hdpi下,具体过程如下:
选择Project视图,app—>src—>res—>右键new resource directory—>选择resource type (drawable)->density,根据需要,选择合适的分辨率,这里选择high density确认后
会生成一个资源文件夹drawable-hdpi—>将图片文件复制到文件夹里。
然后代码如下:
运行结果如下:
(4)相对布局(RelativeLayout)
特点:相对其他组件位置进行布局,通过相对定位的方式让控件出现在布局任意位置 。在相对布局中,通过指定id关联其他组件与之右对齐,上下对齐或以屏幕中央方式来排列组件。
特殊常见属性:
相对于父元素给控件布局(属性值为true或false)
android:layout_centerHrizontal 水平居中
android:layout_centerVertical 垂直居中
android:layout_centerInparent 相对于父元素完全居中
android:layout_alignParentBottom 位于父元素的下边缘
android:layout_alignParentLeft 位于父元素的左边缘
android:layout_alignParentRight 位于父元素的右边缘
android:layout_alignParentTop 位于父元素的上边缘
android:layout_alignWithParentIfMissing 如果对应的兄弟元素找不到的话就以父元素做参照物
属性值必须为id的引用名“@id/id-name”
android:layout_below 位于元素的下方
android:layout_above 位于元素的的上方
android:layout_toLeftOf 位于元素的左边
android:layout_toRightOf 位于元素的右边
android:layout_alignTop 该元素的上边缘和某元素的的上边缘对齐
android:layout_alignLeft 该元素的左边缘和某元素的的左边缘对齐
android:layout_alignBottom 该元素的下边缘和某元素的的下边缘对齐
android:layout_alignRight 该元素的右边缘和某元素的的右边缘对齐
给属性赋予像素值
android:layout_marginBottom 底边缘的距离
android:layout_marginLeft 左边缘的距离
android:layout_marginRight 右边缘的距离
android:layout_marginTop 上边缘的距离
实例:生成一个组件排列的应用程序。
运行结果如下:

android Tabhost底部无法完成切换界面
this.mHost = getTabHost();TabHost localTabHost = this.mHost;
Intent intent = new Intent(WeiboActivity.this,MyActivity.class);
Intent intent1 = new Intent(WeiboActivity.this,My1Activity.class);
Intent intent2 = new Intent(WeiboActivity.this,List1.class);
localTabHost.addTab(buildTabSpec("mblog_tab", "主页",
R.drawable.icon_1_n, intent));
localTabHost.addTab(buildTabSpec("message_tab", "新闻",
R.drawable.icon_2_n, intent1));
localTabHost.addTab(buildTabSpec("userinfo_tab", "私信",
R.drawable.icon_3_n, intent2));
localTabHost.addTab(buildTabSpec("search_tab", "搜索",
R.drawable.icon_4_n, intent2));
localTabHost.addTab(buildTabSpec("more_tab", "更多",
R.drawable.icon_5_n, intent2));

Android UI 界面的问题

在Android 上如何实现这样的效果?
关于[android] 切换界面的通用处理和android 页面切换的介绍已经告一段落,感谢您的耐心阅读,如果想了解更多关于Android popwindow和fragment结合 左侧弹出下拉菜单 切换界面、Android Studio安卓学习笔记(三)Android用户界面的设计布局与组件(一)用户界面布局设计(1)、android Tabhost底部无法完成切换界面、Android UI 界面的问题的相关信息,请在本站寻找。
本文标签:


