在本文中,我们将详细介绍ios–iPhone是否支持硬件加速AES加密?的各个方面,并为您提供关于苹果硬件加速的相关解答,同时,我们也将为您带来关于1.2米防水!金士顿D300加密U盘发布:AES硬件
在本文中,我们将详细介绍ios – iPhone是否支持硬件加速AES加密?的各个方面,并为您提供关于苹果硬件加速的相关解答,同时,我们也将为您带来关于1.2米防水!金士顿D300加密U盘发布:AES硬件加密、360影视大全怎么设置硬件加速 设置硬件加速的操作方法、aes加密iOS 实现、esxi 6.0 vSphere 支持硬件加速的有用知识。
本文目录一览:- ios – iPhone是否支持硬件加速AES加密?(苹果硬件加速)
- 1.2米防水!金士顿D300加密U盘发布:AES硬件加密
- 360影视大全怎么设置硬件加速 设置硬件加速的操作方法
- aes加密iOS 实现
- esxi 6.0 vSphere 支持硬件加速
")
ios – iPhone是否支持硬件加速AES加密?(苹果硬件加速)
有人有任何想法,如果这些API是硬件加速的还是其他的?
解决方法
截至4.3,如果消息具有> 64个块(即1024个字节),则AES的CCCrypt函数将使用硬件加速实现. (这是通过ioctling与/ dev / aes_0,BTW完成的.)
除了AES之外,当输入为>时,SHA-1也被硬件加速. 4096字节.

1.2米防水!金士顿D300加密U盘发布:AES硬件加密
1月19日,金士顿展示了他们的IronKey D300加密U盘,此款U盘最大的亮点在于采用了FIPS 140-2 Level 3级别的256位AES-XTS硬件加密技术,并且支持4英尺(约1.2米)防水。
IronKey D300加密U盘具备独立的数字加密按键,用户插在电脑上使用时需要手动在U盘上输入解锁密码才能读取U盘内部信息,并且U盘将在输入10次错误密码后会自动锁定并进行格式化操作。
U盘使用了数字签名固件,解密过程无需在电脑端操作,因此不会在电脑端留下IronKey D300加密U盘的任何信息,可以有效避免BadUSB等恶意病毒的入侵。
IronKey D300加密U盘外壳采用锌合金与环氧树脂设计,能够实现4英尺(约1.2米)的防水功能(符合IEC60529 IXP8标准)。
U盘为USB3.0接口设计,提供了4GB、8 GB、16 GB、32 GB、64 GB及128 GB共六种容量可选,最高读写速度(128GB款)为250MB/s(读取)、85MB/s(写入),最低读写速度(4GB款)为80MB/s(读取)、12MB/s(写入)。
U盘4GB版本起价为65美元(约合436元RMB),128GB版本售价则高达338美元(约合2266元RMB)。


360影视大全怎么设置硬件加速 设置硬件加速的操作方法
360影视大全作为一款热门的
设置硬件加速方法分享
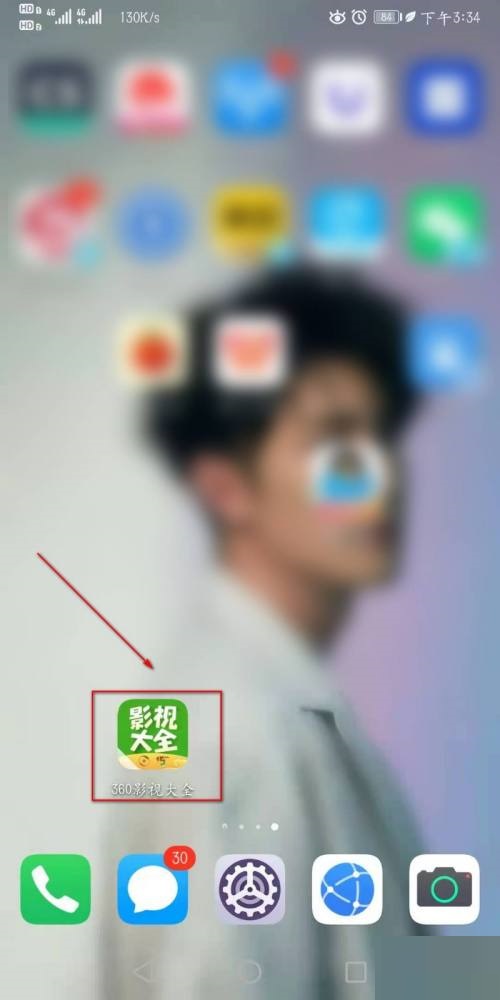
1、首先打开360影视大全APP。
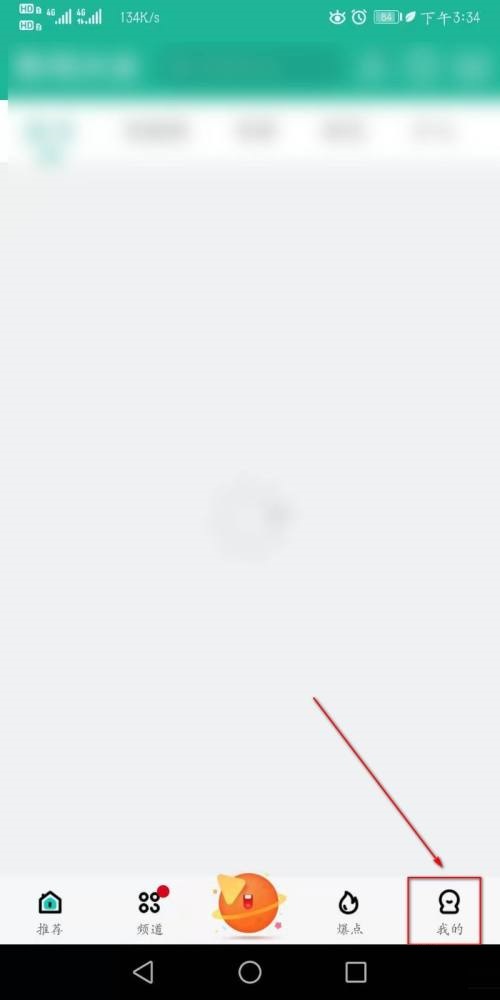
2、然后在其首页点击“我的”。
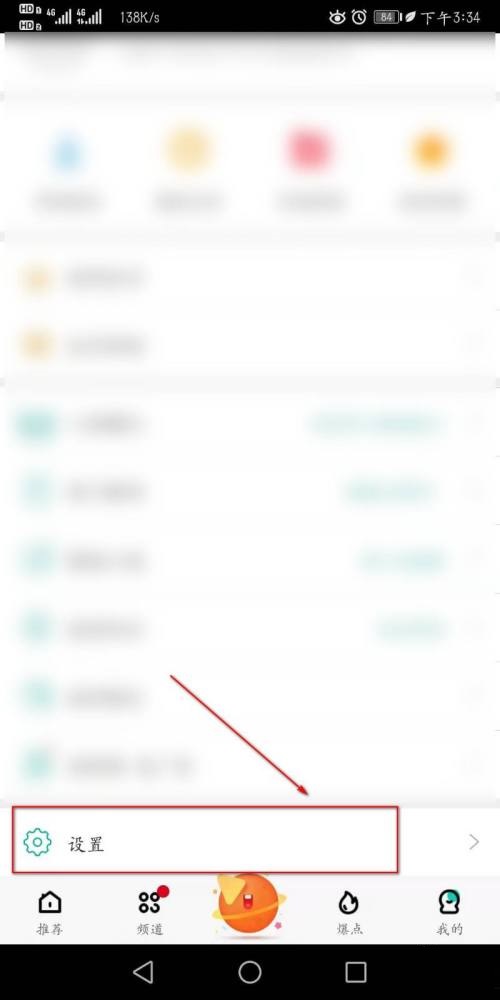
3、接着在此页面继续下拉点击“设置”。
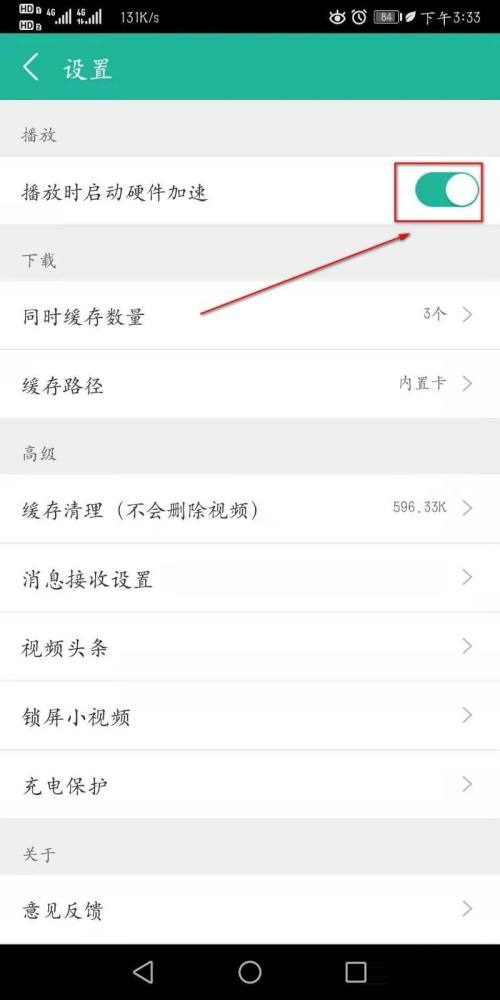
4、在此设置操作页面我们可以看到“播放时启动硬件加速”。
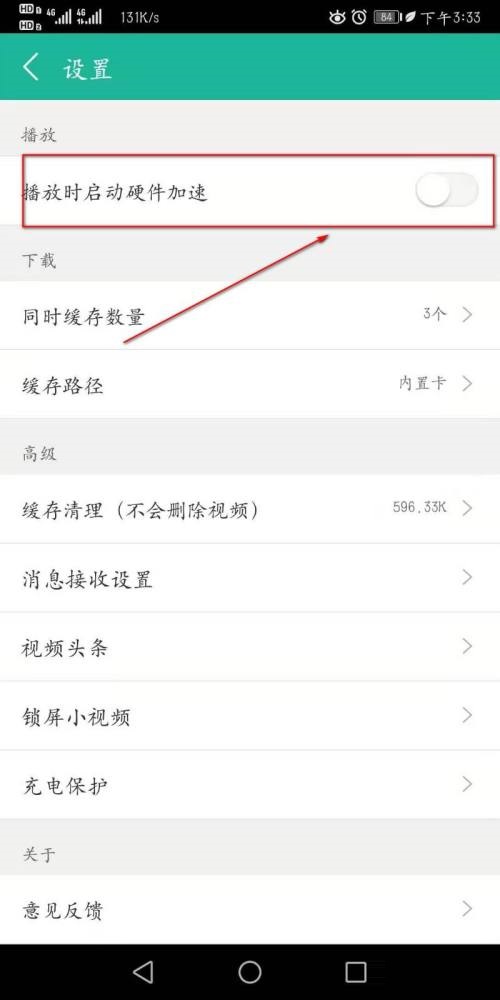
5、最后大家点击“播放时启动硬件加速”进行开启即可。
以上就是360影视大全怎么设置

aes加密iOS 实现
Encryption.h文件


#import <Foundation/Foundation.h>

@class NSString;

@interface NSData (Encryption)

- (NSData *)AES256EncryptWithKey:(NSString *)key;   //加密- (NSData *)AES256DecryptWithKey:(NSString *)key;   //解密- (NSString *)newStringInBase64FromData;            //追加64编码+ (NSString*)base64encode:(NSString*)str;           //同上64编码

 @end

 ------------------------------------------------------------------------------------------------

 Encryption.m文件

#import "Encryption.h"#import <CommonCrypto/CommonCryptor.h>


static char base64[] = "ABCDEFGHIJKLMNOPQRSTUVWXYZabcdefghijklmnopqrstuvwxyz0123456789+/";

@implementation NSData (Encryption)

- (NSData *)AES256EncryptWithKey:(NSString *)key {    // ''key'' should be 32 bytes for AES256, will be null-padded otherwise
    char keyPtr[kCCKeySizeAES256+1]; // room for terminator (unused)
    bzero(keyPtr, sizeof(keyPtr)); // fill with zeroes (for padding)
    // fetch key data
    [key getCString:keyPtr maxLength:sizeof(keyPtr) encoding:NSUTF8StringEncoding];

    NSUInteger dataLength = [self length];
    //See the doc: For block ciphers, the output size will always be less than or
    //equal to the input size plus the size of one block.    //That''s why we need to add the size of one block here
    size_t bufferSize = dataLength + kCCBlockSizeAES128;    void *buffer = malloc(bufferSize);

    size_t numBytesEncrypted = 0;
    CCCryptorStatus cryptStatus = CCCrypt(kCCEncrypt, kCCAlgorithmAES128, kCCOptionPKCS7Padding,
                                     keyPtr, kCCKeySizeAES256,
                                     NULL /* initialization vector (optional) */,
                                     [self bytes], dataLength, /* input */
                                     buffer, bufferSize, /* output */
                                     &numBytesEncrypted);    if (cryptStatus == kCCSuccess) {        //the returned NSData takes ownership of the buffer and will free it on deallocation
        return [NSData dataWithBytesNoCopy:buffer length:numBytesEncrypted];
    }

    free(buffer); //free the buffer;
    return nil;
}- (NSData *)AES256DecryptWithKey:(NSString *)key {    // ''key'' should be 32 bytes for AES256, will be null-padded otherwise
    char keyPtr[kCCKeySizeAES256+1]; // room for terminator (unused)
    bzero(keyPtr, sizeof(keyPtr)); // fill with zeroes (for padding)
    // fetch key data
    [key getCString:keyPtr maxLength:sizeof(keyPtr) encoding:NSUTF8StringEncoding];

    NSUInteger dataLength = [self length];
    //See the doc: For block ciphers, the output size will always be less than or
    //equal to the input size plus the size of one block.    //That''s why we need to add the size of one block here
    size_t bufferSize = dataLength + kCCBlockSizeAES128;    void *buffer = malloc(bufferSize);

    size_t numBytesDecrypted = 0;
    CCCryptorStatus cryptStatus = CCCrypt(kCCDecrypt, kCCAlgorithmAES128, kCCOptionPKCS7Padding,
                                     keyPtr, kCCKeySizeAES256,
                                     NULL /* initialization vector (optional) */,
                                     [self bytes], dataLength, /* input */
                                     buffer, bufferSize, /* output */
                                     &numBytesDecrypted);
    if (cryptStatus == kCCSuccess) {        //the returned NSData takes ownership of the buffer and will free it on deallocation
        return [NSData dataWithBytesNoCopy:buffer length:numBytesDecrypted];
    }

    free(buffer); //free the buffer;
    return nil;
}

- (NSString *)newStringInBase64FromData            //追加64编码{

    NSMutableString *dest = [[NSMutableString alloc] initWithString:@""];

    unsigned char * working = (unsigned char *)[self bytes];    int srcLen = [self length];    for (int i=0; i<srcLen; i += 3) {        for (int nib=0; nib<4; nib++) {            int byt = (nib == 0)?0:nib-1;            int ix = (nib+1)*2;            if (i+byt >= srcLen) break;

            unsigned char curr = ((working[i+byt] << (8-ix)) & 0x3F);            if (i+nib < srcLen) curr |= ((working[i+nib] >> ix) & 0x3F);

            [dest appendFormat:@"%c", base64[curr]];

        }

    }    return dest;

}

+ (NSString*)base64encode:(NSString*)str

{    if ([str length] == 0)        return @"";    const char *source = [str UTF8String];    int strlength  = strlen(source);    char *characters = malloc(((strlength + 2) / 3) * 4);    if (characters == NULL)        return nil;

    NSUInteger length = 0;

    NSUInteger i = 0;    while (i < strlength) {        char buffer[3] = {0,0,0};        short bufferLength = 0;        while (bufferLength < 3 && i < strlength)

            buffer[bufferLength++] = source[i++];

        characters[length++] = base64[(buffer[0] & 0xFC) >> 2];

        characters[length++] = base64[((buffer[0] & 0x03) << 4) | ((buffer[1] & 0xF0) >> 4)];        if (bufferLength > 1)

            characters[length++] = base64[((buffer[1] & 0x0F) << 2) | ((buffer[2] & 0xC0) >> 6)];        else characters[length++] = ''='';        if (bufferLength > 2)

            characters[length++] = base64[buffer[2] & 0x3F];        else characters[length++] = ''='';

    }

    NSString *g = [[[NSString alloc] initWithBytesNoCopy:characters length:lengthencoding:NSASCIIStringEncoding freeWhenDone:YES] autorelease];    return g;

}


@end

 ------------------------------------------------------------------------------------------------

 测试代码


#import "Encryption.h"


    NSString *key = @"my password";

    NSString *secret = @"text to encrypt";    //加密
    NSData *plain = [secret dataUsingEncoding:NSUTF8StringEncoding];

    NSData *cipher = [plain AES256EncryptWithKey:key];

    NSLog(@"%@",[[cipher newStringInBase64FromData] autorelease]);

    printf("%s\n", [[cipher description] UTF8String]);

    NSLog(@"%@", [[[NSString alloc] initWithData:cipher encoding:NSUTF8StringEncoding] autorelease]);//打印出null,这是因为没有解密。    //解密
    plain = [cipher AES256DecryptWithKey:key];

    printf("%s\n", [[plain description] UTF8String]);

    NSLog(@"%@", [[[NSString alloc] initWithData:plain encoding:NSUTF8StringEncoding] autorelease]);    //打印出secret的内容,用密码解密过了。如果使用错误的密码,则打印null
AESEncryption.zip (53.8 KB)
下载次数: 22
i am new in Objective c.My problem is how to convert image to Byte array[Encoding].Similarly how to convert Byte array to Image[Decoding]...In C i am using the Following code for Encoding and Decoding purpose...
#include <stdio.h>#include <stdlib.h>/*** Translation Table as described in RFC1113*/static const char cb64[]="ABCDEFGHIJKLMNOPQRSTUVWXYZabcdefghijklmnopqrstuv wxyz0123456789+/";/*** Translation Table to decode (created by author)*/static const char cd64[]="|$$$}rstuvwxyz{$$$$$$$>?@ABCDEFGHIJKLMNOPQRSTUVW $$$$$$XYZ[\\]^_`abcdefghijklmnopq";/*** encodeblock
**
** encode 3 8-bit binary bytes as 4 ''6-bit'' characters*/void encodeblock( unsigned char in[3], unsigned char out[4], int len )
{out[0] = cb64[ in[0] >> 2 ];out[1] = cb64[ ((in[0] & 0x03) << 4) | ((in[1] & 0xf0) >> 4) ];out[2] = (unsigned char) (len > 1 ? cb64[ ((in[1] & 0x0f) << 2) | ((in[2] & 0xc0) >> 6) ] : ''='');out[3] = (unsigned char) (len > 2 ? cb64[ in[2] & 0x3f ] : ''='');
}/*** encode
**
** base64 encode a stream adding padding and line breaks as per spec.*/void encode( FILE *infile, FILE *outfile, int linesize )
{
unsigned char in[3], out[4];int i, len, blocksout = 0;while( !feof( infile ) ) {
len = 0;for( i = 0; i < 3; i++ ) {in[i] = (unsigned char) getc( infile );if( !feof( infile ) ) {
len++;
}else {in[i] = 0;
}
}if( len ) {
encodeblock( in, out, len );for( i = 0; i < 4; i++ ) {
putc( out[i], outfile );
}
blocksout++;
}if( blocksout >= (linesize/4) || feof( infile ) ) {if( blocksout ) {
fprintf( outfile, "\r\n" );
}
blocksout = 0;
}
}
}/*** decodeblock
**
** decode 4 ''6-bit'' characters into 3 8-bit binary bytes*/void decodeblock( unsigned char in[4], unsigned char out[3] )
{
out[ 0 ] = (unsigned char ) (in[0] << 2 | in[1] >> 4);out[ 1 ] = (unsigned char ) (in[1] << 4 | in[2] >> 2);out[ 2 ] = (unsigned char ) (((in[2] << 6) & 0xc0) | in[3]);
}/*** decode
**
** decode a base64 encoded stream discarding padding, line breaks and noise*/void decode( FILE *infile, FILE *outfile )
{
unsigned char in[4], out[3], v;int i, len;while( !feof( infile ) ) {for( len = 0, i = 0; i < 4 && !feof( infile ); i++ ) {
v = 0;while( !feof( infile ) && v == 0 ) {
v = (unsigned char) getc( infile );
v = (unsigned char) ((v < 43 || v > 122) ? 0 : cd64[ v - 43 ]);if( v ) {
v = (unsigned char) ((v == ''$'') ? 0 : v - 61);
}
}if( !feof( infile ) ) {
len++;if( v ) {in[ i ] = (unsigned char) (v - 1);
}
}else {in[i] = 0;
}
}if( len ) {
decodeblock( in, out );for( i = 0; i < len - 1; i++ ) {
putc( out[i], outfile );
}
}
}
}

But i don''t know in objective c...Pls help me to sort out this issue...
esxi 6.0 vSphere 支持硬件加速
在 VMware ESXi 虚拟机上运行虚拟机,被称为多层虚拟或者嵌套虚拟机(Nested VMs)。如果只有一台电脑想测试多节点 OpenStack 环境的话,使用 VMware ESXi 虚拟几个运行 KVM Hypervisor 的 OpenStack 计算节点是个不错的办法。
VMware ESXi 6.0 默认情况下不支持嵌套虚拟,所以在 VMware ESXi 虚拟机里安装完 KVM 以后会发现 KVM 虽然能装但不可用:
# egrep -c ''(vmx|svm)'' /proc/cpuinfo
0
解决办法很简单:1、开启ESXI服务器 ssh服务 2、修改 VMware ESXi 的设置;3、修改对应虚拟机的设置。
1、登录 esxi 选中左边服务器ip节点--》右边安全配置文件--》右上角属性


1、修改 VMware ESXi 的设置;
用 ssh 登陆 VMware ESXi 服务器shell, 后在 /etc/vmware/config文件中最后加入 vhv.enable = "TRUE" 一行:
[root@localhost:~] vi /etc/vmware/config
libdir = "/usr/lib/vmware"
authd.proxy.nfc = "vmware-hostd:ha-nfc"
authd.proxy.nfcssl = "vmware-hostd:ha-nfcssl"
authd.proxy.vpxa-nfcssl = "vmware-vpxa:vpxa-nfcssl"
authd.proxy.vpxa-nfc = "vmware-vpxa:vpxa-nfc"
authd.fullpath = "/sbin/authd"
vhv.enable = "TRUE"
修改完成配置后重启VMware ESXi 物理机器才能生效!2、修改对应虚拟机的设置。重启 VMware ESXi 后编辑虚拟机选项(需要先关闭虚拟机),打开“编辑虚拟机设置”对话框,在“选项”页面的“客户机操作系统”选项里把“版本”的类型换成“其它”里面的 “VMware ESxi 6.x”,如图:
最后启动虚拟机后再执行egrep -c ''(vmx|svm)'' /proc/cpuinfo 一下就可以看到结果为非0了, KVM 可以用了:
# egrep -c ''(vmx|svm)'' /proc/cpuinfo
今天关于ios – iPhone是否支持硬件加速AES加密?和苹果硬件加速的介绍到此结束,谢谢您的阅读,有关1.2米防水!金士顿D300加密U盘发布:AES硬件加密、360影视大全怎么设置硬件加速 设置硬件加速的操作方法、aes加密iOS 实现、esxi 6.0 vSphere 支持硬件加速等更多相关知识的信息可以在本站进行查询。
本文标签:


![[转帖]Ubuntu 安装 Wine方法(ubuntu如何安装wine)](https://www.gvkun.com/zb_users/cache/thumbs/4c83df0e2303284d68480d1b1378581d-180-120-1.jpg)

